The Image Swatch field shows options as visual swatches — color chips or image thumbnails — in a grid. Customers pick one, and the chosen swatch can add to or subtract from the price. Use it when the option is visual and a text label alone isn’t enough, like colors, fabrics, or finishes.
Requirements #
| Make sure Optiontics Pro installed and active (this field is Pro-only) and WooCommerce active with at least one product |
Use Cases #
- “Choose Color: Red / Blue / Forest Green” — Color chips instead of a plain dropdown.
- “Fabric: Cotton / Linen (+$8) / Velvet (+$20)” — Material swatches with price differences shown.
- “Finish: Matte / Gloss (+$5) / Brushed Metal (+$12)” — Visual finish picker for furniture or hardware.
- “Pick a Pattern” — Thumbnail patterns for cases, wraps, or wallpaper.
Step 1: Add the Image Swatch Field #
- Activate Optiontics Pro.
- Go to Optiontics → Add-ons and edit or create an add-on form.
- Drag the Image Swatch block from the toolbox onto the canvas.
- Select the block to open its settings on the right.
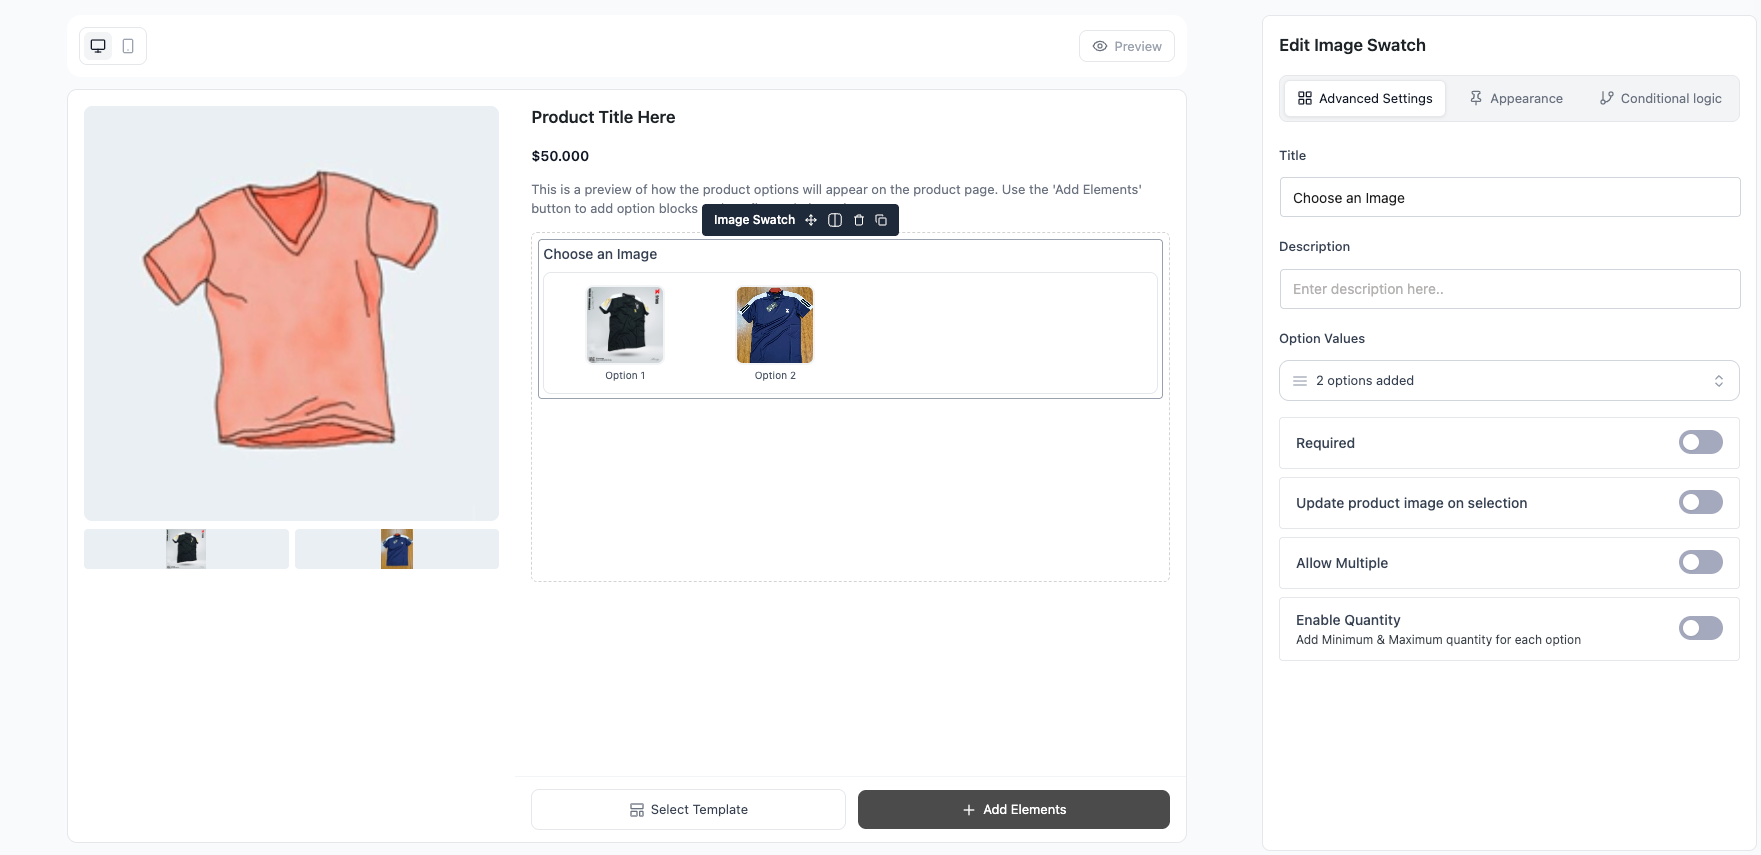
Step 2: Add and Price Your Swatches #
Add one choice per swatch. For each choice set:
- Label — name shown under the swatch (e.g. “Forest Green”).
- Color or image — the swatch shown to the customer; a color value for a flat chip or an uploaded image.
- Price — amount added when selected. Enter a negative value to subtract.
- Price type — Fixed (flat amount) or Percentage of the product base price.
- Default — mark one swatch as pre-selected.
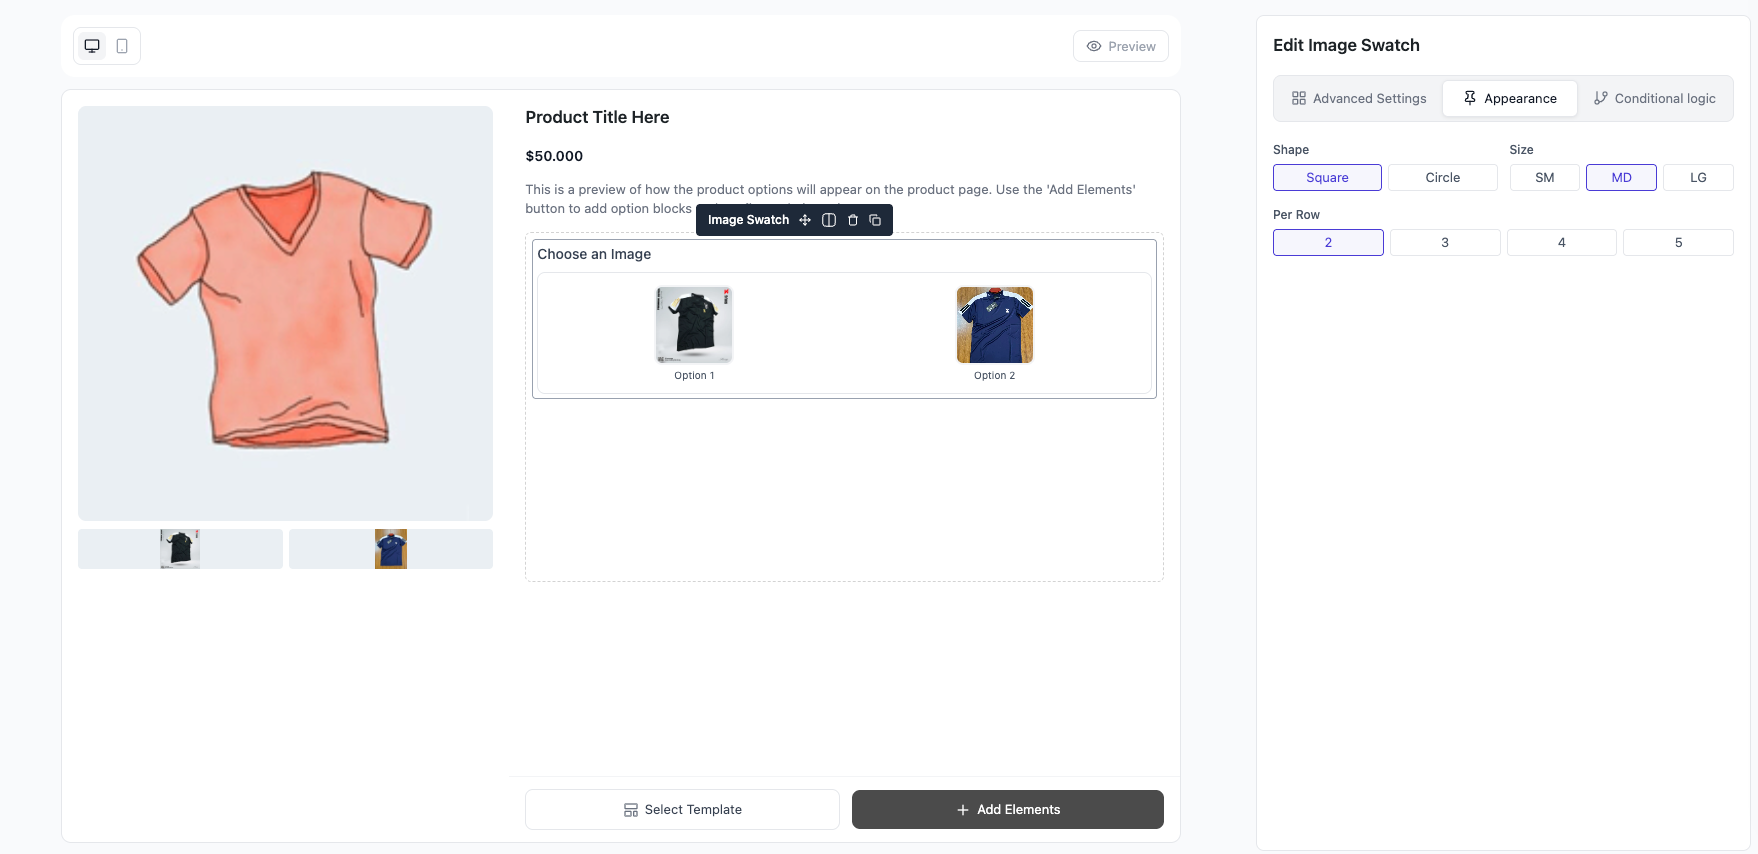
Step 3: Adjust Layout and Field Settings #
- Shape — Circle or Square swatches.
- Size — Small, Medium, or Large.
- Columns — number of grid columns (default 6).
- Title / Hide title / Description — control the heading and helper text.
- Required — customer must select a swatch before add to cart.
- Show sale price — display the discounted choice price when one is set.
Step 4: Save and Preview #
- Click Save.
- Assign the add-on to a product (or category).
- Open the product page — picking a swatch updates the total live and carries through to cart and checkout.
Frequently Asked Questions (FAQ) #
| Q1: Why can’t I find this field? It’s a Pro feature. Activate Optiontics Pro to unlock the Image Swatch block. |
| Q2: Can I use real product photos as swatches? Yes. Assign an image to each choice for a photo swatch, or use a color value for a flat color chip. |
| Q3: Is it single or multi-select? Single — customers pick one swatch at a time. For multiple picks use the Checkbox or Button Group (Multiple) field. |
Conclusion #
The Image Swatch (Pro) field turns option picking into a visual experience — colors, fabrics, and finishes shown as swatches in a tidy grid. Tune shape, size, and columns to match your product page, and price each swatch as needed.


