#
The Optiontics integration lets attendees add paid extras to their tickets at checkout — T-shirt sizes, meal choices, add-on merchandise, or any custom field you can build. You design the extras once in Optiontics as a reusable Option Block, target it at your Eventin events, then switch it on per event and assign it to each ticket type. On the purchase page the options appear under every attendee, the running total updates live as they choose, and Eventin re-prices the order on the server so the charged amount always matches the block definition — never the value the browser submitted.
Prerequisites #
- Eventin — installed and active.
- Optiontics — installed and active on the same WordPress site.
- At least one Eventin event with ticket types — the option blocks are assigned per ticket.
Enable the Optiontics integration in Eventin #
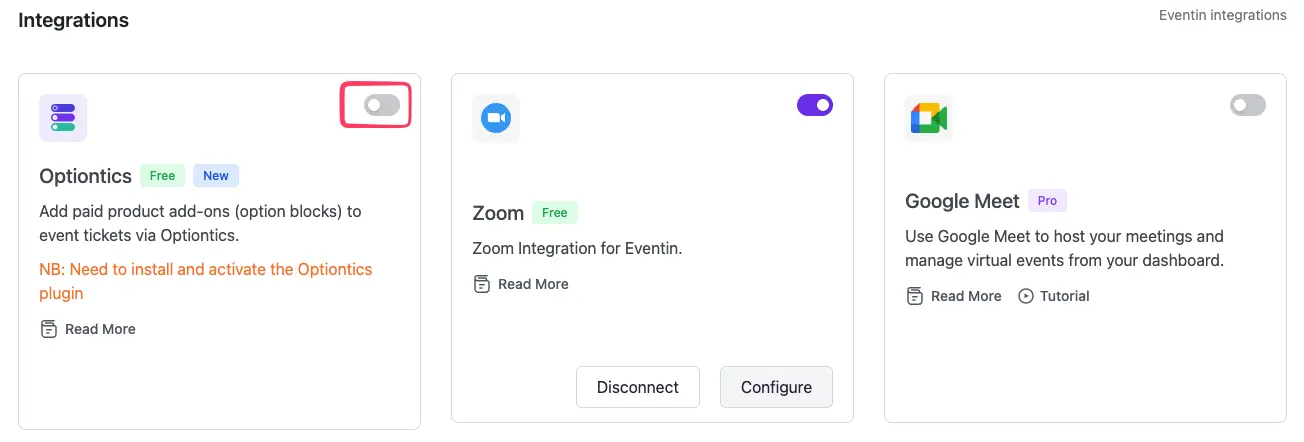
Installing and activating the Optiontics plugin is only half the setup — you also have to switch the integration on inside Eventin. Go to Eventin → Extensions → Integrations and turn on the Optiontics toggle. Until it is enabled, the Integrate Optiontics Add-ons card will not appear on your event’s Advanced tab.
Step 1 — Create an Option Block in Optiontics #
An Option Block is a reusable set of fields (dropdowns, checkboxes, text, and more), each with its own pricing. You build it once and reuse it across events.
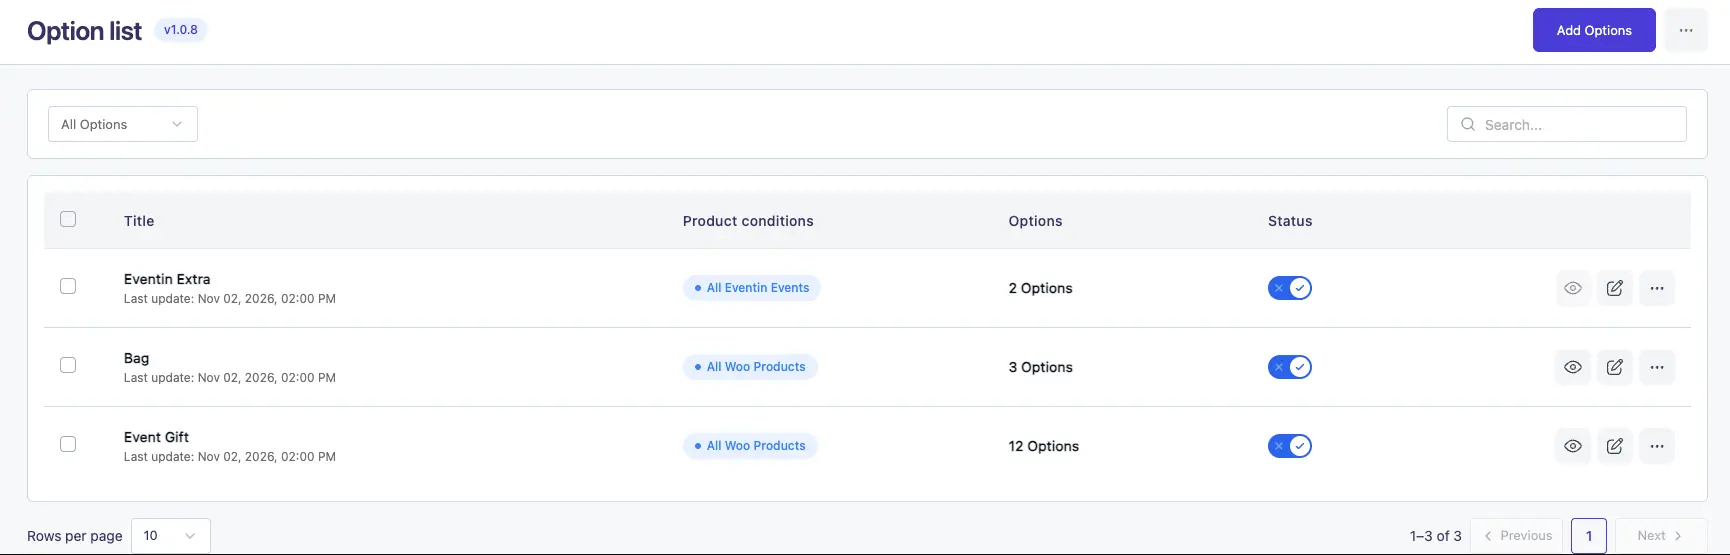
- Go to Optiontics → Options and click “Add Options”.
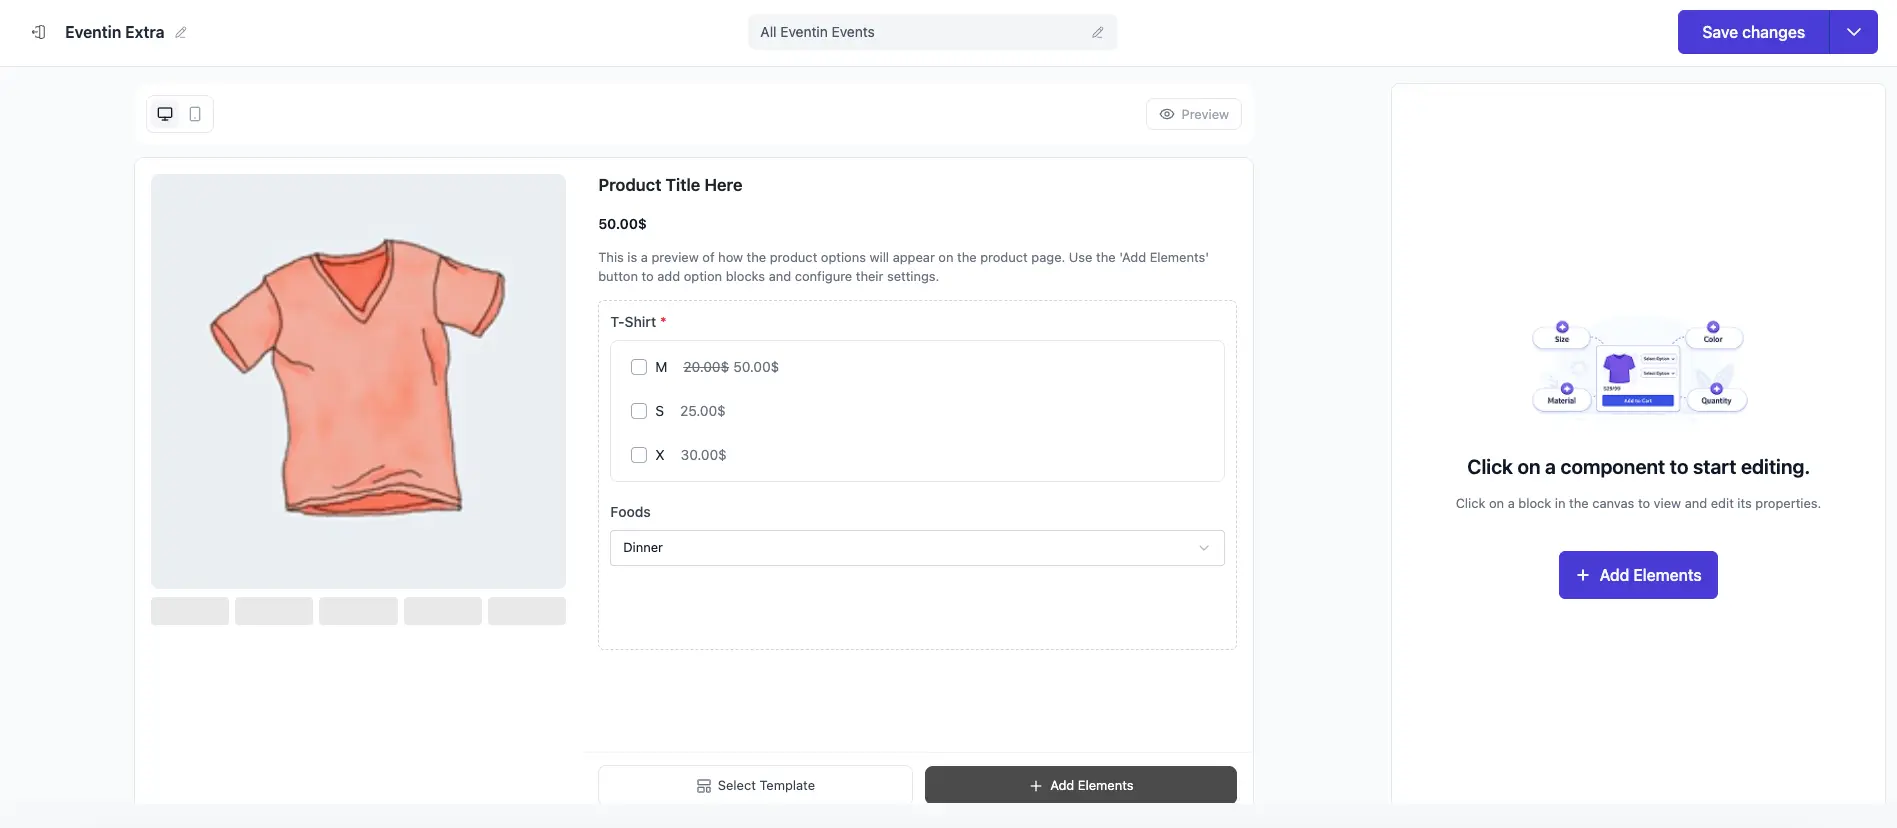
- Give the block a name (for example “Eventin Extra”) and use “Add Elements” to add your fields — e.g. a T-Shirt checkbox group with M / S / X choices, and a Foods dropdown.
- Set a price on each choice (fixed or percentage). The live preview on the right shows exactly how the fields will look to attendees.
Step 2 — Target the block at your Eventin events #
The Product conditions selector at the top of the block builder decides where the block can be used. Choose one of the Eventin options so the block is offered to events instead of (or as well as) WooCommerce products:
- All Eventin Events — the block is available to every Eventin event.
- Specific Eventin Events — the block is available only to the events you pick.
Click “Save changes”. Only blocks targeting Eventin appear inside Eventin — WooCommerce-only blocks are never shown there.
Step 3 — Enable Optiontics Add-ons on the event #
The integration is controlled per event by a master switch, so different events can offer different options — or none at all.
- Open the event in Eventin → Events and switch to the Advanced tab.
- Scroll to the Third-Party Integrations section.
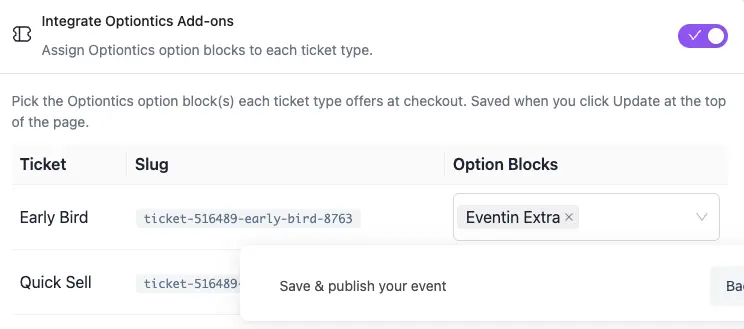
- Find the “Integrate Optiontics Add-ons” card and toggle it ON. The card expands to reveal a ticket table.
Important: this toggle is OFF by default for every event, including events that already had option blocks assigned before this feature existed. While it is off, the purchase page shows no option fields — even if blocks are assigned. No data is lost; the options simply stay hidden until you opt in. If you don’t see the “Integrate Optiontics Add-ons” card at all, Optiontics is inactive or has no Eventin-targeted blocks published (revisit Steps 1–2).

Step 4 — Assign option blocks to each ticket type #
With the card open, the table lists every ticket type for the event. Each row has a multi-select where you choose which option block(s) that ticket offers at checkout.
- In the Option Blocks column for a ticket, pick one or more blocks from the dropdown. You can give different tickets different blocks (e.g. only premium tickets get the merch add-on).
- Blocks you targeted with All Eventin Events in Step 2 appear here automatically; you can keep or remove them per ticket.
- Click “Update” at the top of the event page to save. The assignment and the master switch are saved together.
On the purchase page — attendees choose options #
Once an attendee selects a ticket and clicks Get Tickets, the booking page renders the assigned option fields under each attendee. Because options are scoped per attendee, two people on the same order can pick different sizes or meals.
- Each choice shows its price inline, e.g. M (+50.00$) or Breakfast (+50.00$).
- Required fields (marked with *) must be answered before the order can proceed.

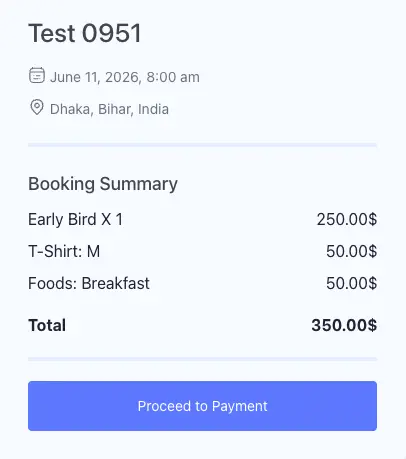
Live pricing and the booking summary #
As selections change, the Booking Summary updates in real time. Each chosen option becomes its own line item, and the total reflects the ticket price plus every add-on. In the example below a $250.00 Early Bird ticket with a T-Shirt: M ($50.00) and Foods: Breakfast ($50.00) totals $350.00.
This price is recomputed on the server when the order is placed — the amount the browser sends is ignored, and any tampered or unknown choice is dropped — so the customer is always charged exactly what the option block defines.
FAQs #
Q: I assigned option blocks but no options show on the purchase page. Why? #
A: The per-event master switch is off. Open the event’s Advanced tab, turn on “Integrate Optiontics Add-ons”, and click Update. The toggle is off by default for every event, so existing events that used options before this feature need it switched on once. Your assigned blocks are preserved — they are just hidden until the toggle is on.
Q: The “Integrate Optiontics Add-ons” card isn’t on the Advanced tab at all. #
A: The card only appears when Optiontics is active and at least one published Option Block targets Eventin (All Eventin Events or Specific Eventin Events). Create or re-target a block in Optiontics → Options, publish it, then reload the event.
Q: What’s the difference between assigning per ticket and “All Eventin Events”? #
A: Targeting on the Optiontics side (All / Specific Eventin Events) controls which events a block can reach. The per-ticket table inside the event then lets you fine-tune which ticket types actually offer it. Both are still governed by the event’s master switch.
Q: Can different tickets offer different options? #
A: Yes. Each row in the ticket table has its own multi-select, so a premium ticket can offer add-ons that a basic ticket does not. A single ticket can also carry multiple option blocks at once.
Q: Could a buyer tamper with option prices in the browser? #
A: No. The browser’s submitted price is ignored. When the order is created, Eventin re-resolves every selection against the stored Optiontics block definition and recomputes the total; selections whose block, field, or choice can’t be matched are dropped. The customer is charged the authoritative price.
3. Conclusion #
Build your extras once as an Optiontics Option Block, target it at Eventin, then on each event’s Advanced tab switch on Integrate Optiontics Add-ons and assign blocks to the right tickets. From there, attendees pick their options at checkout, the total updates live, and every order is re-priced on the server so you collect exactly the right amount — turning a flat ticket into a configurable, upsell-ready product.


