
Overview #
You can change what your booking form asks and how it looks. Show or hide fields, add your own questions, split the form into steps, and change colors and sizes. A live preview shows your changes.
Step 1: Open Form Customization #
Go to WPCafe > Reservations > Customization.
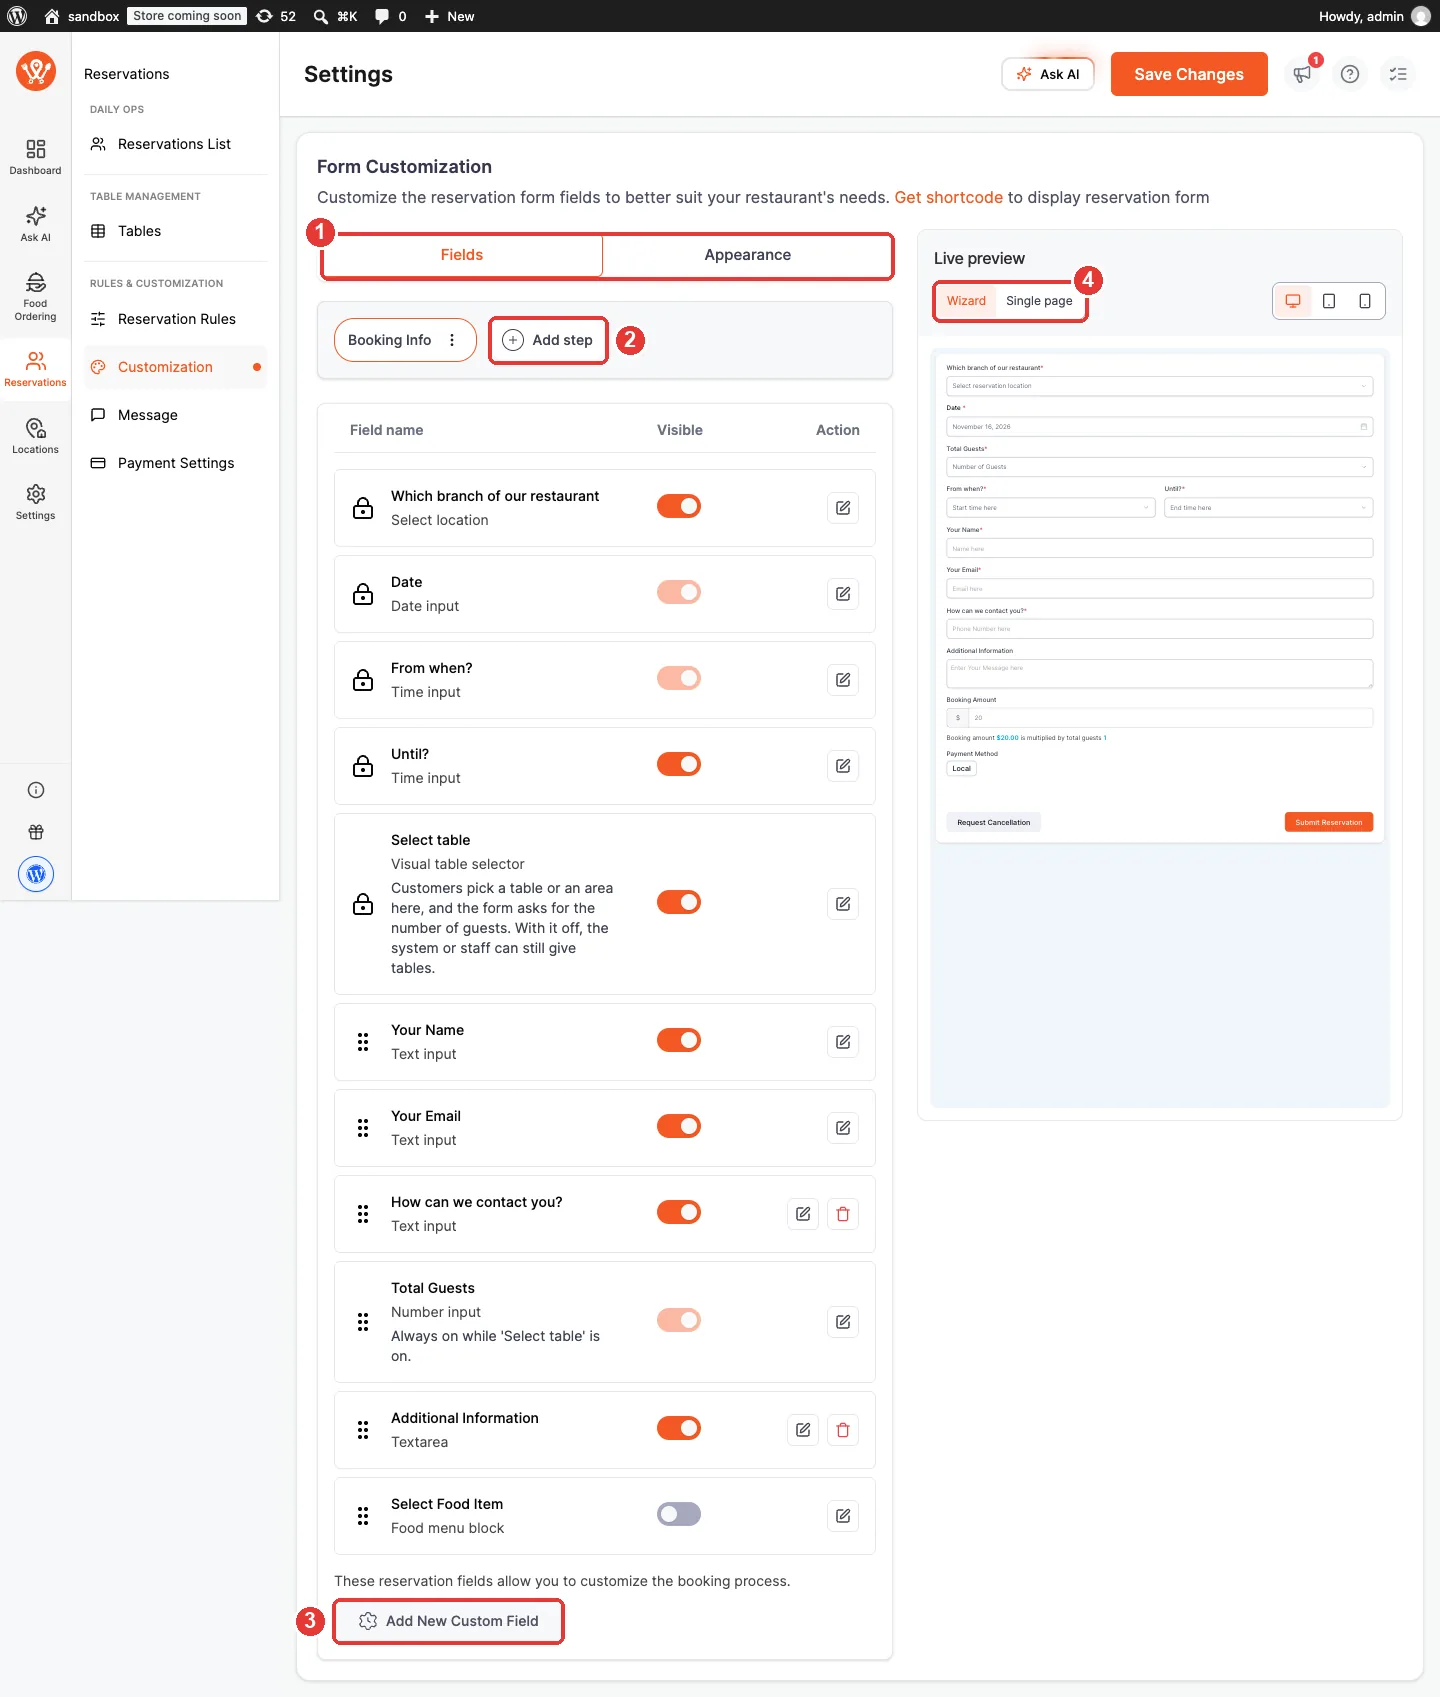
- Fields and Appearance tabs (1).
- Add step (2) (Pro): split the form into steps (Step 4).
- Add New Custom Field (3): add your own question (Step 3).
- Live preview (4): see the form as Wizard or Single page, on desktop, tablet and mobile.
Step 2: Manage Fields #
These fields are in the form by default:
| Field | What it asks |
|---|---|
| Which branch of our restaurant | The branch, if you have more than one |
| Date | The booking date (always shown) |
| From when? / Until? | Start and end time (From when? is always shown). Until? fills in by itself. |
| Select table (Pro) | The table map or area choice |
| Your Name, Your Email, How can we contact you? | Contact details |
| Total Guests | Number of guests (always on while Select table is on) |
| Additional Information | Notes |
| Select Food Item (Pro) | Food to order with the booking |
- Use the Visible switch to show or hide a field.
- Click the pencil to rename a field, change its placeholder, or make it required.
- Drag the dots to change the order. Fields with a lock icon stay at the top.
- Custom fields have a delete button.
Step 3: Add Your Own Field #
- Click Add New Custom Field.
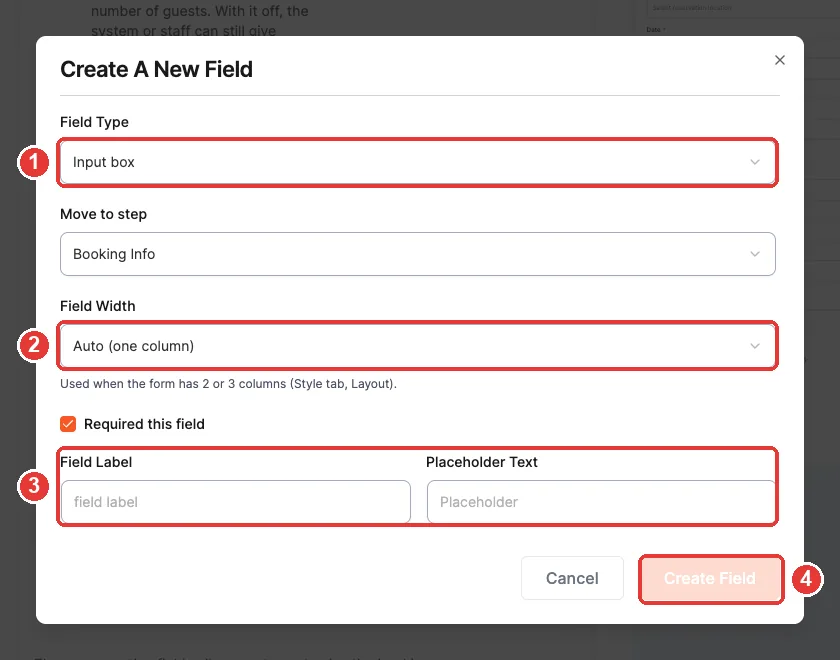
- Choose the Field Type (1): Input box, Dropdown, Textarea, Radio group or Checkbox group.
- Choose Move to step and the Field Width (2): Auto, Half row, Full row or One third.
- Enter the Field Label and Placeholder Text (3). For a dropdown, radio or checkbox group, add the options. Tick Required this field if guests must answer.
- Click Create Field (4), then Save Changes.
Step 4: Split the Form Into Steps (Pro) #
- Click Add step next to Booking Info.
- Name the step.
- Move fields into it with Move to step in each field.
- Click the ⋮ menu on a step to rename or delete it.
Step 5: Change How the Form Looks #
Open the Appearance tab.
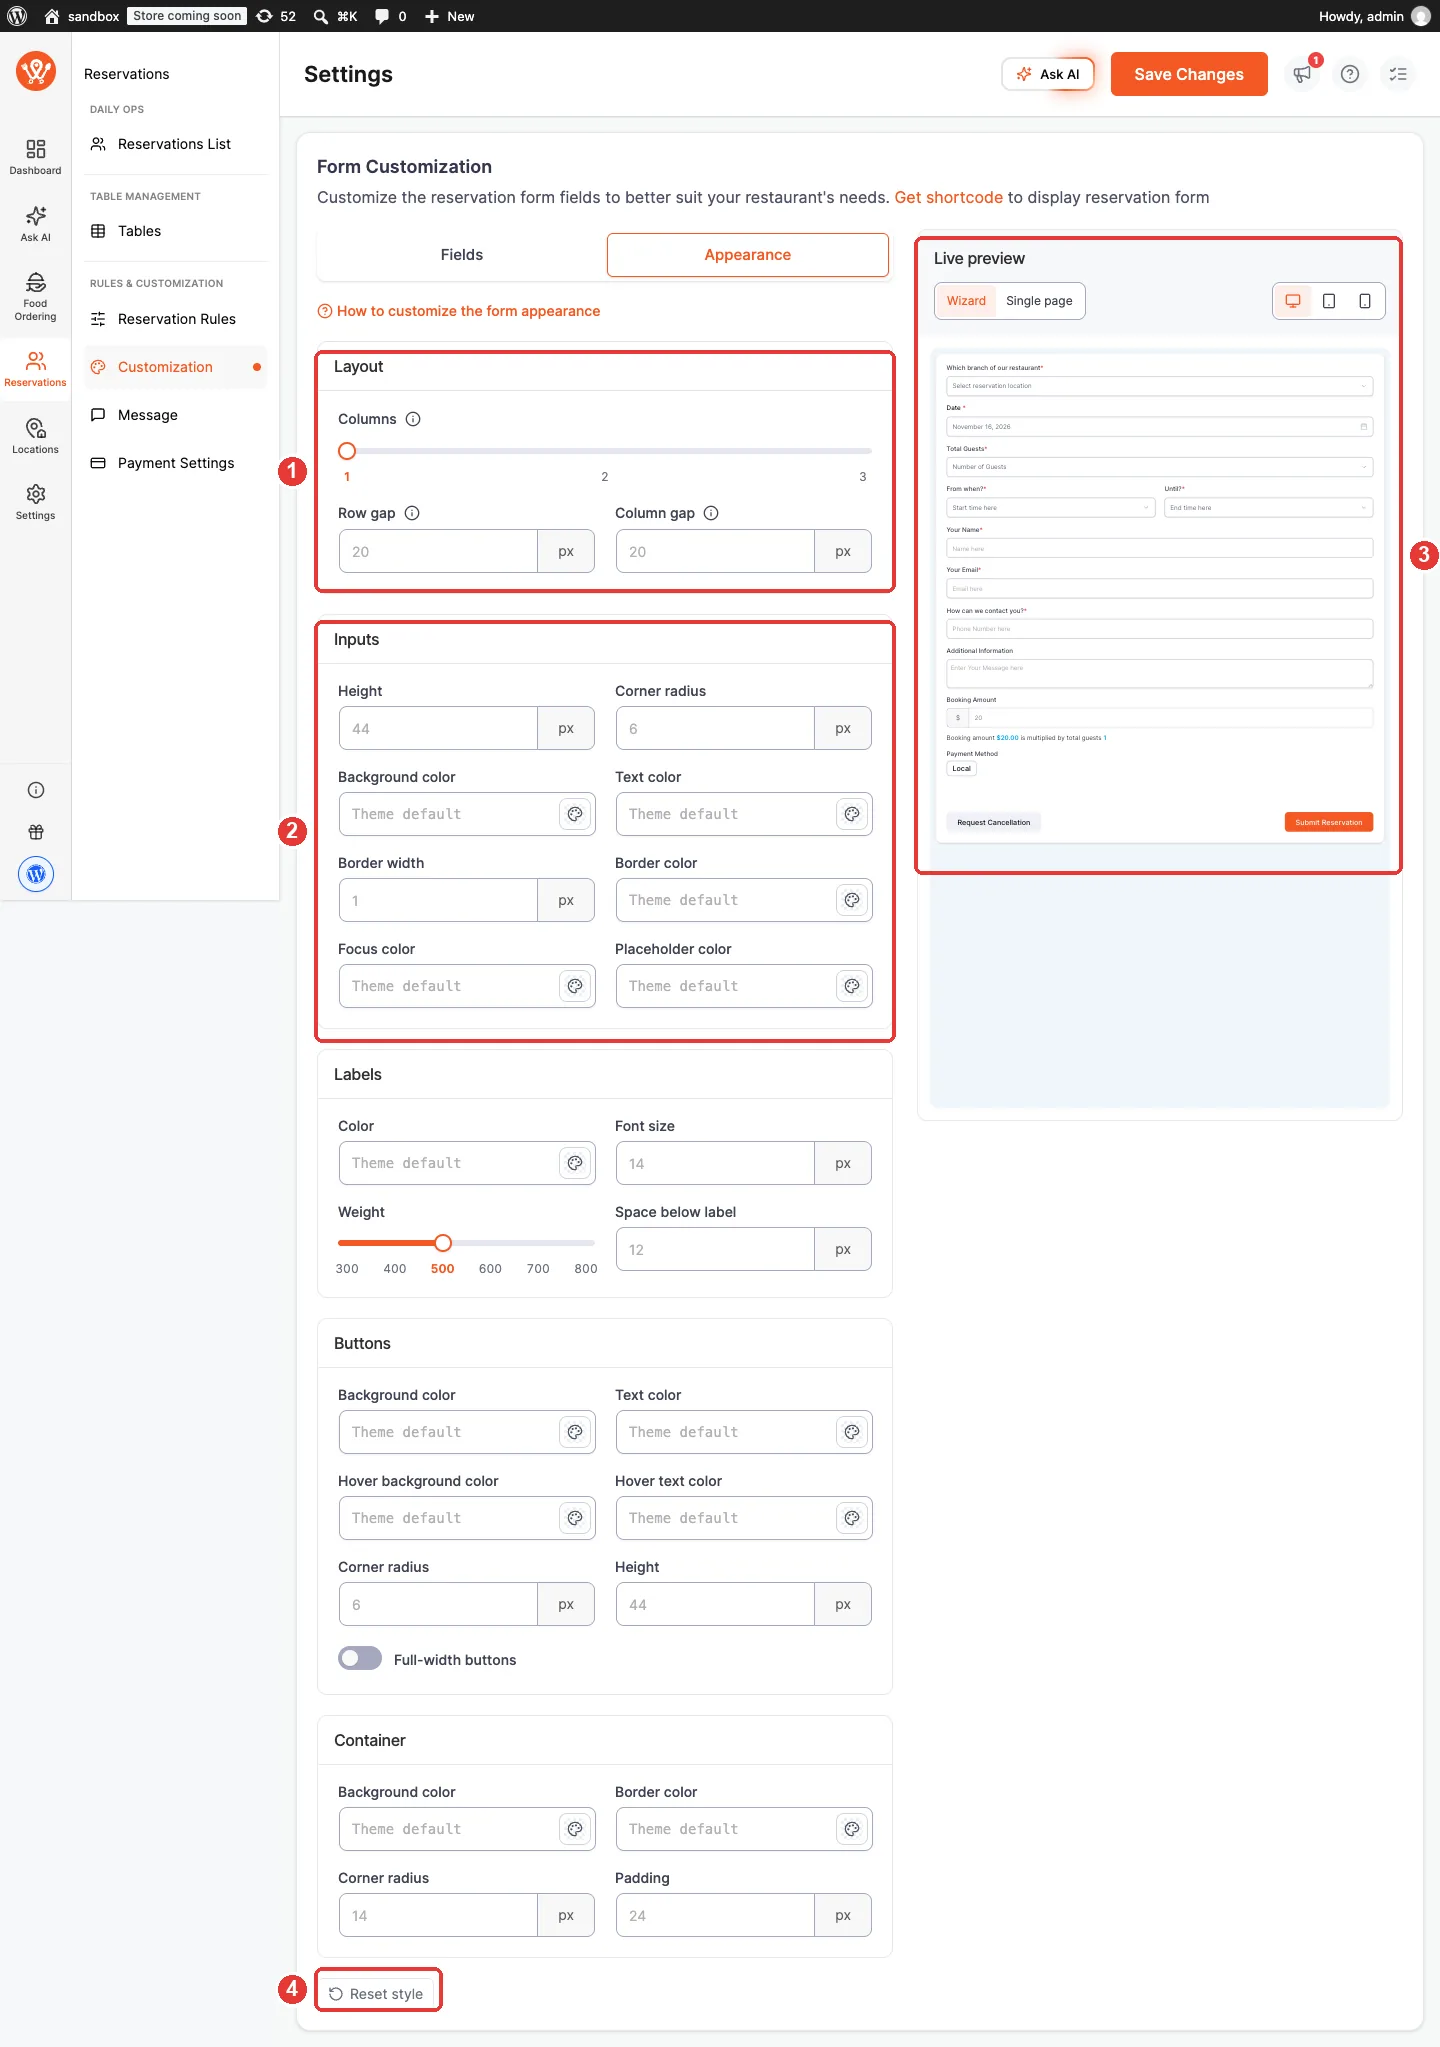
- Layout (1): 1, 2 or 3 columns, and the gaps between rows and columns.
- Inputs (2): height, corner radius and colors of the input boxes.
- Live preview (3): your changes show here at once.
- Reset style (4): go back to the default look.
Below Inputs you can also change Labels (color, font size, weight), Buttons (colors, hover colors, height, full-width) and the Container (background, border, padding).
Click Save Changes.
Frequently Asked Questions (FAQ) #
| Q1: Can I delete default fields like Name or Email? No. You can hide them with the Visible switch, but not delete them. You can delete custom fields. |
| Q2: Why can I not hide Date or From when? A booking needs a date and a time, so these fields are always shown. |
| Q3: Is there a limit to custom fields? No. But a short form is easier for guests. |
Conclusion #
Form Customization lets you ask exactly what you need, and make the form match your website.


