
Attendee Waitlists let people reserve a spot for an event after all tickets are sold out. Instead of leaving a sold-out event with no way to capture interest, Eventin shows a “Join the Waiting List” button so attendees can sign up. When a seat opens up or you decide to release more capacity, you can email those waitlisted attendees a direct payment link so they can complete checkout in one click.
Waitlists work in two modes depending on how you manage capacity: per-ticket waitlists (one limit per ticket type) when Global Capacity is OFF, and a single shared waitlist when Global Capacity is ON.
Where to Find It #
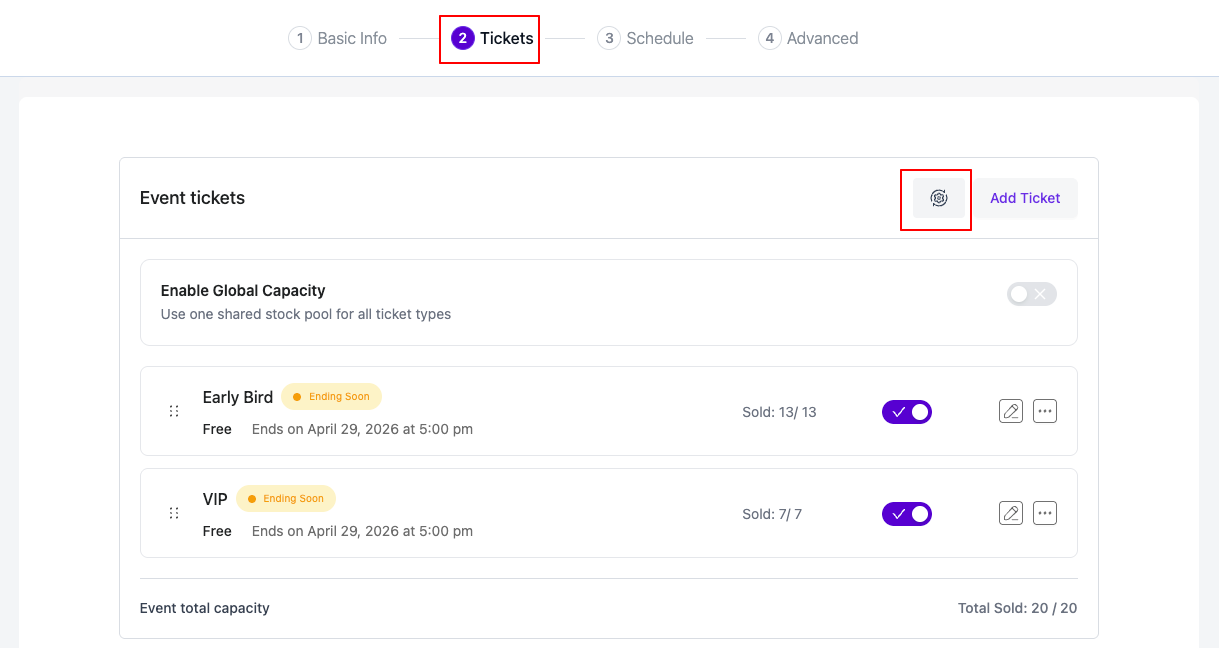
In your WordPress admin, go to: Eventin → Events → (Open or create an event) → Tickets tab
The waitlist toggle lives inside the Tickets tab Settings modal. Click the “Settings” button on the Tickets tab to open it.
How to Enable the Waitlist #
- Open the event in Eventin and switch to the Tickets tab.
- Click the “Settings” button to open the Settings modal.
- Find the “Enable Attendee Waitlists” row and toggle it ON.
- Click “Save Change”.
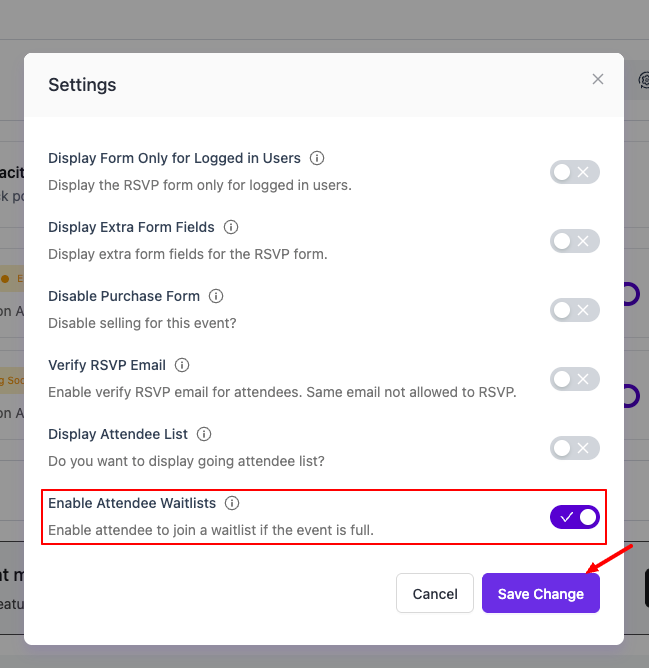
After saving, where you set the waitlist size depends on your event:
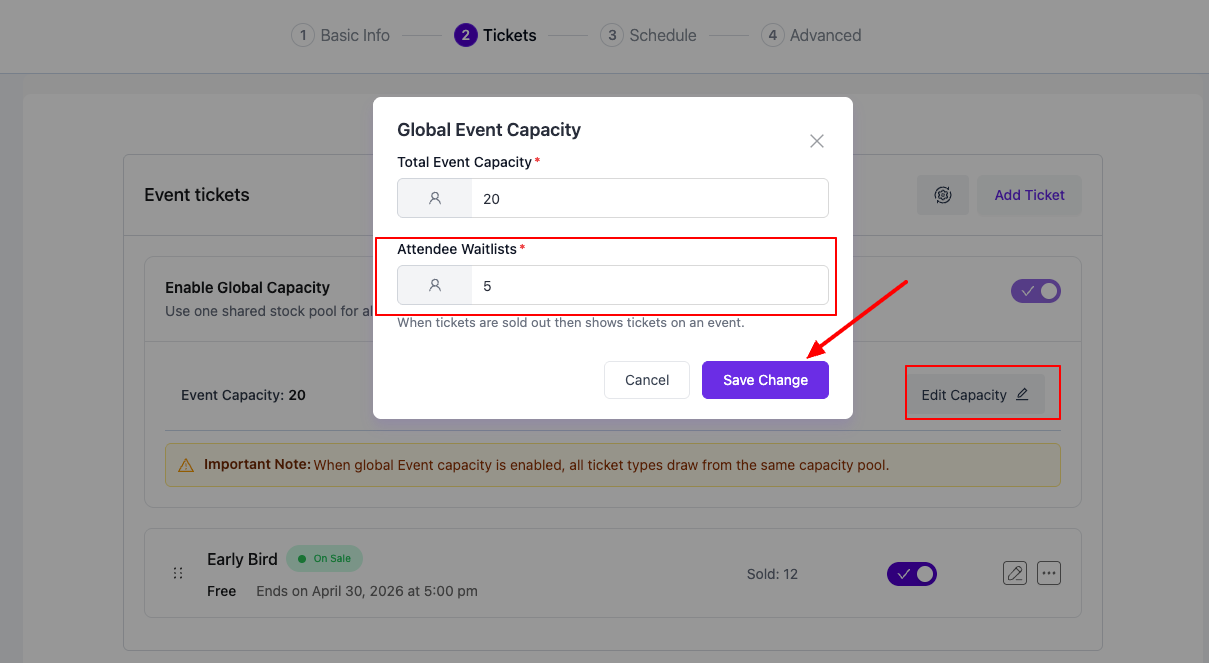
If Global Capacity is ON: Open the global capacity banner, click “Edit Capacity”, and fill in the “Attendee Waitlists” field in the modal. This is one shared waitlist across all ticket types for the event.
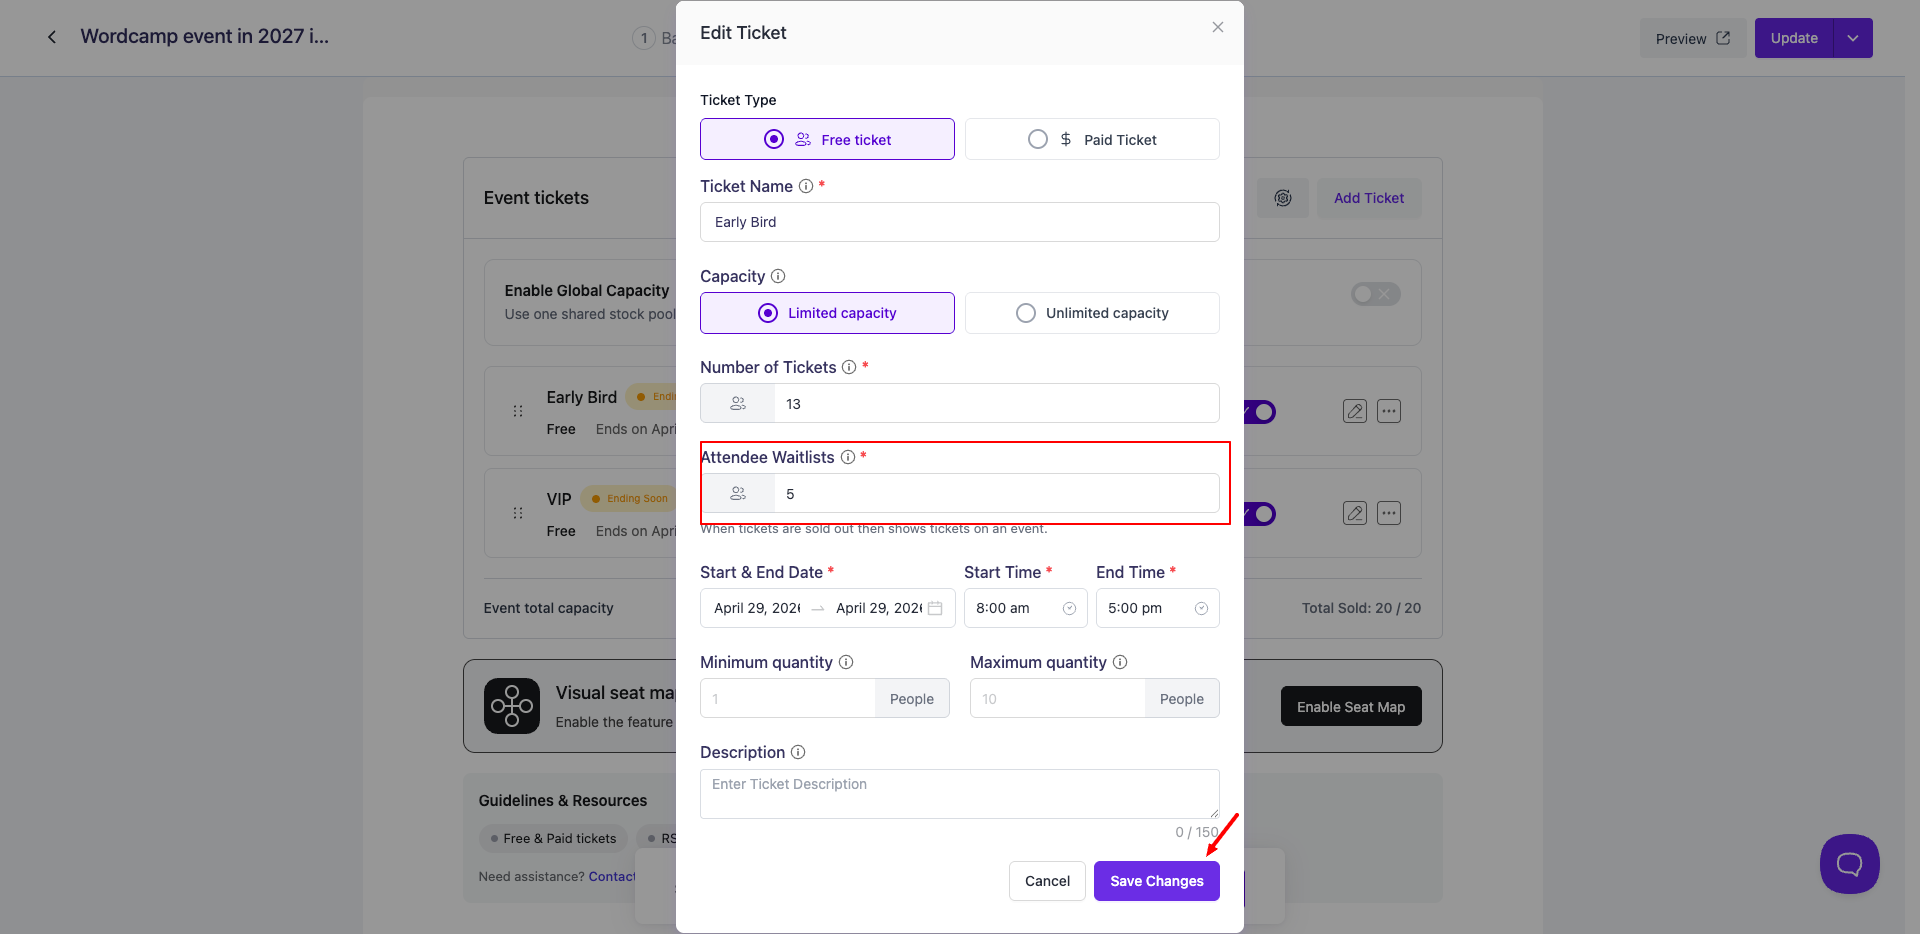
If Global Capacity is OFF: Open each ticket type (or create a new one) and fill in the new “Attendee Waitlists” field. This is the maximum number of people who can join the waitlist for that specific ticket type after it sells out.
What Attendees See #
- While tickets are still available: a normal “Get Tickets” or “Buy Now” button.
- When all waitlist-enabled tickets (or the global pool) are sold out: the button changes to “Join the Waiting List”.
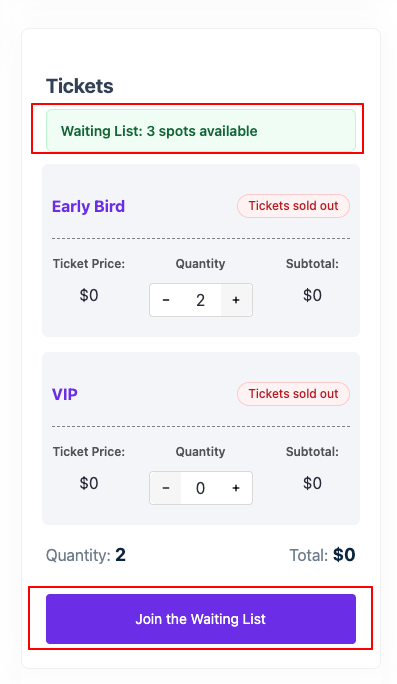
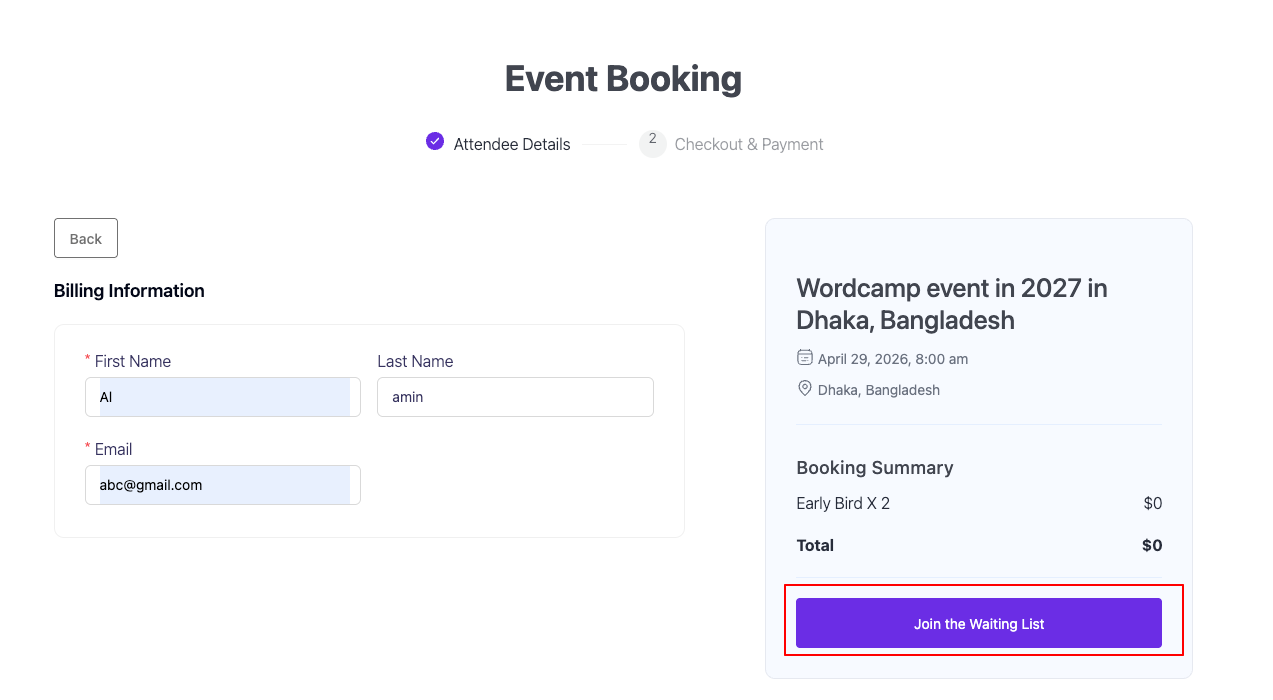
- After joining, the attendee fills in the same form they would for a normal purchase, but no payment is taken. Their order is created with the status “Waiting”.
The waitlist button only appears once the relevant tickets are fully sold out — if even one waitlist-enabled ticket still has stock, the button stays as “Get Tickets”.
How Waitlisted Orders Work from Admin #
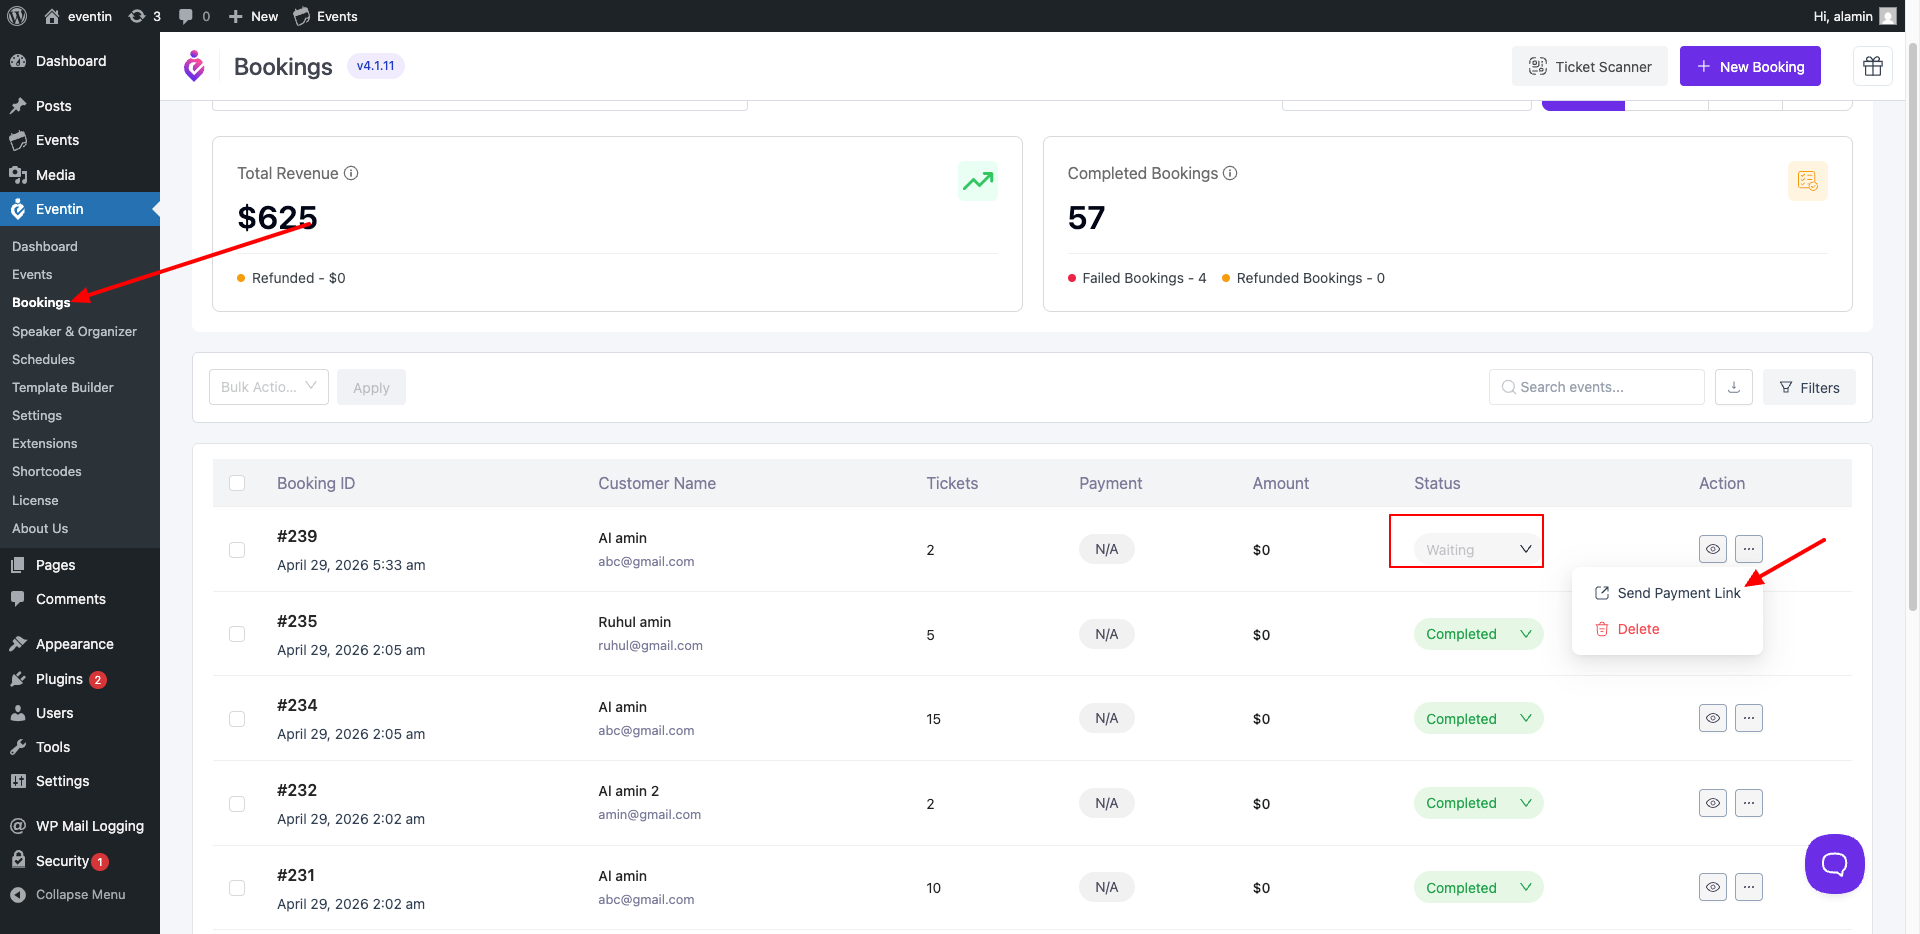
- Go to Eventin → Bookings.
- Waitlisted orders appear with a status badge of “Waiting”.
- Open the actions menu (three dots) on a waiting row.
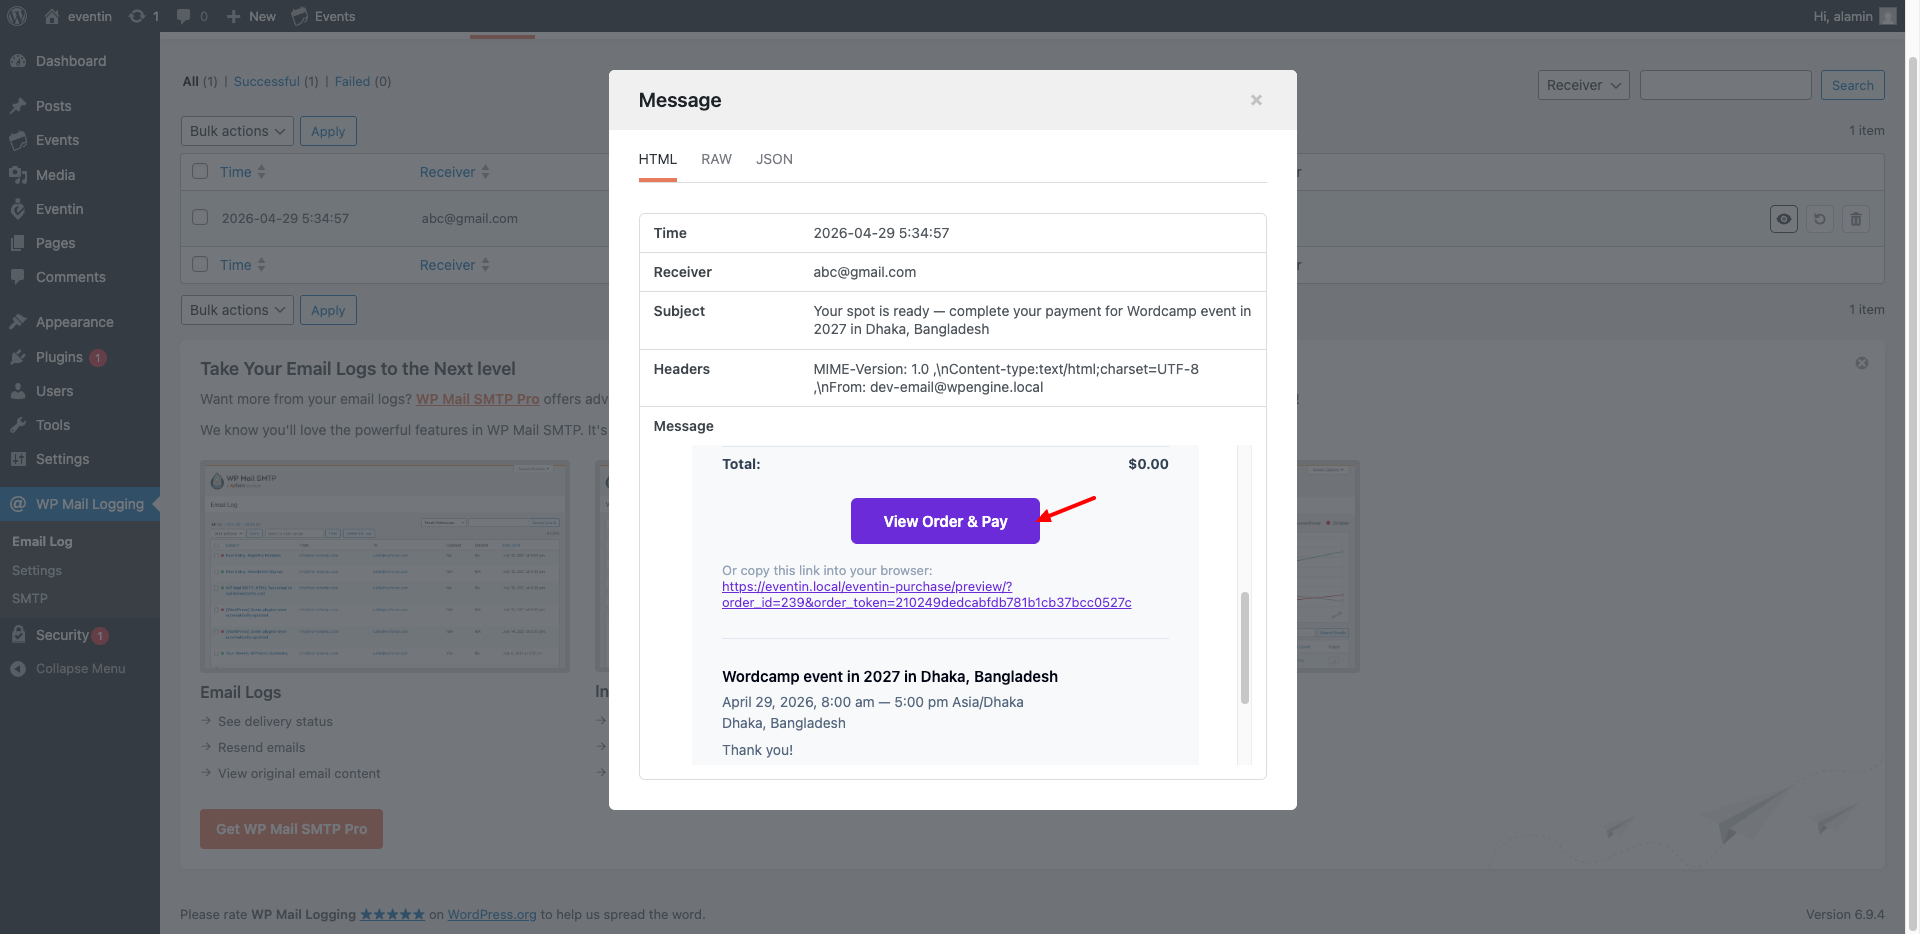
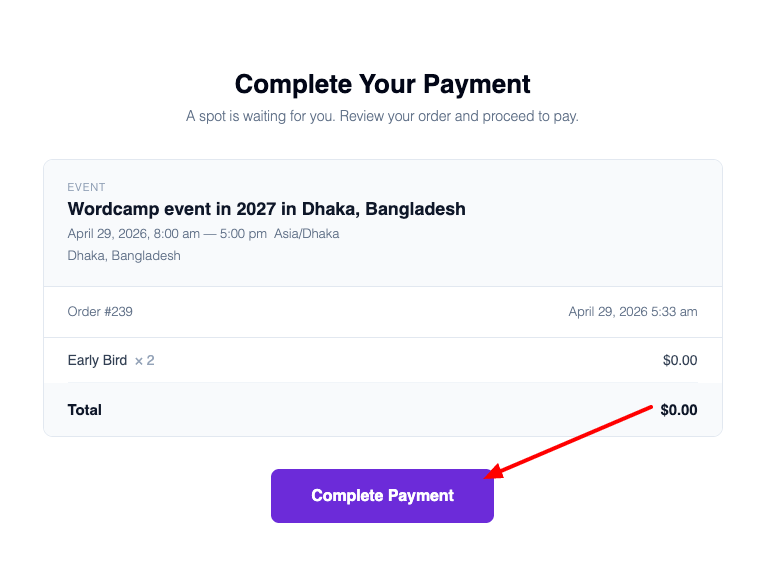
- Click “Send Payment Link”. Eventin emails the attendee a signed link that takes them straight to a payment preview page, where they can complete checkout.
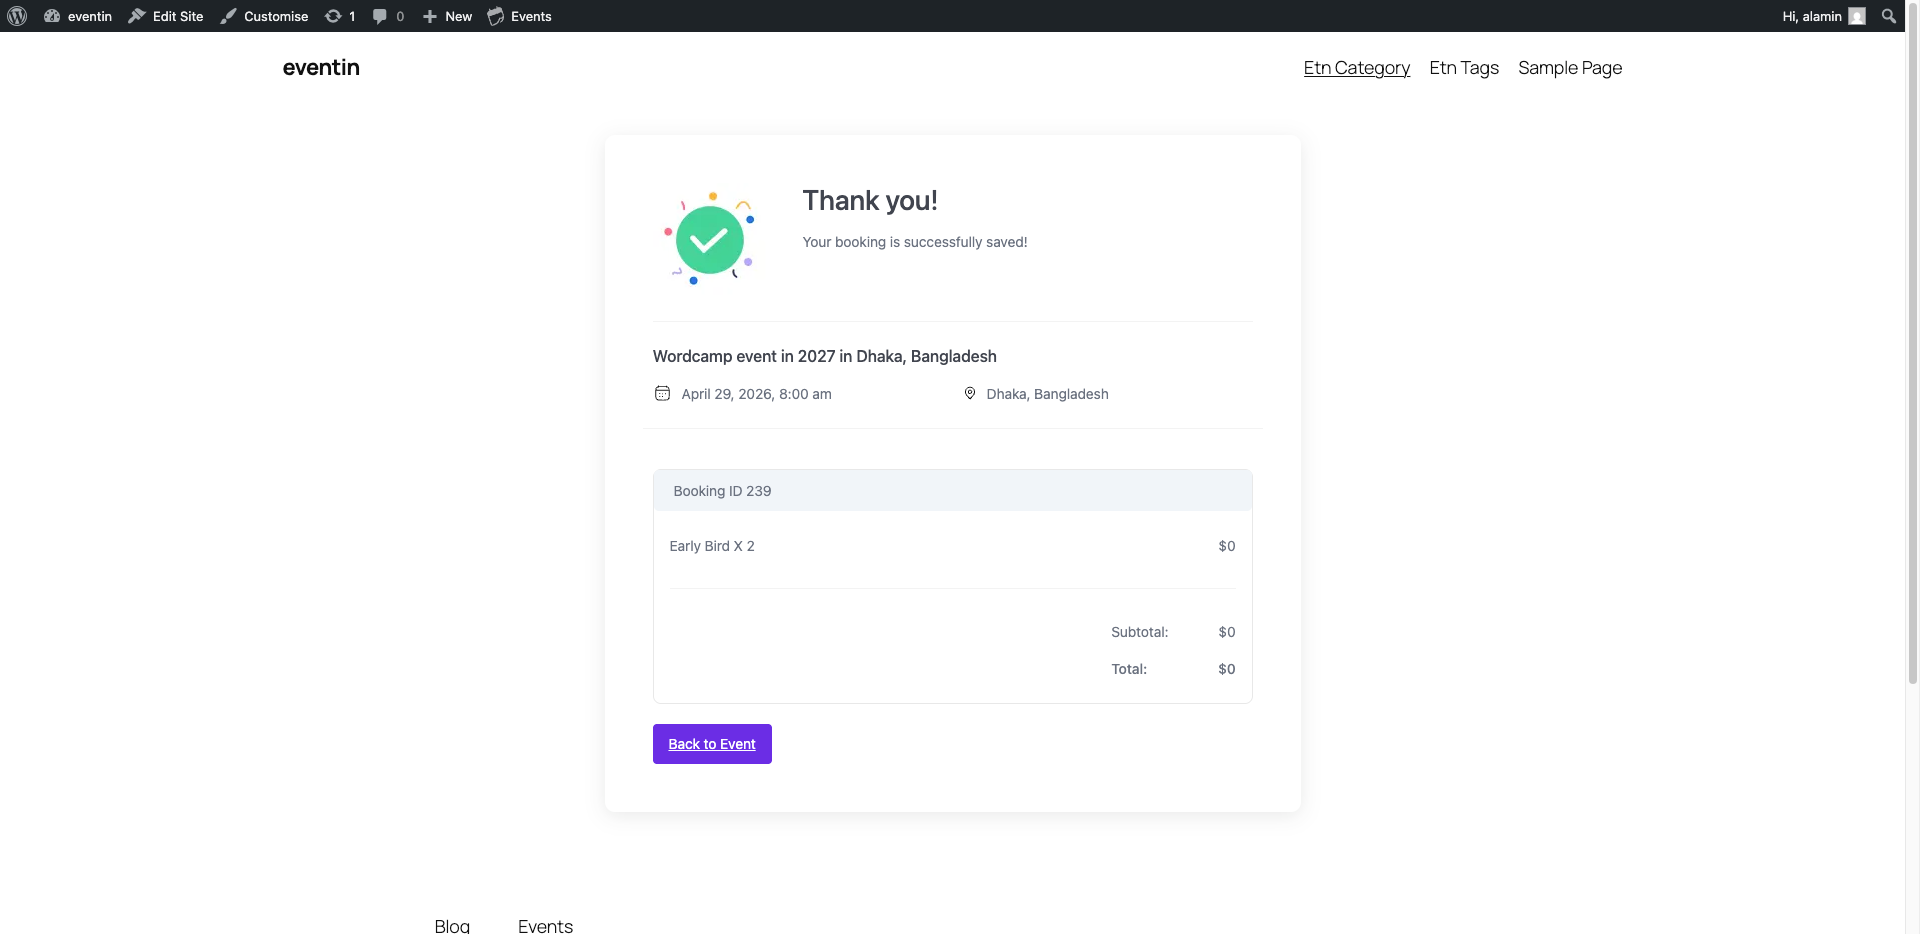
- Once they pay, the order status moves to “Completed” and they receive their tickets like any other purchase.
You decide when to send the payment link — usually after a refund opens up a seat, or when you raise the event capacity.
FAQs #
Q1. Do I have to enable Global Capacity to use the waitlist?
A: No. The waitlist works with both Global Capacity and per-ticket capacity. With Global Capacity disabled, you can set a waitlist limit for each ticket type. When enabled, you set one shared waitlist limit for the entire event.
Q2. When does the “Join the Waiting List” button appear?
A: The Join the Waiting List button appears only when all waitlist-enabled tickets are sold out or the global ticket pool is full. If any eligible ticket is still available, the Get Tickets button is displayed instead.
Q3. Does joining the waitlist charge the customer?
A: No. Joining the waitlist does not require payment. A booking is created with the Waiting status, and payment is only requested later when a payment link is sent.
Q4. How do I notify a waitlisted attendee?
A: Go to Eventin → Bookings, find the booking with the Waiting status, and click Send Payment Link from the action menu. The attendee will receive an email with a secure payment link to complete the purchase.
Q5. What happens when the waitlist is full?
A: No additional users can join the waitlist. Once the configured waitlist limit is reached, Eventin prevents new waitlist registrations.
Q6. Can I see how many people are on the waitlist?
A: Yes. With Global Capacity enabled, the remaining waitlist count is shown in the Tickets tab. For per-ticket waitlists, you can view all waiting attendees from Eventin → Bookings by filtering the Waiting status.
Q7. Does refunding a paid ticket free up a waitlist spot?
A: Yes. Refunding a ticket makes the seat available again, allowing you to send a payment link to a waitlisted attendee so they can claim the spot.
Conclusion #
Attendee Waitlists turn a “Sold Out” page into an opportunity. With one toggle and a capacity number, you stop losing demand once seats run out and gain a ready-made list of buyers you can convert the moment more capacity opens up.
Key takeaways:
- One toggle in the Tickets tab Settings modal turns the feature on.
- Per-ticket limits when Global Capacity is OFF, one shared limit when Global Capacity is ON.
- The “Join the Waiting List” button only appears once the relevant tickets are fully sold out.
- Waitlist sign-ups do not pay until you send them a payment link from the Bookings page.
- Use Bookings → Send Payment Link to convert waitlisted orders into completed sales.


