At Eventin, you can use “Stripe” as your payment gateway and sell tickets.
How to Get Secret and Publishable Key #
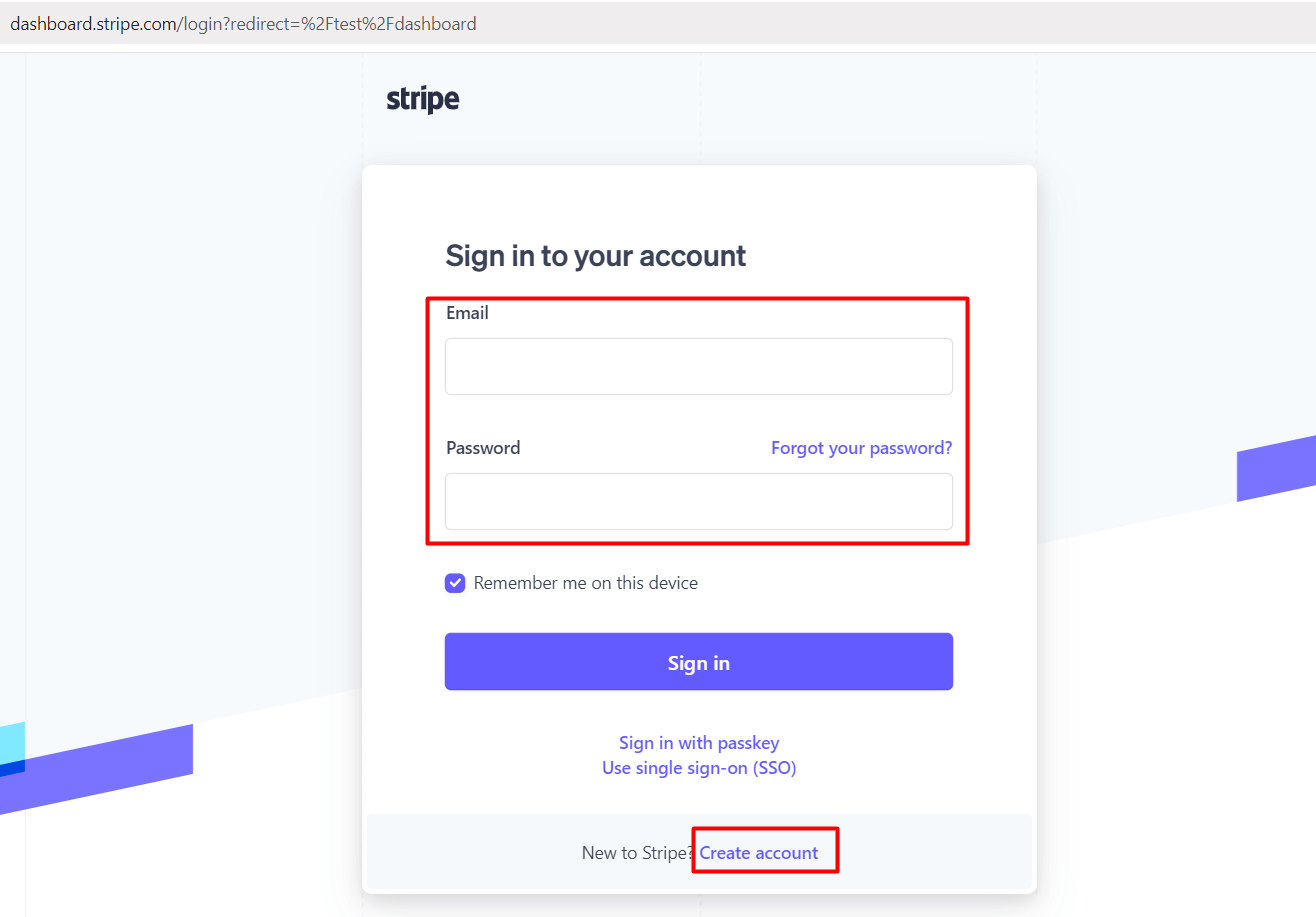
- Go to the Stripe Dashboard and log in. If you don’t have an account, then create an account first.
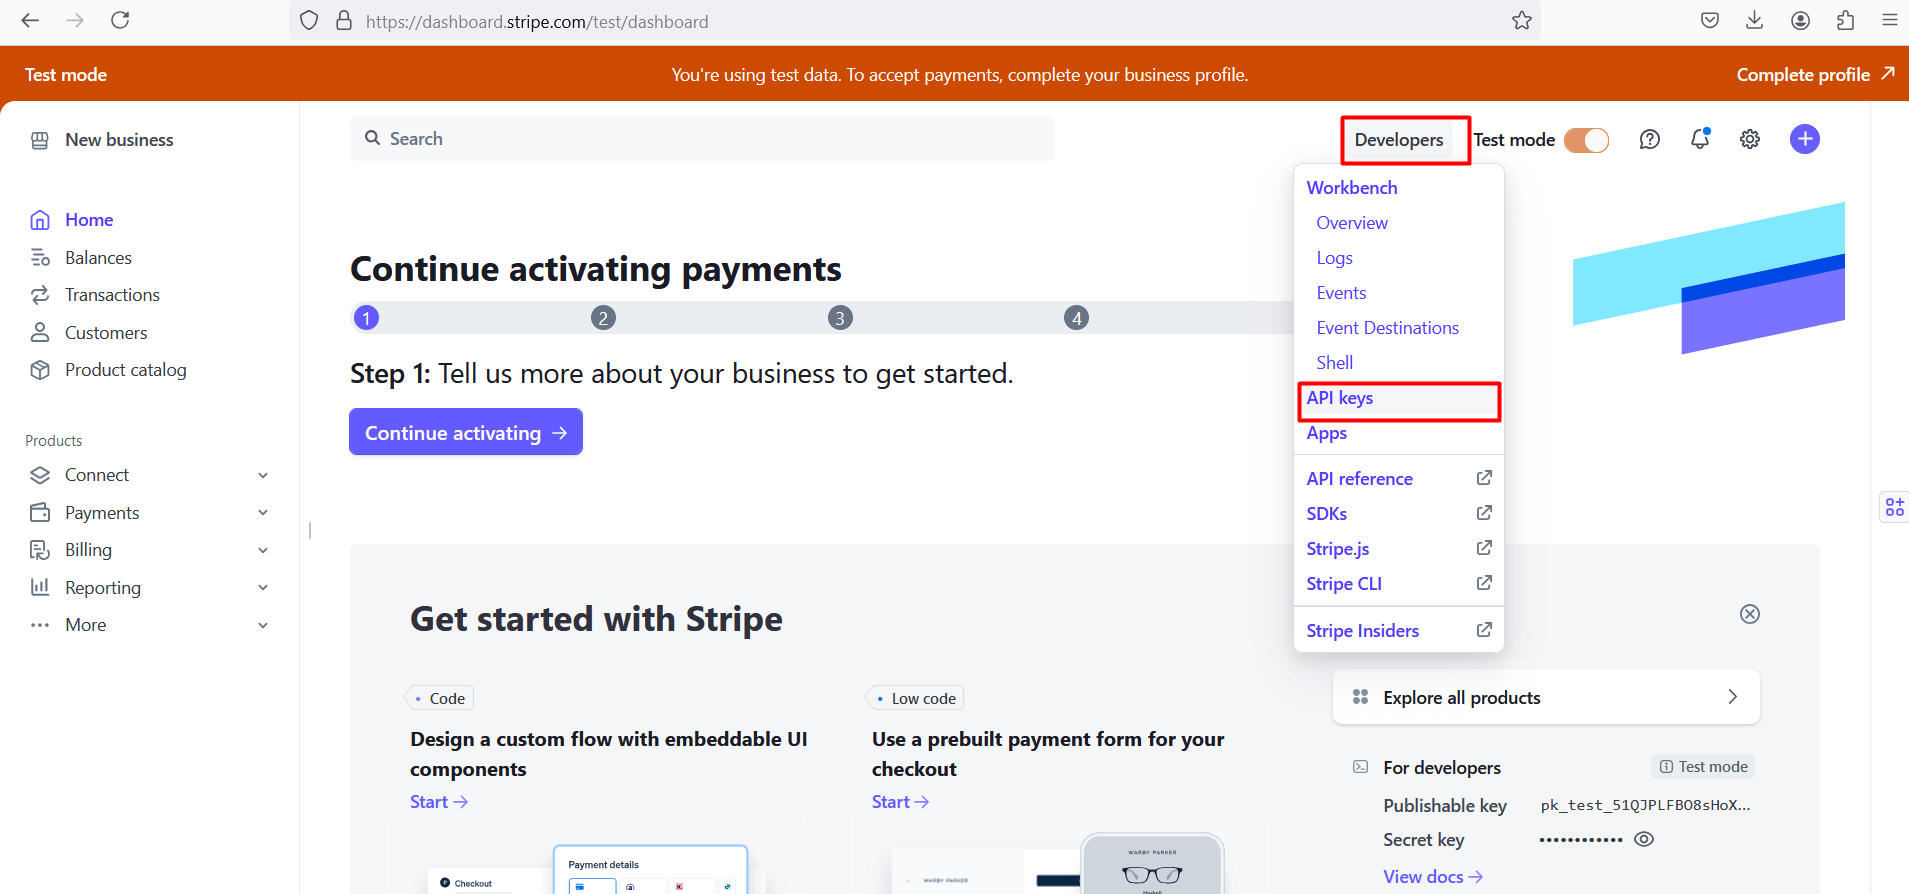
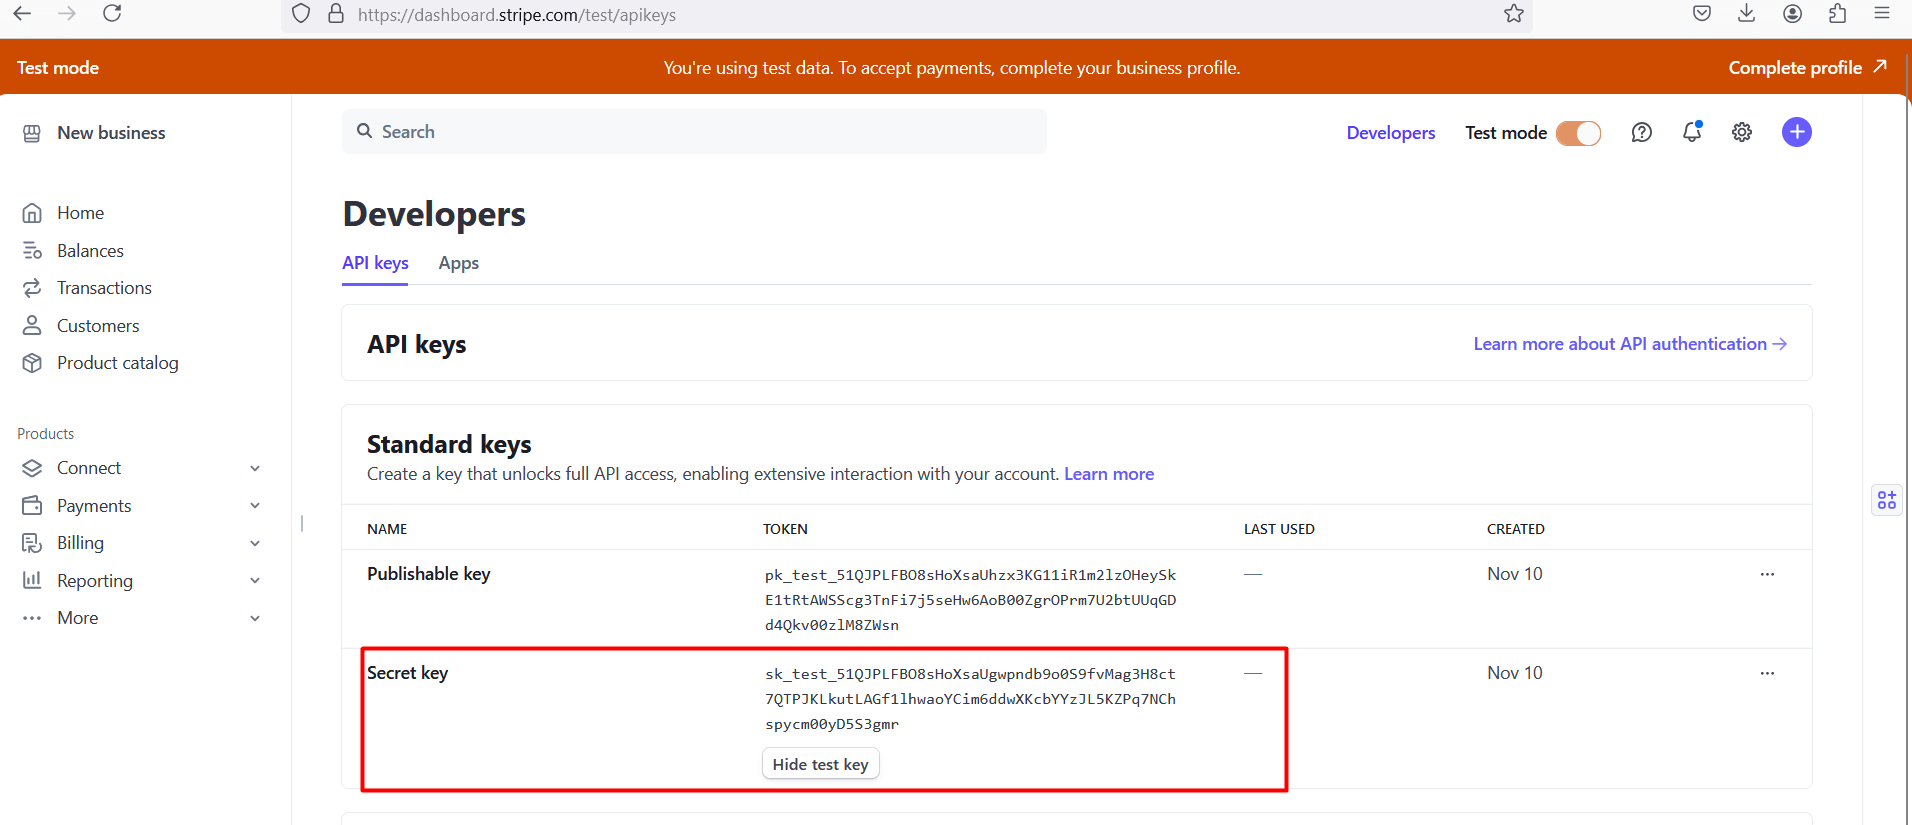
- On the Dashboard, click on Developers Menu-> API Keys.
- You’ll see the Test API Keys.
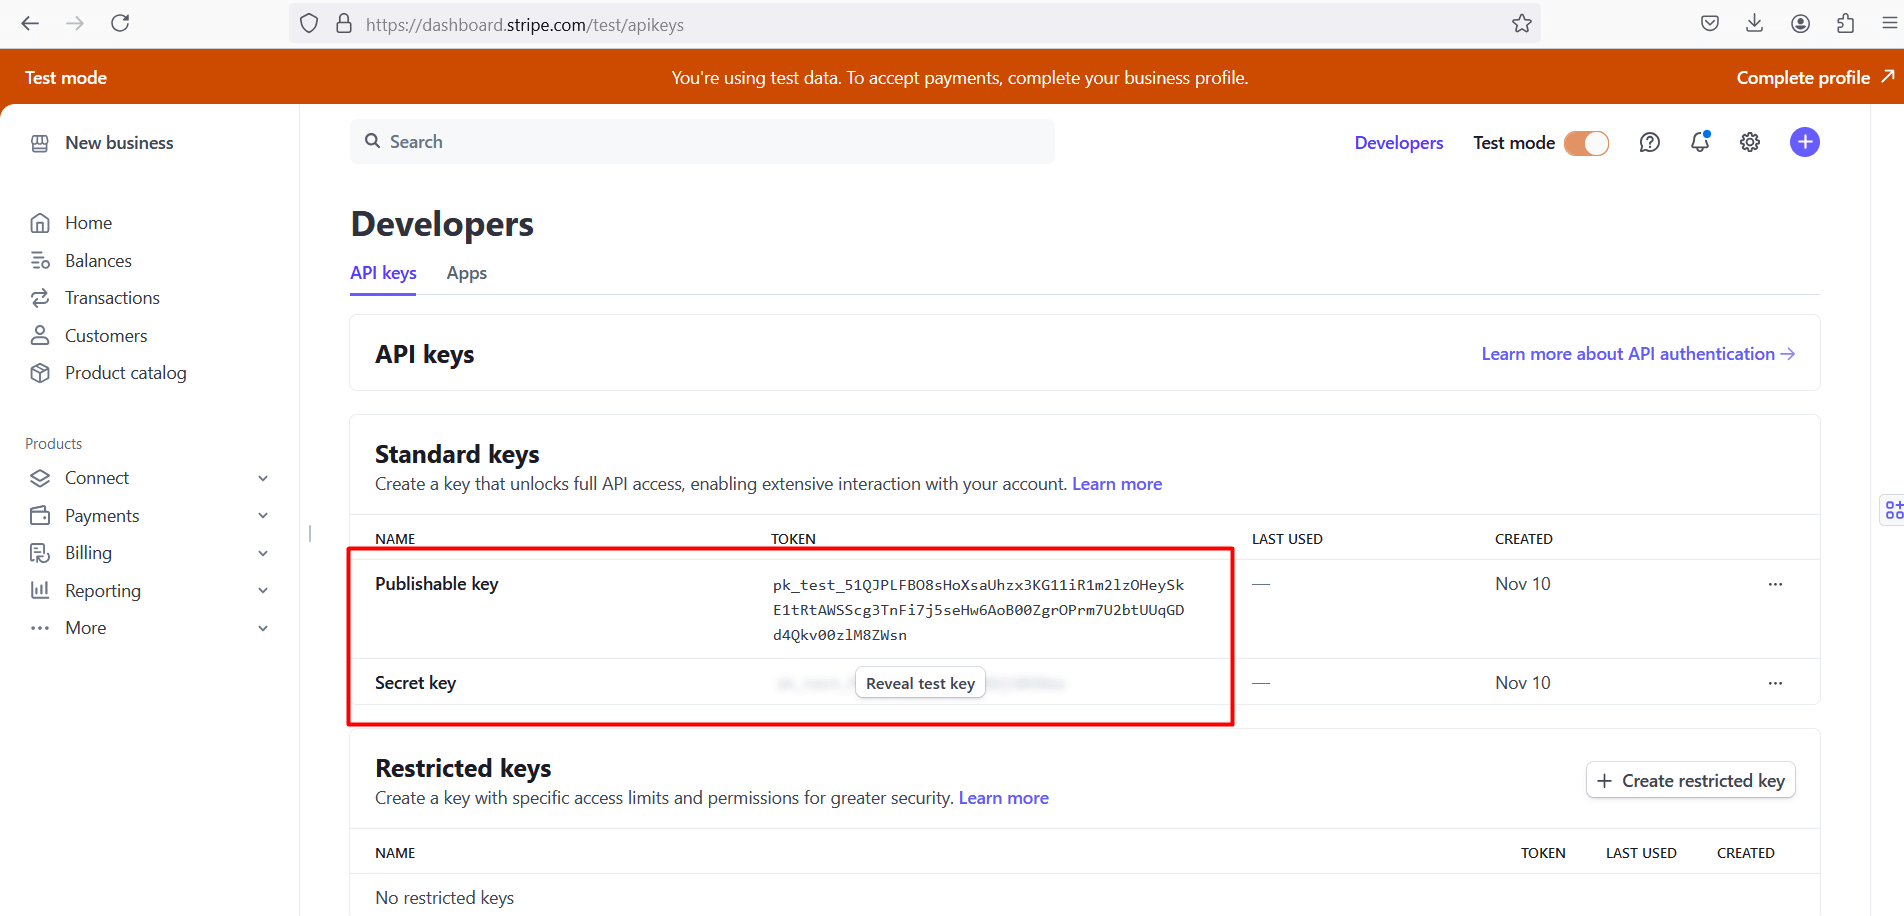
- Click Reveal to see the full keys and copy them.
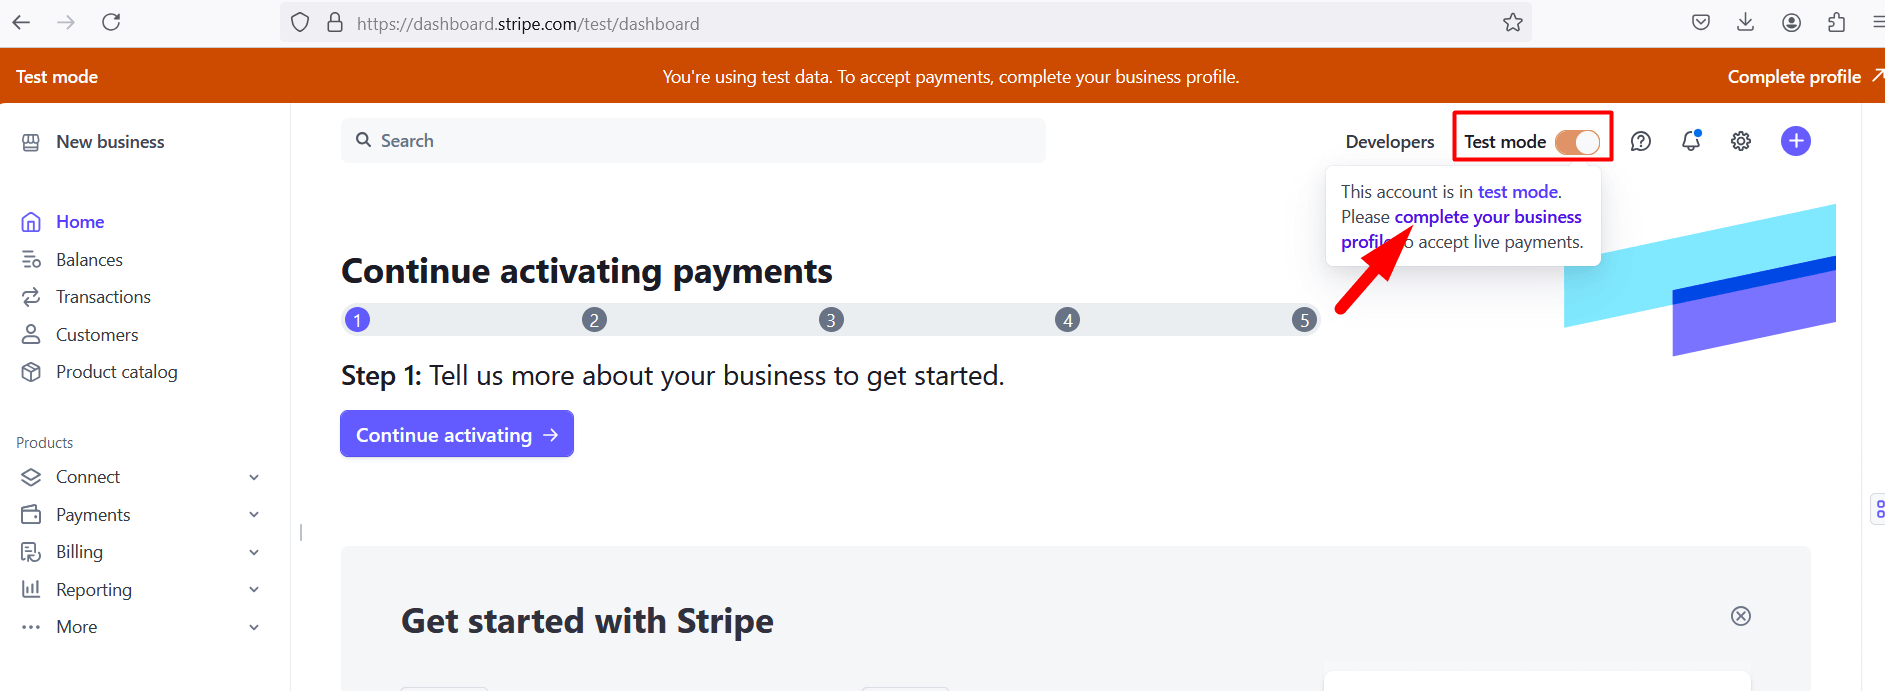
- If you want to use the key for Live Payment, you must configure your business information from this LINK. After that, you can enable Live Mode from the top-right corner of your Stripe Dashboard. Once in Live Mode, you’ll see your Live API Keys.
How to Enable Stripe from Eventin #
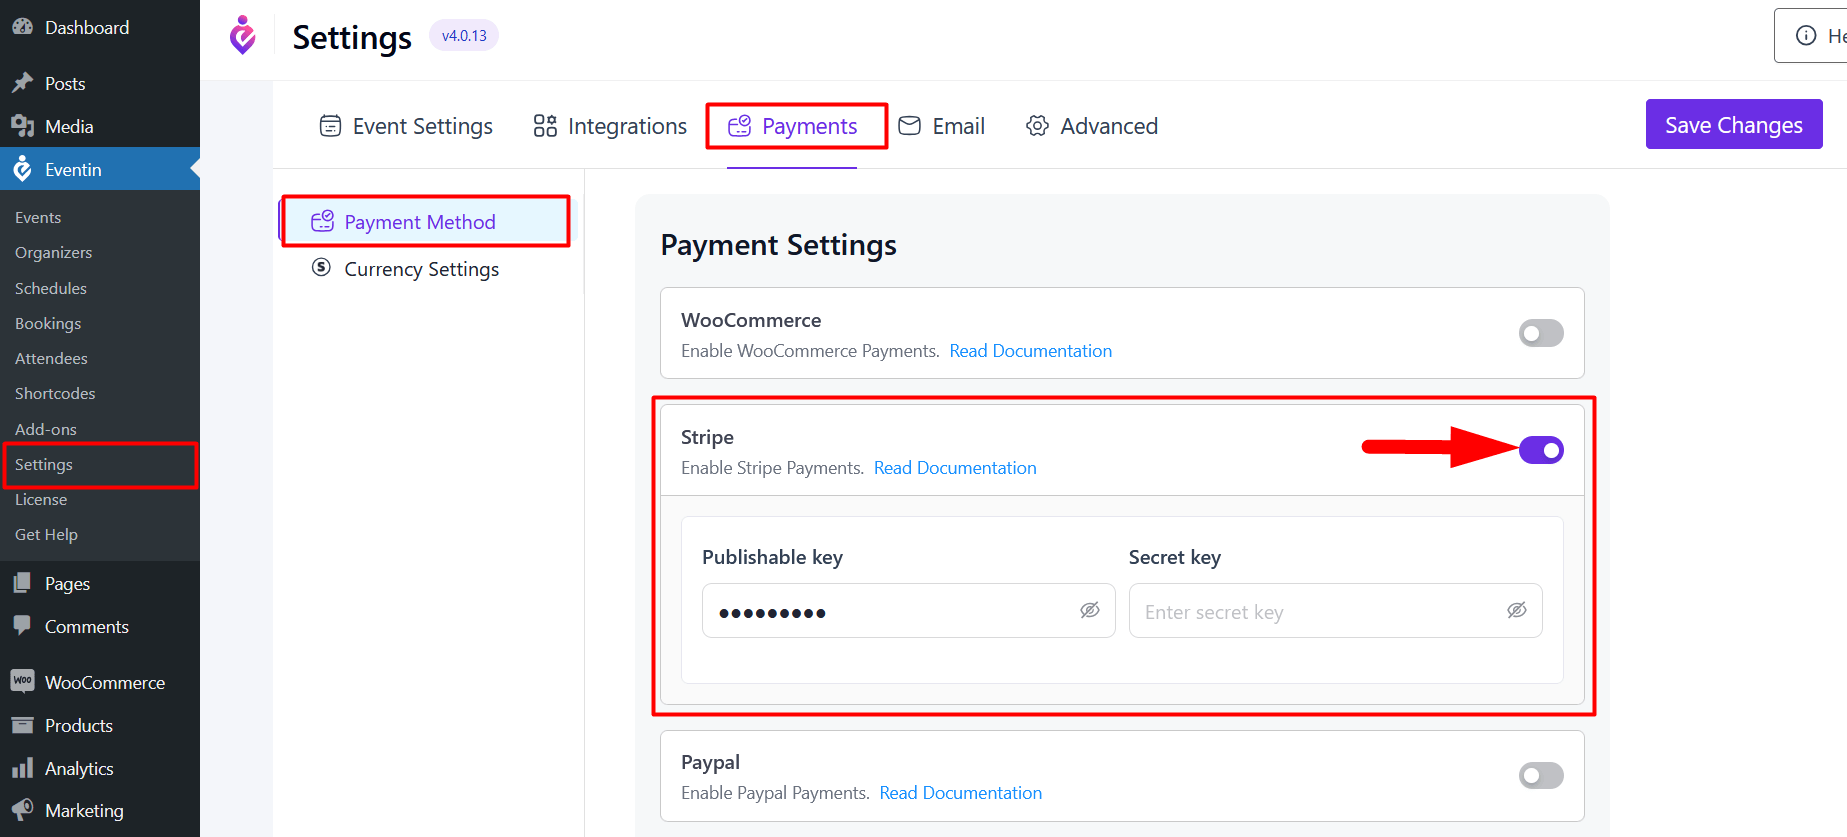
In order to enable Stripe, log in to your WordPress admin panel and go to the Eventin dashboard. Then click on the settings and under the Payments tab, you will get the payment method menu. Click on the payment method menu and enable Stripe. You can not enable both WooCommerce and Stripe together.
- Settings Key: Eventin -> Settings ->Payments -> Payment Method and enable Stripe.
You are fine to go with the Stripe enable toggle button. Add the Public Key and Secret Key. Once done, save the changes.
Here’s a quick VIDEO to help you set it up.
How to Set Up the Stripe Webhook #
A webhook lets Stripe tell your site what happened to a payment after the buyer leaves the checkout. Without it, an order can stay stuck as pending when the payment actually went through, failed payments are never marked as failed, and a refund you issue from the Stripe Dashboard will not show up in Eventin. Setting this up takes about two minutes and only needs to be done once per site.
Step 1 — Copy your webhook URL #
Eventin listens for Stripe at this address:
https://yoursite.com/wp-json/eventin/v2/stripe-webhookReplace yoursite.com with your own domain. The URL must be reachable from the internet over HTTPS — Stripe cannot deliver events to a local site such as localhost or a site behind a login wall.
Step 2 — Add the endpoint in Stripe #
- In the Stripe Dashboard, go to Developers → Webhooks and click Add endpoint.
- Paste your webhook URL into the Endpoint URL field.
- Under Select events, choose these three:
payment_intent.succeeded,payment_intent.payment_failedandcharge.refunded. - Click Add endpoint to save it.
Eventin ignores any other event type, so selecting extra events does no harm — but these three are the ones that matter.
Step 3 — Add the signing secret to Eventin #
- On the endpoint’s page in Stripe, find Signing secret and click Reveal. Copy the value — it starts with
whsec_. - In WordPress, go to Eventin → Settings → Payments → Stripe.
- Paste it into the Webhook signing secret field, below your Publishable key and Secret key.
- Click Save Changes.
Until this field is filled in, Eventin rejects every incoming webhook — this is what verifies the request genuinely came from Stripe and not from someone else.
Test and Live mode use different secrets. Stripe creates a separate endpoint and a separate signing secret for each mode. When you switch your API keys from test to live, come back and replace the signing secret too.
What each event does in Eventin #
- payment_intent.succeeded — the order is marked Completed and the confirmation email with the tickets is sent to the buyer.
- payment_intent.payment_failed — the order is marked Failed.
- charge.refunded — the order is marked Refunded, so a refund issued from the Stripe Dashboard stays in sync with Eventin → Booking.
Each event is safe to receive more than once. If Stripe retries a delivery, Eventin sees the order is already in that status and does nothing, so buyers never get a duplicate ticket email.
Troubleshooting #
In Stripe, open Developers → Webhooks, click your endpoint, and look at the recent deliveries. The response Eventin sent back tells you what went wrong.
- “Stripe webhook secret is not configured” — the Webhook signing secret field in Eventin is still empty. Complete Step 3.
- “Invalid Stripe webhook signature” — the secret does not match the endpoint. The usual cause is a test-mode secret saved while the endpoint is live, or the reverse. Re-copy the secret from the exact endpoint you created.
- Signatures fail even though the secret looks right — Eventin only accepts events signed within the last five minutes. If your server clock is out of sync, ask your host to enable time synchronisation.
- 404 or no response at all — the URL is wrong, or a security plugin or firewall is blocking the WordPress REST API. Confirm the address ends in
/wp-json/eventin/v2/stripe-webhookand allow that path. - Deliveries succeed but the order does not change — the payment was not started from this site, so Eventin has no matching order for that payment. Place a fresh test order and check again.
Users View for Stripe Payment #
After the saved changes to Stripe payment integration, users will see different views for the payment options. While purchasing the tickets, they will see the name and email form on top of the ticket information. And in the next step, after filling up the purchasing information, a pop-up will open for payment.
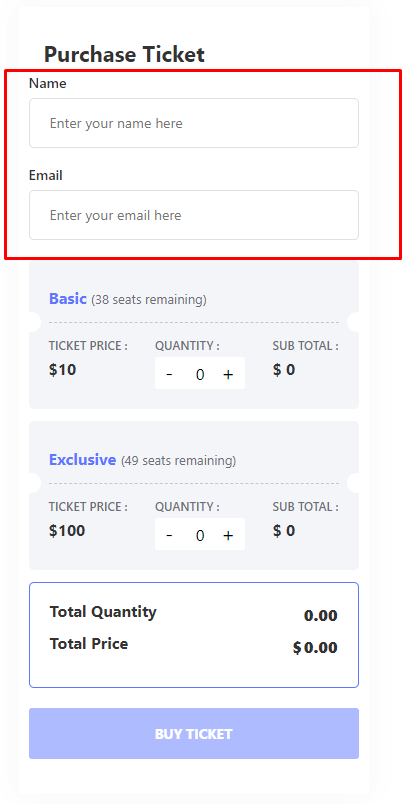
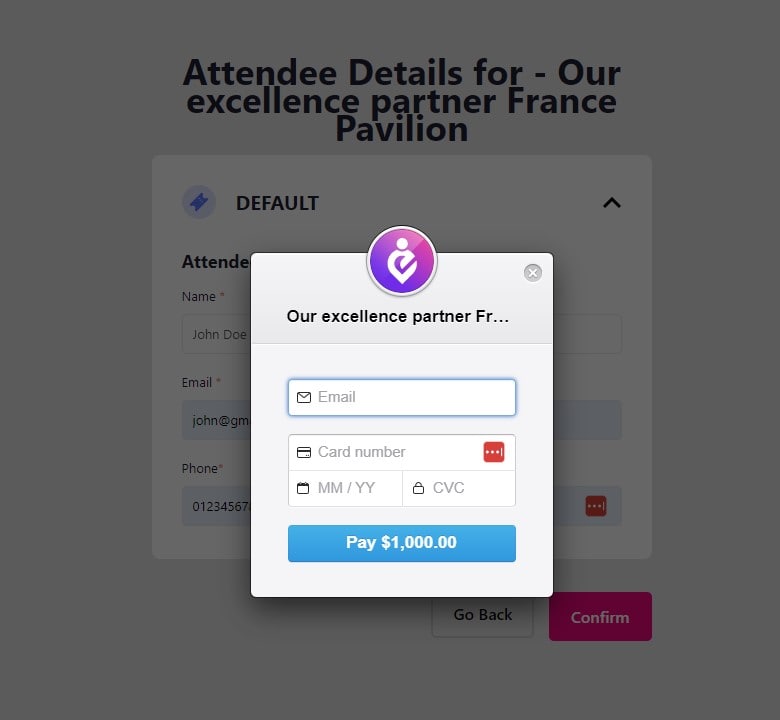
This time, the purchaser will not drive to the checkout page. And for the successful payment, they will be driven to the thank you page.
Stripe Order Details #
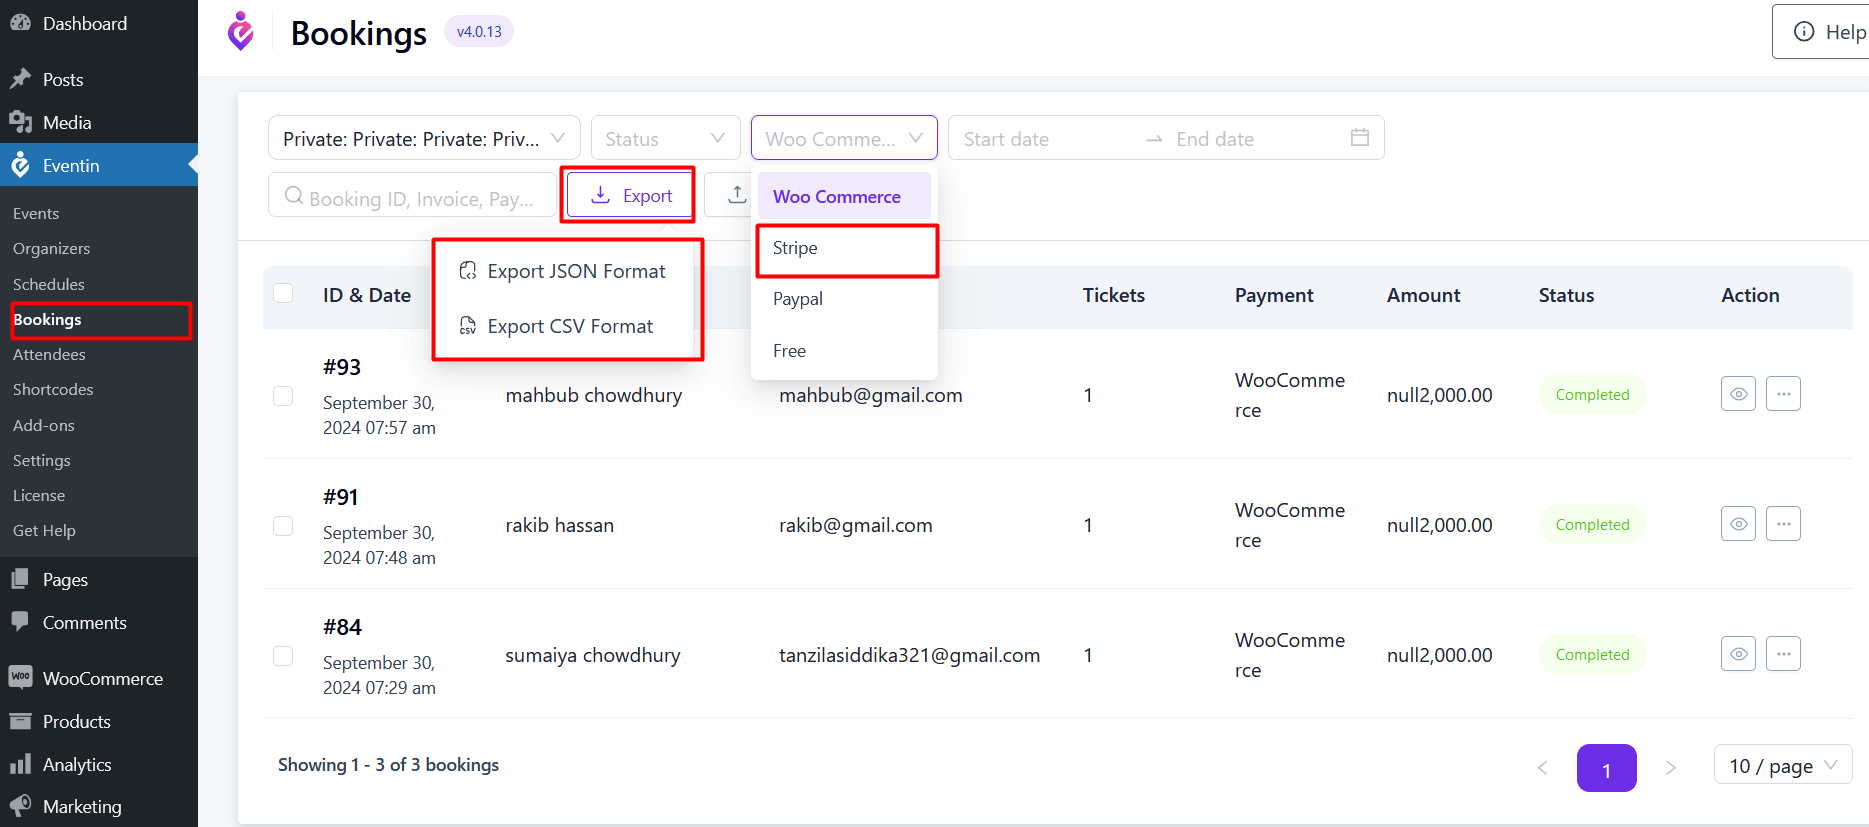
You can see all the Stripe payment orders from Eventin -> Booking -> Select Stripe.
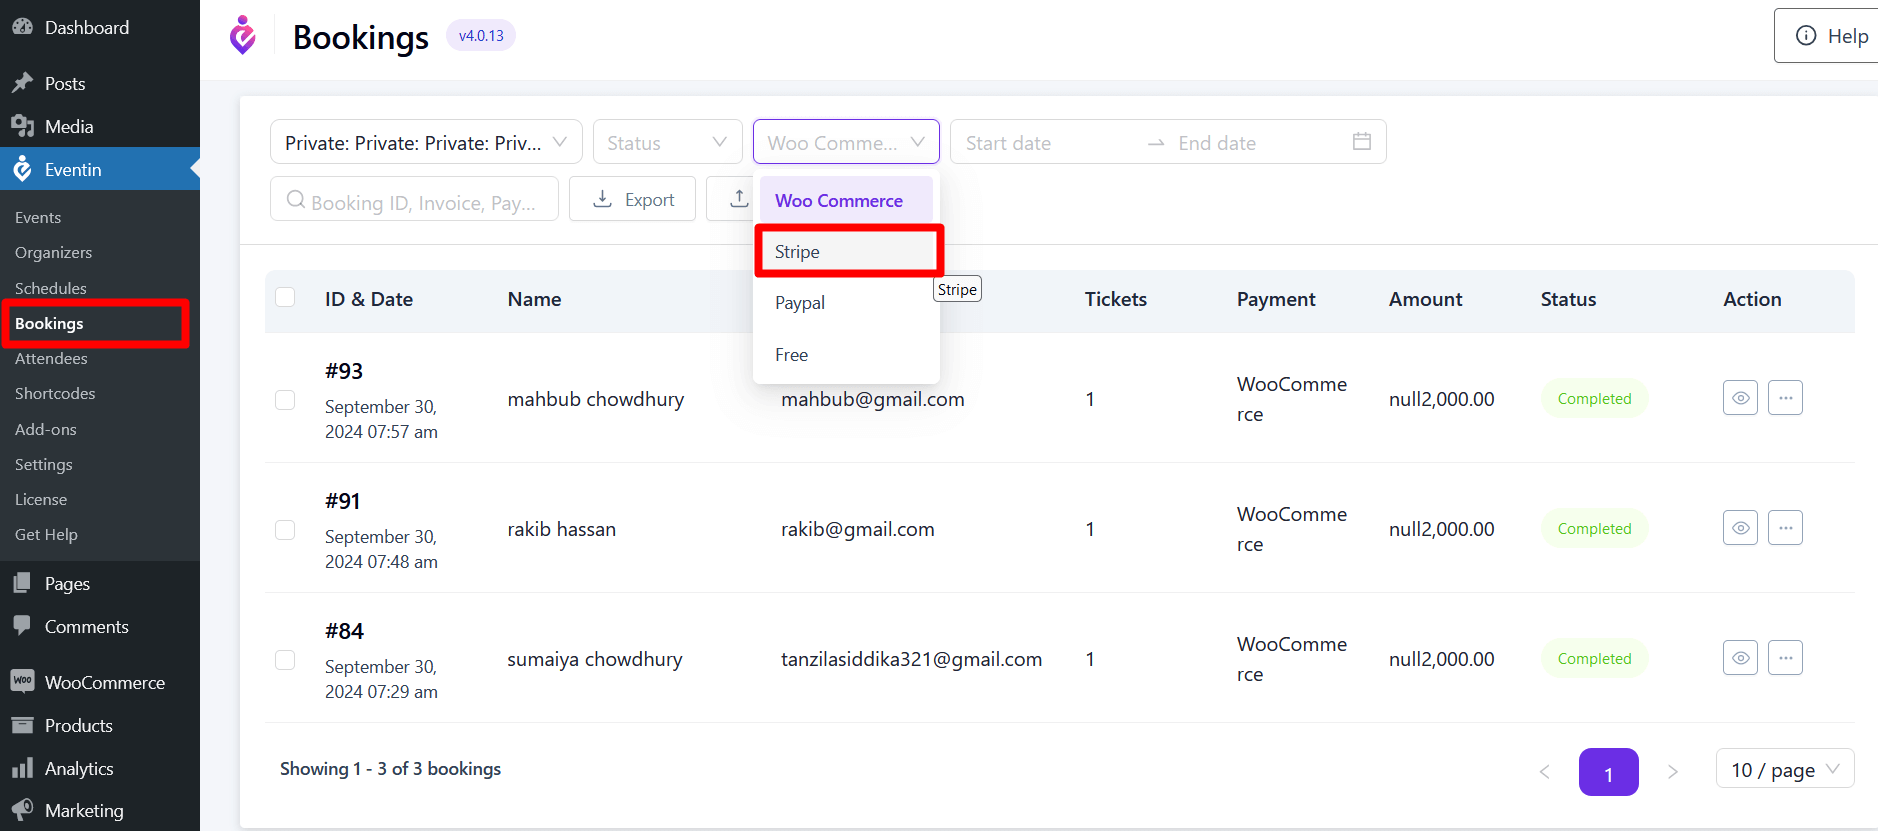
You can also export/import all the bookings in JSON and CSV format.