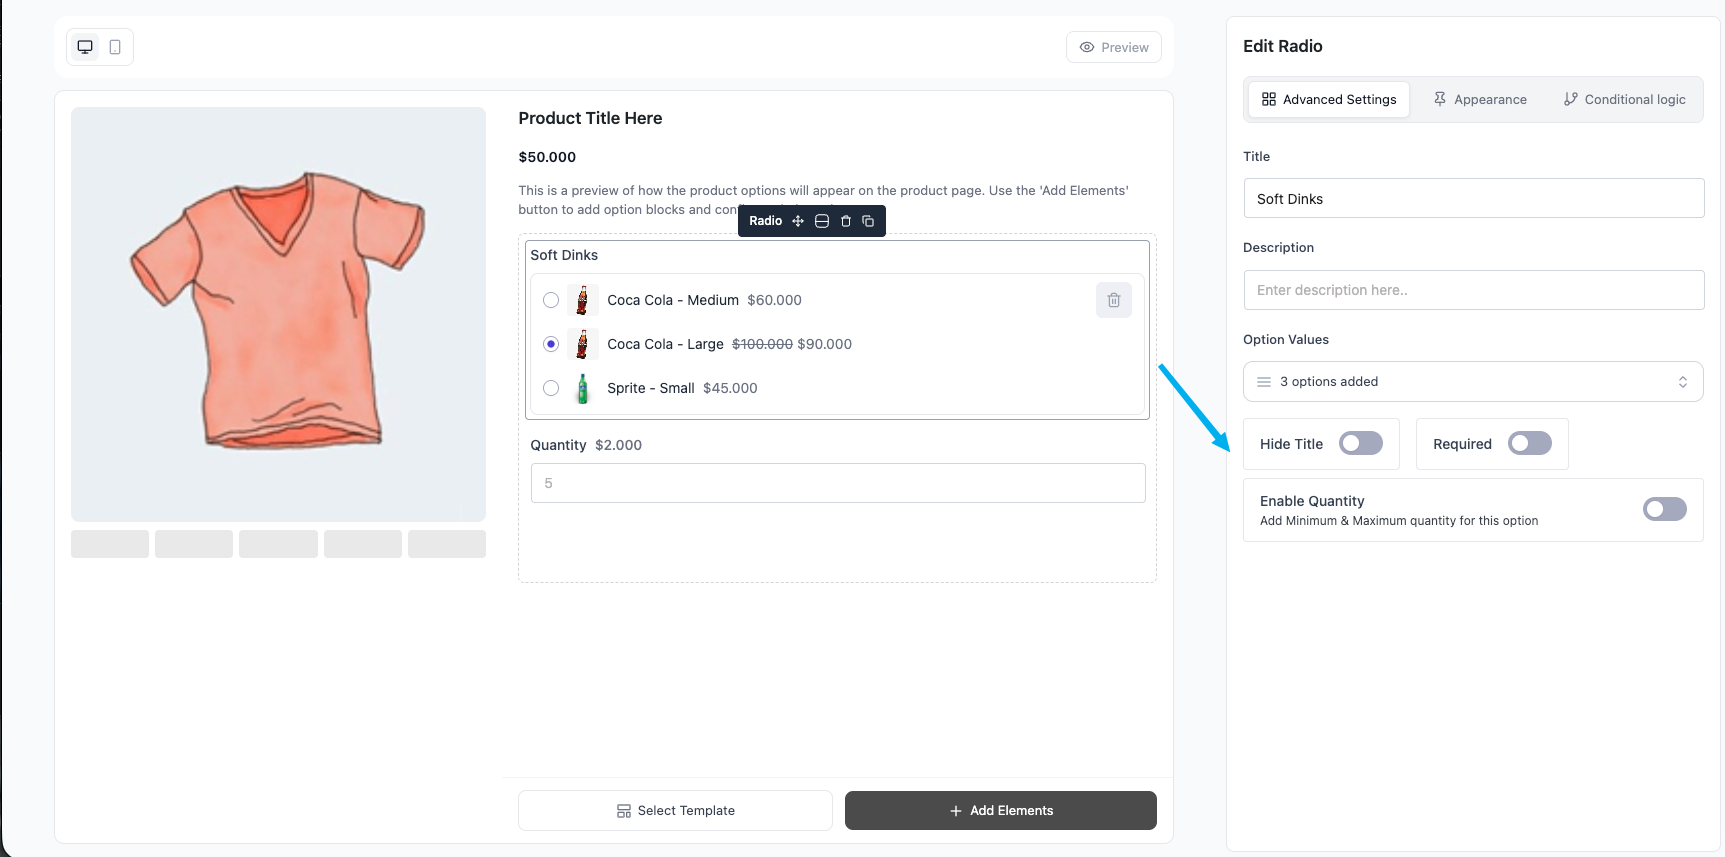
The Radio field lays all options out in the open as radio buttons, so customers see every choice at once and pick exactly one. Each choice can add to or subtract from the price, show an image, and optionally carry a quantity input. Best for short lists where visibility matters.
Use Cases #
- “Pizza Size: Small / Medium (+$3) / Large (+$6)” — Classic single-pick where all prices should be visible upfront.
- “Warranty: 1 Year (+$0) / 2 Years (+$19) / 3 Years (+$29)” — Tiered upsell laid out side by side.
- “Roast Level: Light / Medium / Dark” — Equal-priced choices that just need a clear pick.
- “Choose a Crust” with thumbnails — Visual single-pick using the per-choice image option.
How to Use #
- Open Optiontics → Add-ons and edit (or create) an add-on form.
- Drag the Radio block onto the canvas.
- Select the block to open its settings on the right.
- Add your choices — for each one set:
- Label — text shown next to the button.
- Price — amount added when selected (negative to subtract).
- Price type — Fixed or Percentage of the base price.
- Default — mark one choice as pre-selected.
- Image (optional) — thumbnail shown with the choice.
- Adjust the settings (below).
- Save, assign to a product, and preview.
Settings & Customizations #
- Title / Hide title / Description.
- Required — must select before add to cart.
- Columns — lay choices out in 1–N columns.
- Quantity — enable a per-choice quantity input; set Min and Max.
- Show sale price — show the discounted choice price when set.
FAQ #
Can customers select more than one? No — Radio is single-select. Use Checkbox for multiple.
How do I show choices side by side? Increase Columns.
Can each option have its own quantity? Yes — enable Quantity and set Min/Max.
Can a choice subtract from the price? Yes — enter a negative amount.
Conclusion #
Pick Radio when the list is short and you want every option visible at once. Columns, optional images, and per-choice quantity make it flexible for sizes, tiers, and visual picks alike.


