Integrate Clover POS with WPCafe to allow customers to place orders from your restaurant website and receive order notifications directly on your Clover POS.
A POS (Point of Sale) is where a customer pays for goods or services, either in person or online. Receipts may be printed or generated electronically. Cloud-based POS systems are increasingly popular, making POS integration with WPCafe essential.
Install WooCommerce Clover Payment Gateway #
- Go to Plugins → Add New in your WordPress dashboard
- Search for WooCommerce Clover Payment Gateway
- Install and activate the plugin
This plugin connects WooCommerce with your Clover POS.

Set up Clover POS Payment Gateway #
After installing the plugin, go to WooCommerce → Settings → Payments → Manage (Clover Integration) and enter your Clover POS API Key.
Generate Clover POS API #
To create an API, click on the link to visit the Clover POS website and follow the detailed steps mentioned in the Clover POS Documentation.


Manage Clover Integration Settings #
To set up Clover Integration, you need to fill up the following details:
- Enable/Disable – Enable by clicking on the checkbox.
- API Key – Paste the API key you generated from your Clover POS account.
- Title – Add a title that the user will see during checkout.
- Description – Add a description that the user will see during checkout.
- Use Credit Card Form – Select this option if you want customers to remain on the user checkout page and use an iframe hosted by Clover.
- Status for Paid Orders – Select a status for orders paid successfully.
- Logging – Select this to save debug messages to the WooCommerce System Status log.
- Save Changes

Final Output #
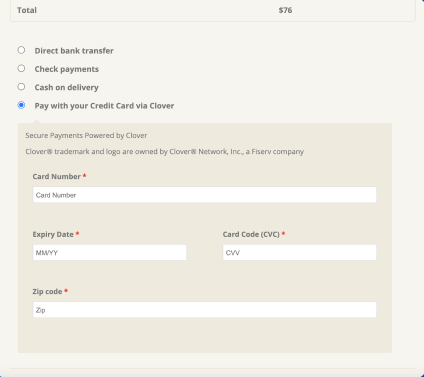
After setting up Clover POS, you will see this option on the checkout page.