The File Upload field lets customers attach one or more files to a product before adding it to the cart — logos, photos, design proofs, documents. Uploaded files travel with the order, and you can optionally charge per file. You control which file types are allowed, the size limit, and how many files a customer may upload.
Use Cases #
- Custom-print products — customer uploads artwork or a logo.
- Personalized gifts — upload a photo to engrave or print.
- Print shops — submit a PDF or design file for a quote/order.
- Services that need a brief, spec sheet, or reference document.
How to Use #
- Activate Optiontics Pro.
- Open Optiontics → Add-ons and edit (or create) an add-on form.
- Drag the File Upload block onto the canvas.
- Select the block to open its settings on the right.
- Set the label, upload text, allowed types, size, and count limits (below).
- Save, assign the add-on to a product, and preview.
Settings & Customizations #
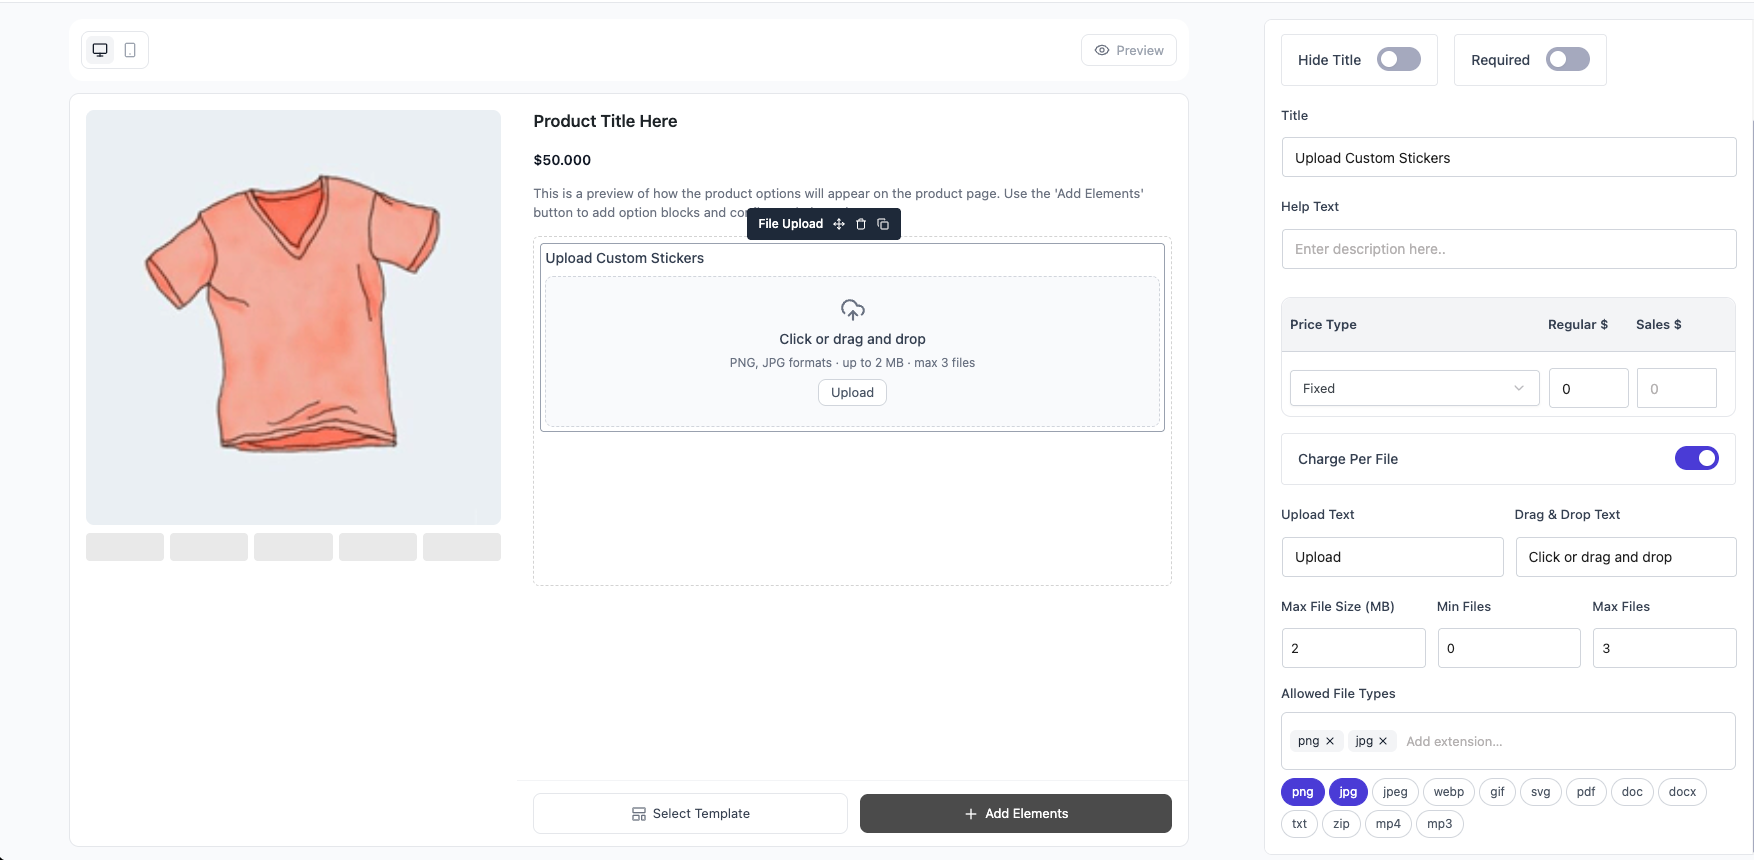
- Label — field title shown to the customer (default: Upload Field).
- Description — helper text under the label.
- Hide title — render the uploader without a label.
- Required — customer must upload before adding to cart.
- Upload text — the upload button text (default: Upload).
- Drag & drop text — hint inside the drop zone (default: Click or drag and drop).
- Allowed types — permitted file extensions (default:
png,jpg). - Max file size — per-file limit in MB (default: 2).
- Min files — minimum number of files required (default: 0).
- Max files — maximum number of files allowed (default: 3).
- Charge per file — add the field price for each uploaded file.
- Conditional logic — show/hide the field based on other field values.
- Custom CSS class / ID — for styling hooks.
FAQ #
Q1: Why is the field empty / locked?
A1: It’s a Pro feature — activate Optiontics Pro to enable it.
Q2: Can customers upload more than one file?
A2: Yes — set Max files (default 3). Use Min files to require a minimum.
Q3: How do I restrict file types?
A3: List the allowed extensions in Allowed types (e.g. png, jpg, pdf).
Q4: Can I charge based on uploads?
A4: Yes — enable Charge per file to apply the price for each file uploaded.
Q5: Where do the uploaded files appear?
A5: Filenames show in the cart and checkout, and the files are attached to the order for fulfillment.
Conclusion #
The File Upload (Pro) field turns any product into a custom-order intake — collect artwork, photos, or documents right on the product page. Lock down allowed types, size, and count, optionally charge per file, and the uploads ride along with the order.


