Overview #
The Range block adds an interactive slider to the product page so customers can pick a numeric value within a min-max window — great for quantity selection, length / weight / size pickers, donation amounts, and any addon where the price scales with the chosen number. Each step the customer slides forward adds the configured unit price to the cart.
Requirements #
Make sure WooCommerce and Optiontics are both installed and active, and that you have at least one product ready to atach the addon to.
When to use the Range block #
Use this block whenever a customer’s choice is a number within a range, not a fixed list of options. Common scenarios:
- Length / width / size pickers — e.g. choose a custom cable length in cm.
- Weight pickers — pick coffee bean weight in grams, or fabric in yards.
- Quantity beyond the WC base — e.g. extra portions for catering (“how many extra plates?”).
- Donation amounts — let the customer drag to set the donation between a min and max.
- Service duration — choose how many minutes / hours of a service.
- Tip / gratuity — drag from 0% to a cap.
The Range block is for single numeric values.
Step 1: Add the block #
- Open the Optiontics dashboard from your WordPress admin sidebar.
- Open the option set attached to your product (or create a new one with Add Options).
- Click Add Elements on the canvas.
- Switch to the Number category in the insertion modal.
- Drag Range into the form.
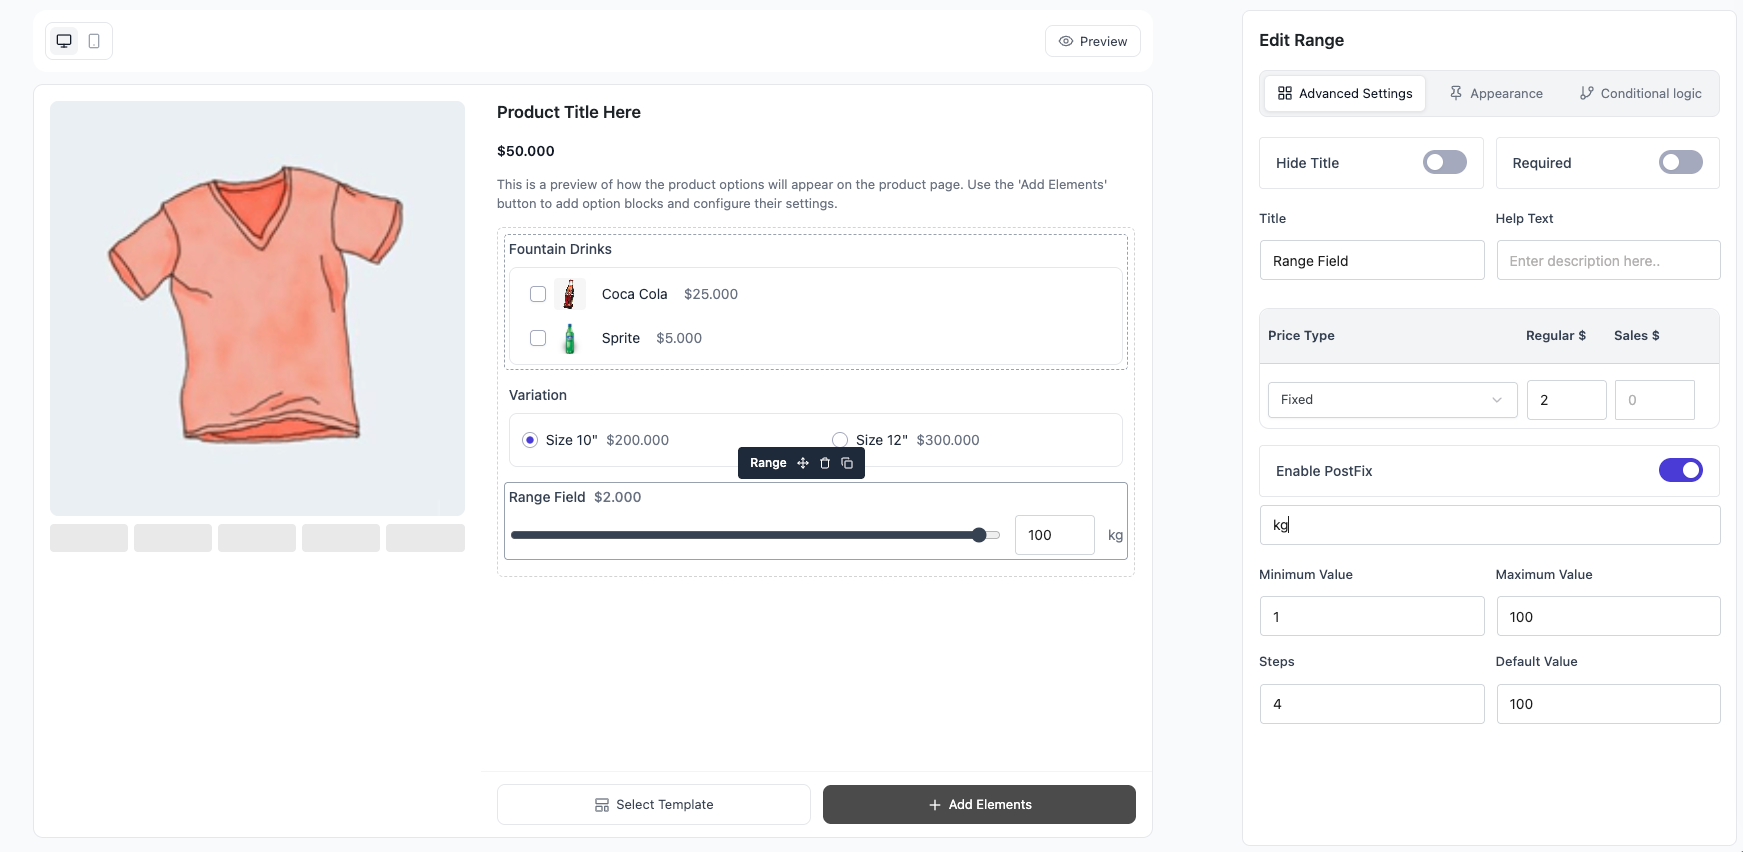
The block lands with a default label of “Range Field”. Click it to surface controls in the right sidebar.
Step 2: Set the slider window — Min, Max, Step #
Three numeric inputs control the slider’s behaviour:
| Setting | Default | What it controls |
| Min | 1 | The lowest value the slider can reach |
| Max | 100 | The highest value the slider can reach |
| Step | 4 | The increment the thumb snaps to (e.g. step 4 means the value jumps 1 → 5 → 9 → …) |
| Default Value | 100 | The starting position when the page loads |
Pick the step value that matches your real-world increments — 1 for whole units, 5 for round numbers, 0.1 for fractional values. The price multiplies by the number of steps above the Min the customer picks (see Step 3).
Step 3: Set the pricing #
Use the Price Type control to choose how each unit is priced.
- Fixed — a flat amount added per unit-above-min. With Min = 1 and the unit price = $2, picking 5 adds $8 to the cart (4 steps above min × $2).
- Percentage — This option sets the addon cost as a percentage of the base product price. For example, if a product costs $30 and the addon is set to 50%, it will automatically add $15 to the total price.
- No Cost — the slider’s value is captured but doesn’t affect price (useful for informational selections like preferred size, where you handle the cost elsewhere).
| Tip: The Range block prices flat-per-unit-above-min, which is different from the Number block (which prices once regardless of value). Pick Range when the price scales with the value; pick Number when you only need to capture a one-time amount. |
Step 4: Add a postfix (optional) #
Toggle Enable Postfix on to append a unit label after the displayed value (e.g. cm, g, min, %).
- Postfix — the text appended to the value.
- The postfix appears next to the value the customer sees while dragging the slider and in the cart row label.
- Leave Postfix off if the value alone is meaningful (e.g. a count).
Examples:
| Use case | Postfix |
| Custom cable length | cm |
| Coffee weight | g |
| Tip percentage | % |
| Service duration | min |
Step 5: Common block controls #
Use the standard controls in the right sidebar:
- Hide Title — suppress the field label (the slider still renders).
- Required — block add-to-cart until the customer interacts with the slider (rare — most ranges have a Default Value, so they always have a value).
- Title — the field label customers see.
- Help Text — short instruction shown below the label (e.g. “Drag to set the cable length”).
- Price Position — where the per-unit price chip appears next to the label.
Step 6: Set up conditional logic #
Open the Conditional Logic tab to use the Range block as either a target or a source.
- As a target — show or hide the slider based on another field.
- As a source — date / numeric comparators (Is, Is Not, Greater Than, Less Than, Greater or Equal, Less or Equal). Example: “Show a
Rush Jobupcharge field if the slider value is greater than50.”
The Range block is in the same comparator family as the Number block, so the operator list matches.
Step 7: Save and verify on the product page #
Save the option set and visit the product page. The customer sees a range slider with the settings setup along with it


