
What is the Customers Screen? #
The Customers screen is the member directory for everyone who has Pointics activity. It shows each customer’s points, level, recent activity, and order count.
From this screen, you can search, filter, sort, export customers to CSV, open individual customer profiles, and manually credit or deduct points.
Why Do You Need It? #
- Handle support requests: Questions such as “Where did my points go?” or “Can you add the points from my order?” can be investigated from this screen.
- Manually correct balances: Adjustments cover situations that automated rules cannot handle, including goodwill credits, corrections, and imported balances.
- Prevent duplicate adjustments: Manual changes are protected against duplicate submissions, so a repeated click does not credit or deduct twice.
Prerequisites #
- An Administrator account.
- No additional setup is required. A customer appears as soon as they have Pointics activity.
When WooCommerce is active, the Customers screen also displays the Orders column. Without WooCommerce, the column shows a dash instead of zero.
Where to Find It #
Go to Pointics → Customers.
/wp-admin/admin.php?page=pointics#/customersStep-by-Step Instructions #
Step 1: Find a Customer #
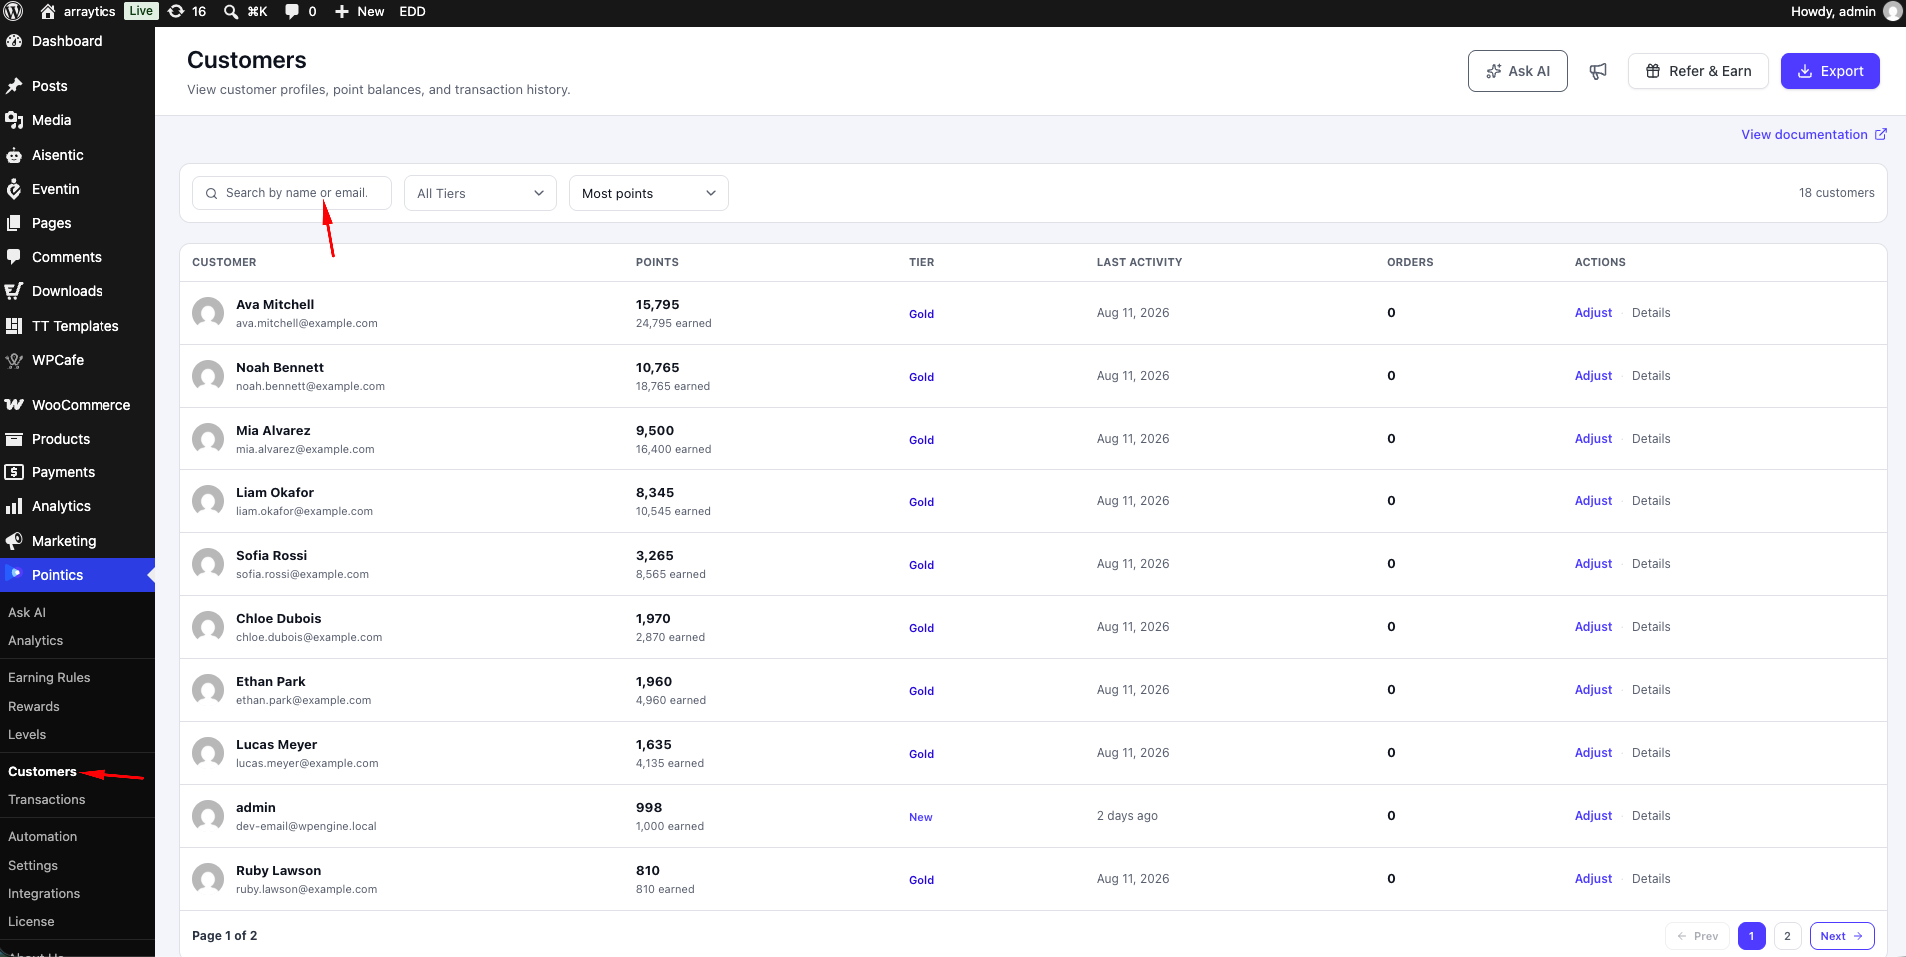
| Control | Behaviour |
|---|---|
| Search Customers — “Search by name or email..” | Matches the customer’s display name and email address. |
| Filter by Tier — “All Tiers” | Select a level, or choose None to show customers who currently hold no level. |
| Sort Customers | Changes the order of the customer list using the available sorting options. |
Sort Options #
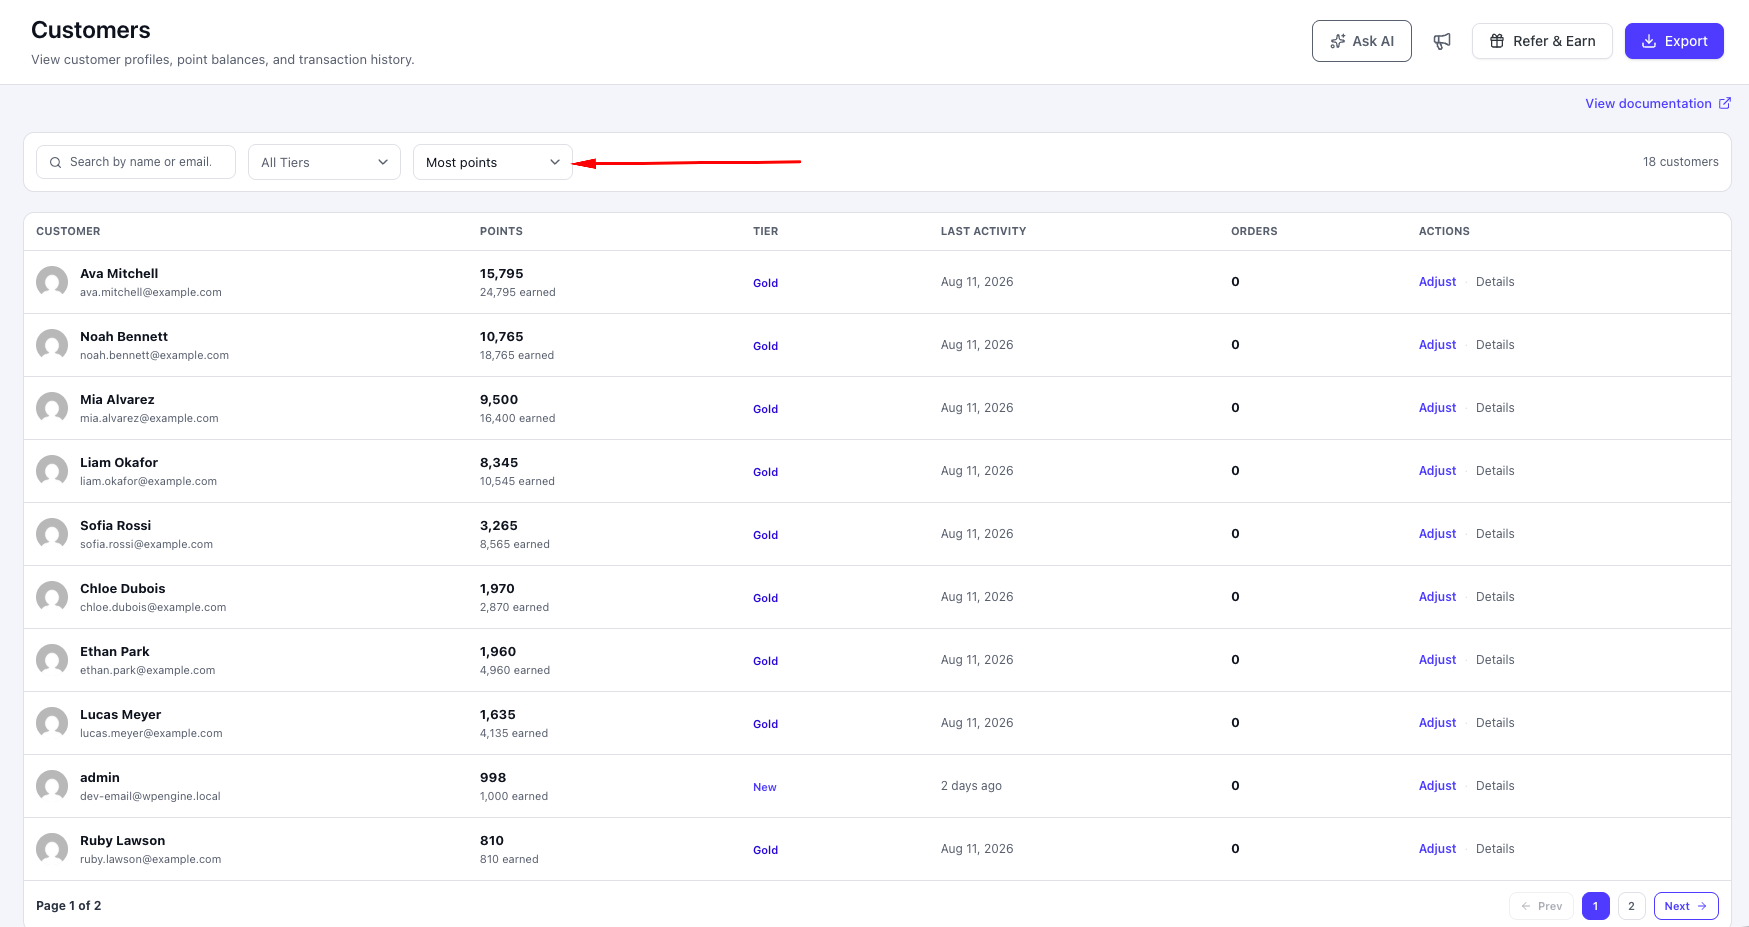
| Label | Sorts By |
|---|---|
| Most Points | Available points balance |
| Most Earned | Lifetime points earned |
| Recent Activity | Last loyalty activity date |
| Newest Member | WordPress registration date |
| Name (A–Z) | Display name alphabetically |
The default sorting option is Most Points, with the highest balances shown first. Pagination remains stable so customers are not skipped or duplicated between pages.
Step 2: Read the Table #
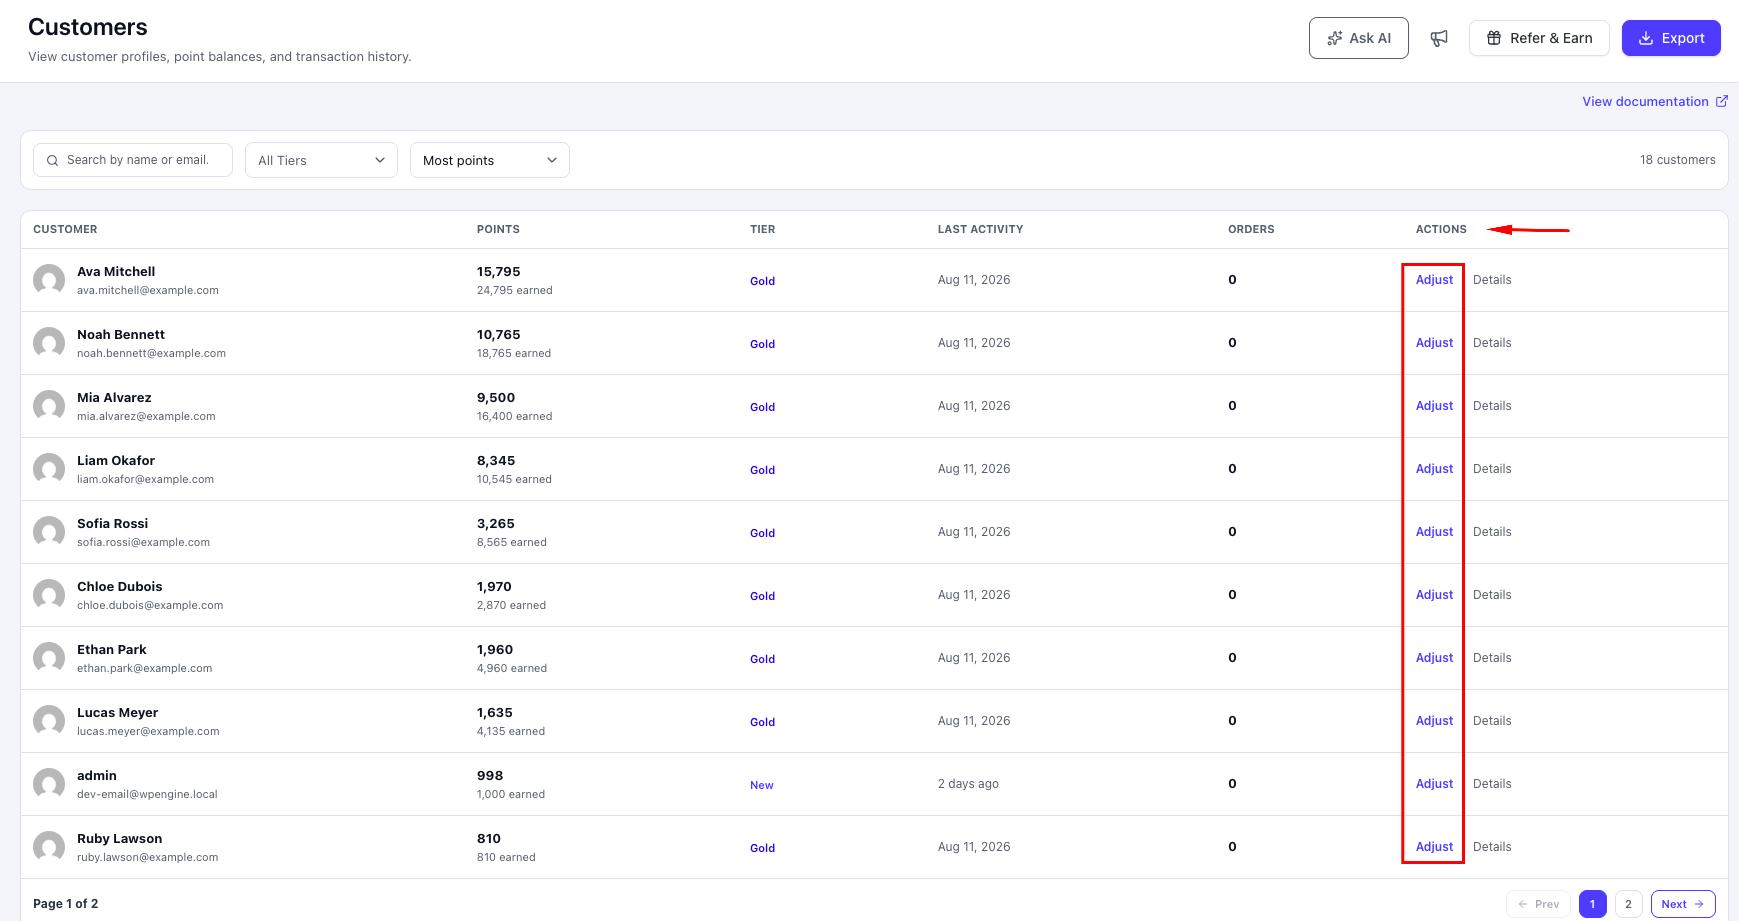
| Column | Shows |
|---|---|
| Customer | Email address, falling back to the display name when needed. |
| Points | Available points balance. |
| Tier | The customer’s current level, or New when no level is assigned. |
| Last Activity | Relative time in the table and an exact date in exported CSV files. |
| Orders | WooCommerce order count, or a dash when WooCommerce is unavailable. |
| Actions | Adjust and View. |
Step 3: View a Customer Profile #
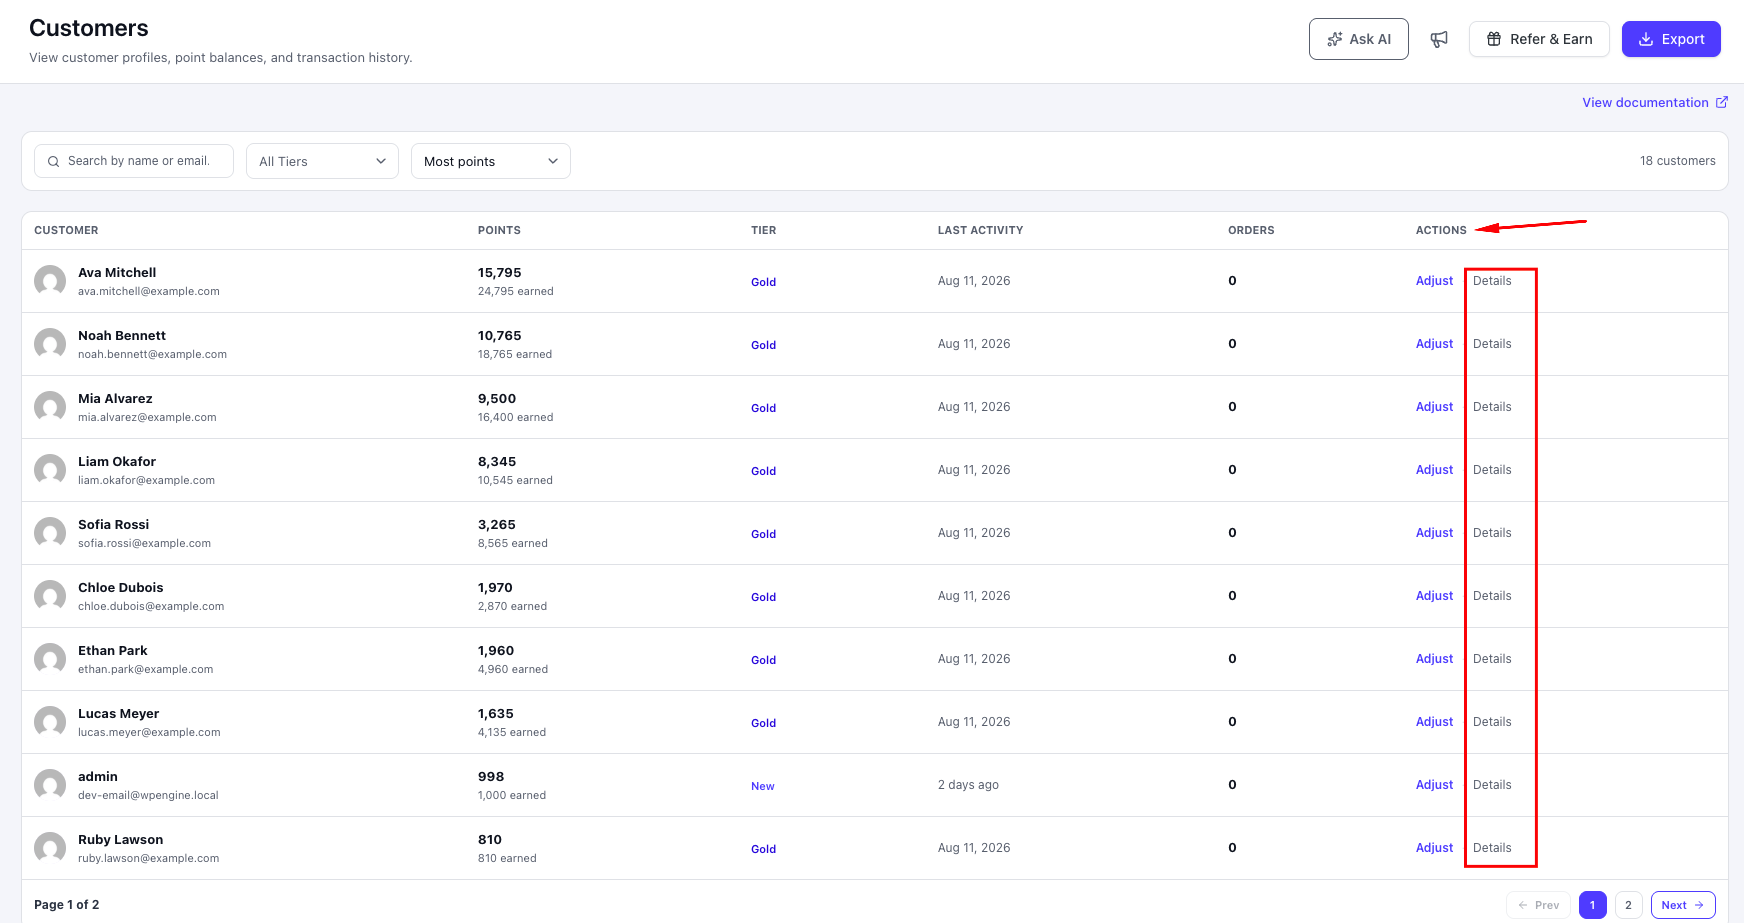
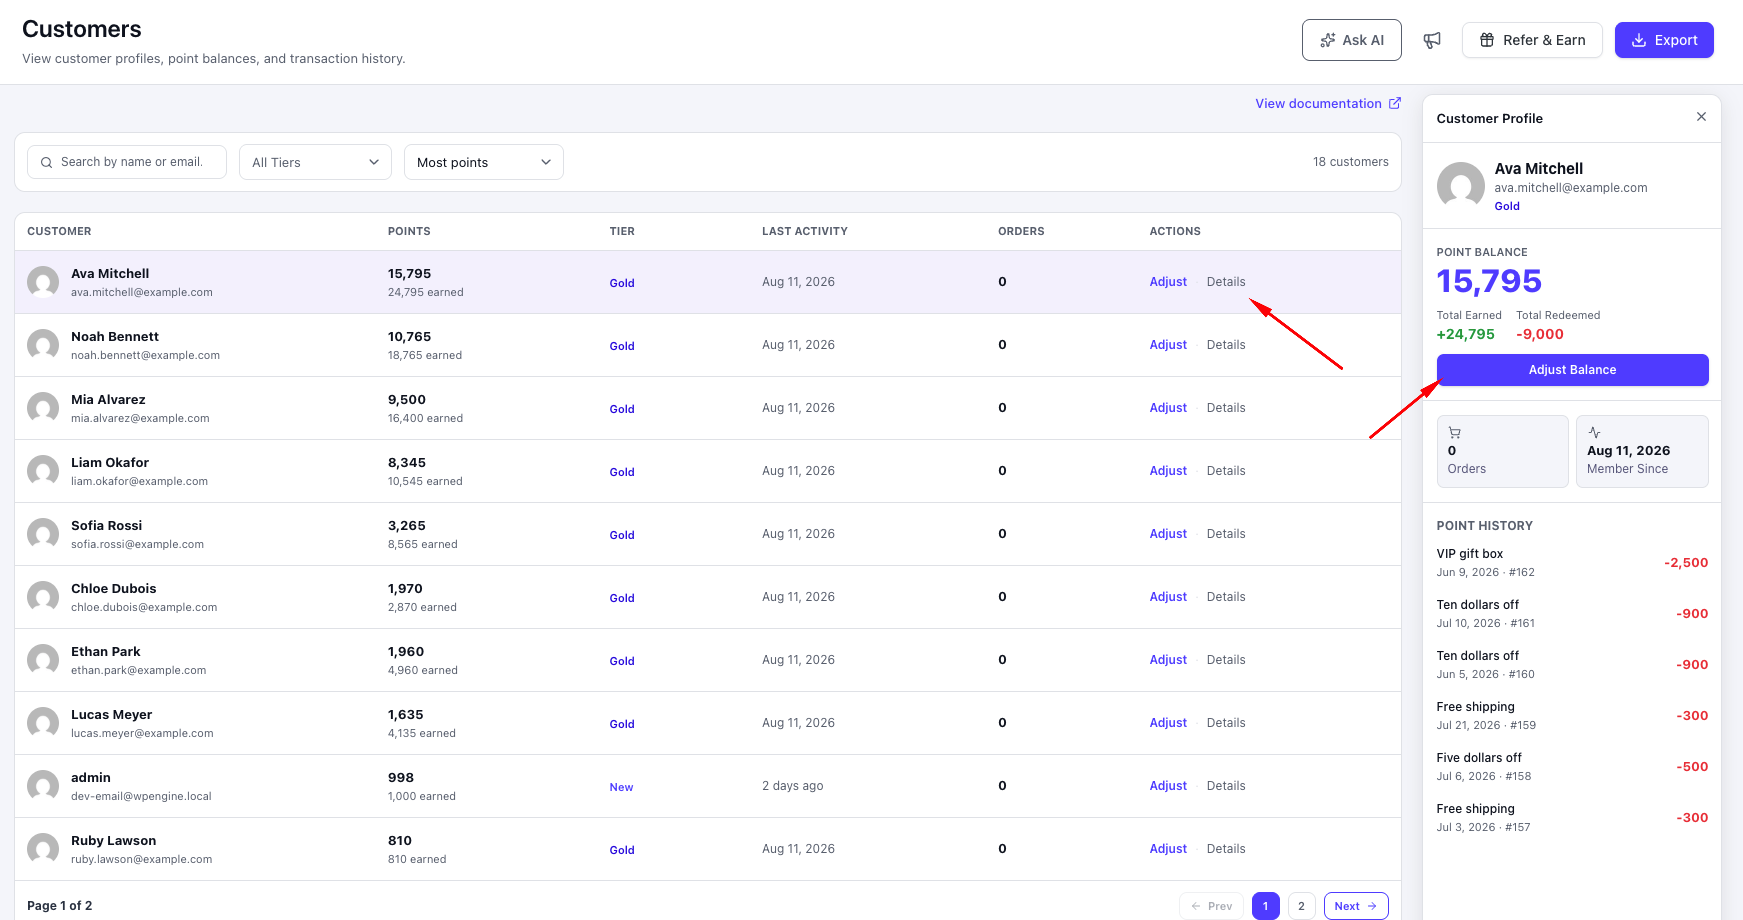
Click Details to open the customer’s profile panel.
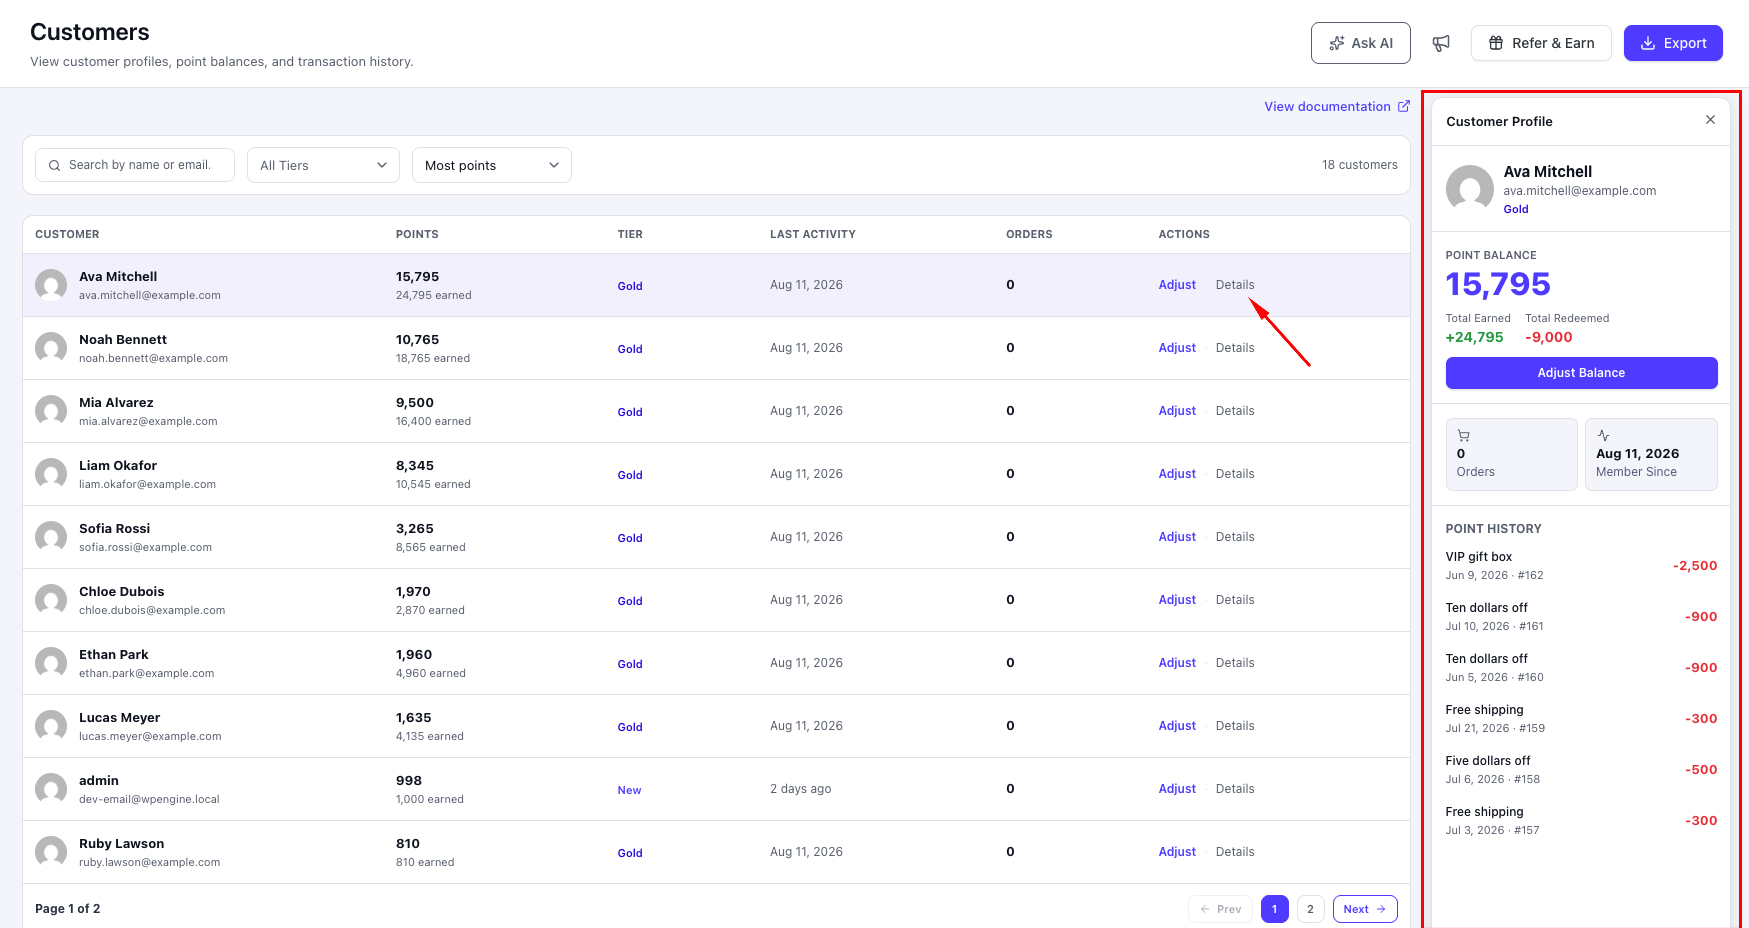
- Point Balance
- Total Earned
- Total Redeemed
- Orders
- Member Since
- A Point History list
- An Adjust Balance button
Step 4: Adjust Points Manually #
Click Adjust on a customer row.
Or click Adjust Balance from the customer profile.
The Adjust Points dialog opens with the customer name.
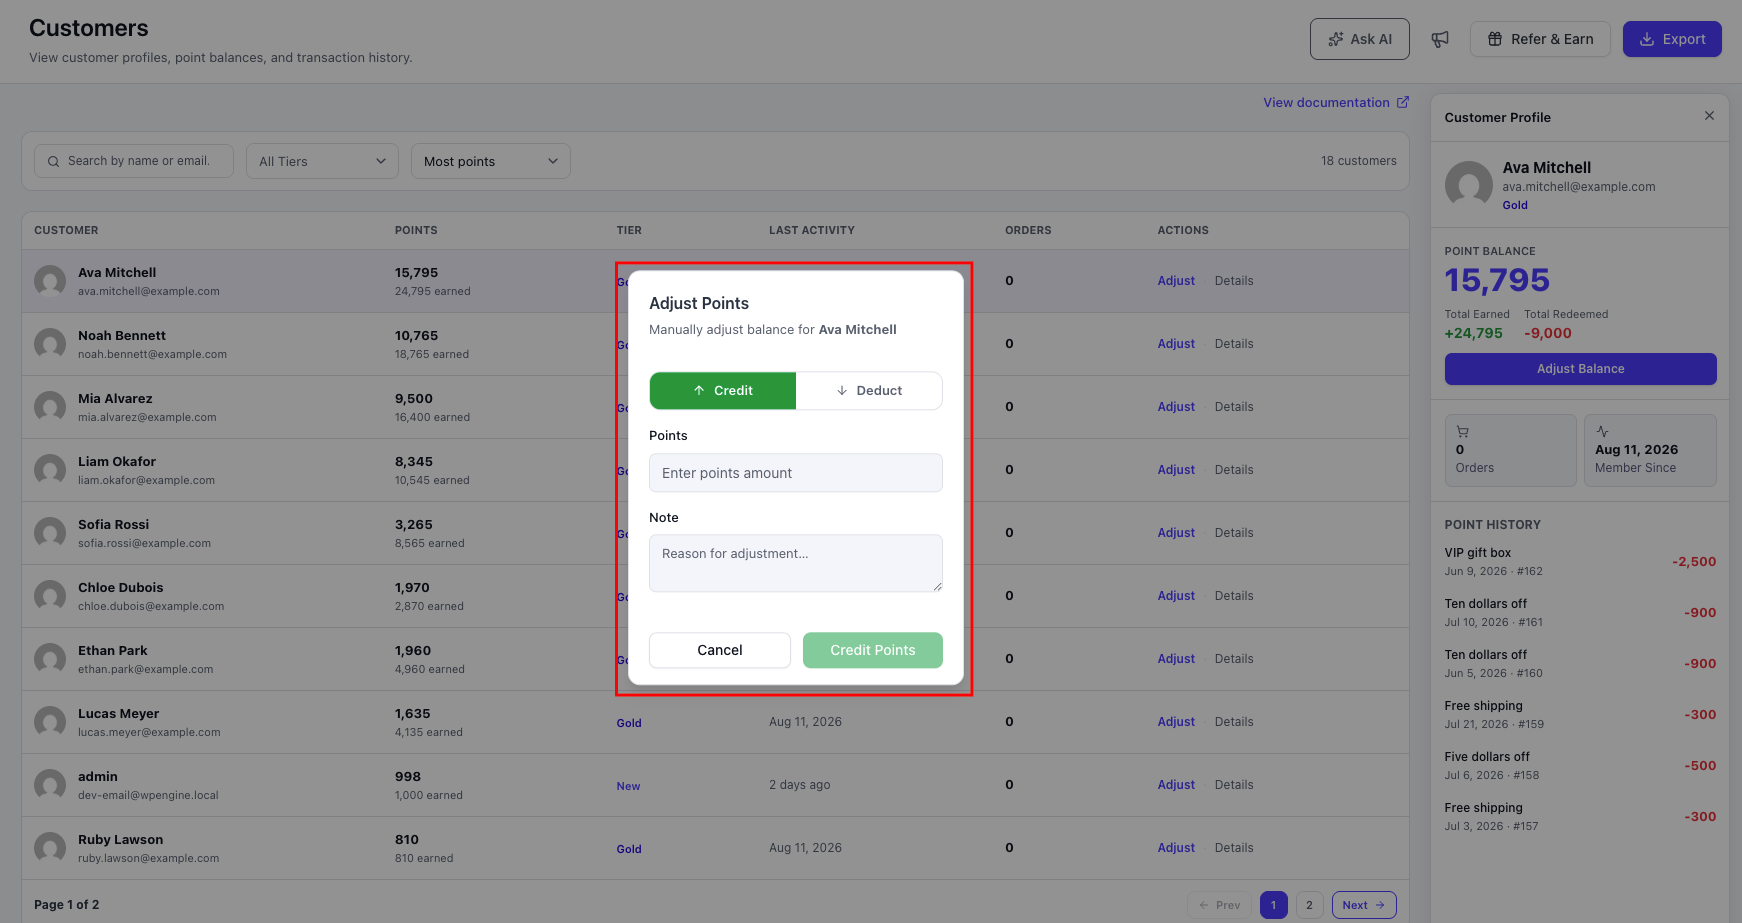
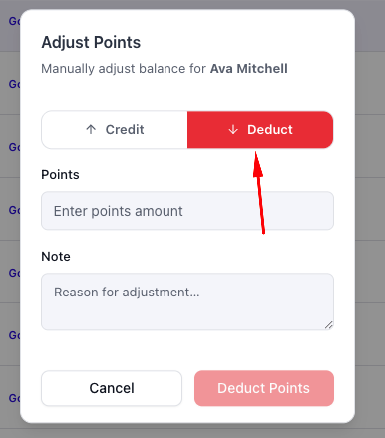
Choose Credit to add points or Deduct to remove points.
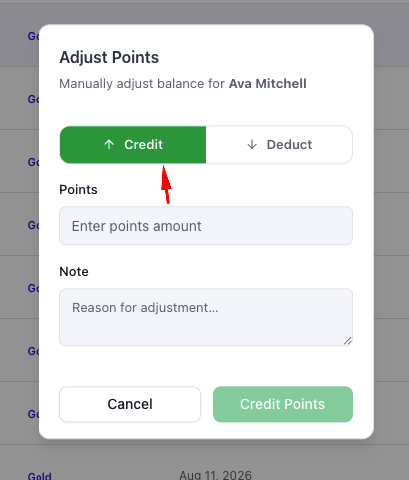
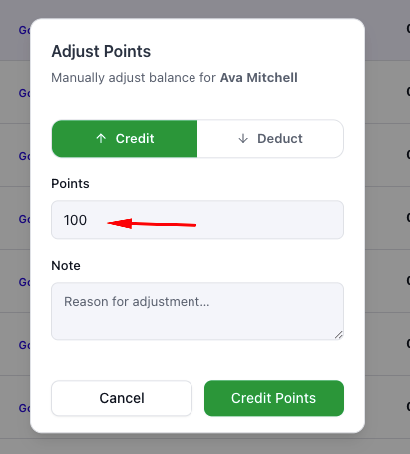
Enter the number of points in the Points field.
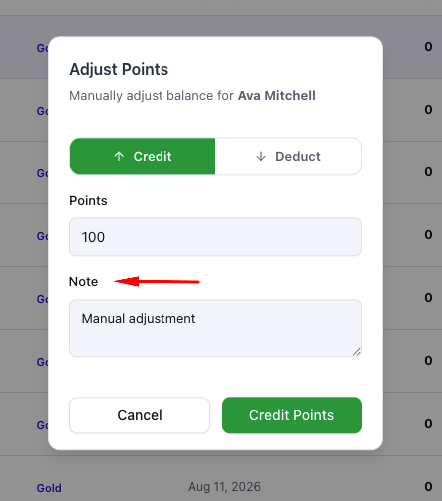
Optionally enter a reason in the Note field.
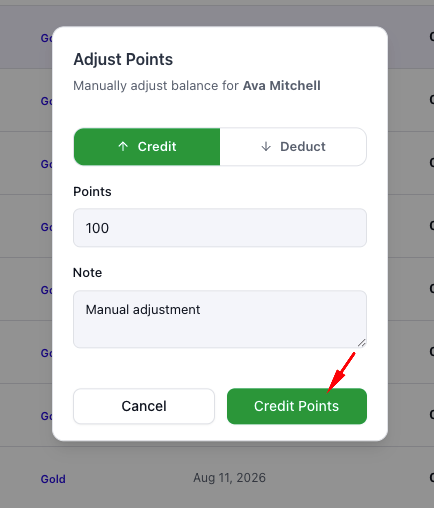
Click Credit Points or Deduct Points.
You do not need to enter a negative number when deducting points. Pointics combines the selected direction with the amount automatically.
Step 5: Export the Customer List #
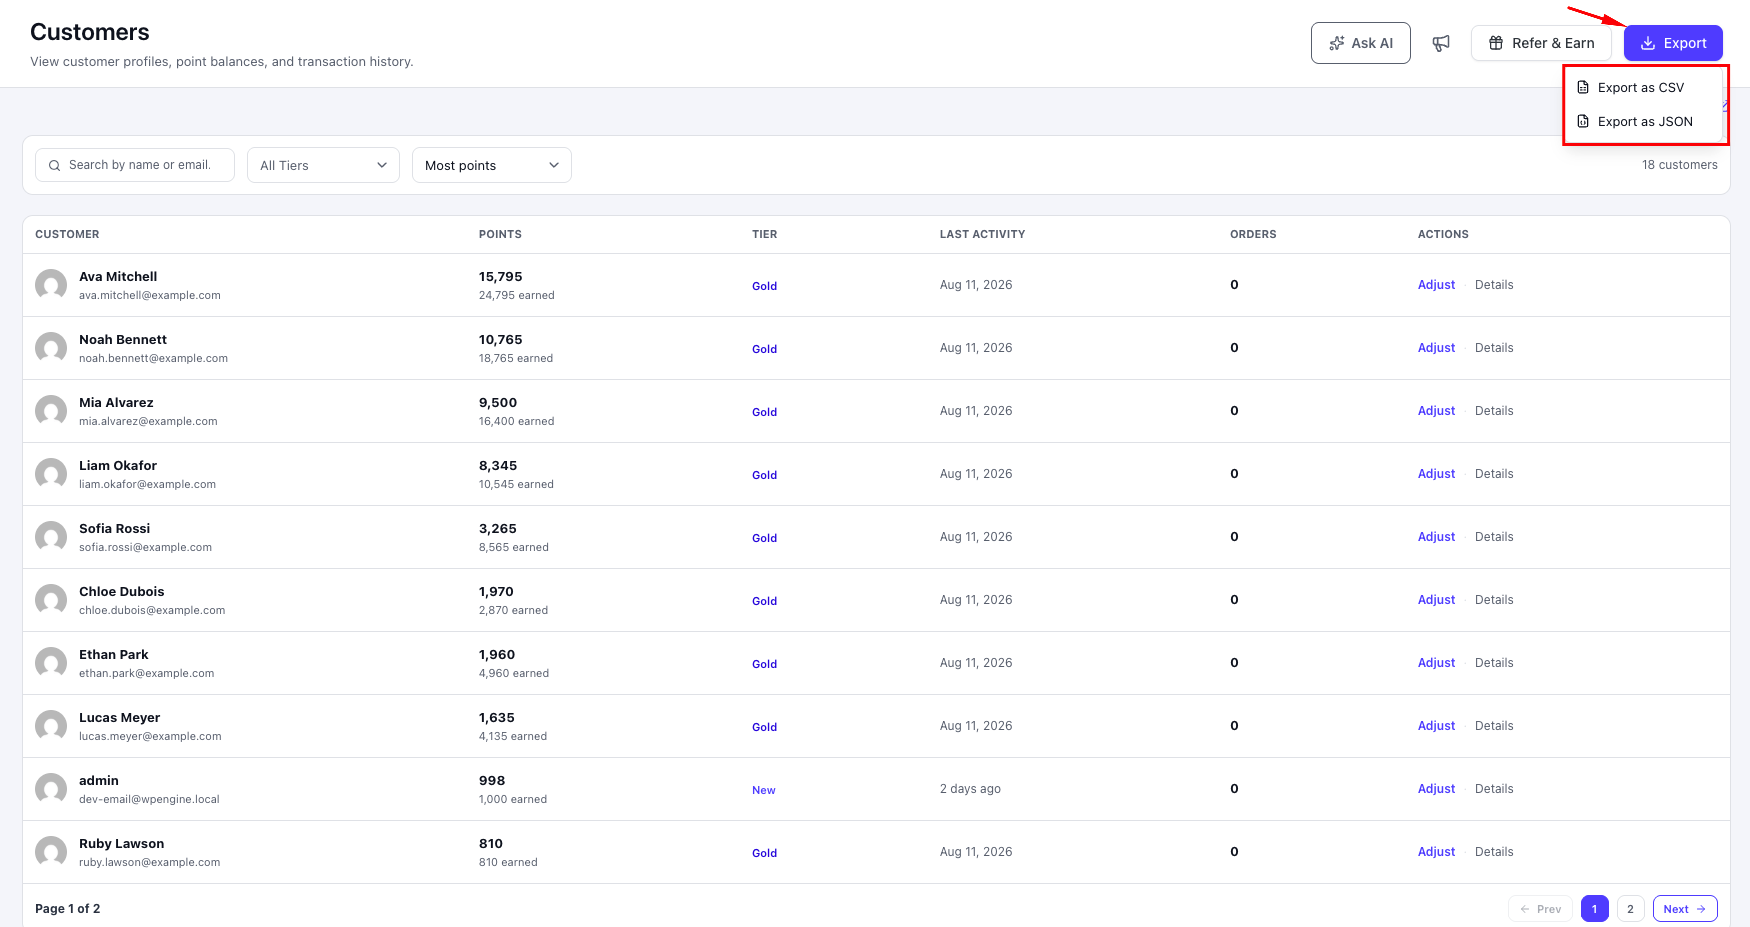
The CSV export includes every customer that matches the current filters, not only the customers visible on the current page.
The file is exported as pointics-customers.csv and contains the same customer information shown in the table. Activity dates are exported as exact dates so they can be sorted correctly in spreadsheet software.
Key Functionality #
Manual point adjustments include duplicate protection. If a request appears to fail and you submit it again, Pointics recognises the second request as the same adjustment and does not apply it twice.
This protection is established when the adjustment dialog opens, so it also protects against duplicate changes caused by a lost connection or repeated clicks.
Each customer can only access their own transaction history. A customer-history request cannot be used to retrieve another customer’s transactions.
How an Adjustment Settles #
A customer adjustment follows this process:
- Open the Customers screen.
- Search, filter, or sort the customer list as needed.
- You can export all matching customers to CSV or open an individual customer’s profile.
- Click Adjust or Adjust Balance.
- Select Credit or Deduct.
- Enter the number of points and submit the adjustment.
- For a deduction, Pointics checks whether the customer has enough available points.
- If the balance is insufficient, the adjustment is refused.
- If the adjustment is allowed, Pointics records a transaction and updates the balance.
- The customer list and profile panel refresh with the new balance.
Settings #
The Customers screen has no settings of its own. It reads customer levels from Levels and balances from the customer’s points history.
Validation Rules #
- Points is required and must be a whole number.
- Note is optional and accepts free text.
- Filter by Tier accepts an existing level or None. A deleted level cannot be used as a filter.
- Sort accepts only the five available sorting options. Any unsupported value falls back to Most Points.
- The adjustment submit button remains disabled until the points value is a number greater than zero.
Limitations #
- The Orders column requires WooCommerce.
- Customers without Pointics activity do not appear. The list is based on loyalty activity rather than the complete WordPress user list.
- Member Since uses the customer’s first Pointics activity date, not their WordPress registration date.
- The history shown inside the profile panel supports search only. It cannot be filtered by date or transaction type.
- Use the Transactions screen when you need more advanced history filtering.
- There is no bulk adjustment. Points must be adjusted one customer at a time.
- You cannot manually assign a customer’s level from this screen. Levels are calculated from qualifying points.
- The CSV export includes all matching customers, so exporting a very large customer base can take longer.
Troubleshooting #
| Problem | Solution |
|---|---|
| “Customer not found.” | The customer has no Pointics loyalty activity. |
| “Unknown tier slug…” | The selected tier filter refers to a level that no longer exists. Reset the filter. |
| “Could not adjust points (insufficient balance?).” | The requested deduction is larger than the customer’s available balance. |
| Adjusting twice credited only once. | This is expected. Pointics recognised the second request as a duplicate and ignored it. |
| Orders column shows a dash. | WooCommerce is inactive or unavailable. |
| A customer is missing from the list. | The customer has not generated any Pointics activity yet. |
| Sorting appears to ignore the selected option. | An unsupported sort value falls back automatically to Most Points. |
| Tier column shows New. | The customer currently holds no loyalty level. |
| CSV export is slow or times out. | The export contains every customer matching the active filters. Narrow the filters before exporting. |
| The balance shown in the profile does not match the transaction history. | Balances and transactions are written together. If they appear inconsistent, contact support. |
Notes #
- Manual point adjustments appear in the Transactions screen with the type Adjust.
- The adjustment note is stored with the transaction so there is a record of why the balance was changed.
- Pointics refuses deductions larger than the customer’s available balance instead of allowing the balance to become negative.


