
Successful event management requires tracking performance, attendees, and sales. Eventin makes this easy with built-in reports and management tools directly from your WordPress dashboard.
After completing the purchase of an event with a successful payment, Eventin provides you with detailed reports and event management options. From the admin dashboard, you can easily track attendees, sales, RSVPs and even manage event settings like cloning, exporting, or deleting events.
To access these features:
- You will see all the reports and management options available for your event.
- Navigate to Events.
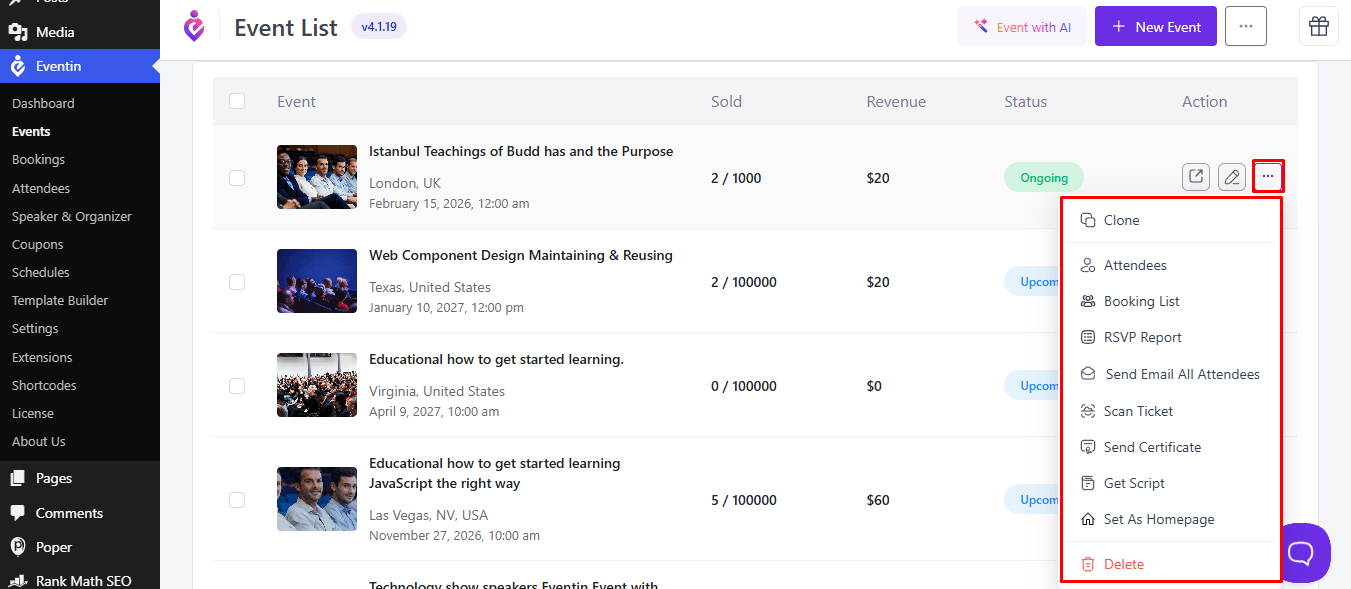
- Click on the More Actions button.
Available Actions and Reports #
Here, you can check..
- How to Clone Your Event
To create a duplicate of an existing event, click the More Options (⋮) icon next to the event and select Clone. This creates a copy of the event with its existing information and settings, allowing you to quickly create a similar event without entering all the details again.
- How to Check Attendee Information
Click the More Options (⋮) icon and select Attendees to view the attendee information for the selected event. You can check attendee details and manage attendee records from the attendee management section.
- How to Check the Booking List
Click the More Options (⋮) icon and select Booking List to view the booking information for the selected event. This allows you to check the bookings associated with the event.
- How to Check the RSVP Report
Click RSVP Report from the More Options (⋮) menu to view RSVP responses for the event. This report helps you track attendee responses and confirmations.
- How to Send Email to All Attendees
To send an email to everyone registered for an event, click the More Options (⋮) icon and select Send Email All Attendees. You can use this option to communicate important updates or information to all attendees.
- How to Scan Tickets
Click Scan Ticket from the More Options (⋮) menu to scan and validate event tickets from the admin dashboard. This helps you manage attendee check-ins efficiently.
- How to Send Certificates
To send certificates to event attendees, click the More Options (⋮) icon and select Send Certificate. This option allows you to send certificates to eligible attendees of the event.
- How to Get the Script
Click Get Script from the More Options (⋮) menu to quickly get the Eventin event script. You can use this script to embed the event on another website or platform.
- How to Set an Event as Homepage
To make an event the homepage of your website, click the More Options (⋮) icon next to the event and select Set As Homepage. The selected event will then be used as your website’s homepage.
- How to Delete Your Event
To remove an event, click the More Options (⋮) icon and select Delete. Make sure you want to remove the event before confirming the deletion.
Export/Import Eventin Event #
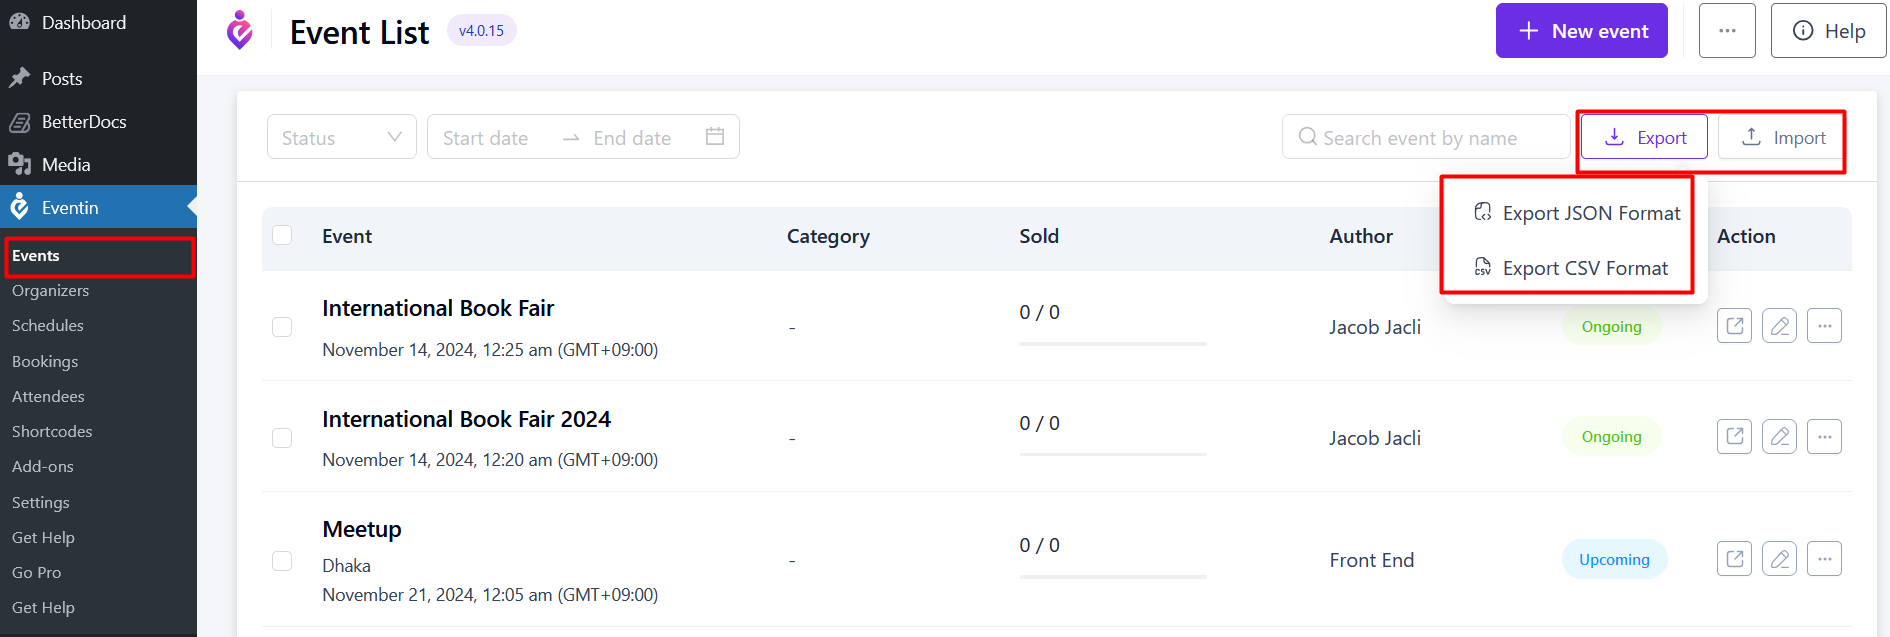
Eventin allows you to easily import and export events in two convenient formats: JSON and CSV. This flexibility ensures that you can manage your event data efficiently according to your needs.
Frequently Asked Questions (FAQ) #
1. Can I edit an event after cloning it?
Yes, once cloned, you can edit all event details, such as date, venue, and ticket settings, without affecting the original event.
2. Can I export only attendee reports instead of the whole event?
Yes, attendee reports can be exported separately from the attendee dashboard in CSV and JSON format.
3. Is it possible to scan tickets without internet access?
No, ticket scanning requires an active internet connection to validate attendees in real-time.
Conclusion #
Eventin makes event management seamless by combining reporting, attendee tracking, ticket scanning, and event duplication tools in one place. Whether you want to monitor event success, streamline check-ins, or manage attendee engagement, Eventin provides everything you need for smooth event execution.


