Unlock the full potential of your events with the Eventin event management plugin for WordPress. Effortlessly sell event tickets, boost attendee engagement, personalize event certificates, and more!
15K+ Happy Customers!
🏆 Winner of WP Weekly Silver Award 2023
Over 568,378+ Downloads
Rating 4.6/5 on WordPress
Rating 4.5/5 on Trustpilot
99% Customer
Satisfaction
15-Days
Money Back Guarantee


Trusted by Leading Brands for Exceptional Event Management


Not just an online meeting or webinar, Eventin lets your attendees engage and convert more smoothly with our online event ticketing system.

A mixed event? Fuel up a stunning hybrid experience for in-person and online attendees, with a simple calendar and many integrations.

Boost your money-rolling WordPress events, sell event tickets, and confirm them with QR codes with the event manager plugin.
Increase in event revenue
More satisfied event attendees
Events created so far
Create Your Brand New Event
Fill up all Your Event Details
Set Event Start & End Date
Publish Your Event and Share
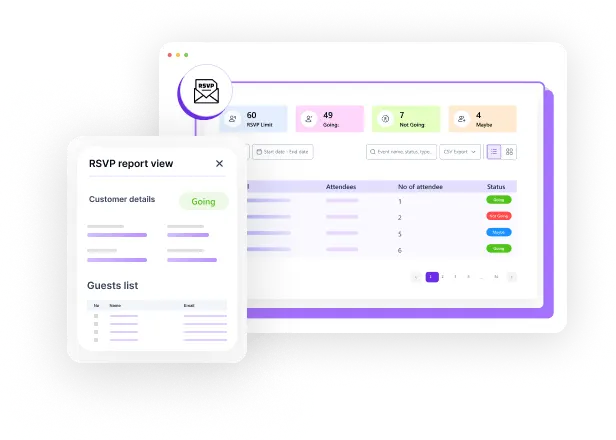


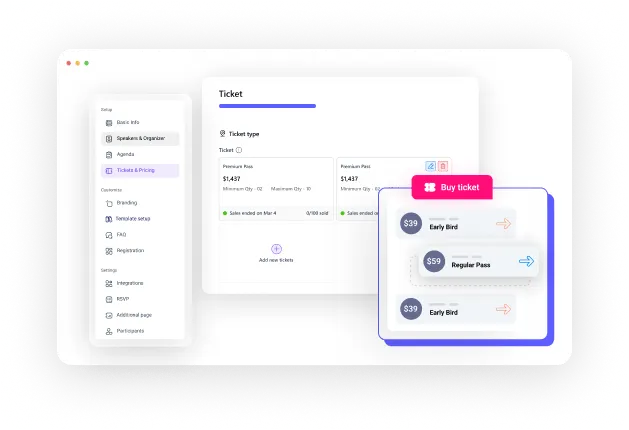
Make your events stand out with unique ticket IDS for your attendees and track their attendance from the WordPress dashboard.
Scan through your event performance and goals on WordPress with Analytics and keep your event ticketing platforms on the roll.
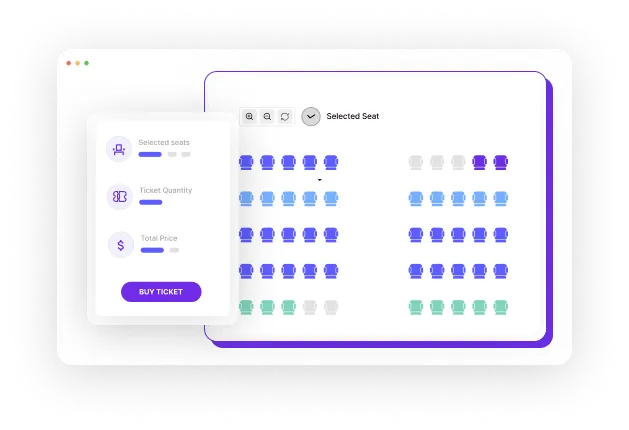
Enjoy customizing your online event registration and ticketing forms with unlimited extra fields for your attendees.
Sit back while one of the best event ticketing platforms creates and repeats your multiple custom schedules on multiple WordPress events.
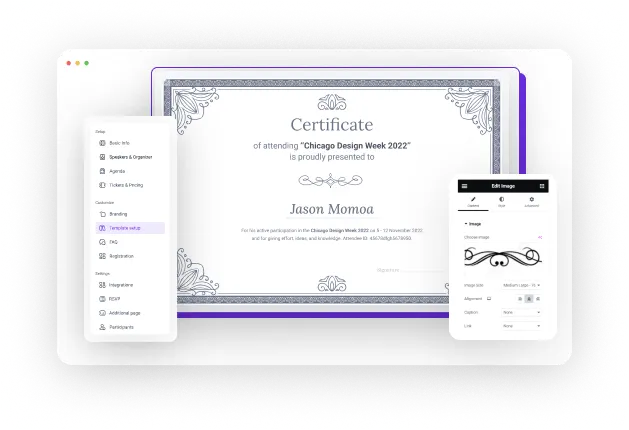
Harness your event management on WordPress with a dedicated page that manages both your speakers and organizers.
Automate all your event marketing campaigns with GroundHogg & FluentCRM integration.
Stay focused on all the event updates on your user’s dashboard panel, with all the details you need to work smarter.
Manage WordPress events more easily with the WooCommerce payment system and never miss a payment you deserve with Eventin.
Enjoy receiving payments worldwide with Stripe/PayPal payment system and sell your event tickets to your attendees.
Run memorable virtual events with your online attendees using Google Meet/ Zoom.
Let your team members or users create and manage events on WordPress from your front-end dashboard.
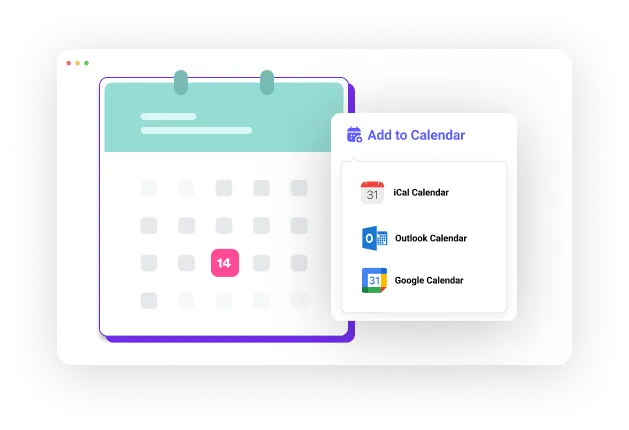
Make WordPress event details more insightful using a side calendar widget on your WordPress website.
Reliable "20/7" Support, Just a Click Away!
Build confidence in your decision with genuine feedback from satisfied clients.
“This event management plugin is simply outstanding! It’s packed with all the features I needed to manage my events seamlessly on WordPress...”
“I’ve been working with the Eventin plugin for some time now ad it is a great bit of software if you want to sell tickets for events both online and offline...”
“We use the eventin plug-in. The plug-in is an excellent product to manage your tickets, events, etc. and sell them online. the support is fast and competent”
“EventIn is a solid events management plugin that is ticking all of the right boxes. It is easy to use, from a talented team, is well coded...”
“Since getting in EventIn, I have moved away from other ticket purchase plug-ins and I couldn’t be happier. Mainly with the customer service...”
“I wanted to thank you for quickly and efficiently resolving the issue we encountered. Your professional approach and support made the....”
“The support is timely as they never miss to follow up with users. A great innovative plugin. The plugin has great features for any booking businesses.”
“Been building WordPress websites for over 15 years now - many that needed a good event solution. Over the years I have used them all.lol This plugin....”
“I recommend this plugin to anyone wanting to sell tickets and make some serious money. Besides the plugin being phenomenal the customer service is....”
Eventin is now integrated with OpenAI to help you save time in creating events and adding event details.
Run your virtual WordPress events comfortably with Google Meet.
Run WordPress events on Zoom with the Eventin events management plugin.
Use PayPal as the simplest payment for event ticketing platforms with Eventin.
Transfer all the WordPress event data from Eventin across platforms using ZapierZapier.
Enjoy easy WordPress events and tickets with WooCommerce integration.
Automate your WordPress event workflow on Eventin intuitively with Pabbly.
Remind your attendees with SMS for WordPress events with Twilio.
Automate your WordPress event to connect apps and simplify workflows on Eventin with SureTriggers.
Use Divi to create the perfect event management website on Eventin.
Build a solid multivendor WordPress event marketplace on Eventin with Dokan integration.
Build your event ticketing platform on Eventin much faster with Bricks Builder integration.
Automate all your event marketing campaigns on Eventin with FluentCRM integration.
Shake hands with WP Timetics integration to book, remind, and draw floor plans before WordPress events on Eventin.
Manage events and sell tickets with the Eventin event management plugin inside WordPress.
Subscribe for updates
© Copyright 2025 eventin. All rights reserved.
Optimize Your WordPress Business with AI-powered Plugins: We Deliver More Than Tools; We Deliver Solutions.
By submitting your email, you agree to our Terms & Privacy Policy
Copyright © 2013-2025 ThemeWinter - A Brand of Arraytics.
Event Management System
Restaurant Management
Appointment Scheduling
Lead Generation Popups
WordPress Booking Management