
Engagement Widgets add two small floating widgets to your site: a Video Widget that plays a short video in a corner, and a Contact Card that shows the organizer’s contact details. You choose where each one sits, which pages it appears on, and when it shows up. Both are switched off until you turn them on.
Prerequisites #
- Eventin and Eventin Pro (version 4.1.19 or later) — installed and active.
- An Administrator account. Other roles cannot open this screen.
Step 1 — Open Engagement Widgets #
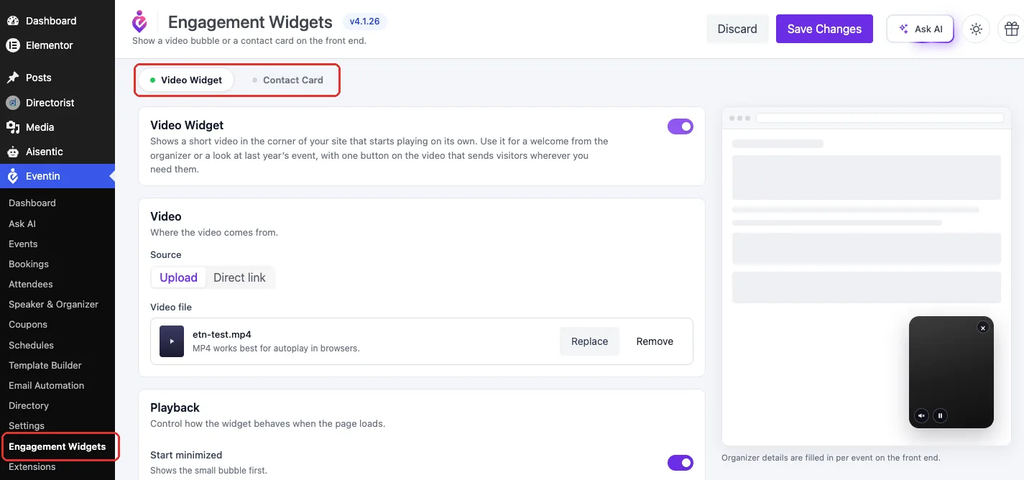
Go to Eventin → Engagement Widgets. The screen has two tabs, Video Widget and Contact Card, and a live preview on the right. The dot on each tab turns on when that widget is enabled.
Step 2 — Turn on the Video Widget and add a video #
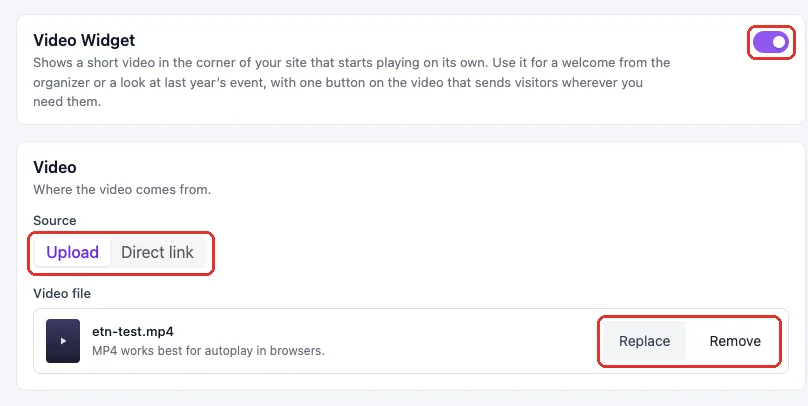
On the Video Widget tab, switch on the toggle at the top. Then choose where the video comes from under Source.
- Upload — click Select video and pick a file from the Media Library. MP4 works best. If a video is already chosen, the button reads Replace.
- Direct link — paste a link to a video file or a YouTube video into Video URL.
Links from Vimeo, Facebook, TikTok and similar sites cannot be played. If you paste one, a warning appears and the widget will not show on your site.
Step 3 — Set the playback options #
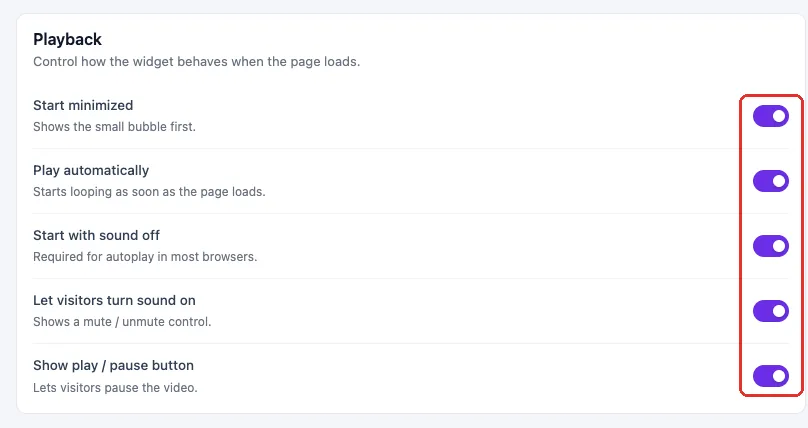
The Playback card controls how the video behaves when the page loads.
- Start minimized — shows the small bubble first. Visitors click it to open the video.
- Play automatically — the video starts looping as soon as it appears.
- Start with sound off — most browsers only allow autoplay when the video is muted.
- Let visitors turn sound on — adds a mute / unmute control.
- Show play / pause button — lets visitors pause the video.
Step 4 — Add a button to the video #
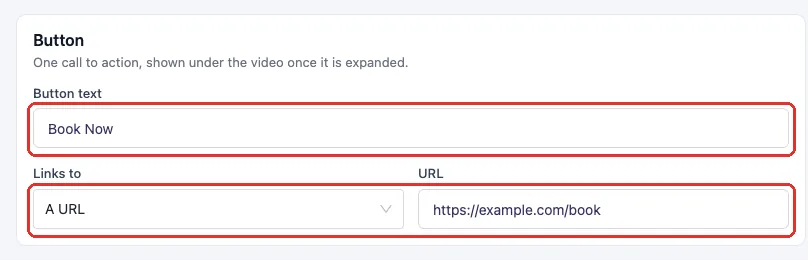
In the Button card, type the Button text, for example Get your ticket. Under Links to, pick A page and select one of your pages, or pick A URL and paste a link. The button appears on the video once a visitor opens it.
Step 5 — Choose the placement #
The Placement card decides where the widget sits and which pages it appears on.
- Pick a Corner.
- Use Nudge sideways (px) and Nudge up/down (px) to move it away from the edge. Each accepts 0 to 80.
- Under Show on, choose All pages, Eventin pages only, Specific events or Specific pages.
- For the last two, select the events or pages in the field that opens below.

Eventin pages only covers single events, the event archive, event category and tag pages, and speaker and schedule pages. Checkout, ticket and order pages are always excluded.
Step 6 — Choose when it appears #
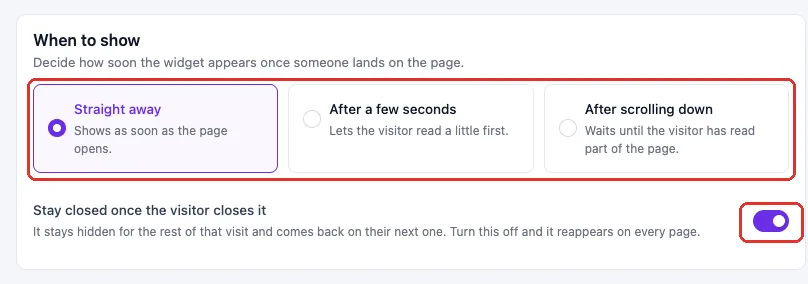
In the When to show card, pick one option.
- Straight away — shows as soon as the page opens.
- After a few seconds — waits 1 to 60 seconds.
- After scrolling down — waits until the visitor has scrolled the percentage you set.
Keep Stay closed once the visitor closes it on to hide a closed widget for the rest of that visit. Turn it off and the widget comes back on every page.
Step 7 — Set up the Contact Card #
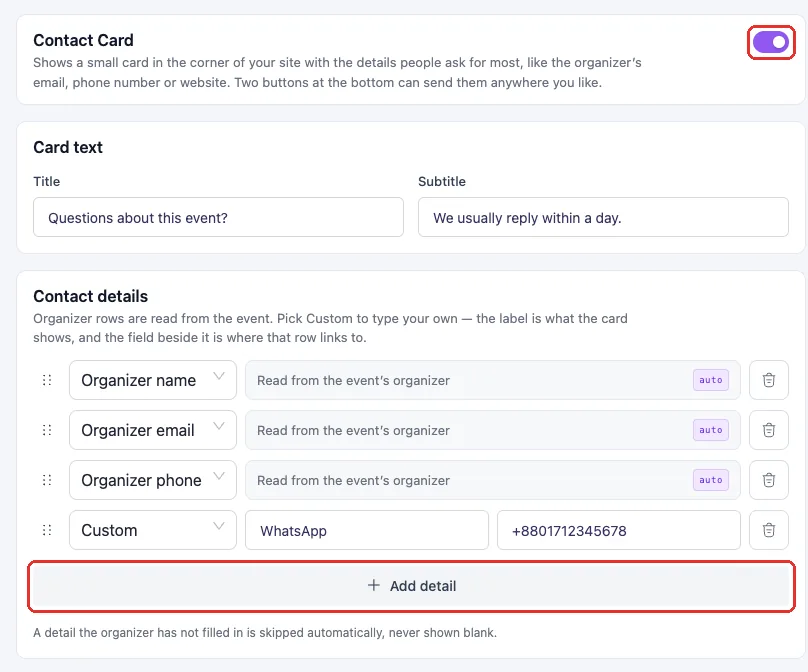
Open the Contact Card tab and switch on the toggle at the top. Then fill in the card.
- Add a Title and a Subtitle.
- Under Contact details, choose what each row shows: Organizer name, email, phone, website, company or role. These are read from the event’s organizer.
- Pick Custom to type your own. The Label is what the card shows, and the field beside it is the email, phone number or link it opens.
- Click Add detail for more rows, up to eight. Drag a row by its handle to reorder it.
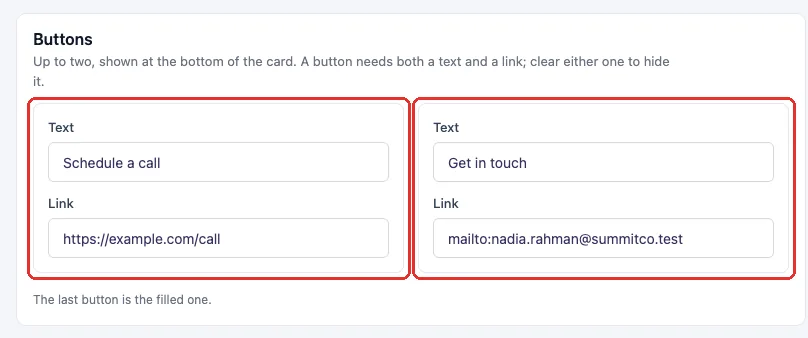
In the Buttons card you can add up to two buttons. Each needs a Text and a Link. The last button is the filled one.
The Contact Card has its own Placement and When to show cards. Set them the same way as in Step 5 and Step 6. Put the two widgets in different corners so they do not overlap.
Step 8 — Save your changes #
Click Save Changes at the top right. Use Discard to undo anything you have not saved yet.

How it looks on your site #
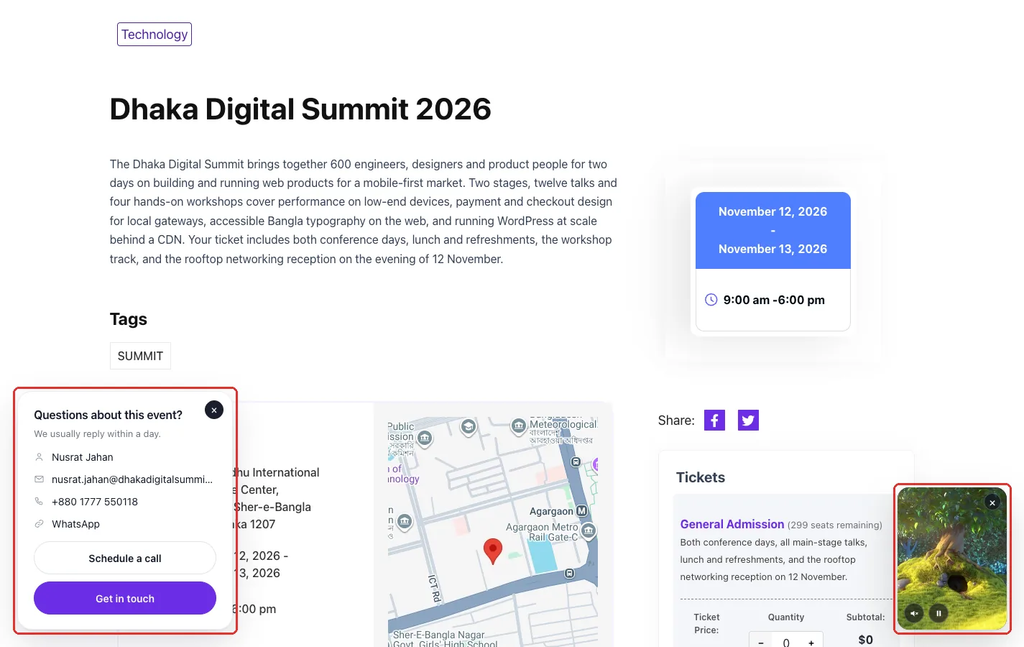
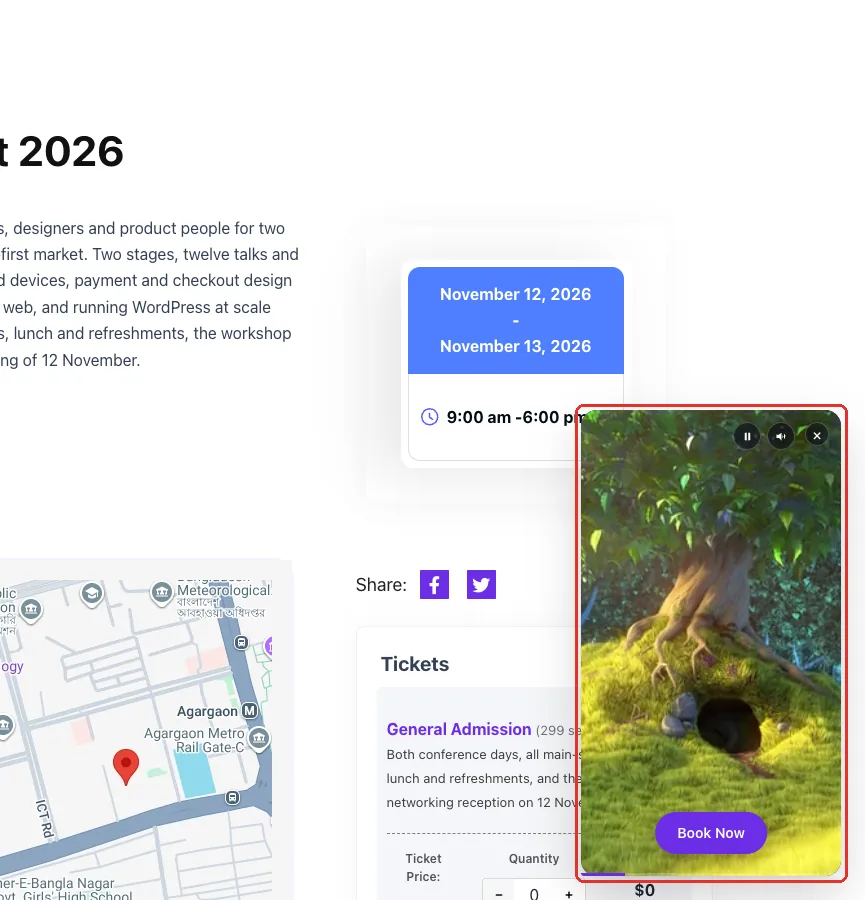
Visitors see the video as a small bubble and the contact card in the corners you chose. Clicking the bubble opens the video with your button on it. Each widget has a close button.
FAQs #
Q: I turned the widget on but it does not show on my site. Why? #
A: Check that you clicked Save Changes, that the page matches your Show on choice, and that a video is selected. With Specific events or Specific pages, the widget shows nowhere until you pick at least one.
Q: Can I use a YouTube or Vimeo video? #
A: YouTube links work. Vimeo, Facebook, TikTok, Instagram and other video sites are not supported yet. Use a direct video file or a YouTube link instead.
Q: Why does my video start without sound? #
A: Most browsers block autoplay with sound. Keep Start with sound off on and turn on Let visitors turn sound on so visitors can unmute it.
Q: Why are some contact rows missing on the front end? #
A: Organizer rows are read from the organizer of the event being viewed. A detail the organizer has not filled in is skipped. On pages that are not an event, only Custom rows and buttons appear.
Q: The button on my video or card is not showing. What is wrong? #
A: A button needs both a text and a link. If you linked it to a page, make sure that page is published.
Q: Will the widgets show on the checkout page? #
A: No. Checkout, cart, ticket and order pages are always excluded, whatever you choose under Show on.
Q: A visitor closed the widget. Will they see it again? #
A: With Stay closed once the visitor closes it on, it stays hidden for the rest of that visit and returns on their next one.
Conclusion #
Turn on the widget you need under Eventin → Engagement Widgets, add your video or contact details, choose the corner and pages, and click Save Changes. The preview shows the result as you go, so you can adjust it before your visitors see it.


