
Overview #
Receipt Layout in WP Cafe lets you design the printed receipt for WooCommerce food orders using the block editor, then print it from any order. You build the layout once, pick which one prints by default, and staff print a clean kitchen or customer receipt in one click.
Restaurants print the same order many times a day for the kitchen, the counter, and the customer. Without a set layout, every print is the raw WooCommerce order page. Receipt Layout gives you a fixed, branded format so each print looks the same and shows only what you want.
Requirements #
- WP Cafe free and Pro plugin with WooCommerce active.
Step 1: Open the Receipt Layouts List #
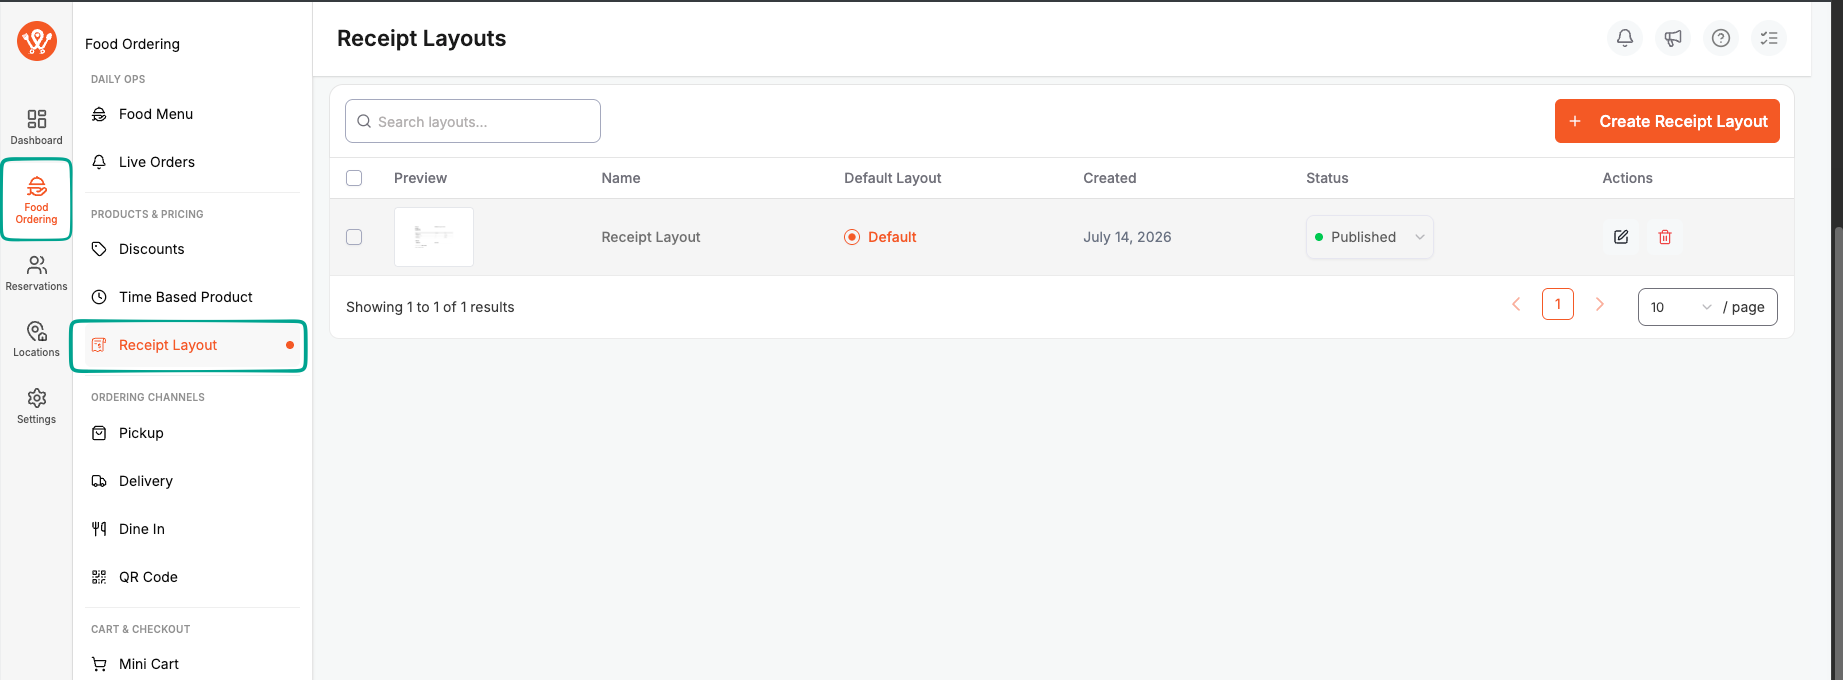
Go to your WordPress admin, then open WP Cafe and the Food Ordering area. Click Receipt Layouts to open the list.
- In the left admin menu, go to WP Cafe.
- Open the Food Ordering section.
- Click Receipt Layouts.
The list shows every layout you have, with its title, status, a thumbnail preview, the Default Layout column, and the created date. A fresh install already has one starter layout seeded for you, so you can print right away.
Step 2: Create or Edit a Layout #
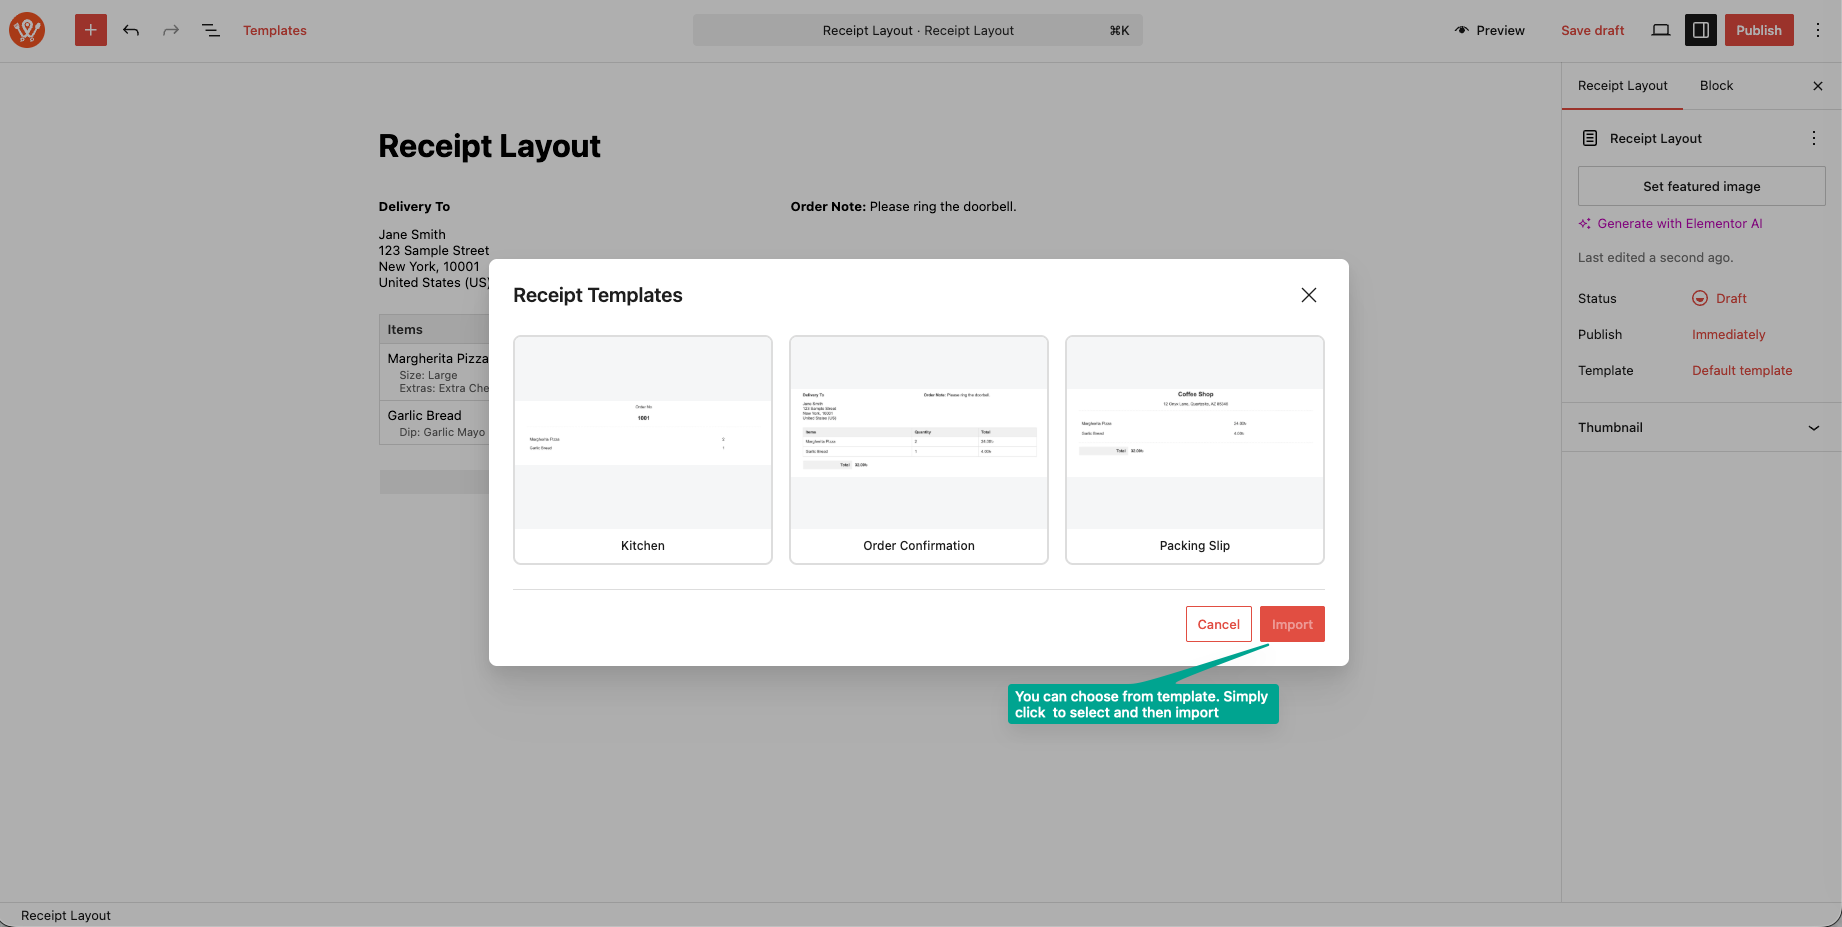
Click Create Receipt Layout to build a new one, or click a layout’s edit icon to change an existing one. Layouts open in the WordPress block editor.
- Click Create Receipt Layout (or the edit icon on a row).
- Give the layout a title, for example “Kitchen Ticket” or “Customer Receipt”.
- Build the receipt with the WP Cafe receipt blocks: order header, order line items, totals, and footer.
A new layout starts from the order-confirmation template, not a blank page, so you have a working receipt to adjust instead of building from scratch.
Step 3: Print Item Add-ons and Options #
Add-ons are the options a customer picks on an item, such as size, extra cheese, or a chosen variation. The Order Line Items block can print these under each item name.
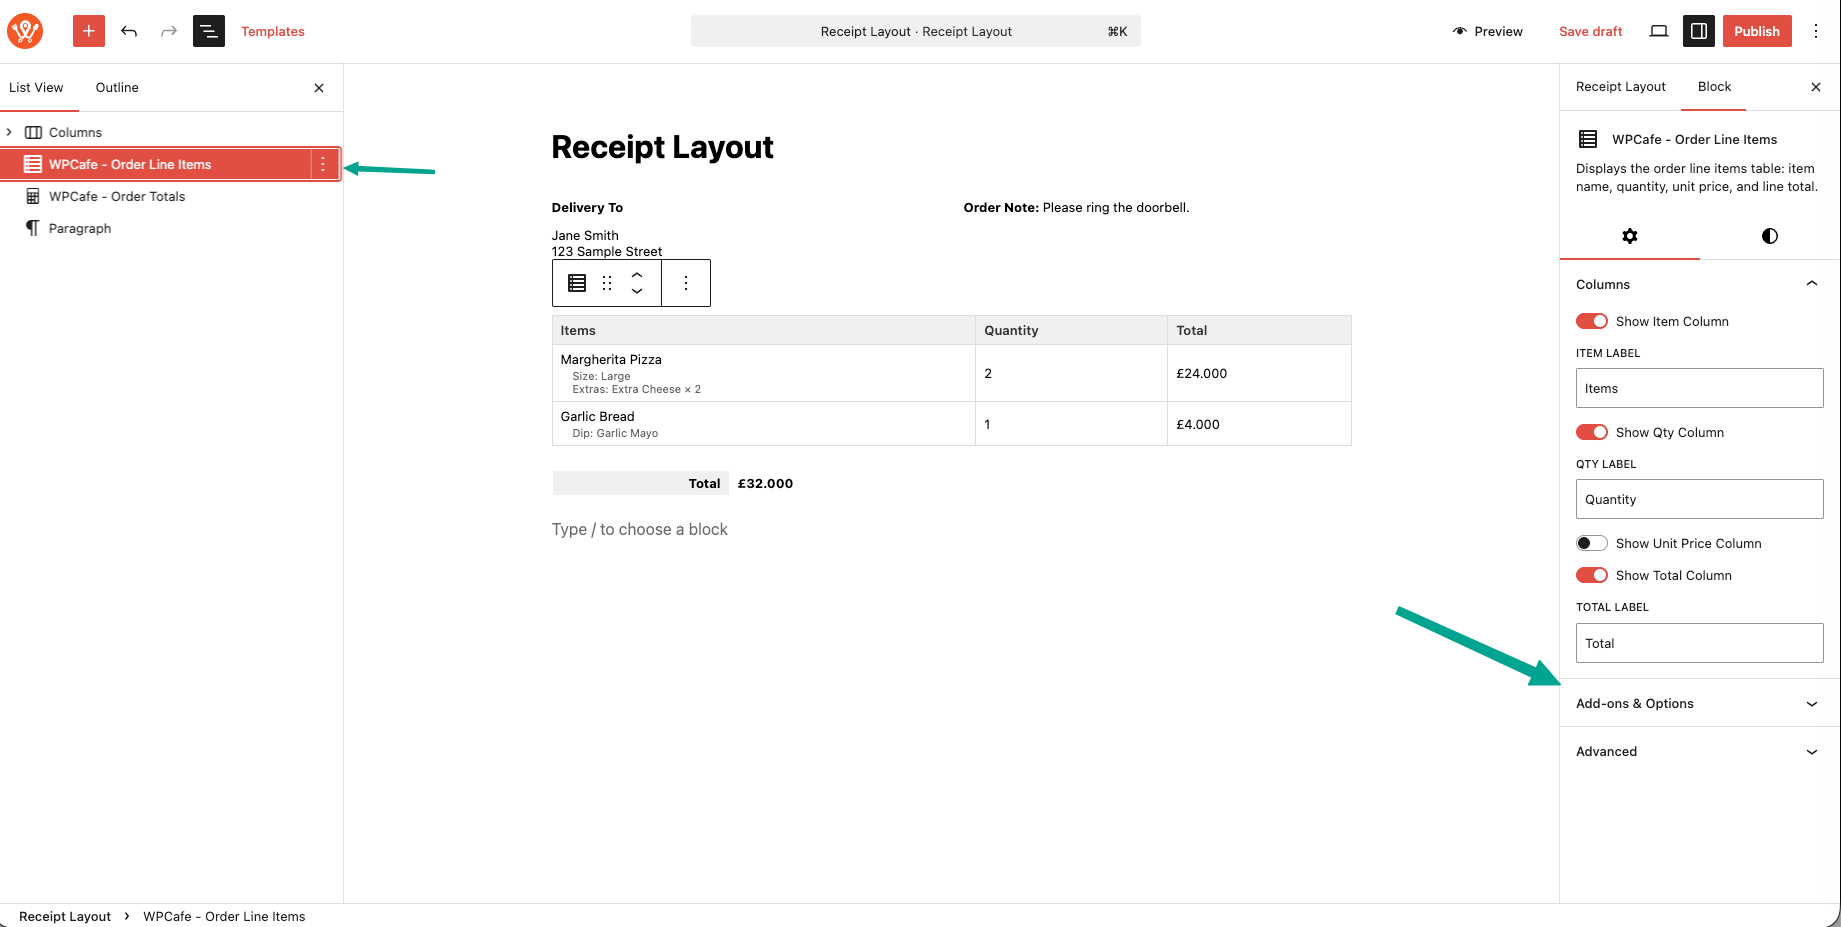
- Click the Order Line Items block in your layout.
- In the block settings, open the Add-ons & Options panel.
- Turn on Show Item Add-ons.
- Adjust the add-on font size, text color, and indent to match your receipt.
The add-on lines read WooCommerce’s own order data, so options from Optiontics, product variations, and other add-on plugins all print without extra setup. If you turn Show Item Add-ons off, only the item name prints.
Step 4: Set the Default Layout #
The default layout is the one that prints unless you pick another. Set it from the Receipt Layouts list, not from a settings page.
- Go back to the Receipt Layouts list.
- Find the layout you want as default.
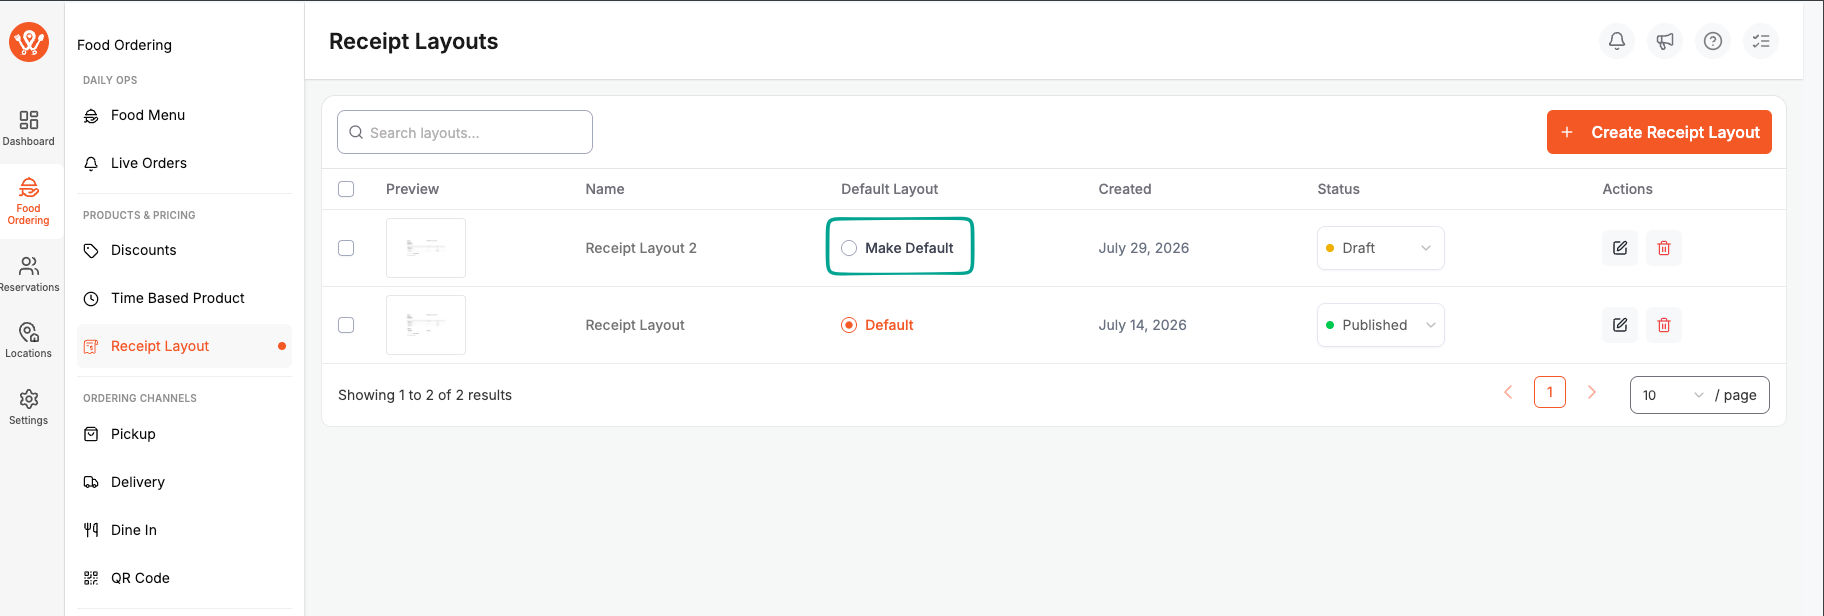
- In the Default Layout column, click Make Default on that row.
Only one layout is the default at a time, so setting a new one clears the old default automatically. The current default shows Default in that column. You can only switch the default to another layout, never turn it off, so printing always has a layout to use.
| Note: If you delete the layout that is set as default, WP Cafe hands the default to the next published layout automatically, so printing never falls back to a random format. |
Step 5: Print a Receipt from an Order #
Once a default is set, print from any order. WP Cafe adds a Print Receipt button in a few places.
- Open an order in WooCommerce, at WooCommerce then Orders.
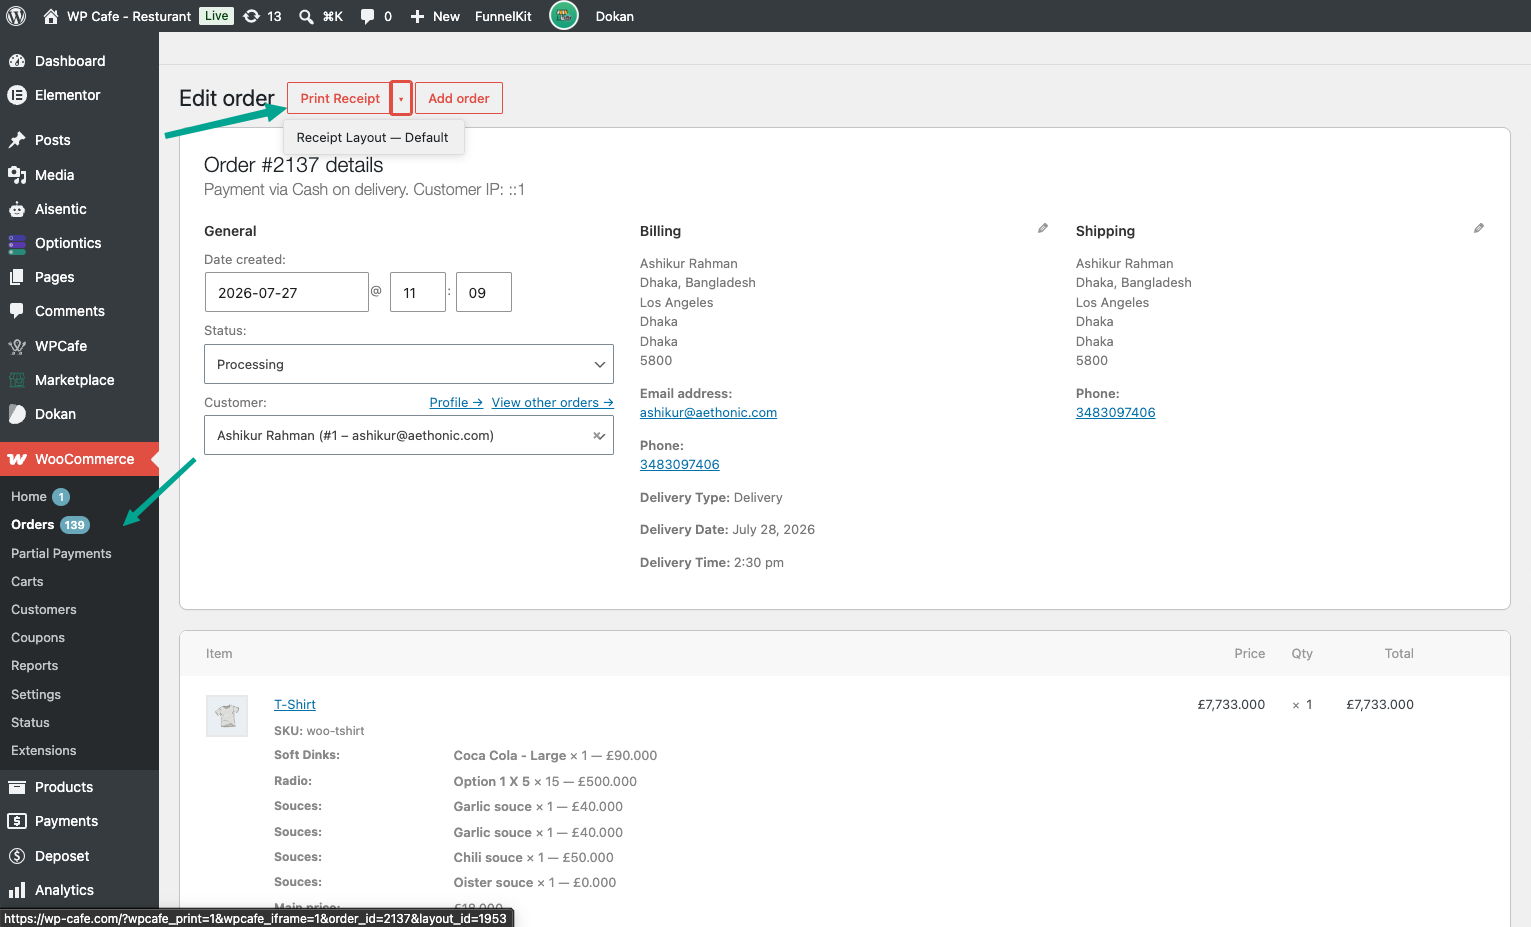
- Click the Print Receipt button on the order edit screen.
- To print a different layout for this one order, use the small arrow next to the button and pick a layout from the list.
Print Receipt also appears on the WooCommerce orders list as a column icon and on the customer’s order-received (thank you) page. Each of these uses your default layout unless you choose another.
Frequently Asked Questions (FAQ) #
| Q1: What happens to the default when I delete the layout that was set as default? WP Cafe hands the default to the next published layout automatically, so printing never falls back to a random format. If you delete every layout, the next one you publish claims the default on its own. You do not have to reset it by hand. |
| Q2: My item add-ons are not printing on the receipt. What should I check? Open your layout, select the Order Line Items block, and confirm Show Item Add-ons is turned on in the Add-ons & Options panel. Add-ons only appear when the order actually has options saved on the item, so test with an order that has variations or Optiontics selections. |
| Q3: Can I use different layouts for the kitchen and the customer? Yes. Build one layout for the kitchen ticket and another for the customer receipt, then set one as the default. For a single order, click the arrow next to Print Receipt and pick the other layout, so you print the kitchen ticket and the customer copy from the same order. |
Conclusion #
Receipt Layout in WP Cafe gives every printed order a fixed, branded format you control from the block editor. Set your default layout in the Receipt Layouts list, then print any order in one click.


