How to Sell Personalized Gifts Online with WooCommerce


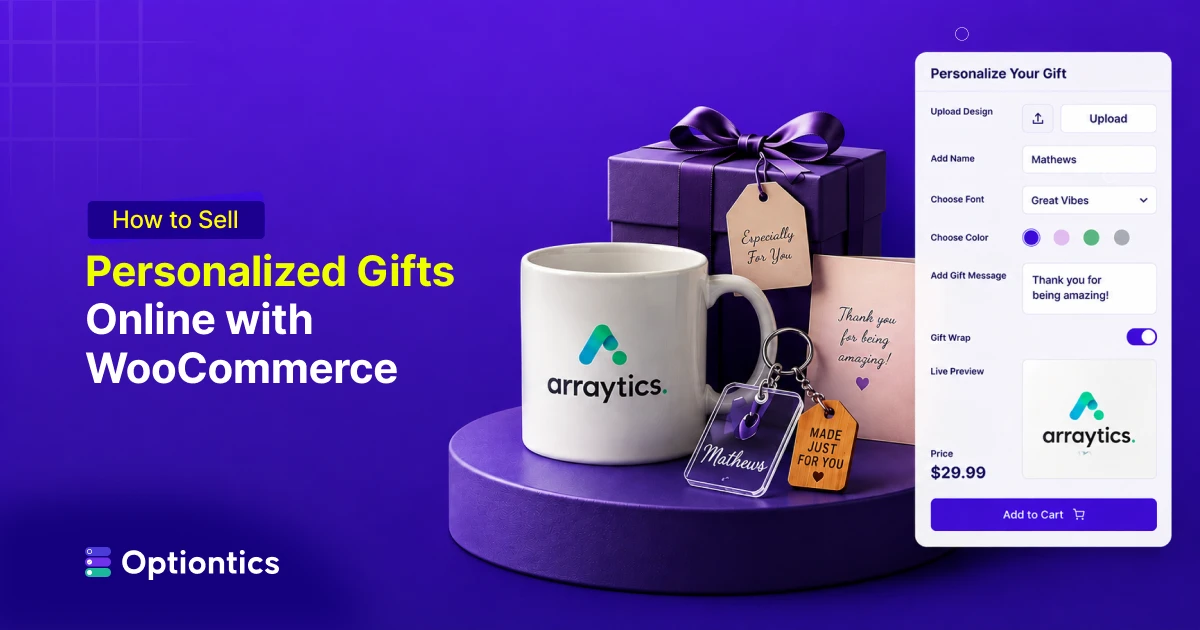
Table of Contents
Selling personalized gifts with WooCommerce starts with adding products and giving customers a simple way to submit their customization details. They can enter a name, write a message, upload a photo, choose a font, or add gift wrapping directly from the product page.
WooCommerce manages products, payments, and orders. Optiontics adds the personalization fields, pricing rules, and conditional choices. Together, they help you collect complete order details before checkout and keep those details connected to each purchase.
This guide covers WooCommerce product customization, option pricing, order management, production rules, and checkout testing.
Key Takeaways
- Use WooCommerce variations for product choices that affect price, stock, or SKU, and use personalization fields for names, photos, engraving, and gift messages.
- Charge extra only when an option adds material, packaging, or production costs, and show the updated price before checkout.
- Keep each customer’s personalization details attached to the correct order to reduce production errors.
- Test required fields, image uploads, conditional options, pricing updates, cart details, and mobile checkout before launching.
What Is a Personalized WooCommerce Product?
A personalized WooCommerce product is an item that customers can customize before adding it to their cart. They may enter their own text, upload an image, select a font, choose a color, or add a personal message.
For example, a customer buying a photo mug may upload an image, add a name, and select gift wrapping. The store can display extra charges immediately and save every selection with the order.
What Do You Need to Sell Personalized Gifts with WooCommerce?
You need a WordPress website, WooCommerce, suitable gift products, a shipping method, and a plugin for adding personalization fields. WooCommerce manages products, payments, and orders, while a product options plugin can collect customer text, images, visual selections, and optional extras.
You also need a clear production process. Decide who will review each submission, prepare the product, check its quality, package it, and arrange delivery. This helps reduce order mistakes and delays.
What Personalized Gifts Can You Sell Online?
You can sell any gift that allows customers to add personal text, images, colors, or design choices. Start with products that are easy to customize and ship.
- Photo mugs: Let customers upload a photo, enter a name, or add a short message.
- T-shirts: Offer custom artwork, text, size, and color choices.
- Jewelry: Collect initials, dates, engraving text, and font preferences.
- Tumblers and water bottles: Allow names, logos, colors, and printed designs.
- Phone cases: Accept photos, artwork, text, and device model selections.
- Gift boxes: Let customers choose items, wrapping styles, and gift notes.
- Notebooks: Offer custom covers, names, page types, and colors.
Choose personalization options based on how the product is made. A photo mug needs an image upload field, while an engraved bracelet needs a short text field, character limit, and font choice. This keeps the form relevant and easier to complete.
What Is the Difference Between WooCommerce Attributes, Variations, and Personalization Fields?
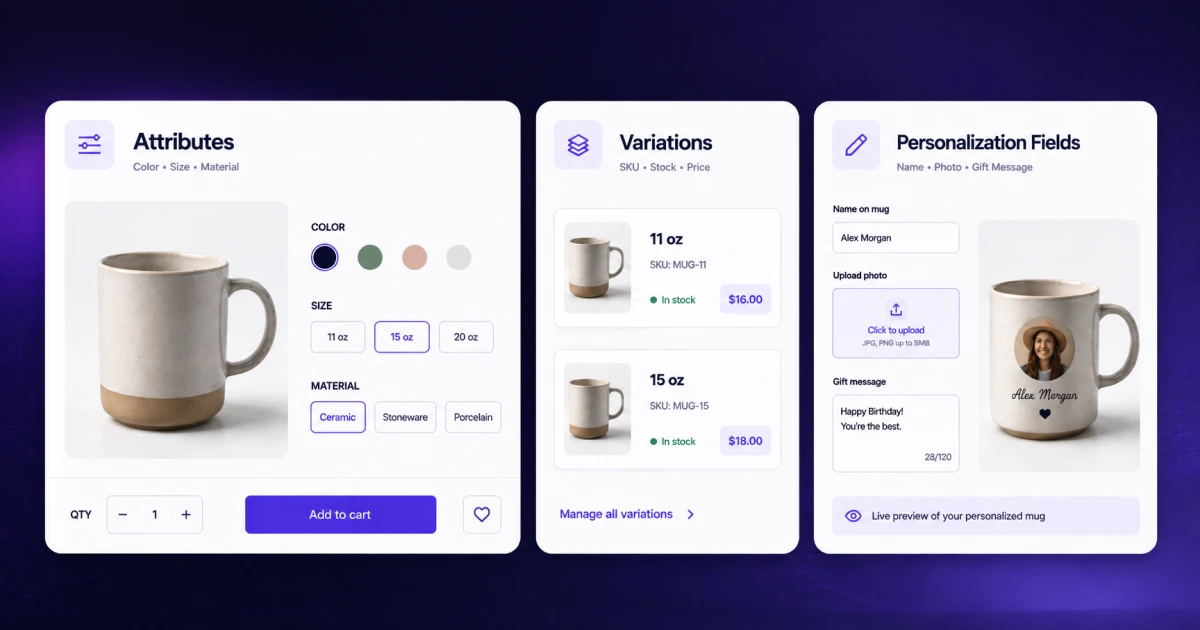
Attributes describe predefined product details or choices, such as color, size, or material. You can use them to organize product information or as the basis for creating variations.
Variations create separate versions of the same product. Use them when a choice changes the SKU, stock level, product image, or base price. For example, an 11 oz mug and a 15 oz mug may have different prices and inventory, so they should be variations.
Personalization fields collect information unique to each order. Customer names, engraving text, uploaded photos, gift messages, and delivery notes belong in these fields because the details change with every purchase.
Use attributes for predefined choices, variations for choices that affect stock or the main product, and personalization fields for customer-provided details.
For example, a mug size can be a variation, while the uploaded photo and printed name should be personalization fields. This structure keeps inventory accurate without creating a separate variation for every custom request.
How to Build a Personalized Gift Store with WooCommerce and Optiontics
To build a personalized gift store, create the main product in WooCommerce and use Optiontics to collect custom text, images, visual choices, and paid extras. Begin with one product and test the full ordering process before applying the setup to your wider catalog.
For this example, we will create a personalized photo mug.
1. Set Up WooCommerce
Install WooCommerce and complete the basic store setup. Add your store address, currency, payment methods, tax settings, shipping zones, and shipping rates.
Place a test order with a regular product before adding any personalization. Confirm that the payment works, the order appears in your dashboard, and the correct emails arrive. This helps you solve general checkout problems before custom files and option pricing enter the process.
2. Create the Photo Mug
Go to Products → Add New and create the mug as a regular WooCommerce product. Add its title, starting price, images, stock details, shipping information, production time, and care instructions.
Separate the product choices from the customer’s custom details. For example, create 11 oz and 15 oz mugs as variations if they have different prices or stock levels. Add the customer’s photo, printed name, and gift message later as personalization fields.
3. Install Optiontics
Once the main product works correctly, install and activate Optiontics as your personalized product plugin. You can then add the fields customers need to complete before placing an order.
You may create the fields manually, start with a template, or use AI to prepare an initial setup. Review every generated field before publishing it. The form should match the information your team actually needs to produce the mug.
4. Create an Option Group
Create a new option group and give it a clear internal name, such as Photo Mug Personalization. Assign it to the photo mug or a category containing products with the same personalization requirements.
Only reuse a group when the products follow the same production process. A photo mug may require a picture, printed name, and color choice. An engraved bracelet may need initials, a font, and a strict character limit. Separate groups make submitted orders easier to review.
5. Collect the Printed Text
Add a text field for the customer’s name or a short phrase. Use a textarea only when you accept longer messages.
Write a label that clearly explains what the customer should enter:
Name on the mug
Enter a maximum of 20 characters. We will print the text exactly as submitted.
Set the character limit based on the available printing area. Make the field required if you cannot produce the mug without this information. You can also add placeholder text to show customers the expected format.
6. Accept Customer Photos
Add a file upload field for the customer’s photo or artwork. Explain which file formats you accept, the maximum file size, minimum image quality, and preferred image shape.
For example:
Upload your photo
Choose a clear JPG or PNG file. Avoid screensho
ts, blurred images, or photos saved from social media.
Test the field with several files before publishing the product. Confirm that your production team can download and open each accepted format without requesting a replacement from the customer.
7. Add Visual Choices and Optional Extras
Add the remaining WooCommerce product options based on how customers can personalize the mug. A font picker can display available text styles, while color or image swatches can make visual choices easier to compare.
You can use checkboxes, switches, or buttons for extras such as gift wrapping, a printed gift card, a premium box, double-sided printing, or rush production. Keep only the options that affect the final product, packaging, price, or production process.
8. Show Fields Only When Needed
Use conditional logic to display a field after the customer selects a related option. This keeps the initial form shorter and prevents customers from completing fields that do not apply to their order.
For example, selecting Add a photo can reveal the upload field. Choosing Include a gift card can display the message box. Selecting double-sided printing can open a second design field.
Test every possible selection. A hidden field that remains required may prevent customers from adding the mug to their cart.
9. Add Charges for Paid Choices
Add a fee when an option increases your material, packaging, or production cost. Display the charge beside the related choice and update the product total before checkout.
Not every option needs an extra fee. A font choice may be free, while gift packaging or double-sided printing may cost more. The next section explains the available option-pricing methods in more detail.
10. Review the Product Page
Save the option group and view the product page as a customer. Confirm that all fields appear correctly and that free and paid choices update the product as expected.
At this stage, focus on whether the form is clear and easy to complete. The launch checklist below covers detailed testing for the cart, checkout, emails, uploaded files, and order dashboard.
How Does Dynamic Pricing Work for Personalized Gifts?
Dynamic pricing changes the product total based on the customization choices a customer makes. The base price remains visible, while paid additions increase the total before checkout.
For example:
- Base photo mug: $15
- Photo printing: +$3
- Custom message: +$5
- Premium gift box: +$8
- Final price: $31
Choose a pricing method that matches how the extra work creates cost.
- Fixed fee: Add one set charge for gift wrapping or photo printing.
- Percentage fee: Calculate the charge from the product price.
- Per-character price: Charge based on the length of engraved text.
- Quantity-based price: Adjust the cost according to the selected amount.
- Formula-based price: Calculate complex custom orders using several values.
- Conditional price: Apply a charge only when specific choices are selected.
Charge only when an option adds a real material, packaging, or production cost. Display the updated total before the customer adds the gift to the cart.
How Do You Manage Personalized Gift Orders in WooCommerce?
Keep every submitted choice attached to the correct WooCommerce order item. This gives your production team one source for the customer’s text, uploaded files, paid additions, and packaging requests.
The order flow should move from the product page to the cart, checkout, order review, production, and shipping. Before production begins, your team should:
- Confirm that all required details are present.
- Check that the text fits the available space.
- Review the uploaded file quality.
- Match each paid option with the production request.
- Contact the customer if anything is unclear.
- Mark the order as ready for production.
Avoid collecting missing details through separate emails whenever possible. Messages can arrive late or become disconnected from the order.
What Production, Shipping, and Return Rules Do Personalized Gift Stores Need?
Set clear production, shipping, correction, and return rules before accepting personalized orders. Customers should see these details on the product page instead of searching through a separate policy page.
Explain Production and Delivery Times Separately
Production time starts after you receive complete and usable personalization details. Shipping time starts after the finished product leaves your store.
Tell customers how many business days production takes, whether proof approval adds extra time, and whether rush production is available. Also explain what happens when an image is unclear or required information is missing.
For example:
Production takes three to five business days after we receive complete personalization details. Shipping time begins after production ends.
Add separate order cutoffs for Christmas, Valentine’s Day, Mother’s Day, and other busy periods. Avoid guaranteeing an arrival date unless you can control both production and delivery.
Set Rules for Proofs and Order Changes
Explain whether customers will receive a design proof and whether they must approve it before production begins. State how much time they have to respond and how proof approval affects the delivery estimate.
Customers should also know when they can correct a name, date, image, or color. You may accept changes before production starts. Once printing, engraving, or assembly begins, changes may no longer be possible.
Separate Customer Errors from Production Errors
Ask customers to review spelling, dates, colors, and uploaded files before checkout. State whether you accept returns or replacements when the customer submits incorrect information or approves the wrong design.
Offer a replacement or refund when the mistake comes from your side, such as:
- The item arrives damaged
- The wrong design or text is used
- The customer receives the wrong product
- The finished item differs from the approved order
Tell customers how quickly they must report a problem and whether they need to provide photos of the item and packaging.
Display the Rules Where Customers Need Them
Show production estimates, proof terms, correction deadlines, and a short return summary on the product page. Keep the complete policy available at checkout and in the order confirmation email. Your terms must also follow the consumer laws that apply to your business and customers.
How Should You Test a Personalized WooCommerce Product Before Launch?
Place one complete test order on both desktop and mobile before publishing the product. Follow the same steps a real customer would use, from personalization to the final order details.
Check whether:
- Required fields show clear errors when left empty
- Character limits work correctly
- Supported and unsupported file uploads behave as expected
- Conditional fields appear after the correct selection
- Every paid option updates the total accurately
- Personalization details remain visible in the cart and checkout
- Emails contain the correct text, choices, and charges
- Store staff can find the details and open uploaded files
Also test a difficult order with long text, special characters, multiple paid extras, and a large image. If you provide design proofs, complete the approval process as well.
Continue reviewing support questions and order errors after launching your personalized gift website. If customers repeatedly make the same mistake, improve the related label, instruction, or field.
Can customers upload images to a WooCommerce product?
Yes. Add a file upload field to the product page so customers can submit photos, logos, or artwork before placing an order. Clearly state the accepted file formats, maximum size, minimum resolution, and image ownership requirements.
How can I charge extra for engraving in WooCommerce?
Add an engraving field and assign a fixed, conditional, or per-character fee based on the work required. Display the additional charge beside the option and update the product total before the customer adds the item to the cart.
What is the difference between a variation and a personalization option?
A variation creates a predefined version of a product with its own price, SKU, image, or stock level. A personalization option collects details unique to an order, such as a name, uploaded photo, gift message, or engraving text.
Can I require personalization before customers add a product to the cart?
Yes. Mark essential personalization fields as required. Customers must complete those fields before adding the product to their cart. Only require information your team needs to prepare the order.
Do personalized products need a different return policy?
Usually, yes. Your policy should explain how you handle customer input errors, production mistakes, damaged products, cancellations, and change requests. It must also follow the consumer laws that apply to your business and customers.
What is the best way to customize WooCommerce products?
Use variations for choices that affect stock, price, SKU, or the main product. Use personalization fields for customer-specific details such as names, engraving text, uploaded photos, gift messages, and paid extras. This keeps product inventory accurate while attaching each custom request to the correct order.
Final Thoughts
You can sell personalized gifts with WooCommerce when customers have a clear way to submit their choices and understand the final cost. Start with one product, define the production rules, and test the full order process before expanding your catalog.
Optiontics helps you add text fields, file uploads, visual choices, conditional logic, and option pricing to WooCommerce products. Choose only the fields each gift needs and keep the ordering process simple.