How to Set Up Event Registration on WordPress with Eventin


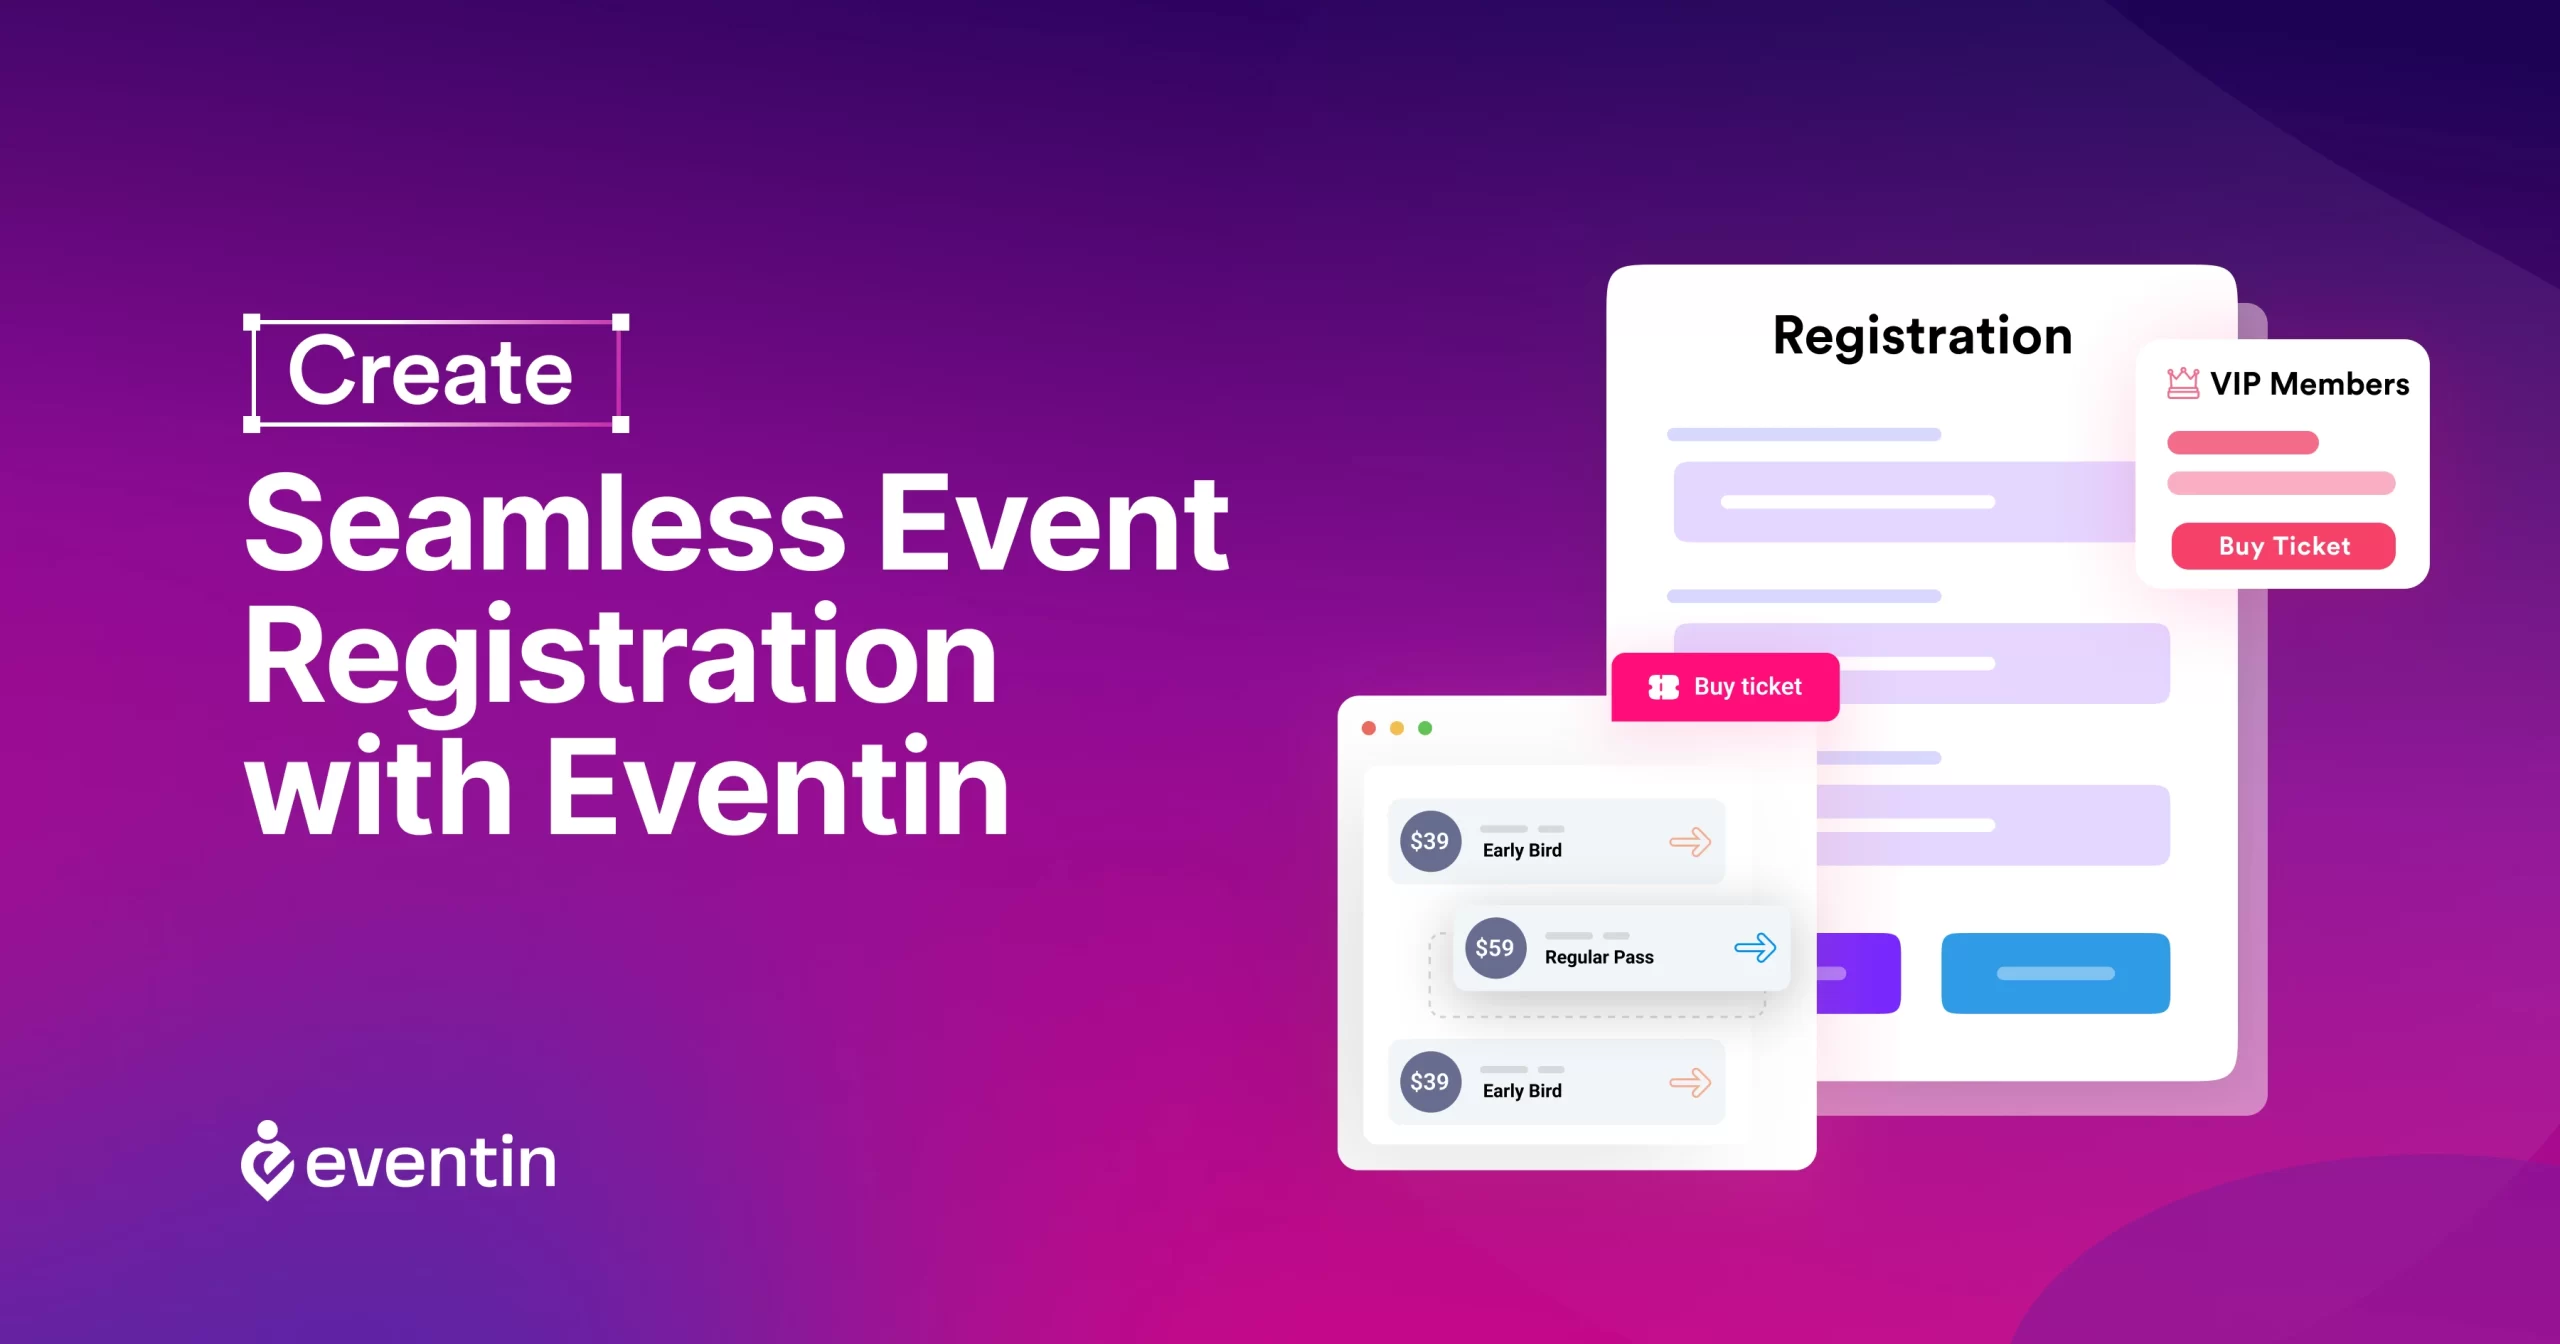
Table of Contents
To set up event registration on WordPress, install Eventin, create an event, configure the registration form, add tickets, and publish the event. You can then manage attendee details, ticket information, payments, confirmations, and check-ins from your WordPress dashboard.
If you want to explore the complete features of Eventin, read our WordPress event registration plugin guide.
Grow Your Events Faster
Plan, manage, and grow your events with Eventin event manager.
- 🟣 Attendee registrations
- 🟣 Virtual events with Zoom
- 🟣 Smart email reminders
- 🟣 Secure ticket sales with Woo
Overview
This tutorial explains how to set up event registration on WordPress with Eventin. You’ll learn how to create an event, configure registration forms, add tickets, test the registration process, and manage attendees.
Inside this article, you’ll learn:
- What event registration on WordPress means
- What you need before setting up event registration
- How to Set Up Event Registration on WordPress with Eventin
- How to manage registered attendees
- Which Eventin integrations you can use
- How to improve the attendee registration experience

What is Event Registration on WordPress?
Event registration on WordPress allows visitors to sign up for an event directly from your website. Depending on your setup, attendees can submit their information, choose a ticket, complete payment, and receive event confirmation.
This process keeps registration data organized in one place. It also reduces the need to manage sign-ups through emails, spreadsheets, or separate form tools.
You can use WordPress event registration for:
- Hybrid events
- Conferences
- Workshops
- Webinars
- Meetups
- Training sessions
- Online classes
- Networking events
What Do You Need Before Setting Up Event Registration?
Before creating an event registration form in WordPress, prepare the information your attendees need. You should also decide whether your event is free, paid, online, in-person, or hybrid.
You will need:
- A WordPress website
- The Eventin plugin
- Your event title and description
- Event date, time, and location
- Speaker or organizer details
- Registration fields
- Ticket types and prices
- A supported payment method for paid tickets
Only request information that is relevant to your event. A short and focused registration form is easier for attendees to complete.
Why Use Eventin to Set Up Event Registration?
Eventin brings event creation, registration forms, ticketing, and attendee management into your WordPress dashboard. It supports different event workflows, including free and paid tickets, custom fields, and attendee check-in, depending on your plan and configuration.
Want to simplify your event registration process?
Eventin helps you manage registrations, payments, and attendees in one place.
👉 Try Eventin Event Registration Plugin
How to Set Up Event Registration on WordPress with Eventin
Create a smooth online registration process is easy with Eventin. Let’s go through the key steps.
1. Install and Activate Eventin
Start by installing Eventin on your WordPress website. From your WordPress dashboard, go to Plugins → Add New and search for Eventin.
Click Install Now, then select Activate after the installation is complete. The Eventin menu will then appear in your WordPress dashboard.
Depending on your plan, some features may require additional configuration or a Pro upgrade. Review the available options before creating your event.
2. Create Your First Event
To create an event, go to:
Eventin → Events → Add New
Enter the event title and write a clear description. Explain what the event is about, who should attend, and what participants can expect.
You can also add:
- Event date and time
- Physical venue
- Online meeting link
- Featured image
- Event category
- Event organizer
- Event capacity
- Registration deadline
Make sure the event title, date, location, and ticket information are easy to find. Attendees should not have to read the entire page to understand the basic event details.
3. Add Event Details, Speakers, and Schedules
After creating your event, add the information attendees need before registering. Enter the event title, description, date, time, location, event type, and venue details.
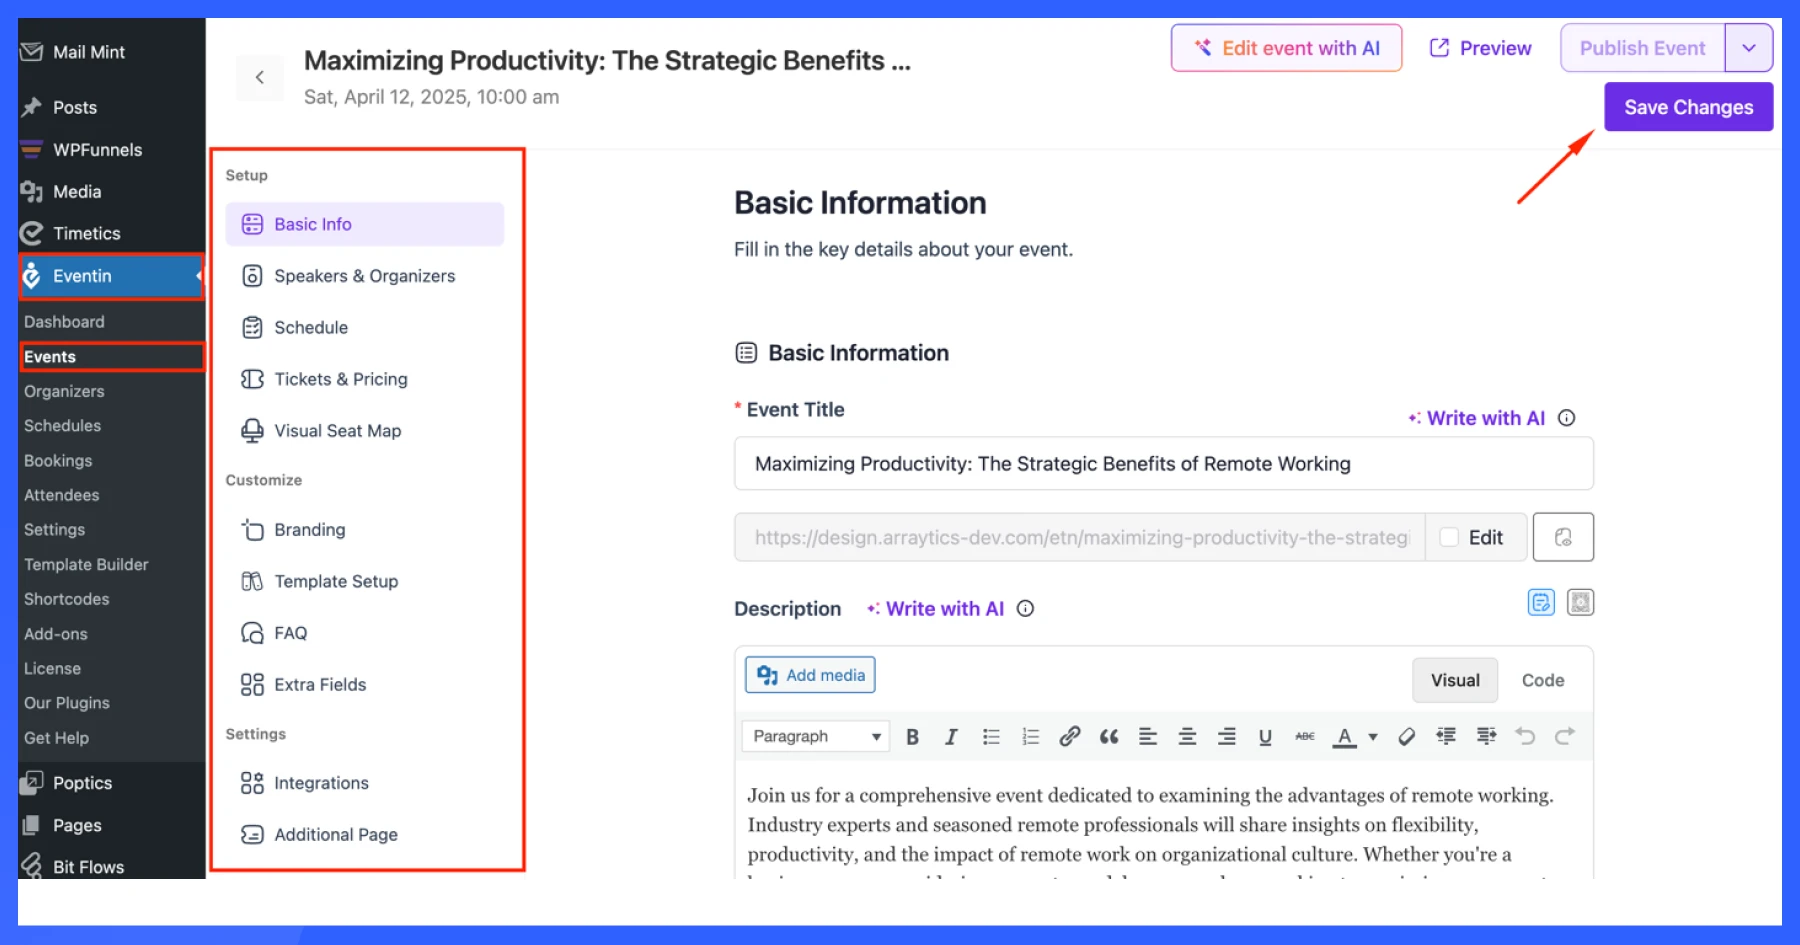
- Basic Information: Enter the event title, description, location, start and end date, event type (online or offline), and venue name. These are the must-have details attendees will see first.
- Speakers and Organizers: Add profiles for your speakers and organizers, including their names, images, biographies, and social media links. This helps build trust and credibility.
- Schedule: Break down your event into sessions or time slots. You can list speakers, topics, and timings to provide attendees with a comprehensive overview of what to expect.
- Tickets and Pricing: Utilize Eventin’s custom ticket builder to create multiple ticket types, including free, paid, early bird, VIP, and more. Add prices, ticket limits, and sale dates.
- Visual Seat Map: Let attendees choose their seats. You can create a visual seat map and assign tickets to specific spots, perfect for in-person or hybrid events.
- Branding: Customize the look and feel of your event with your logo, cover image, brand colors, and social links. This makes your event page feel professional and on-brand.
- Template Setup: Choose templates for your event landing page, ticket layout, and certificate. You can customize them to match your branding and audience.
- FAQ: Add answers to common questions right on the event page. This saves time and reduces confusion for your attendees.
- Extra Fields: Do you require additional information from attendees, such as their company name, job title, or dietary preferences? Add extra registration fields to collect exactly what you need.
4. Configure the Registration Form
The registration form collects the information attendees submit when they sign up. Open your event settings and enable attendee registration.
Depending on your Eventin version, this option may appear inside the event settings or under the attendee settings. Menu names can vary between plugin versions.
Add the fields your event requires, such as:
- Full name
- Email address
- Phone number
- Organization
- Job title
- Dietary requirements
- Special requests
Mark only essential fields as required. Avoid collecting unnecessary information because it can make the registration process feel longer.
5. Add Ticket Types and Pricing
Eventin lets you create ticket types for your event. You can use one ticket or add multiple options based on your event structure.
Common ticket types include:
- General admission
- VIP ticket
- Student ticket
- Early-bird ticket
- Group ticket
- Speaker or sponsor pass
For each ticket, add the ticket name, price, availability, and ticket limit. You can also set sale dates when the feature is available in your configuration.
Eventin can support both free and paid ticket setups. For detailed instructions on creating a zero-price ticket, see our guide to free attendee registration in WordPress.
6. Connect Payment Methods for Paid Tickets
If you are selling paid tickets, connect a payment method supported by your setup. Depending on your configuration, Eventin may work with options such as WooCommerce, Stripe, or PayPal.
Configure the payment method before publishing the event. Then complete a test transaction to confirm that the checkout, payment confirmation, and attendee record work properly.
A payment method is not needed when your event uses only free tickets. The requirements depend on the ticket type and checkout workflow you choose.
7. Customize the Event Page
Customize the event page so it matches your website and provides a clear registration experience. You may be able to add your logo, featured image, brand colors, social links, ticket details, and frequently asked questions.
Keep the page layout simple. Important information should appear before lengthy descriptions, including:
- Event title
- Date and time
- Location or meeting link
- Ticket price
- Registration deadline
- Main registration button
A well-organized event page helps visitors decide whether the event is relevant before they complete the form.
8. Publish and Test the Registration Flow
After completing the event settings, publish the event page. Before sharing the registration link, test the full process as an attendee.
Open the page in an incognito browser window and check that:
- The event information is accurate
- The registration form appears correctly
- Required fields work properly
- Ticket prices are displayed correctly
- The payment process works for paid tickets
- Confirmation messages or emails are delivered
- The attendee appears in the dashboard
Test the page on a mobile device as well. Check the form fields, ticket options, buttons, and confirmation message on a smaller screen.
How to set up Eventin on your event WordPress website
Before you can start creating events and collecting registrations, you’ll need to get Eventin up and running on your WordPress site. Don’t worry—it’s quick and easy.
How to Manage Registered Attendees
After your event goes live, open the Attendees section in Eventin to view registered participants. The available information may include attendee names, ticket types, and payment status.
Depending on your plan and configuration, you may be able to:
- View attendee details
- Review ticket information
- Check payment status
- Send confirmation emails
- Send event reminders
- Check in attendees with QR codes
- View RSVP responses
- Export attendee lists
Keep attendee information organized and use it only for appropriate event-related communication. If you plan to send future marketing messages, collect the required consent from attendees.
Ready to Manage Event Registration the Easy Way?
Stop managing registrations manually. Use Eventin to handle everything—from signup to check-in.
Get Started with EventinWhich Eventin Integrations Can You Use?
Eventin can connect with other tools to support different event workflows. Available integrations may depend on your plan and event configuration.
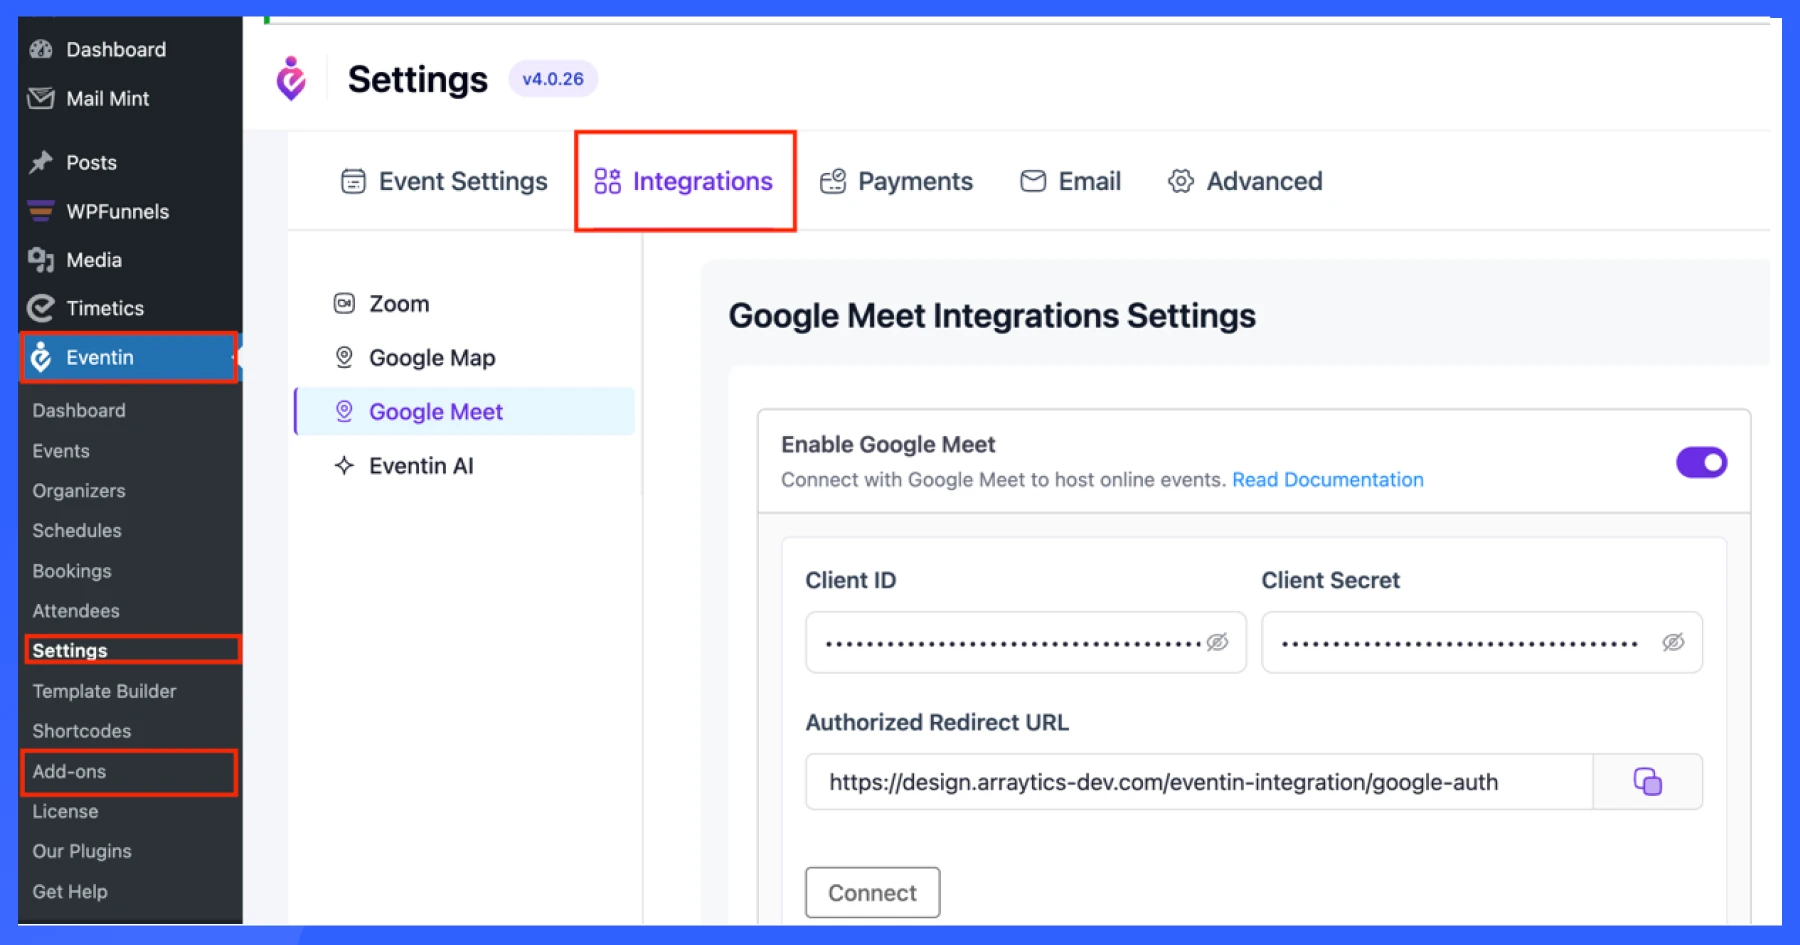
- Zoom & Google Meet– Host online events directly from your dashboard and share links automatically with attendees.
- Google Maps – Display precise event locations on your site to help attendees easily find venues.
- Eventin AI – Create landing page descriptions for events using AI.
- Dokan Multivendor – Let multiple vendors or organizers create and manage their events on your marketplace.
- BuddyBoss – Promote events inside online communities and boost signups through member engagement.
- Google Calendar & Outlook Sync – Let users add events to their calendars with one click to improve attendance.
- FluentCRM & Mailchimp – Automate follow-ups, reminders, and email campaigns for better communication.
Only enable the integrations your event needs. Test each integration before promoting the event to attendees.
💁 Related blog: How to Write Best Meeting Reminder Emails (Tips + Templates)- Read more
How Can You Improve the Registration Experience?

A seamless event registration process isn’t just a courtesy it’s a powerful lever for driving higher attendance rates and improving customer satisfaction. Based on proven UX principles and real-world event marketing data, here’s how to optimize your event registration experience for maximum impact.
1. Design for action, not just aesthetics
Your event page must prioritize clarity and momentum. Key event details like name, date, location, pricing, and ticket options should be immediately visible above the fold.
Use a single, prominent call-to-action (CTA) that drives immediate sign-ups. Incorporate scarcity elements, such as real-time ticket availability (“Only 15 spots left!”), to create urgency without overwhelming the visitor. High-quality visuals should reinforce the event’s value proposition, not distract from the registration path.
Pro tip: Remove unnecessary fields. According to Formstack, every additional form field can decrease conversion rates by up to 11%.
2. Prioritize mobile-first optimization
Today, over 60% of event registrations are completed on mobile devices. If your form isn’t mobile-optimized, you’re leaving registrations and revenue on the table.
Design with a mobile-first mindset:
- Simplify layout and forms for smaller screens.
- Ensure lightning-fast loading speeds.
- Test usability across multiple devices and browsers, particularly Android and iOS.
- Implement autofill and easy payment integrations, such as Apple Pay or Google Pay.
Quick win: Always preview your registration page from a real mobile device — simulators often miss subtle UX issues.
3. Eliminate friction with guided steps
Complex, multi-step registrations can overwhelm users. Instead, break the process into manageable steps with clear progress indicators, such as “Step 1 of 3.”
Best practices:
- Allow guest checkout to avoid forced account creation.
Use inline validation to catch errors before submission, such as invalid email addresses. - Offer social login options when appropriate.
Remember: Every second of delay or confusion increases the risk of abandonment.
4. Proactive and personalized communication
Effective communication begins at registration, not after. Instantly send confirmation emails, include a calendar invite attachment, and clearly outline what attendees can expect.
Beyond email:
- Set up SMS reminders, which boast a 98% open rate.
- Share real-time updates if there are any changes to schedules, venues, or speakers.
- Personalize communications with attendee names and session choices where possible.
Insight: Personalized emails deliver 6x higher transaction rates compared to non-personalized ones (Experian study).
5. Automate strategically but stay human
Automation is essential for scaling, but it should feel personal. Leverage platforms like Eventin to set up triggered workflows:
- Immediate purchase confirmation
- Pre-event reminders (7 days, 24 hours before)
- Post-event thank-you emails with feedback surveys
Utilize dynamic fields to personalize every message effortlessly. Proper automation ensures no attendee falls through the cracks — while freeing your team to focus on high-impact engagement.
💁 Related blog: How to Create a Catchy Event Announcement- Read more
Common Event Registration Mistakes to Avoid
Avoid these mistakes when setting up event registration on WordPress:
- Adding too many required fields
- Publishing without testing the form
- Displaying incorrect event information
- Forgetting to set ticket limits
- Using unclear registration button text
- Failing to test the payment process
- Ignoring the mobile experience
- Enabling integrations without checking them
- Making claims about features without verifying plan limitations
Review the event page from an attendee’s perspective before sharing the registration link.
Can I create event registration on WordPress without coding?
Yes. Eventin lets you create events, configure registration fields, add tickets, and manage attendees from the WordPress dashboard without manually building the registration system.
Can I create free and paid tickets for events?
Yes. Eventin supports different ticket configurations depending on your plan and setup. Paid tickets require a supported checkout method, while free tickets do not collect payment.
Do I need WooCommerce for event registration?
WooCommerce may be required for selected paid-ticket checkout workflows. It should not automatically be treated as necessary for every event, especially when the event uses only free tickets.
Can I add custom fields to the registration form?
Yes. You can add fields such as name, email address, phone number, organization, job title, and other information relevant to your event.
Can I manage attendees after they register?
Yes. You can view registered attendees from the Eventin dashboard. Depending on your configuration, you may also manage confirmations, reminders, check-ins, and attendee exports.
Can I use Eventin for online and hybrid events?
Yes. You can add online meeting details, physical venue information, schedules, speakers, and other event information. Available integrations may vary by plan.
Get started with the best event registration WordPress plugin
Setting up event registration on WordPress requires more than adding a basic form. You need to create an event, configure the registration fields, add tickets, connect payment methods when necessary, and test the complete attendee experience.
Eventin brings these steps together inside your WordPress dashboard. After publishing your event, you can manage attendees, review ticket information, send updates, and prepare for check-in.
If you are comparing different tools before choosing one, explore our guide to the best event registration plugins for WordPress.