How to Manage Concerts with Eventin in WordPress: Step-by-Step Guide
Table of Contents
Planning a concert is more than just picking a date and booking a venue. You need to manage artists, attendees, sell tickets, and ensure everything runs on time, including handling attendees.
If you’re managing all this with spreadsheets, emails, and various tools, it can quickly become a mess. That’s where having the right tool makes a big difference.
That’s where Eventin comes in — a WordPress event plugin built to help organizers manage events from start to finish. But beyond general event management, Eventin can make concert planning much more organized and less stressful.
In this guide, we’ll walk you through how to manage concerts with Eventin in WordPress from start to finish, without the stress.

What are the most common challenges in traditional concert management
Concerts are exciting, but music event management often comes with a lot of behind-the-scenes challenges.
The most common challenges in traditional concert management are mainly limited customization for complex event schedules, managing large volumes of attendees, ensuring smooth check-ins, and handling real-time updates.
Here are a few more common issues:
- Disorganized ticketing: Selling through multiple platforms or offline often results in confusion and incomplete data. It’s challenging to track how many are sold, which ticket types remain, or who is coming.
- Disorganized artist schedules: When you’re managing more than one performer, keeping track of who goes on stage when can get tricky. Without a clear schedule, delays or miscommunication can happen.
- Poor attendee experience: From long check-in lines to last-minute updates not reaching guests, a bad entry or communication process can hurt the overall experience.
- No central system: Using different tools for ticketing, emails, calendar sync, and payments can slow things down. You waste time switching between systems and trying to keep them up to date.
- Lack of real-time updates: If there’s a last-minute change (such as a new gate, delayed performance, or weather issue), it’s challenging to notify all ticket holders promptly.
How Eventin solves these problems
Eventin is designed to address the common issues that concert organizers often face. It’s an ideal event plugin for music shows of any size that brings everything into one system right inside your WordPress dashboard.
Here’s how Eventin helps:
- Centralized event setup: You can create your concert as a single event inside WordPress. Simply, add the venue, performers, time, ticket info, and more, all on one screen.
- Email automation and calendar sync: You can set up automatic reminders for attendees. Also, sync your events with calendars like Google or Outlook and stay informed without manual follow-ups.
- Built-in ticketing system: You can create and manage all ticket types, General, VIP, Early Bird, and more in one place. You set prices, limits, and sale periods.
- Artist and performer profiles: You can create individual profiles for each performer or band, complete with bios and images. These can be displayed on the event page to give attendees a better sense of the lineup.
- Clear schedule builder: Eventin includes a visual schedule tool that allows you to map out the concert timeline, including set times, breaks, and special announcements. This helps keep the event on track.
- QR code check-ins: Each ticket of Eventin comes with a unique QR code. At the gate, scan the QR code using your phone or a scanner to mark the guest as checked in instantly.
🎉 Power Up Your Events with Eventin
Eventin is an AI-powered WordPress plugin that makes event management easy. Create unlimited events, sell tickets, add speakers, track attendees with QR check-ins, and even let vendors run their own events — all from your WordPress dashboard.
🔗 Try Eventin NowSetting up your concert in WordPress using Eventin
Let’s see how Eventin makes it easy to manage everything from one place and get your landing page ready without any hassle.
Create your concert event
Once Eventin is installed and activated, go to your WordPress dashboard and head to Eventin > Add New Event and start by filling out the basic information:
- Event title: Write the name of your concert. Example: “Summer Beats 2025”.
- Start date & end date: Choose when your concert begins and ends. If it’s a one-day event, both dates will be the same.
- Start and end times: Select the opening and closing times for your event.
- Add event recurring (optional): If this concert repeats (e.g., a weekly show or monthly series), you can enable recurring mode and set the schedule.
- Event type: Choose whether it’s an Offline Event (in-person concert) or Online Event (like a virtual stream or hybrid session).
- Venue location: Add the concert venue or address. This will show up on your event page and in calendar sync features.
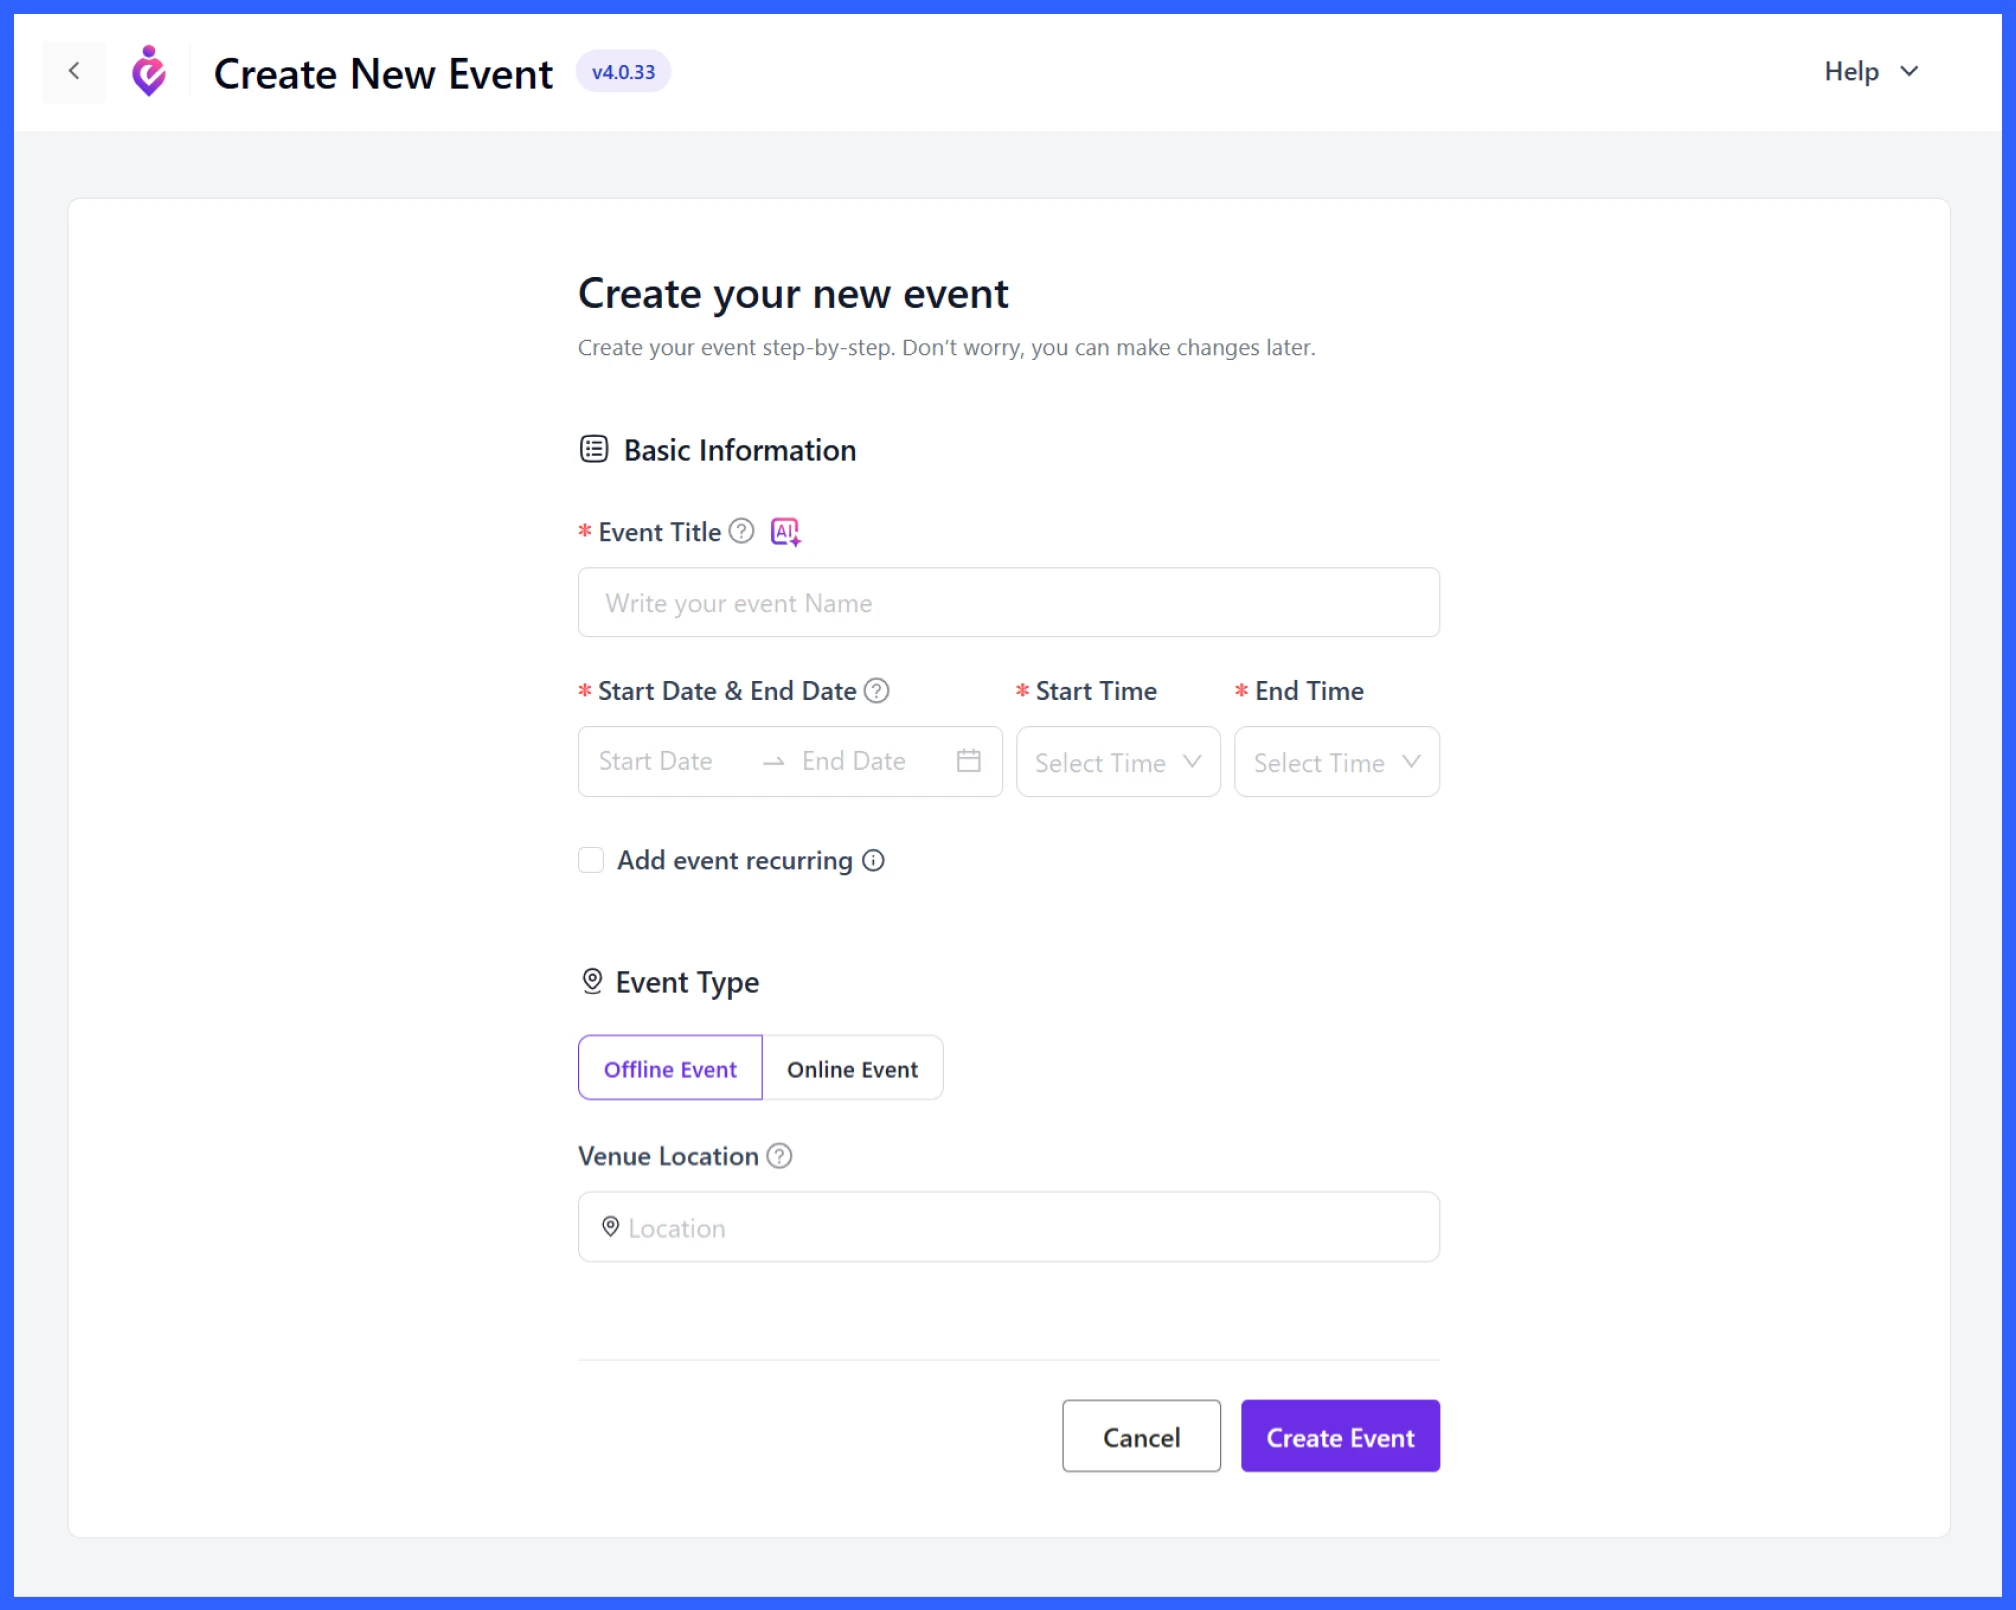
Once done, click “Create Event” to proceed. You can edit or update these details at any time.
You can also add a short and detailed description later or use the Eventin AI (Edit with AI feature) to explain what the concert is about and what attendees should expect.
💡Read also: How to Create Recurring Events in WordPress
Set up tickets and pricing
Once your concert event is created, navigate to the Tickets & Pricing section. This is where you add and manage your ticket types, like,
- General admission
- VIP access
- Group passes or early bird options
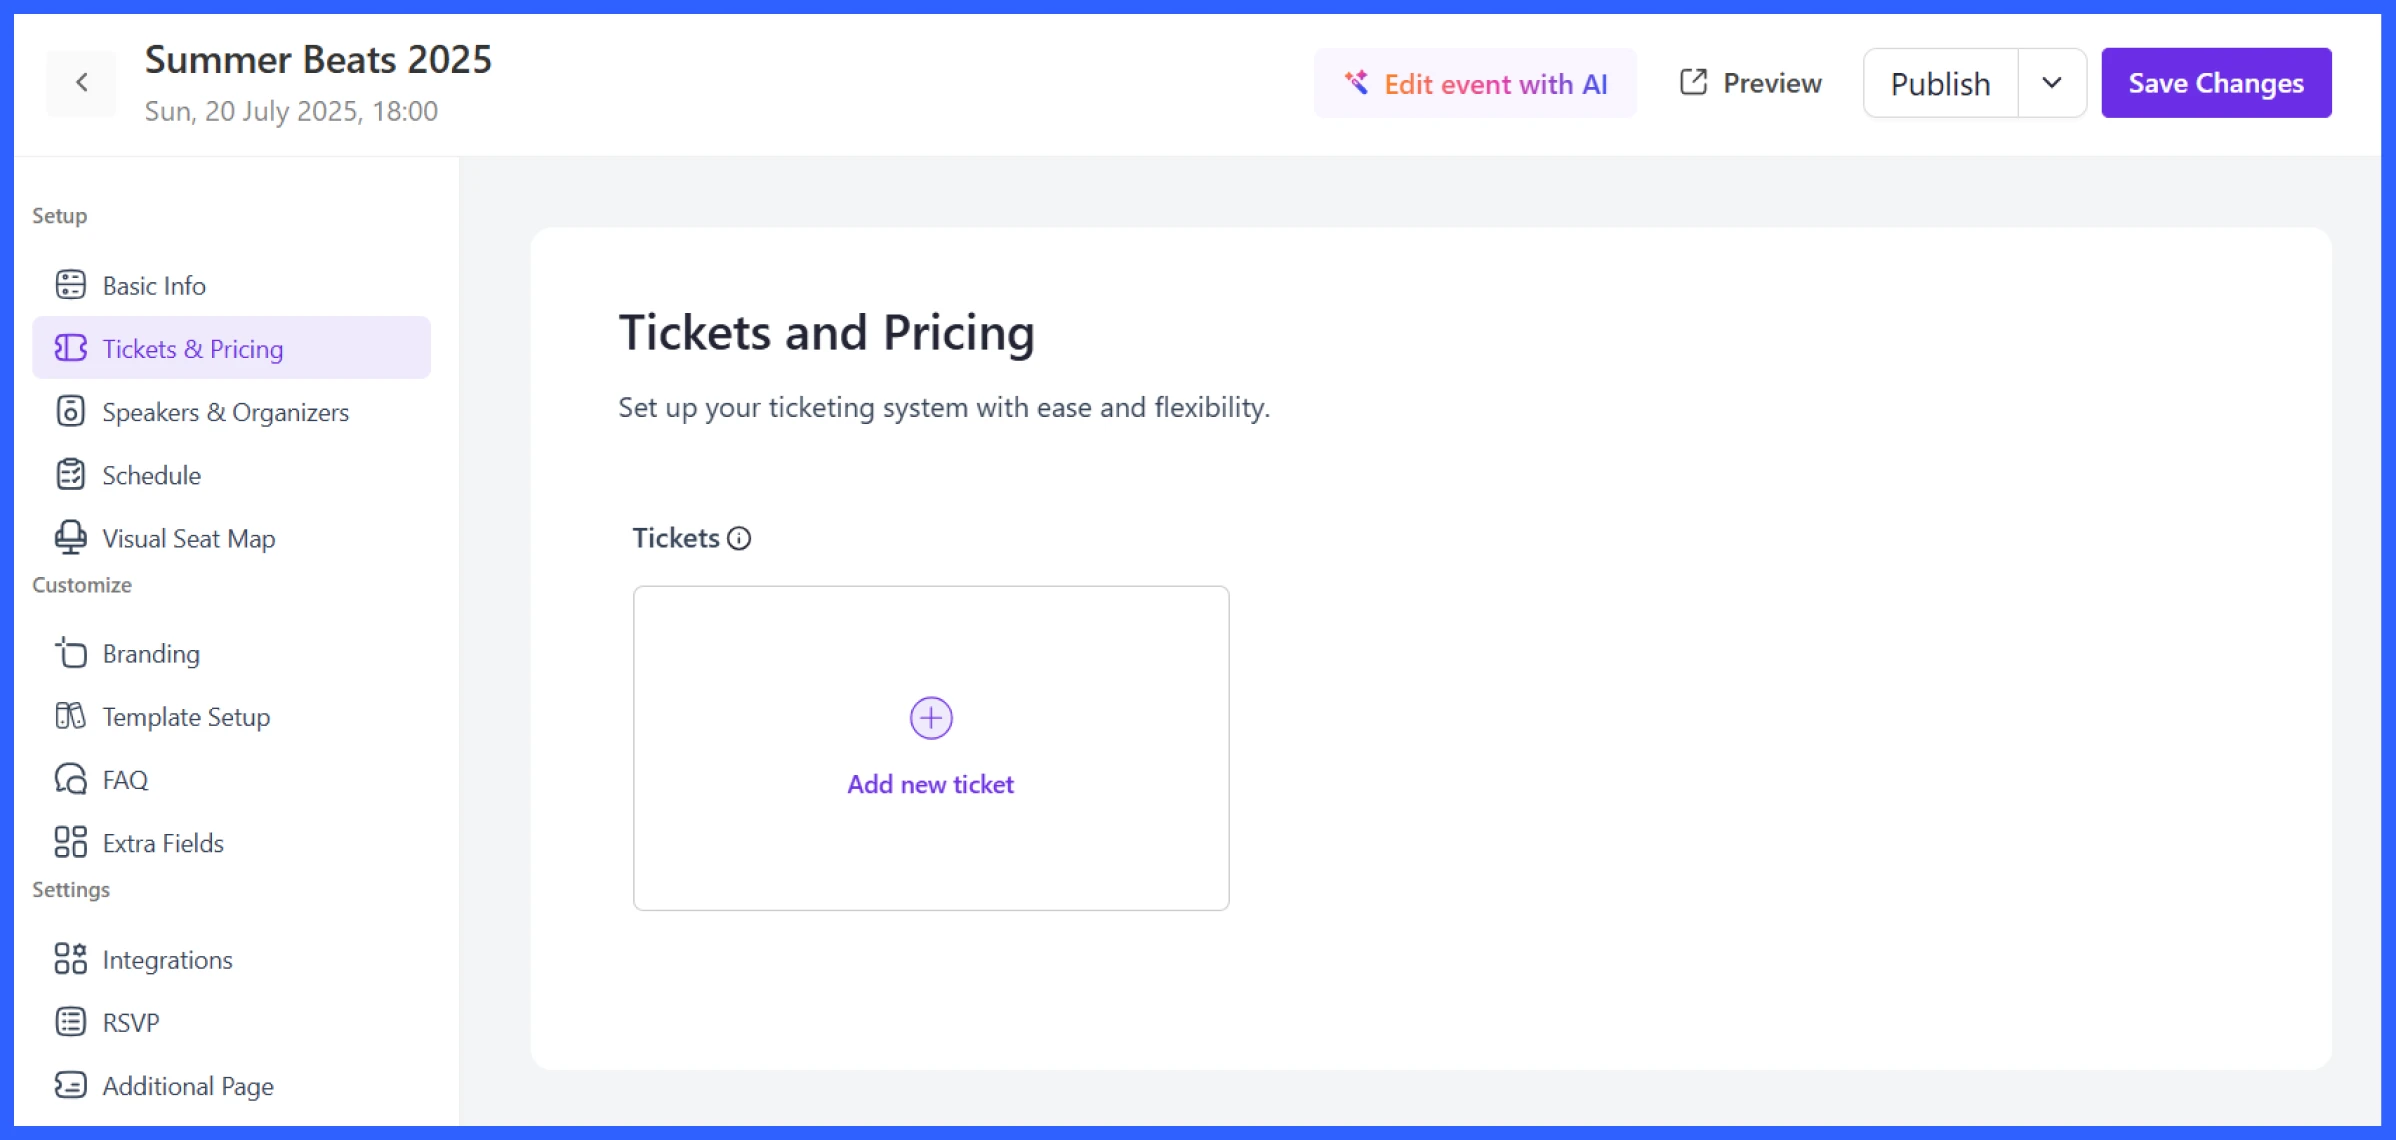
Click on “Add new ticket,” and a pop-up will appear with the following fields:
- Ticket Name: Give your ticket a clear name, such as General Admission, VIP Pass, or Early Bird.
- No. of Tickets: Set the total number of tickets available for this type.
- Ticket Price: Enter the price for each ticket. You can set different prices for different ticket tiers.
- Start Date & End Date: Select the dates when the ticket will be available for sale. Valid for early bird or limited-time tickets.
- Start Time & End Time: Set the exact time ticket sales should begin and end.
- Minimum & Maximum Quantity: Select the quantity of tickets a person can purchase at once. This helps control group sales.
- Ticket Description: Add a short note about what’s included. For example, “Front-row seating + free t-shirt.”
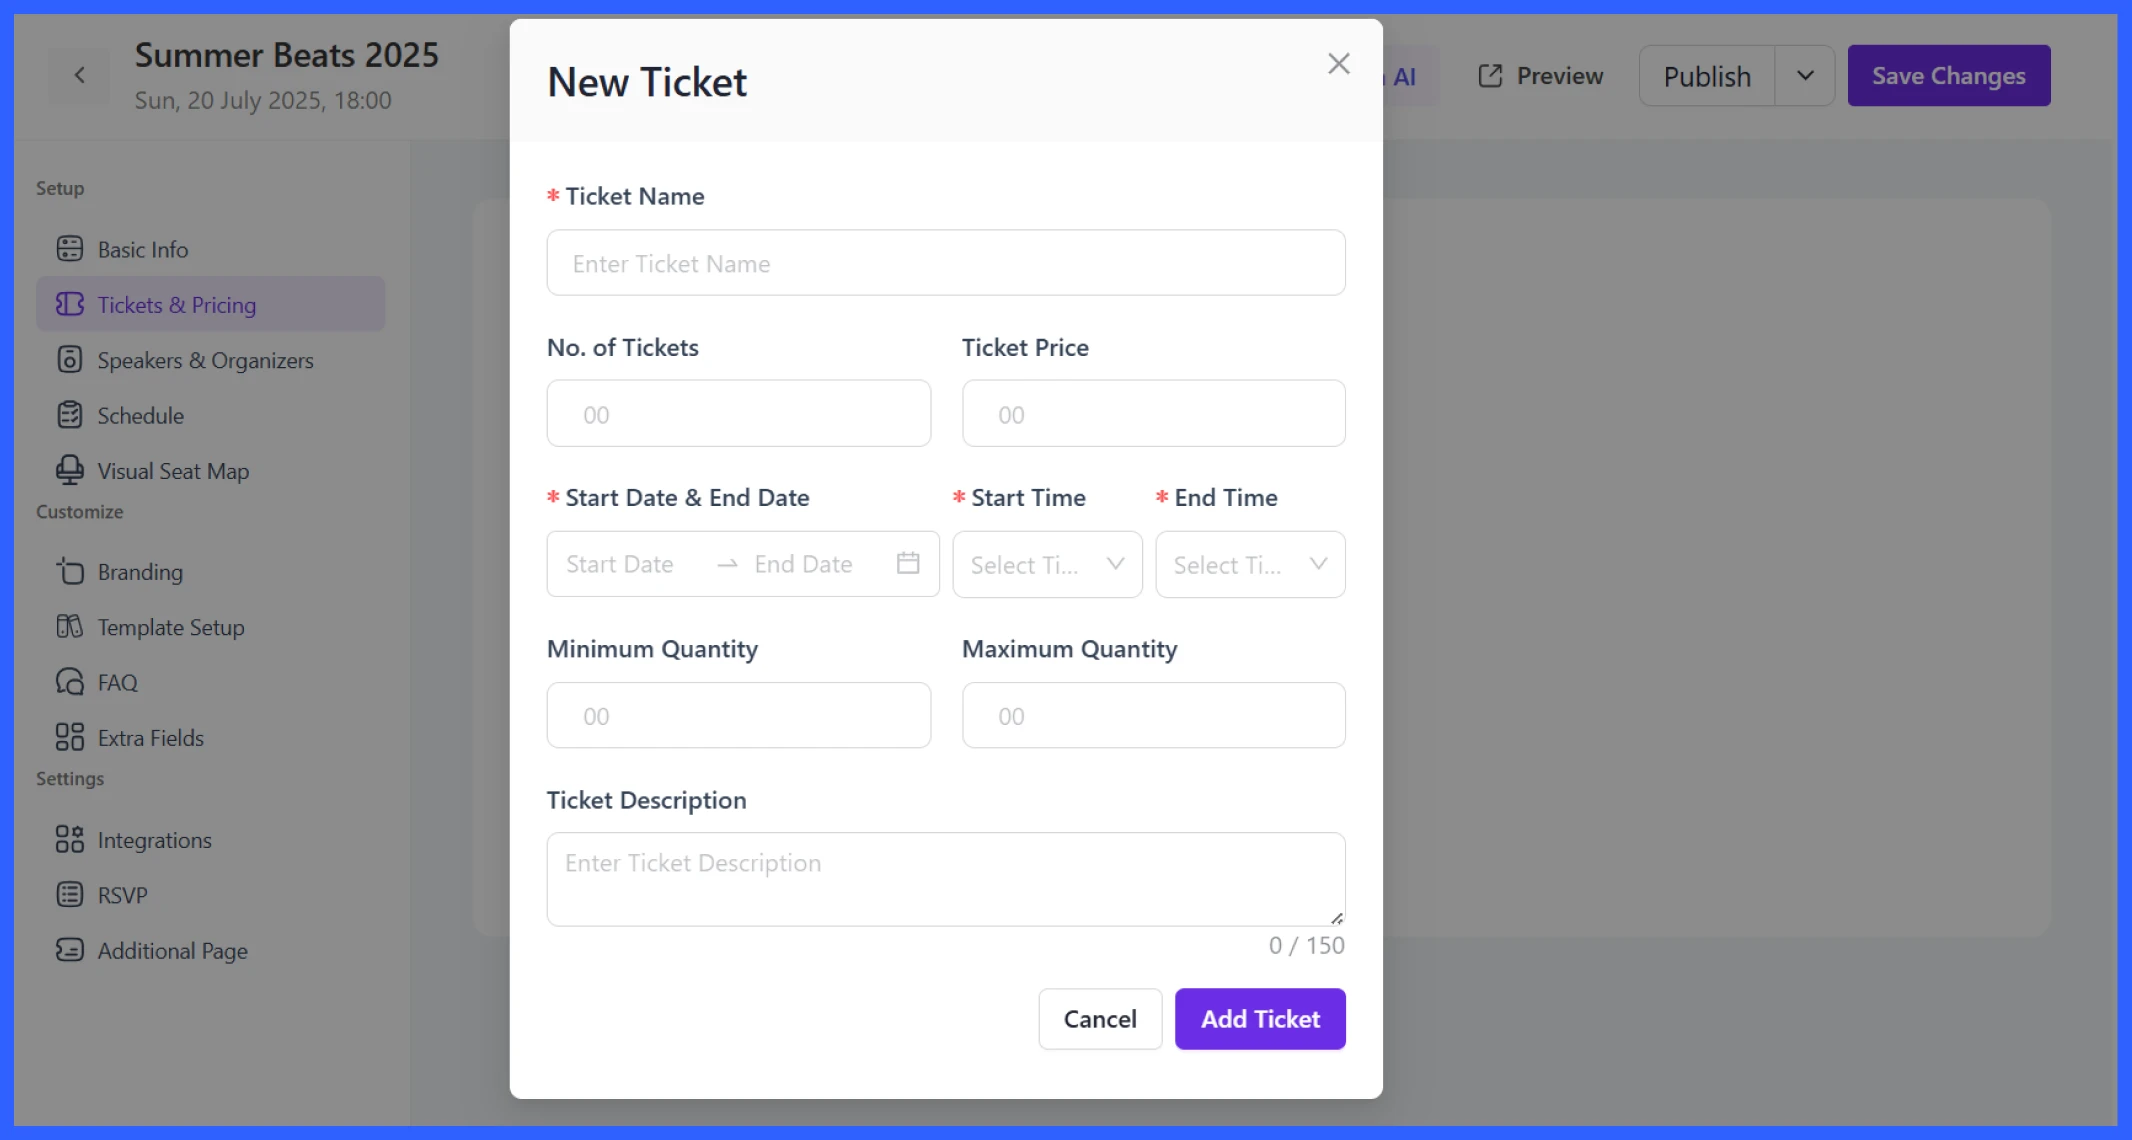
Once everything looks good, click “Add Ticket” to save it. You can add multiple ticket types depending on your concert setup.
💡Read also: How to Sell Event Tickets in WordPress for Free
Add performers and build the lineup
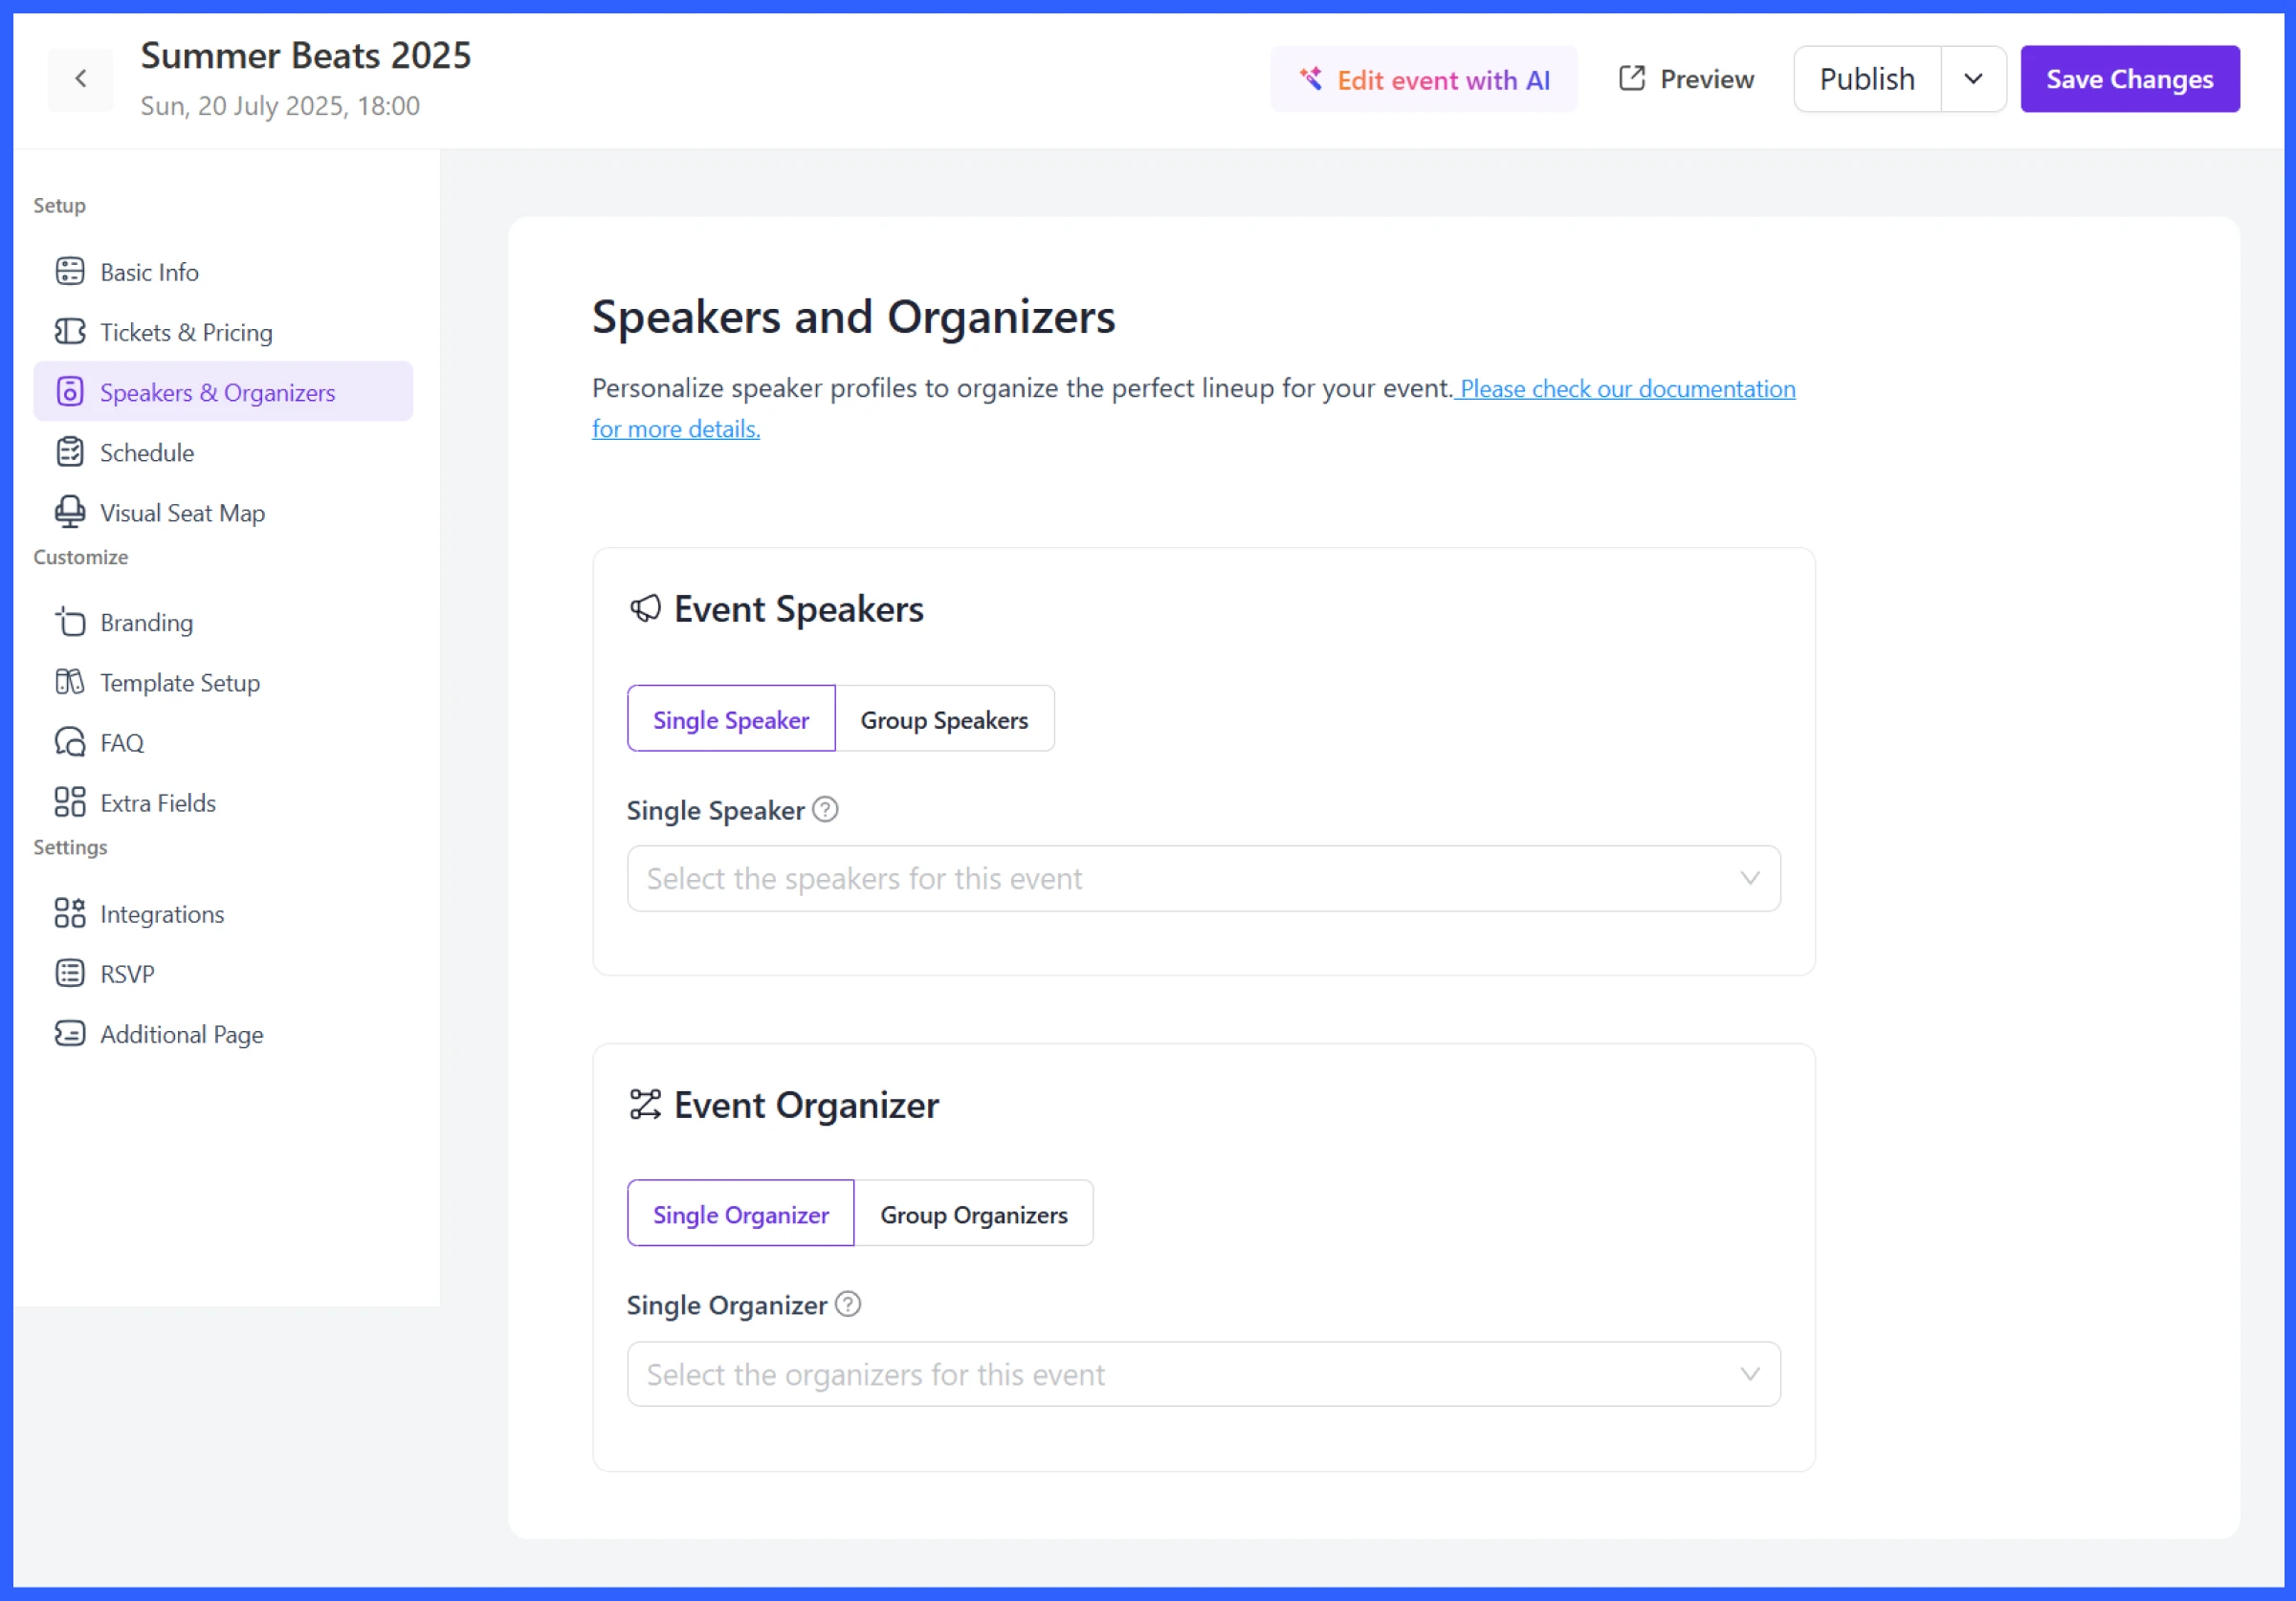
Eventin includes a built-in feature to manage performers. Under Event Speakers, you can choose between:
- Single Speaker – add solo artists
- Group Speakers – add band names or multiple performers
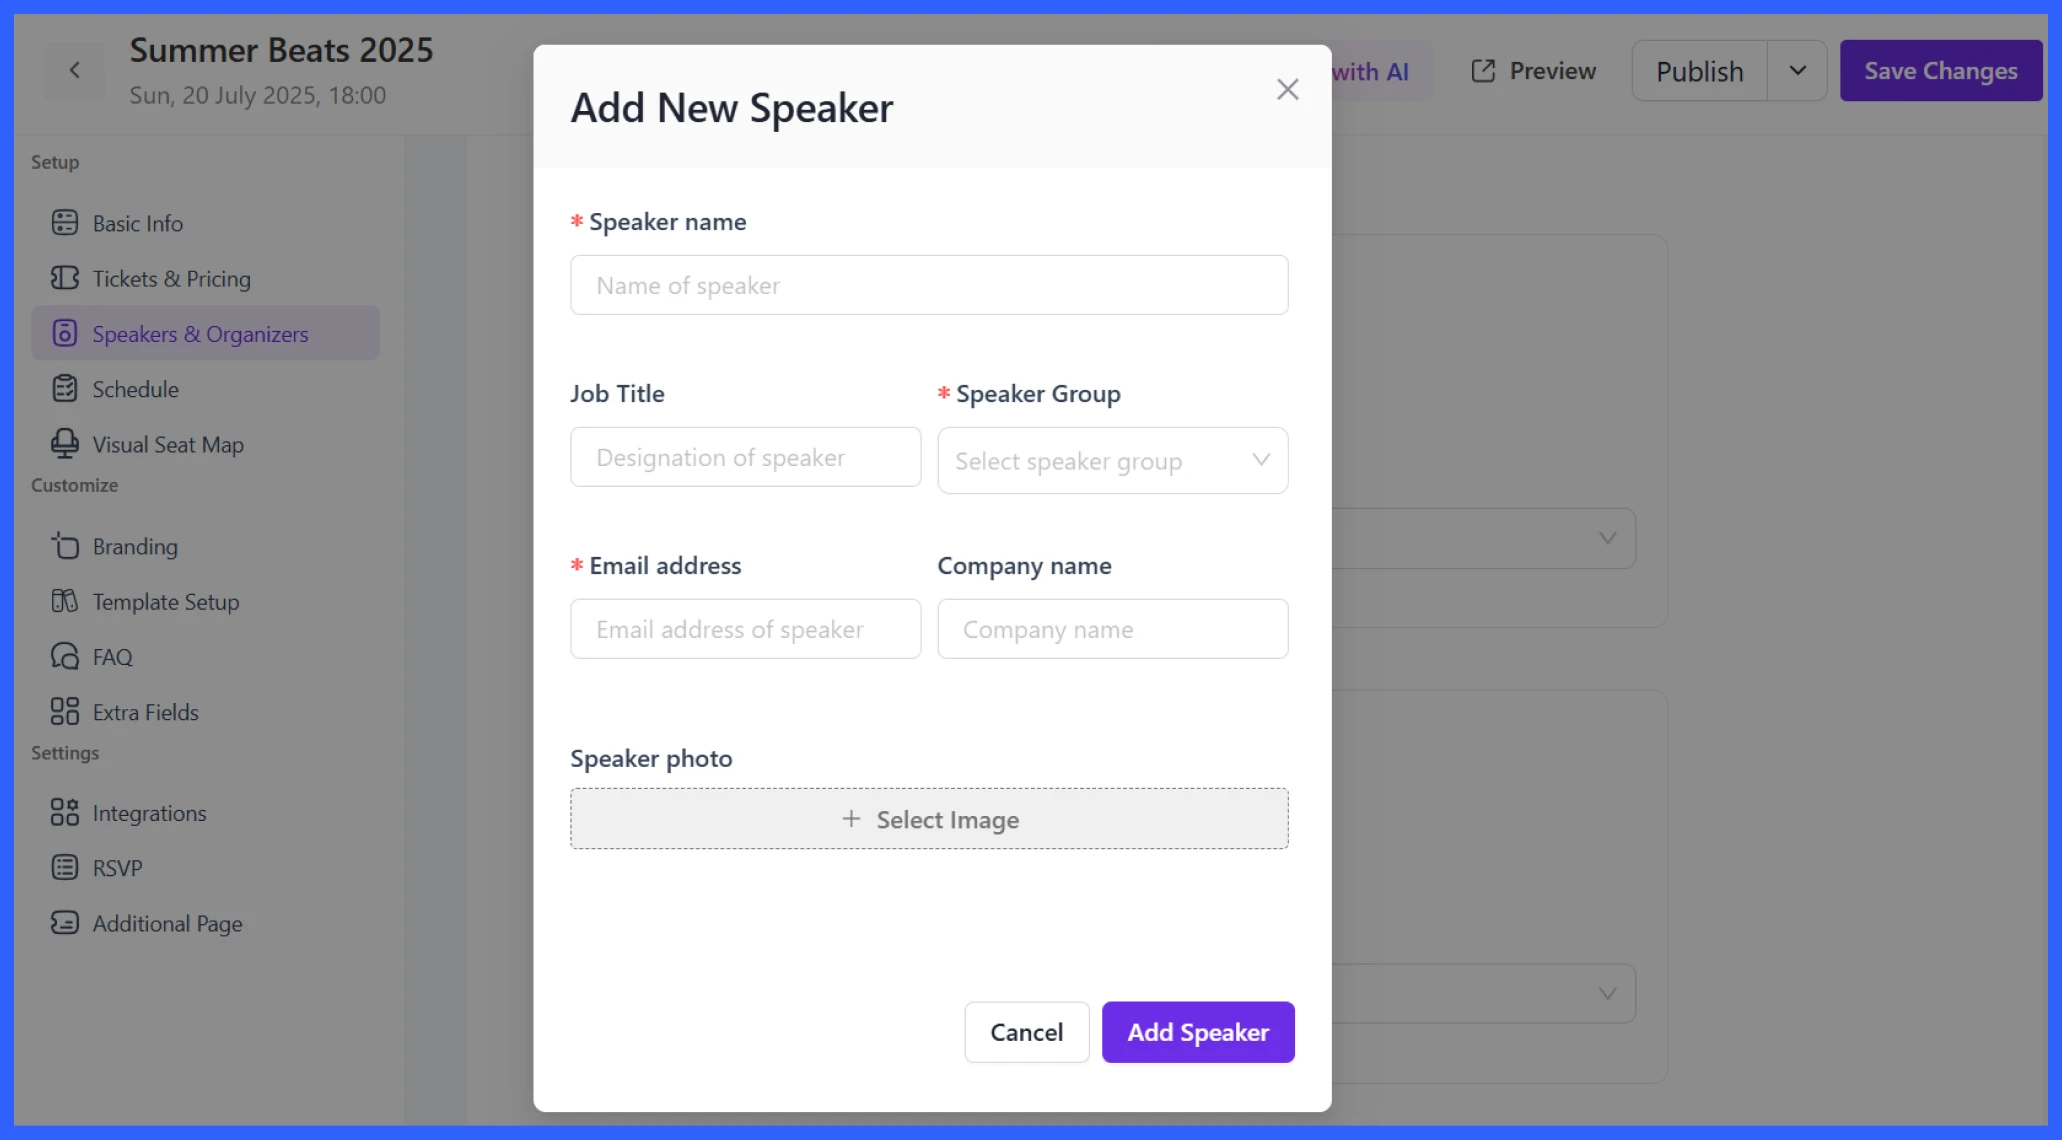
Each artist’s profile can include a name, job title, speaker group, photo, company name, and email, so your attendees can see who’s performing and learn more about them.
You can also assign:
- Single Organizer – great for small shows
- Group Organizers – ideal if you’re co-hosting or running a multi-stage event
This section keeps your lineup organized and lets visitors know exactly who they’ll see on stage.

Add the concert schedule
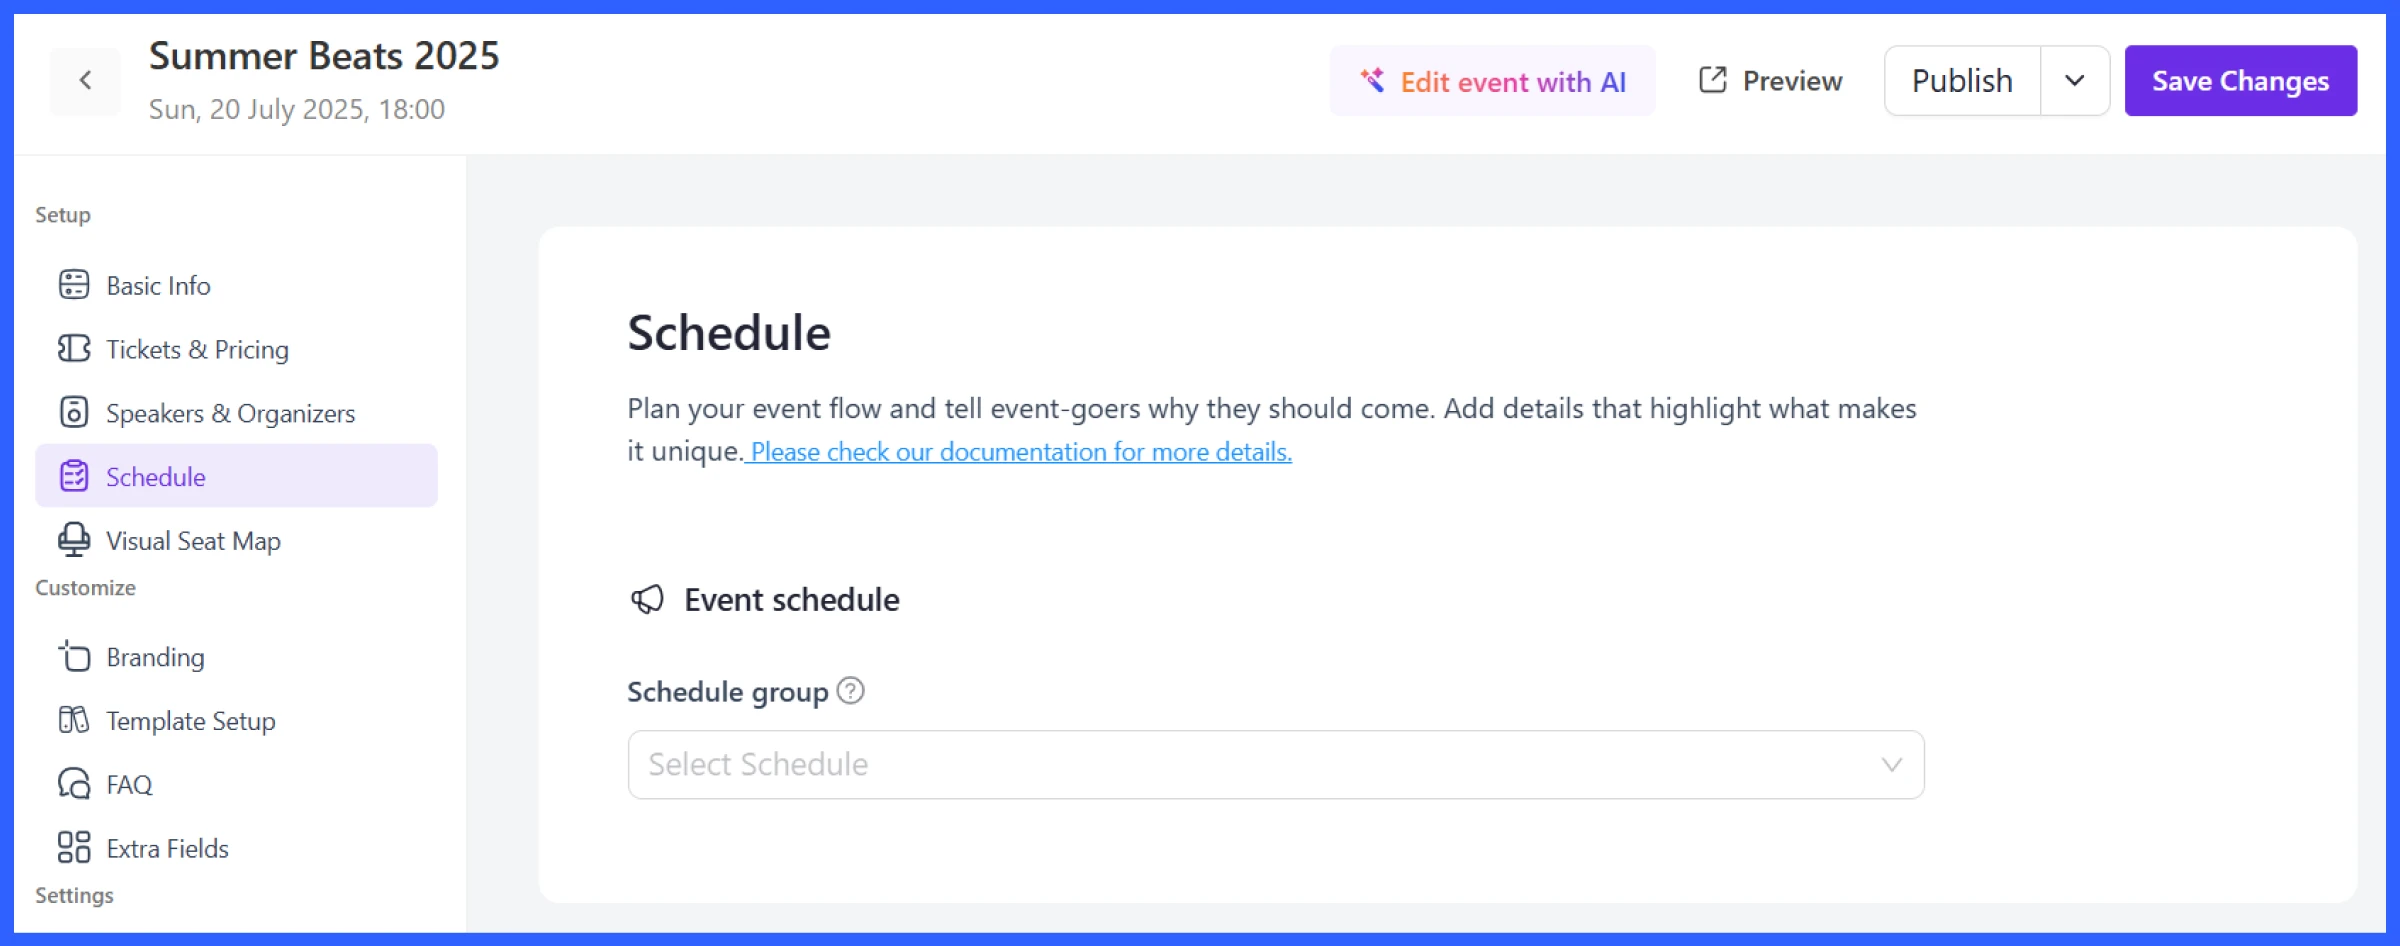
Once you’ve added performers, it’s time to create your concert timeline. Head to the Schedule tab and click Add Schedule to open the setup window.
Here’s what you can configure:
- Program Title: Name the session, like “Opening Act” or “Main Performance.”
- Date: Pick the event date for this performance block.
- Schedule Topics: These are individual segments or time slots under the program. For each topic, you’ll add:
- Topic Name: Example: “DJ Set by Alex” or “Band Performance: Echo Vibe”
- Start Time & End Time: Define when each act goes on and off stage
- Speaker: Choose the performer (from the Speaker profiles)
- Location: Useful if you’re using multiple stages or zones
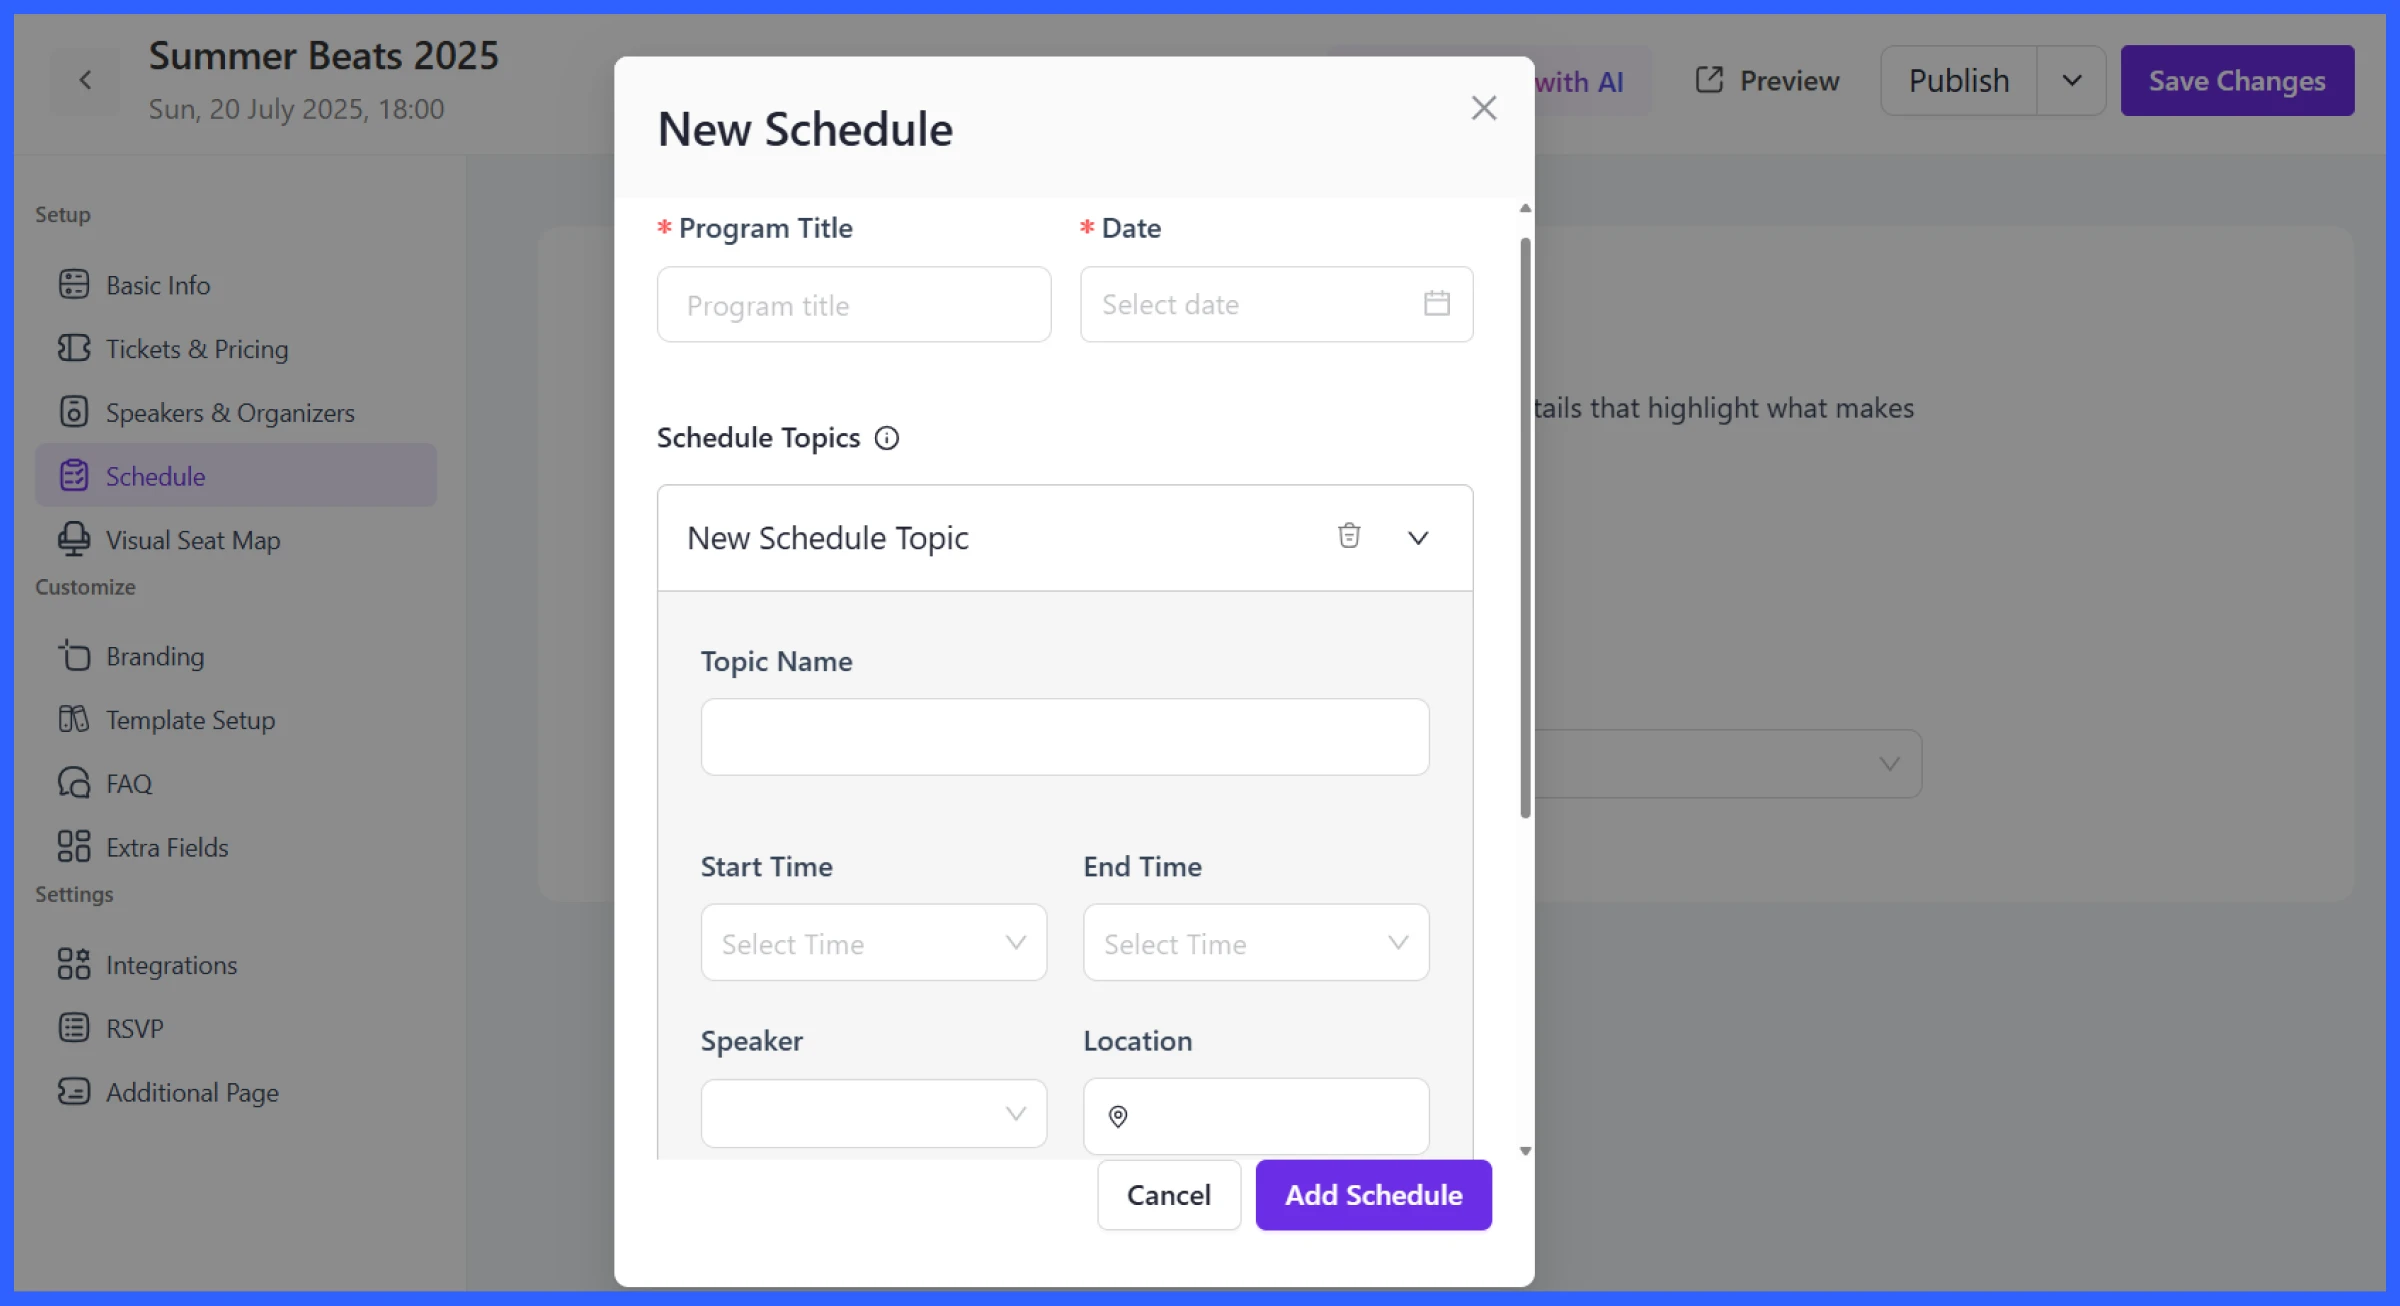
Once saved, the schedule appears on your event page, providing fans with a clear view of who’s performing and when.
Enable QR code check-in
For each ticket type, Eventin automatically generates a unique QR code, which is emailed to the attendee after the purchase is complete. At the venue, you can scan these codes using a mobile device or a QR scanner to check people in quickly and track attendance in real-time.
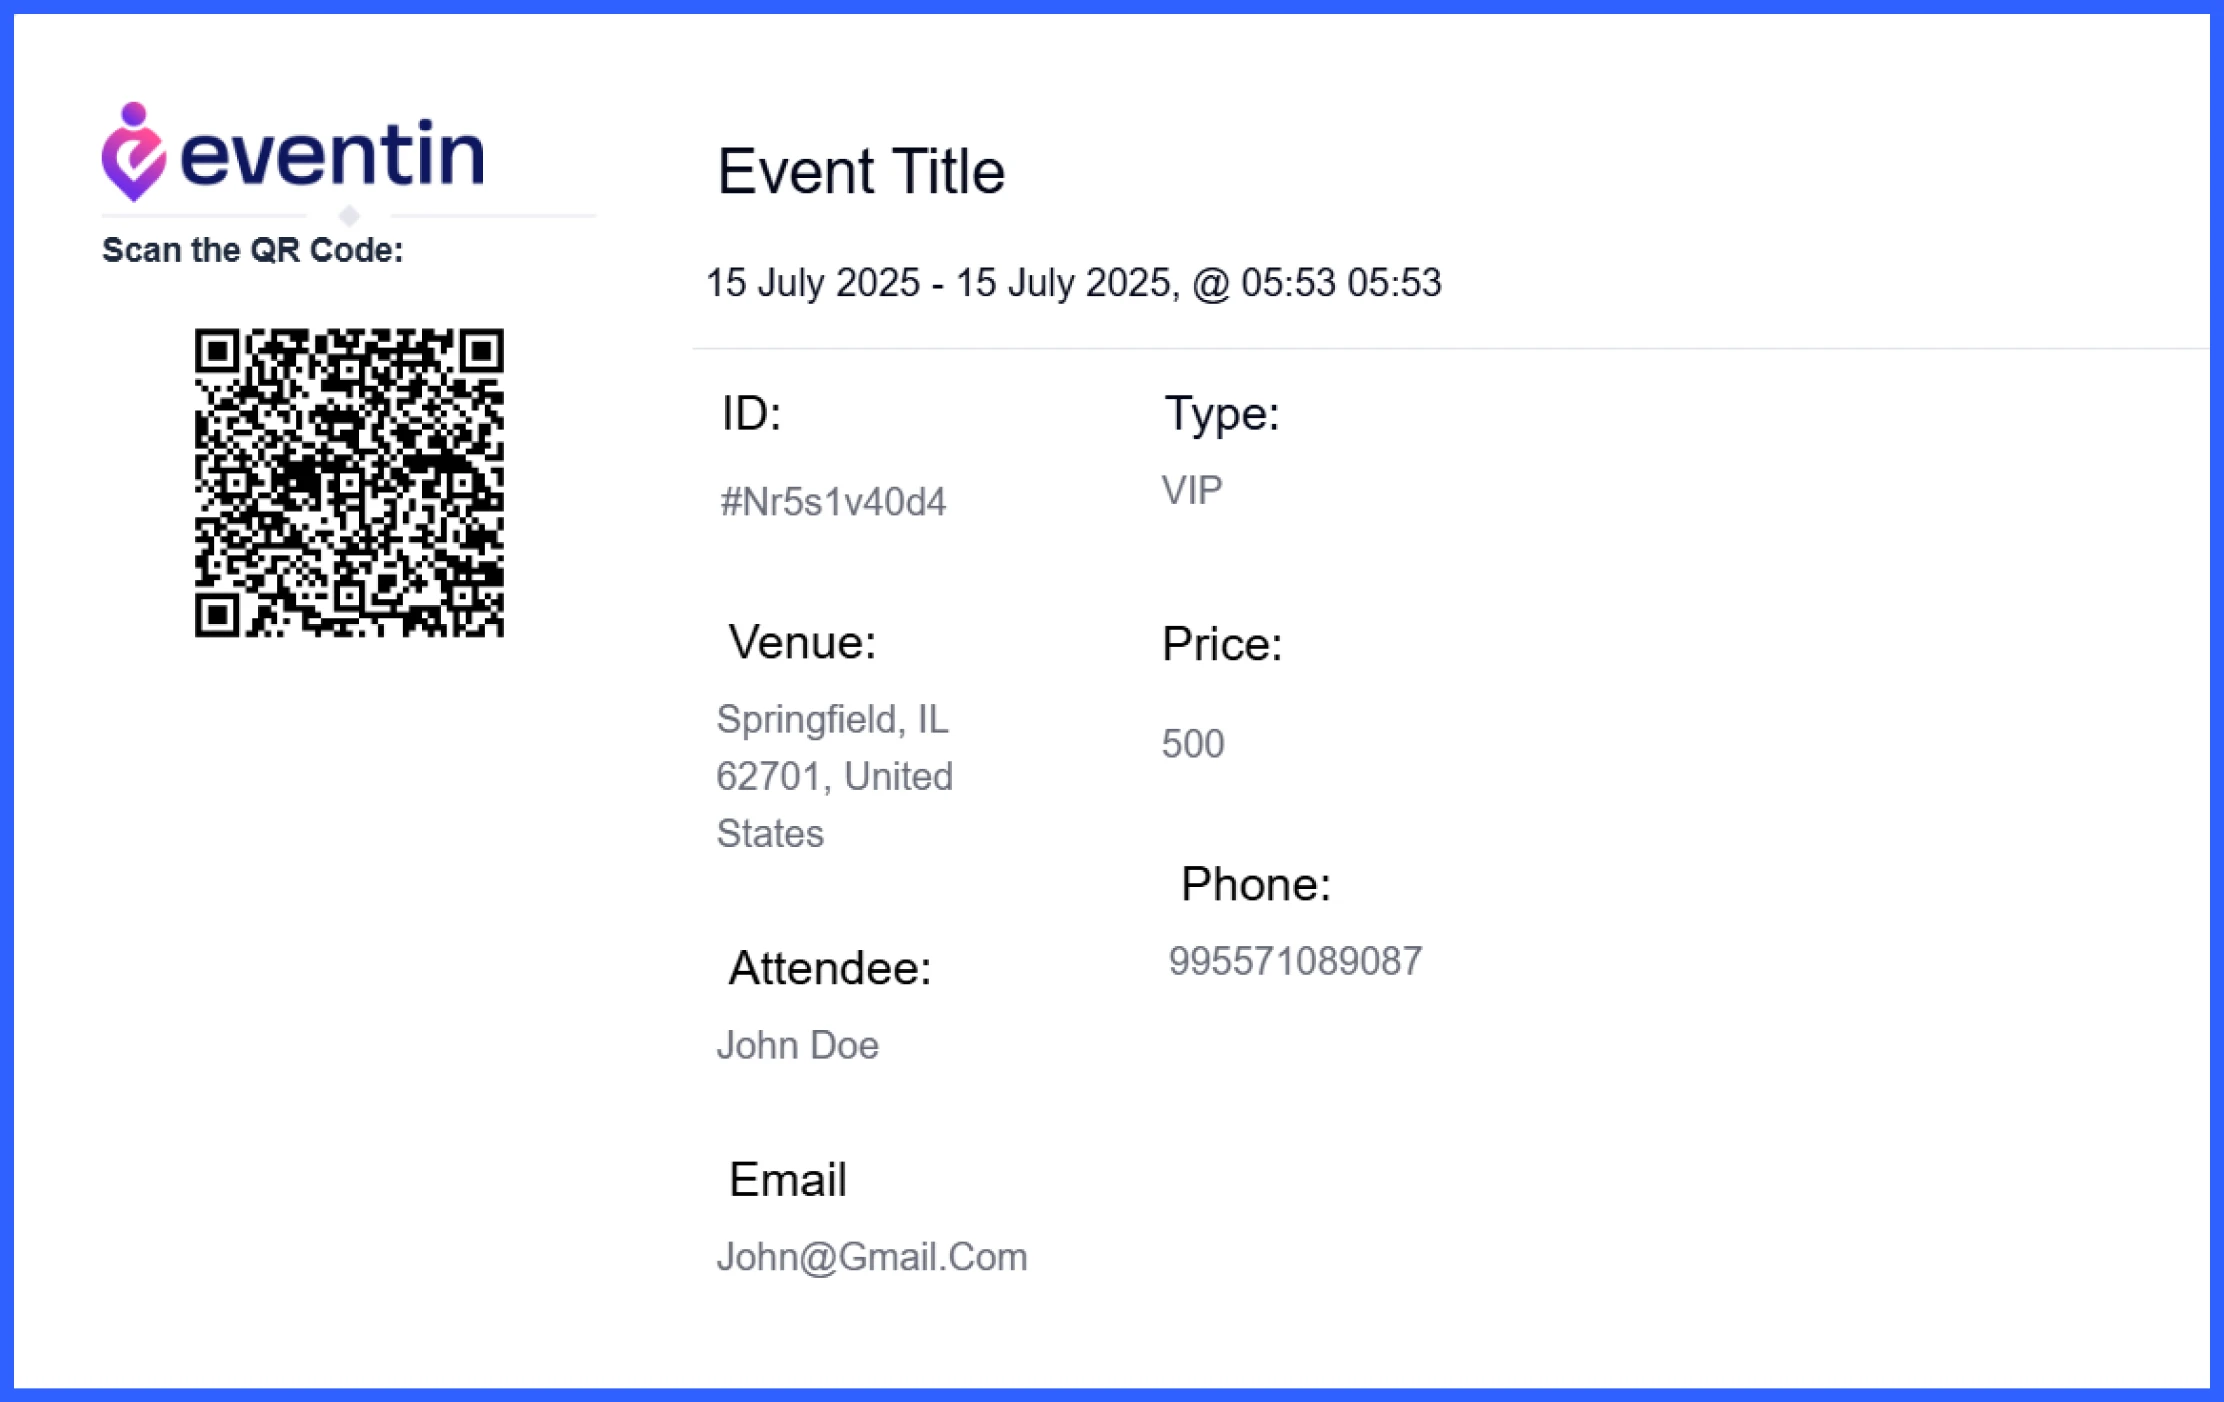
This is especially useful when managing large crowds or multiple entry points.
💡Read also: How to Create Seamless Event Registration with Eventin
Add branding
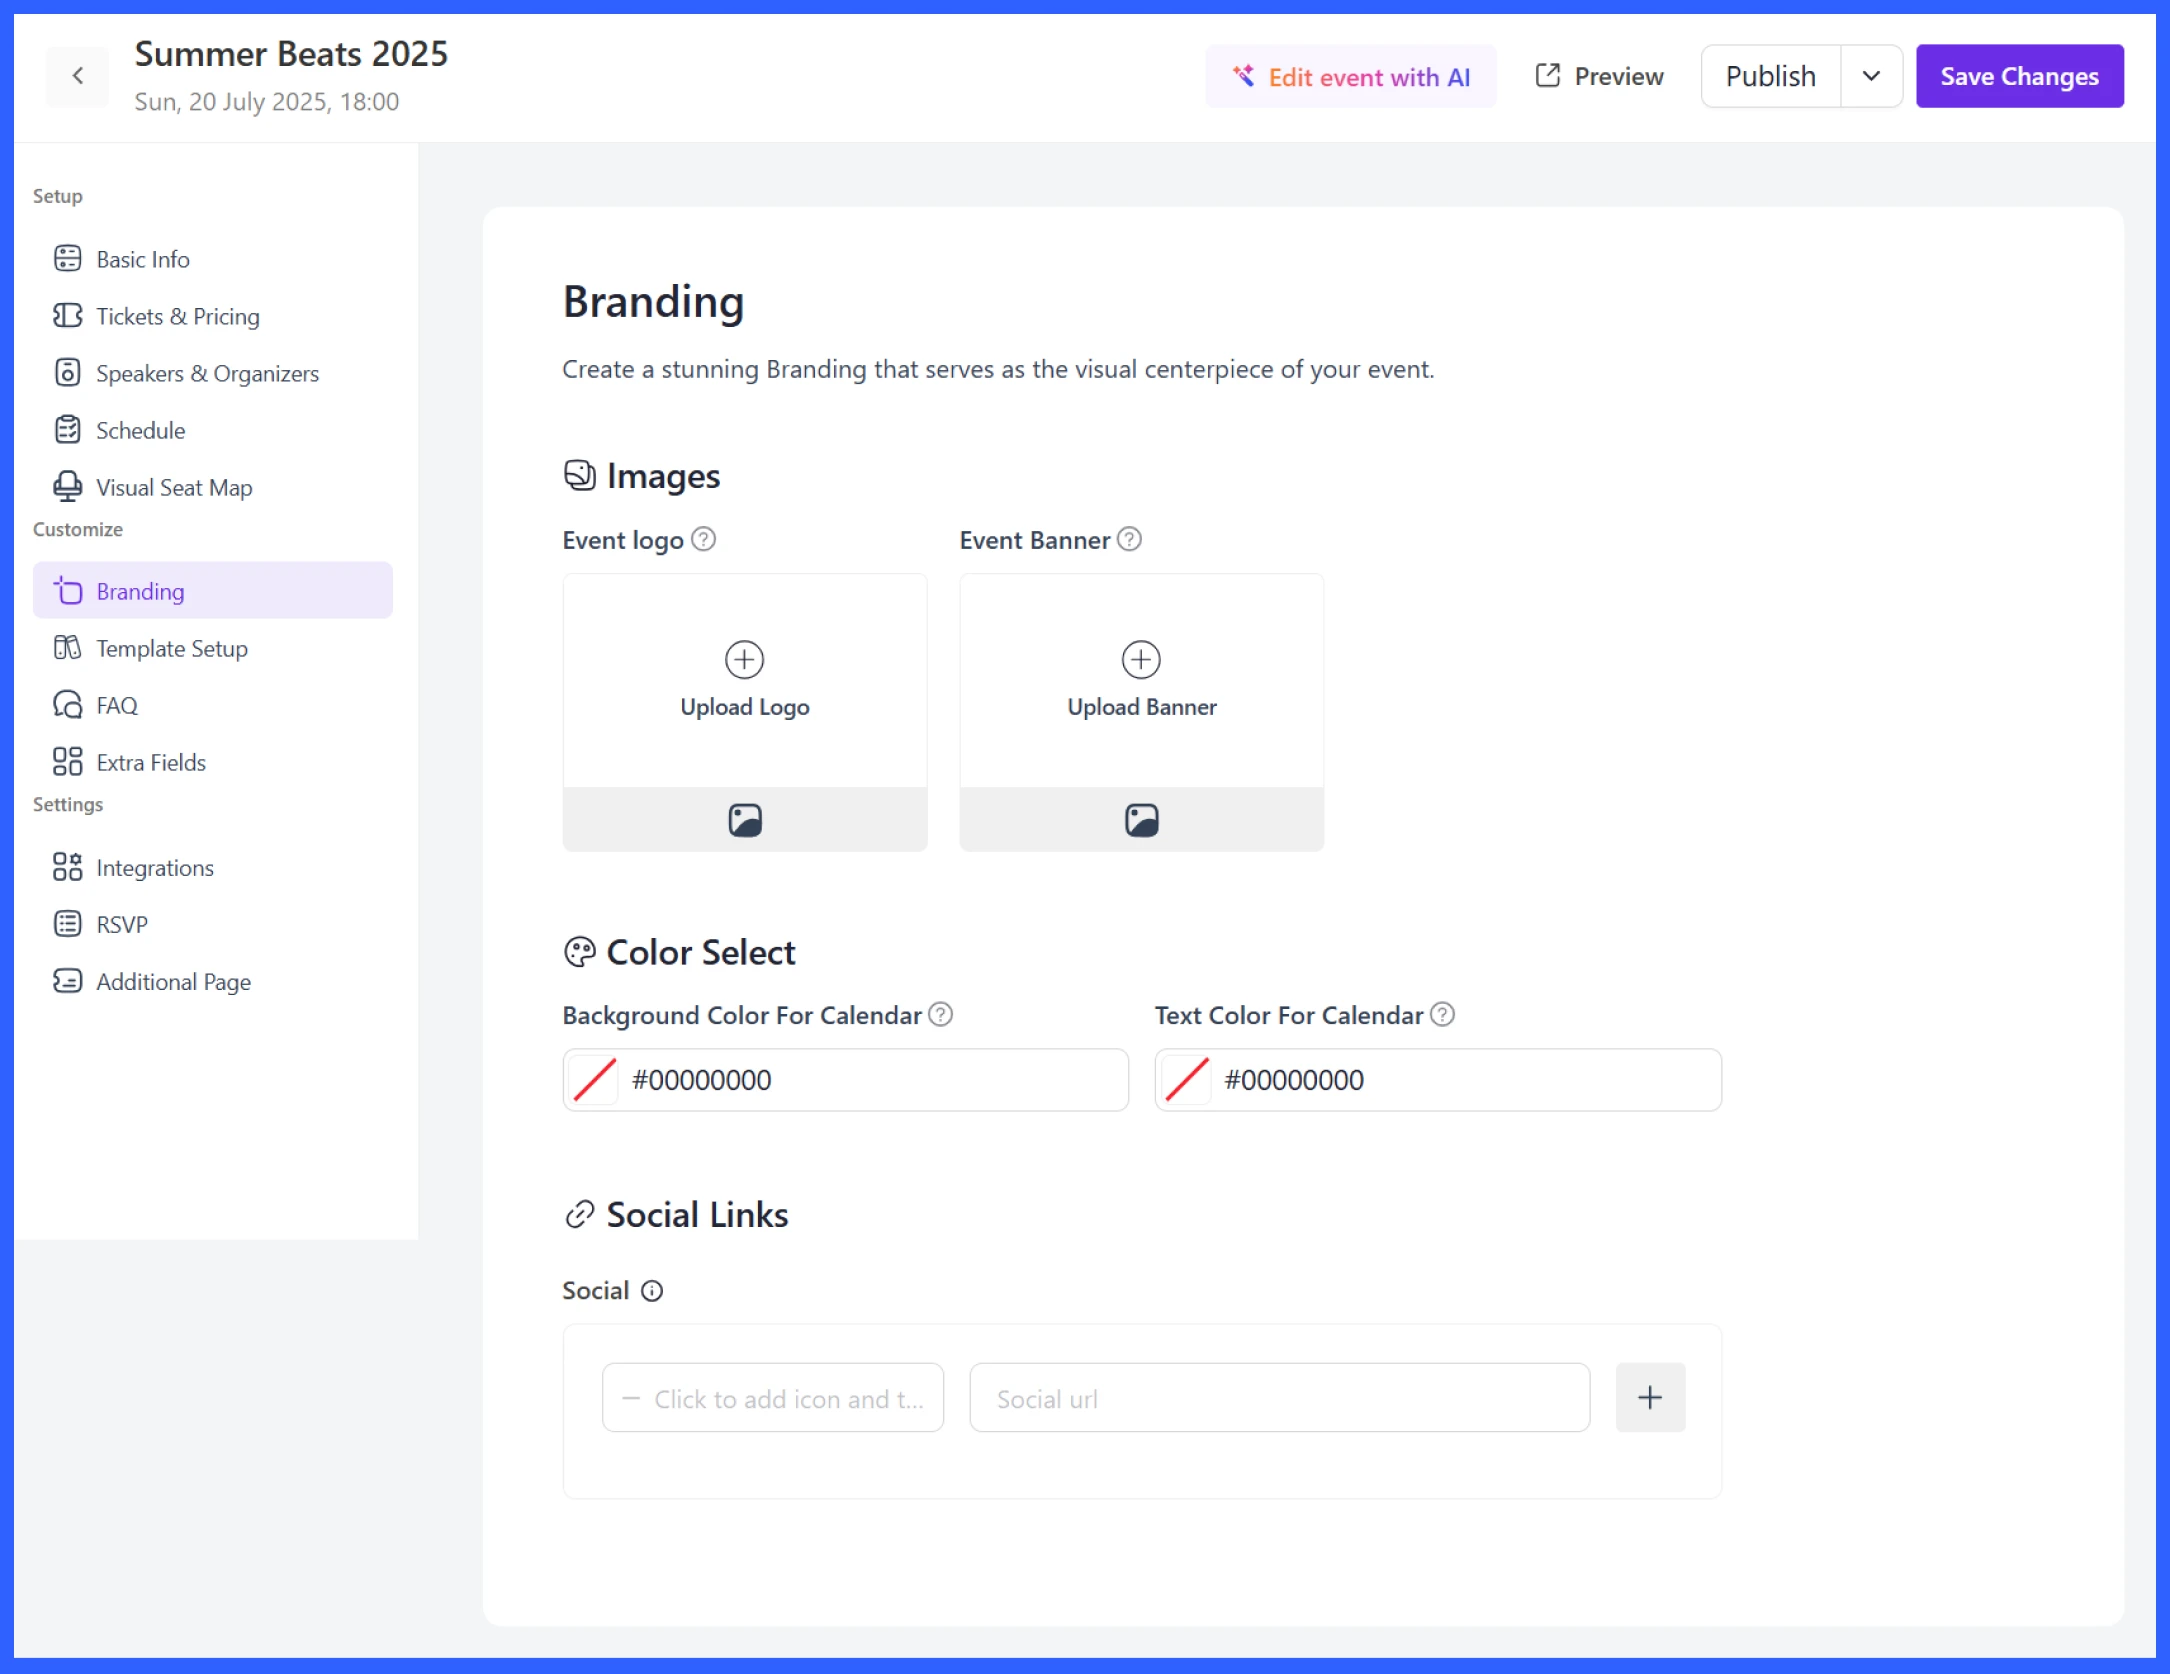
Eventin lets you easily brand your concert. You can upload your event logo and banner, set custom colors for your event calendar, and add social media links to promote your event. This makes your event page look professional and consistent with your concert’s theme.
Customize the concert landing page
Your concert landing page is where everything comes together. So, when you create a concert landing page, it should reflect the vibe and details of your show.
To set this up, go to the Template Setup tab and choose from multiple ready-made templates. These templates are designed to look good and work well, even if you’re not a designer.
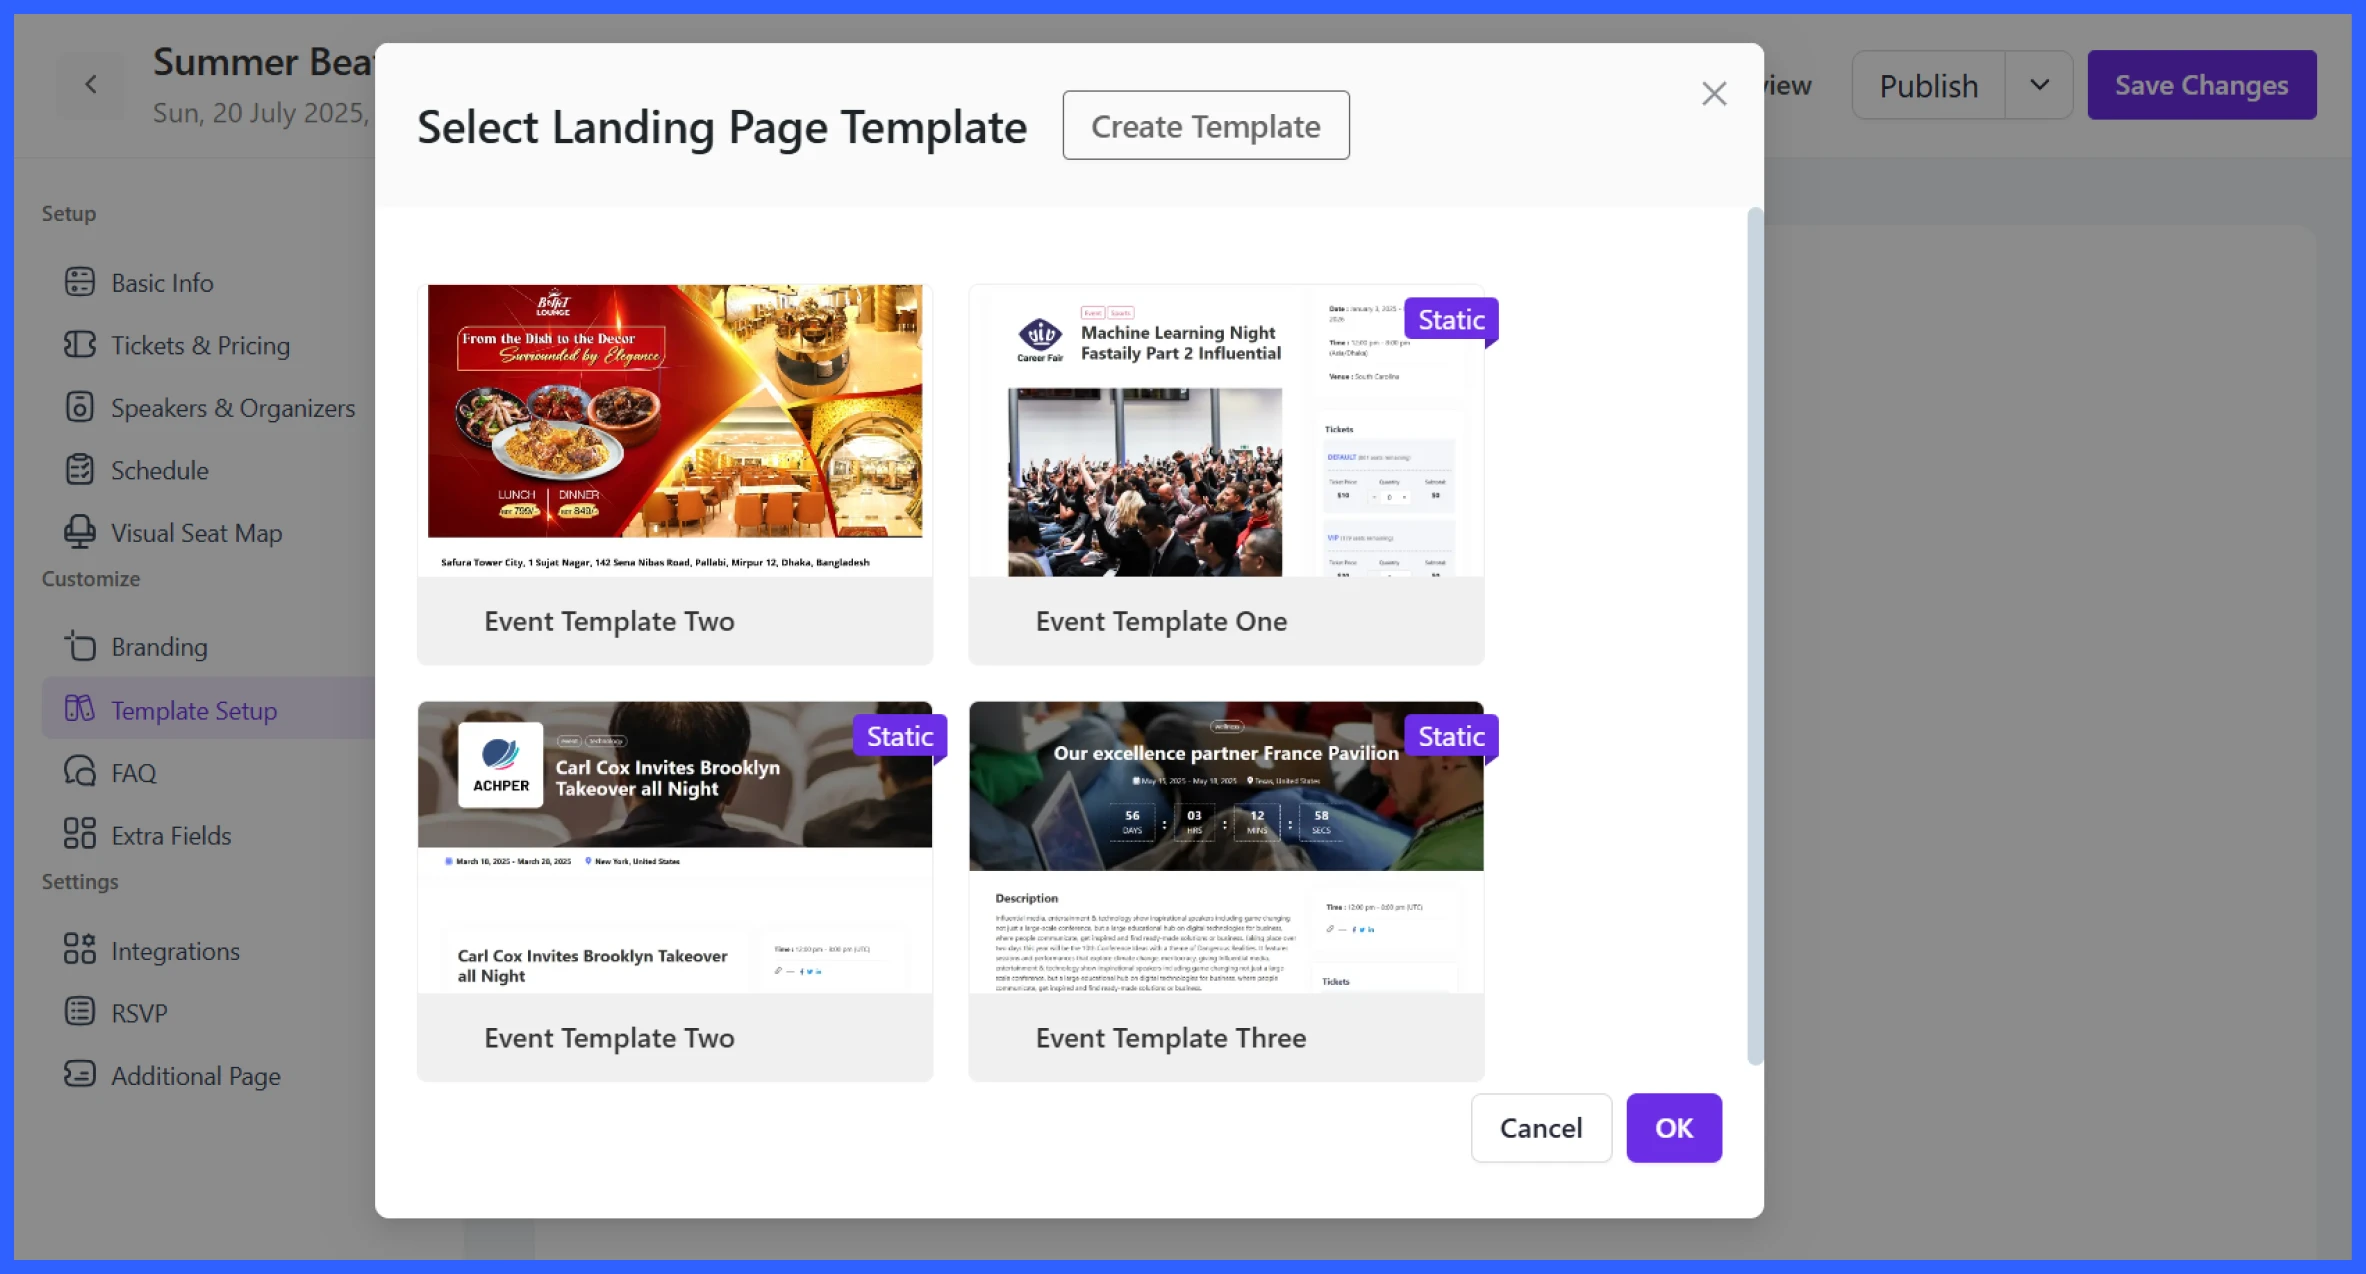
Once selected, your landing page will display:
- A featured image or banner
- Event name, date, time, and location
- Ticket types and prices (with quantity selector)
- Add-to-calendar buttons
- Performer details with photos and bios
- A teaser video or promo content
- Full schedule with time slots
- Organizer profiles
- Related upcoming events
- Social media sharing options
- A “Join Attendee List” call-to-action
You can preview the page before publishing and make edits at any time. If you want complete control, open the Template Builder. This gives you a drag-and-drop interface where you can:
- Add blocks like images, headings, lists, or galleries
- Adjust styling (border radius, padding, colors)
- Set custom background images or colors
- Control layout width and section spacing
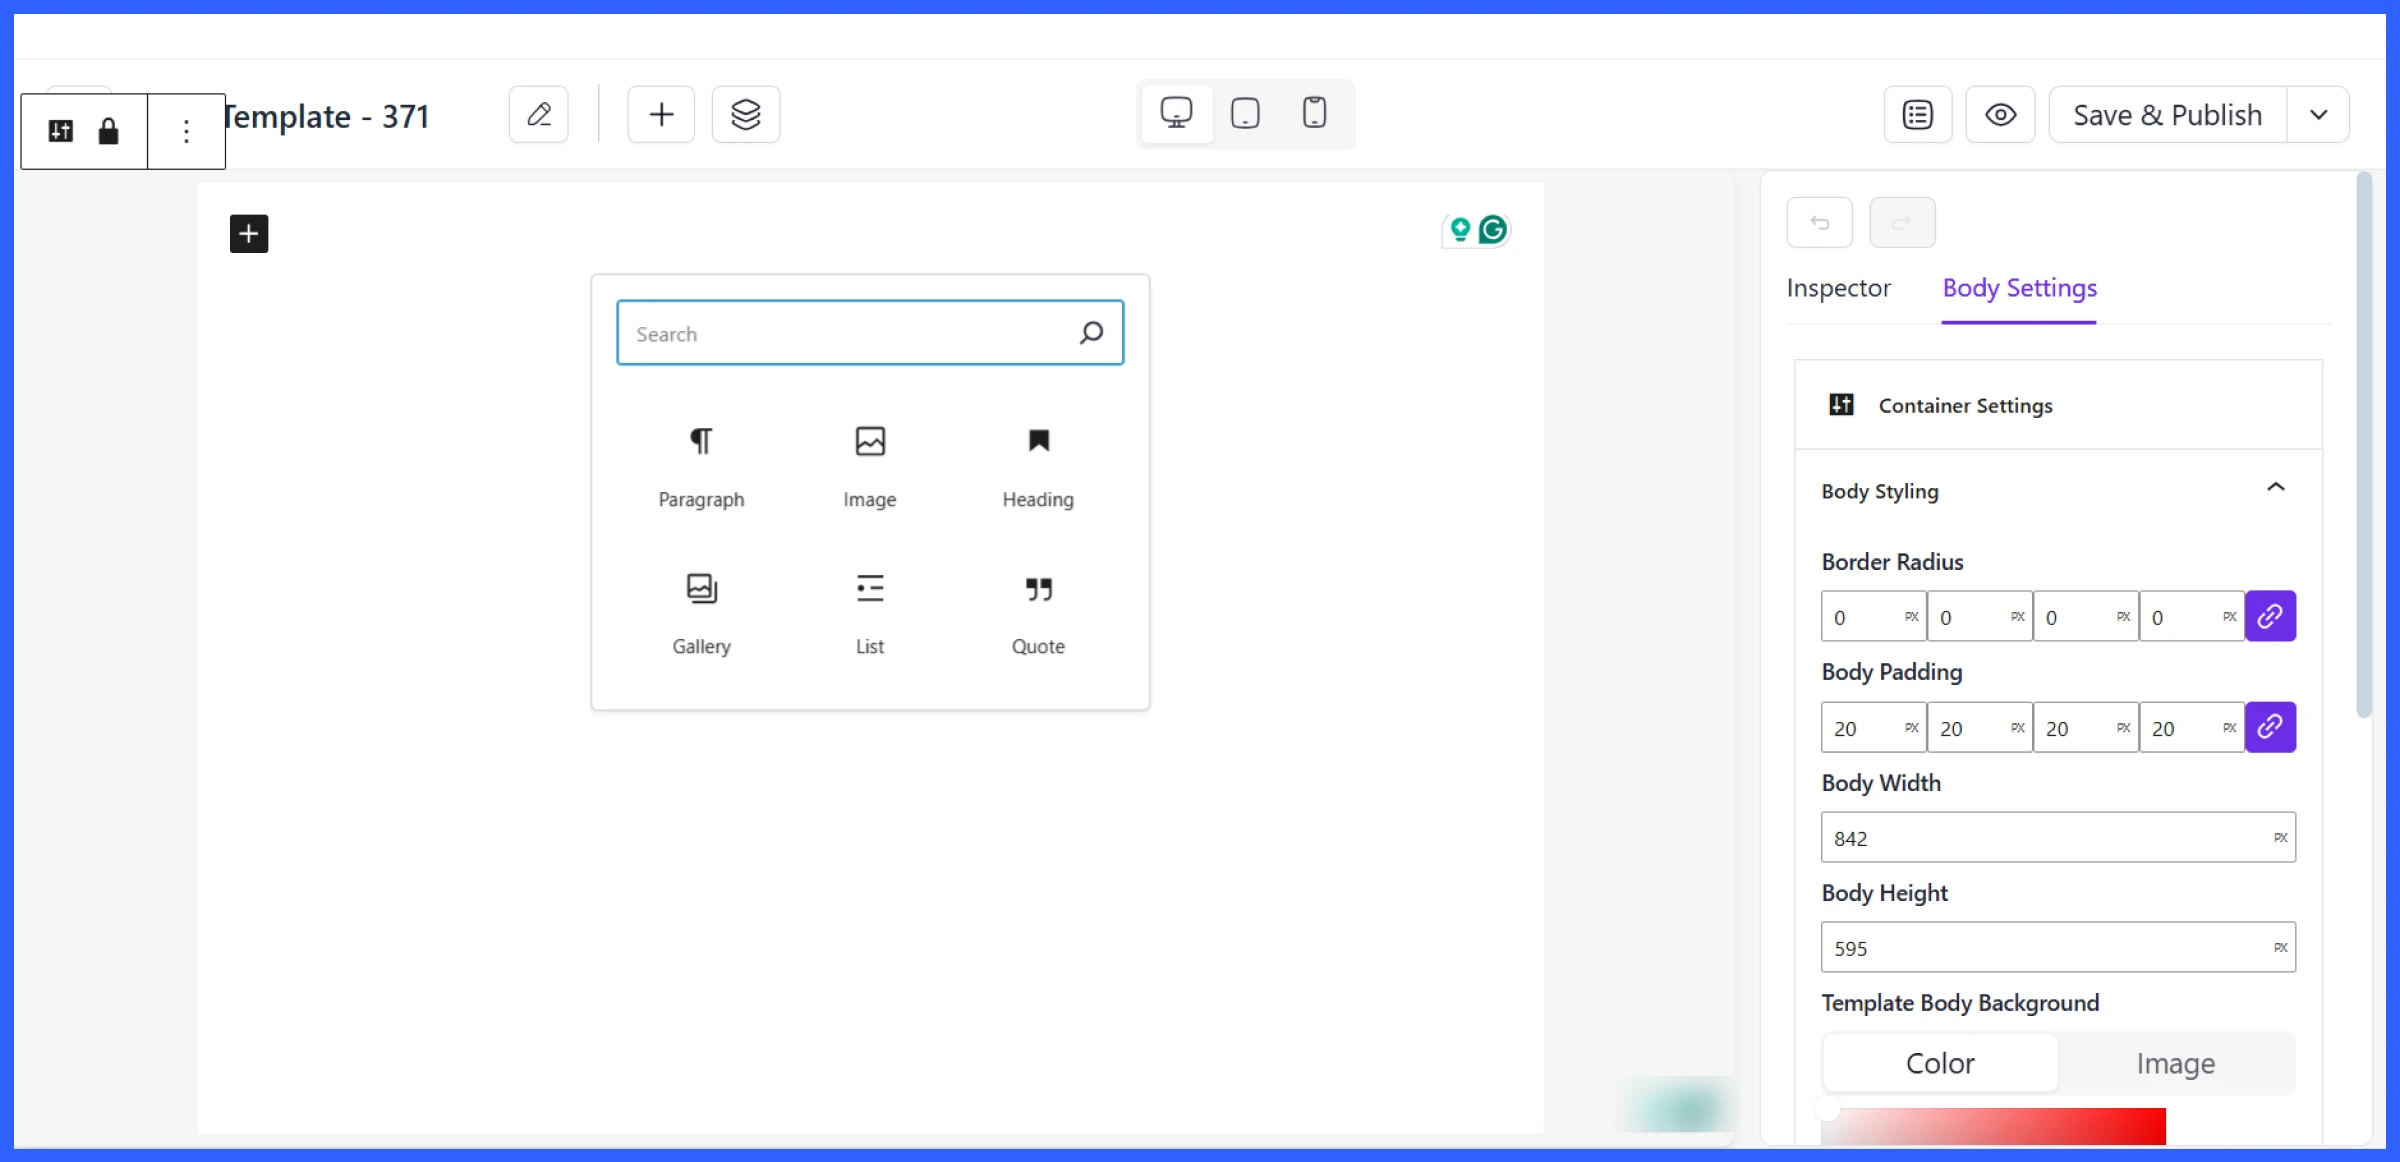
This is ideal if you have a unique concert brand or want to match an existing theme. Once you’re done, just hit Save & Publish.
💡Read also: How to Design a Custom Event Landing Page
Email notifications and reminders
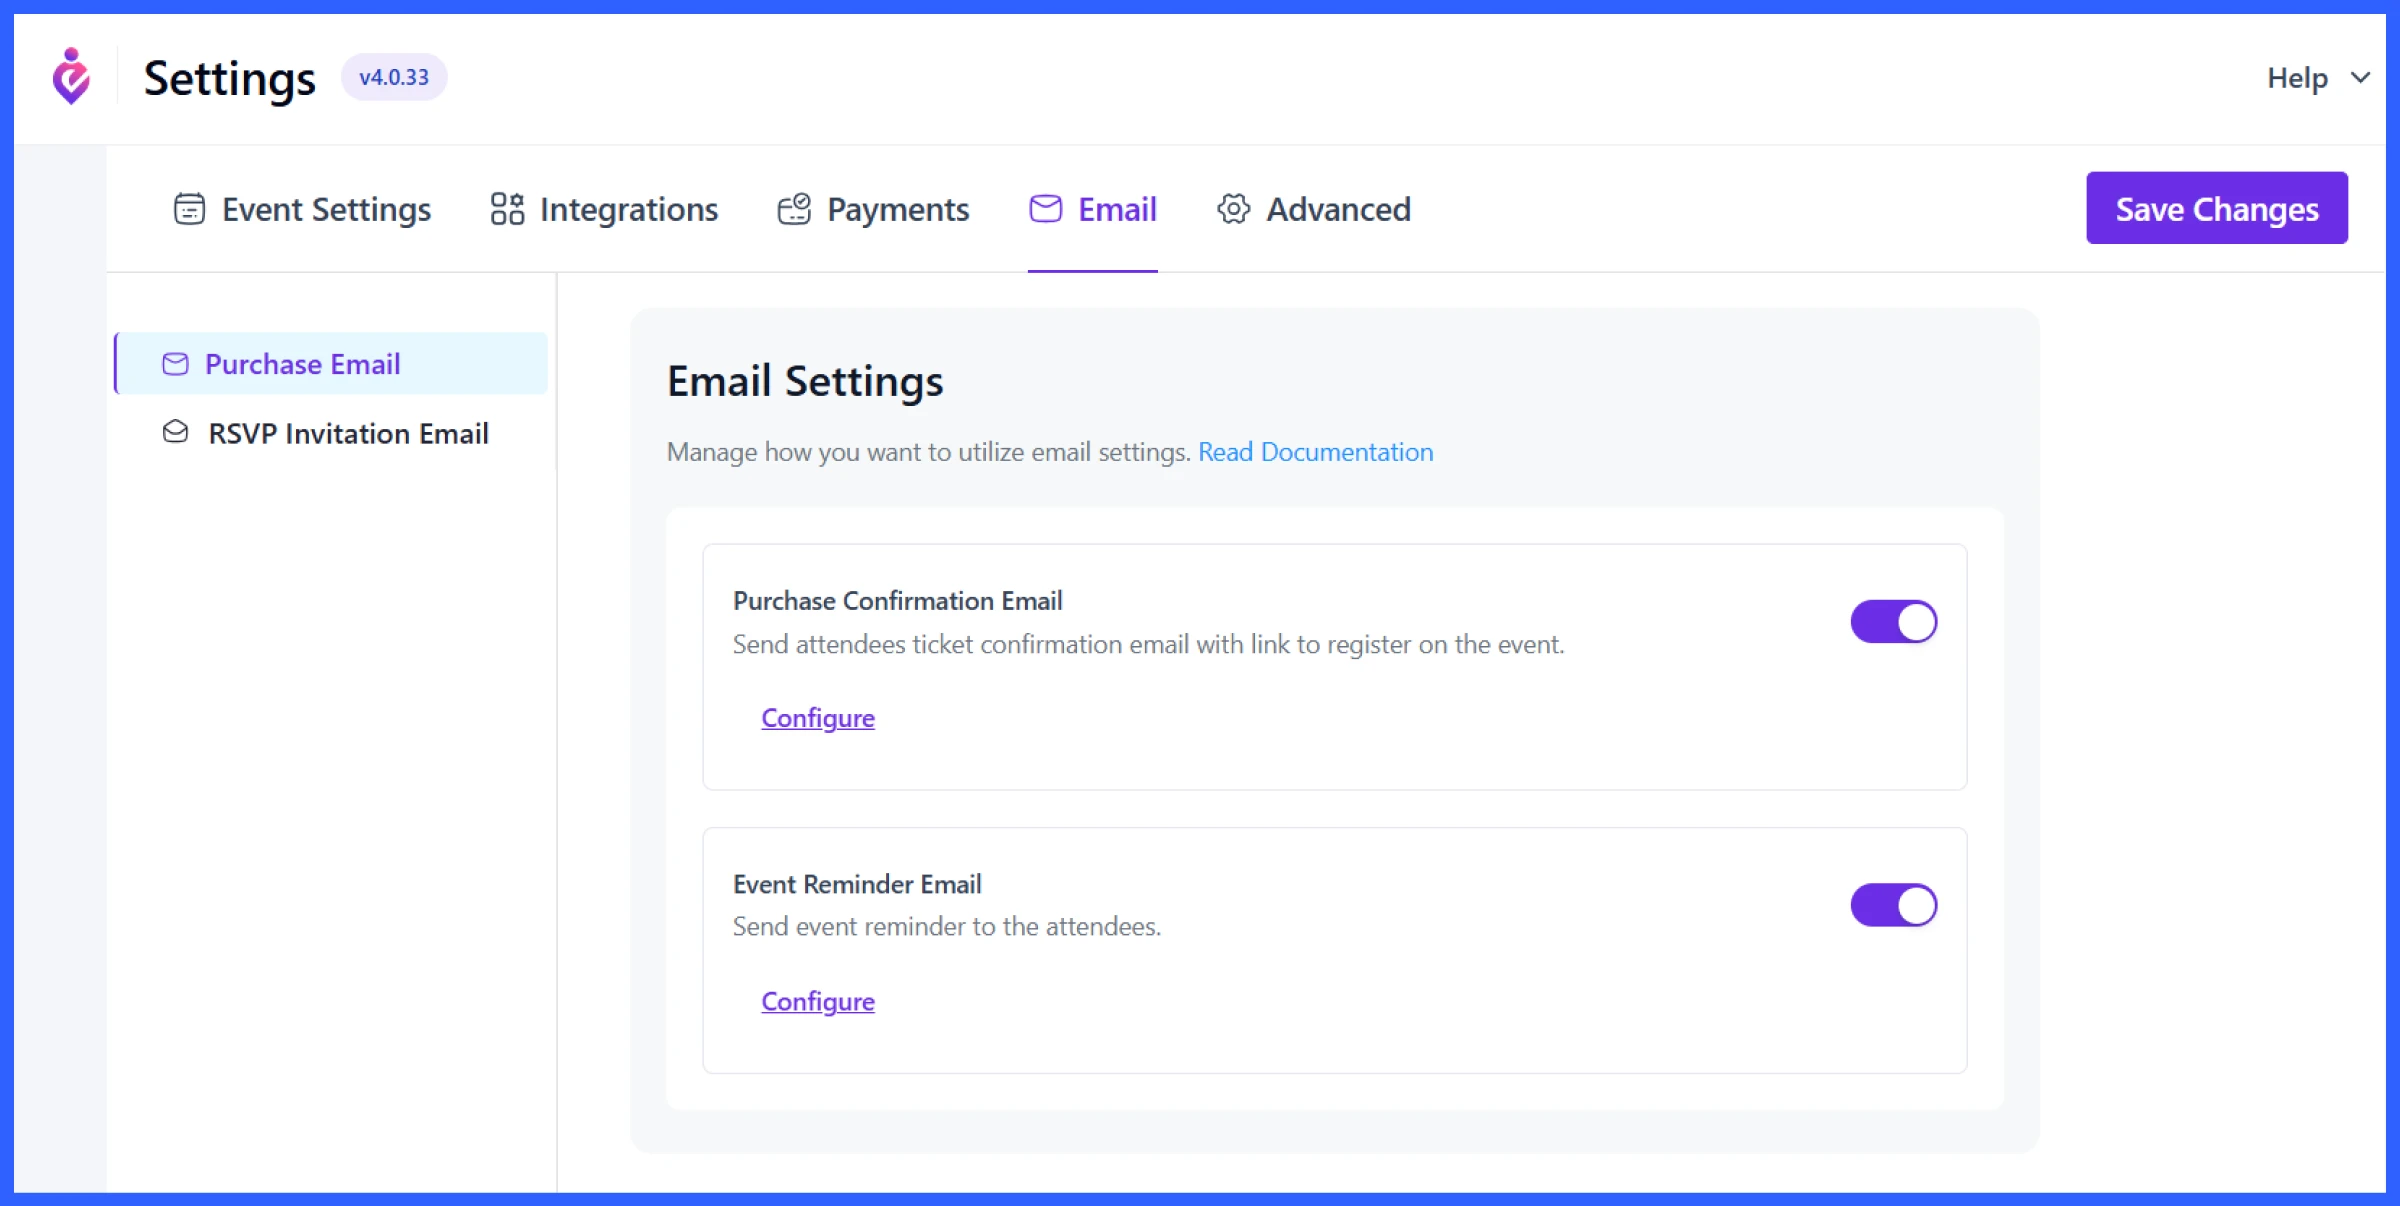
From your dashboard, you can enable automated emails to confirm ticket purchases, send reminders before the event, or follow up after it ends. Simply go to Settings > Email and enable two important options:
- Purchase Confirmation Email: This is sent right after someone buys a ticket. It confirms their order and includes a link to view or register their ticket.
- Event Reminder Email: Set this to go out a day or a few hours before your concert. You can use it to share important information, such as entry time, gate number, parking tips, or last-minute changes.
Click Configure under each option to customize the message. You can change the wording, add branding, and ensure it aligns with your event’s tone.
Sync with the calendar and set the payment method
If you’re running a hybrid or fully virtual concert, you can sync your event with platforms like Google Meet and Zoom.
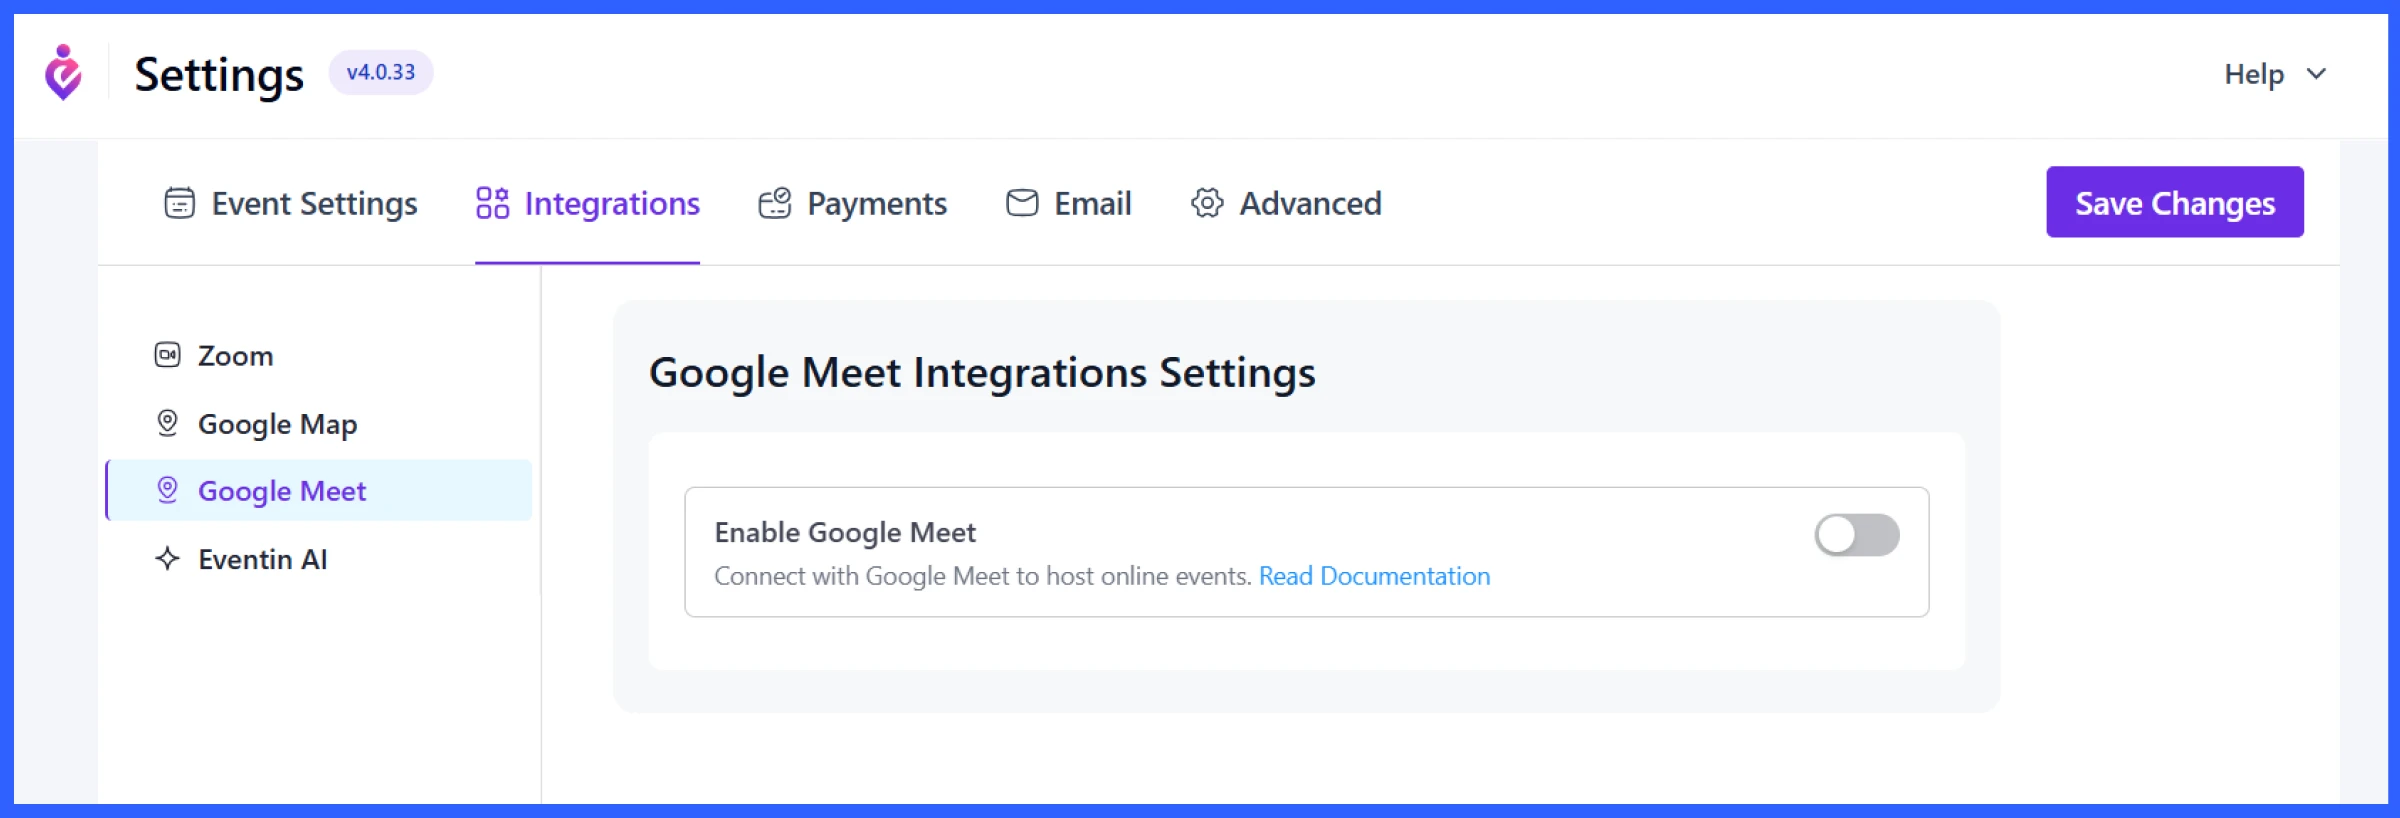
To enable this:
- Go to Settings > Integrations
- Choose Google Meet or Zoom
- Toggle the switch to connect your account
Once linked, your attendees can join virtual concerts directly from their confirmation email or calendar.
To collect payments for tickets, go to Settings > Payments. You can enable:
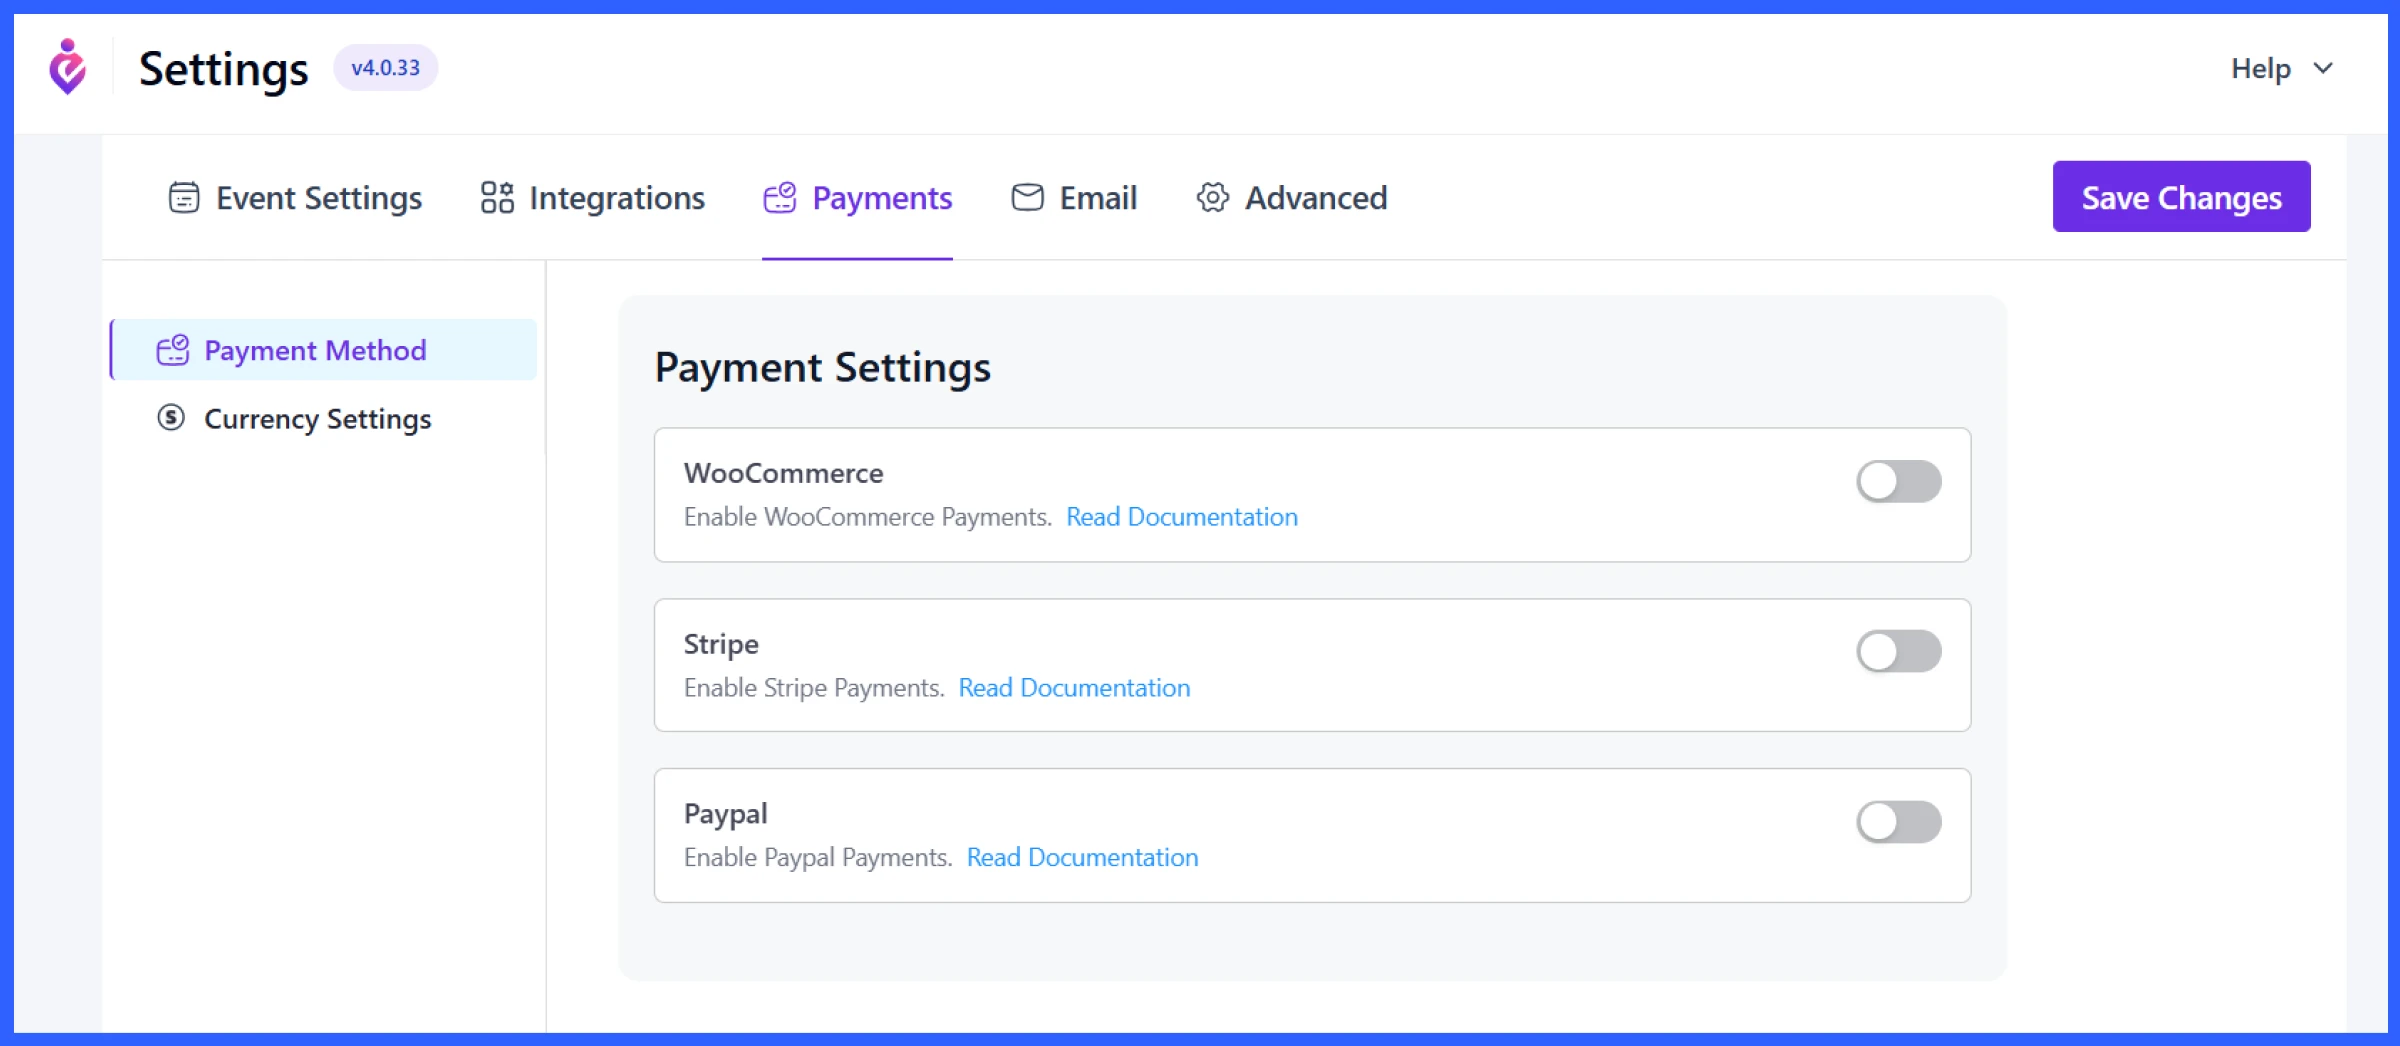
- WooCommerce: For full store integration
- Stripe: Accept credit/debit cards globally
- PayPal: Add a popular and trusted payment option
Click to toggle each provider and follow the setup documentation if needed.
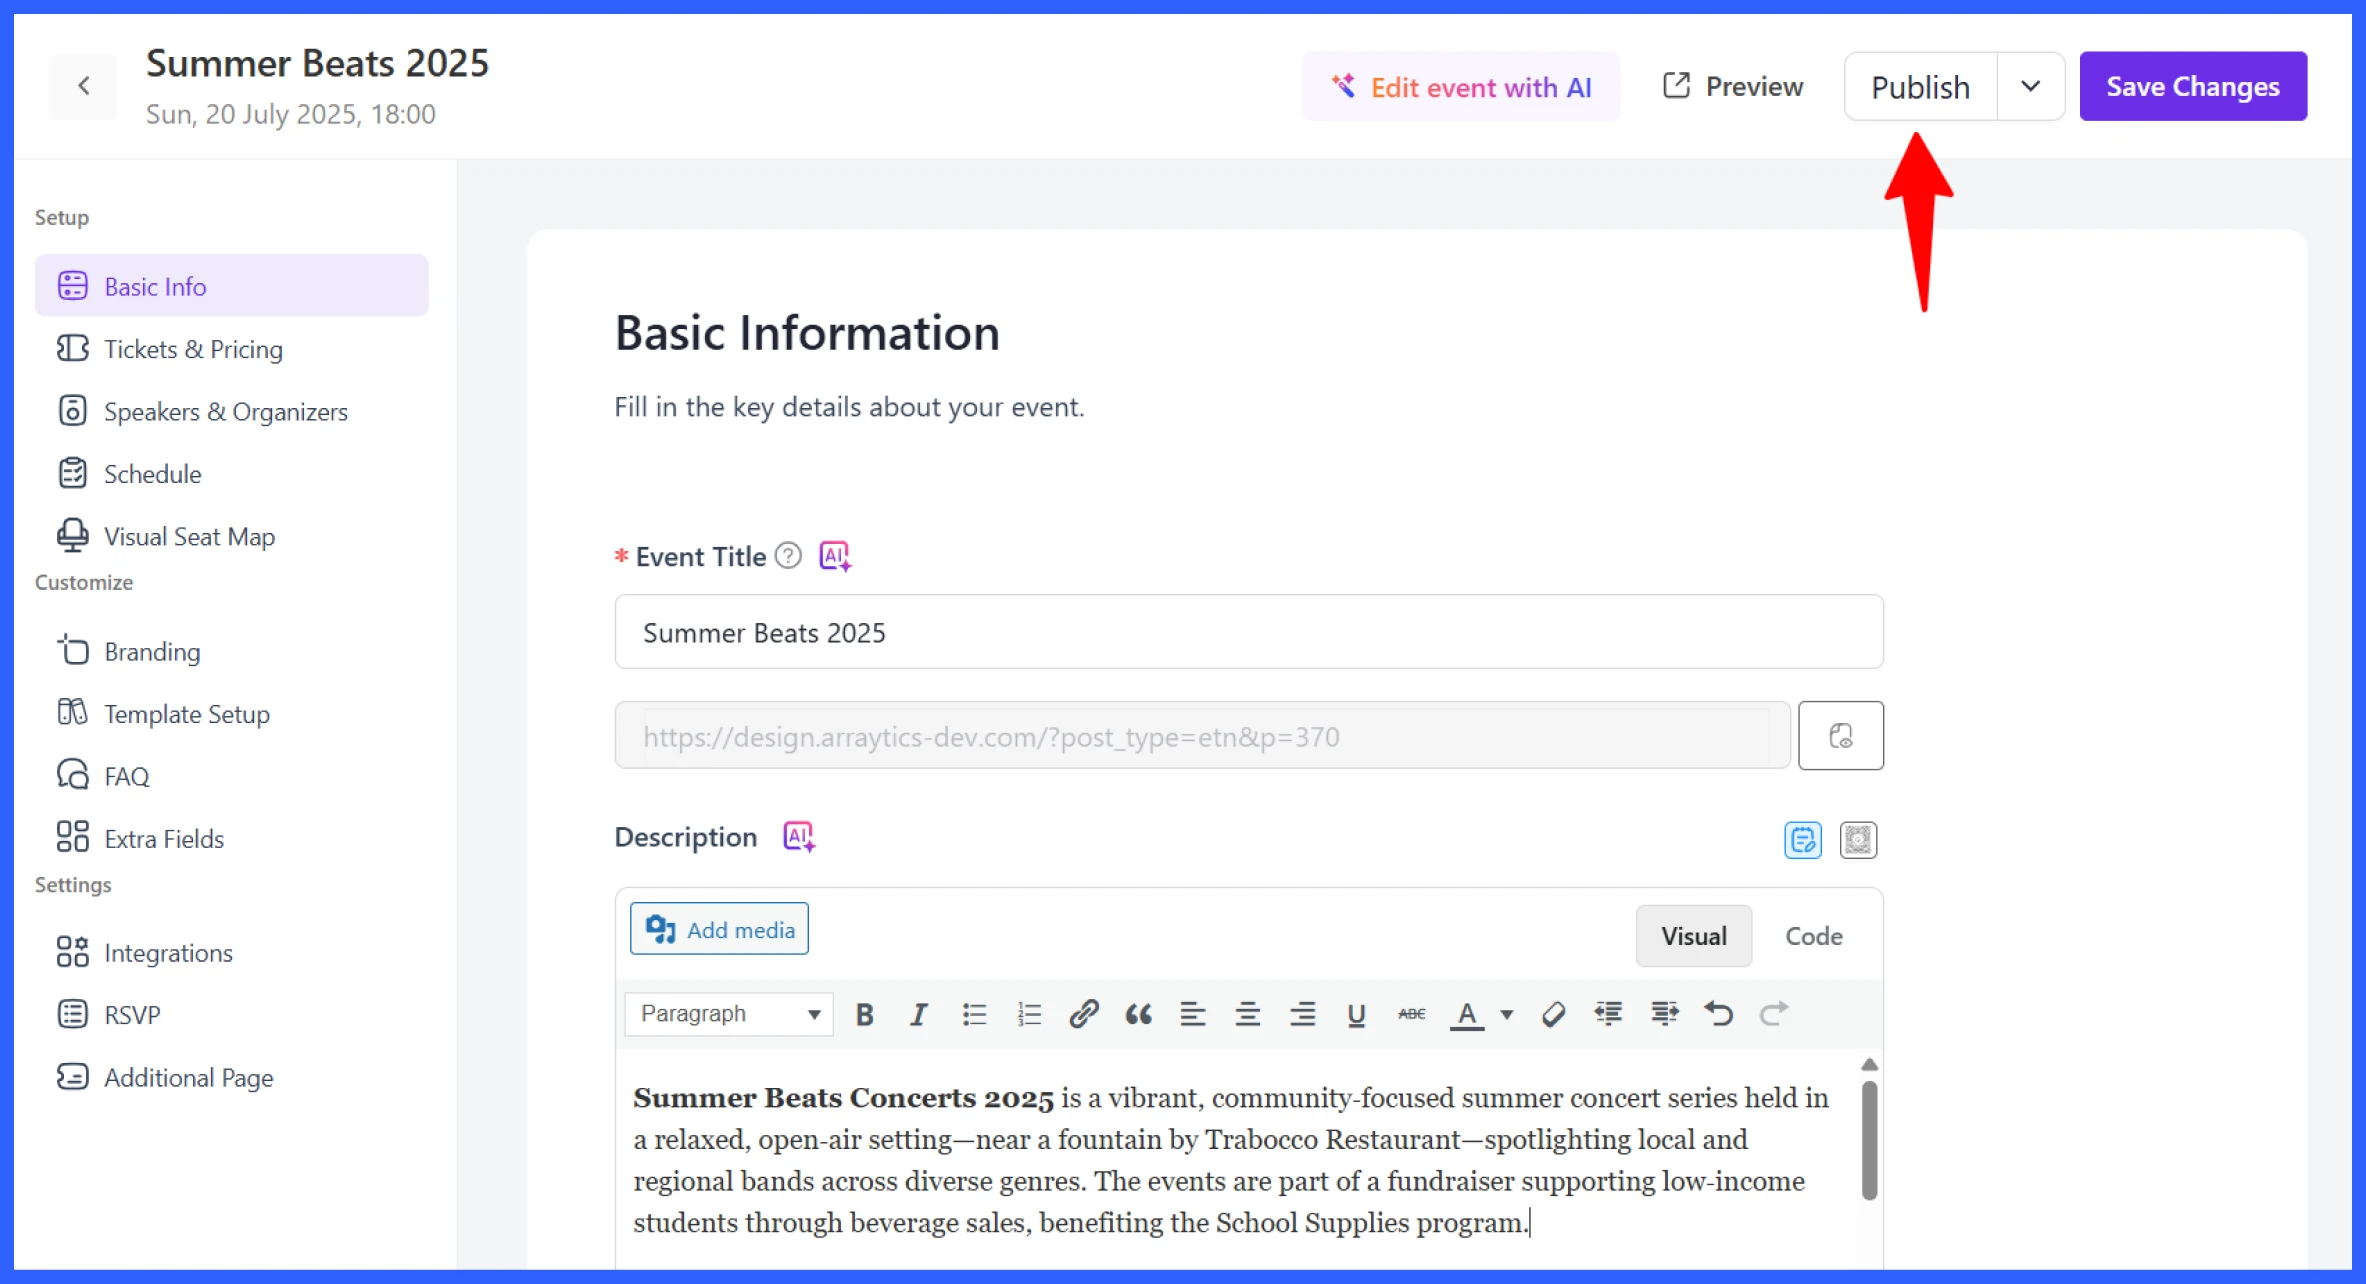
Publish the event
Once everything is set, your concert details, tickets, lineup, branding, and email reminders, just click “Publish” to make your event live on your site.
There are also numerous other features within Eventin that you can explore, including attendee lists, RSVP settings, custom fields, and more. Take your time and customize it to fit your concert best.
5 Pro tips for managing concerts smoothly
Once your concert is set up and published online, the next challenge is to make sure everything goes as planned. Here are some pro tips that can help you make things organized and efficient.
1. Promote your concert details on social media
Once your event page is live, don’t keep it to yourself. Share the link on your social channels, including Facebook, Instagram, X (formerly Twitter), and LinkedIn. You can also use the artist or sponsor pages to help promote it. Eventin’s landing page makes it easy for people to view the schedule, lineup, and purchase tickets immediately.
2. Automate with email reminders
Even with tickets sold, it’s easy for attendees to forget dates or miss important updates. That’s why the best solution is to set up reminder emails that go out:
- One week before the concert
- One day before, with arrival instructions or venue details
- A follow-up message after the event
This keeps your audience engaged and reduces last-minute confusion. It’s also a chance to remind people about items such as parking, entry rules, or opening hours.
3. Make entry fast with QR code check-ins
Long entry lines can frustrate attendees and delay the start of your show. Make sure to designate a check-in team and have them prepared with QR code scanners (or a mobile device with a scanning app).
It’s also helpful to have a plan in place for walk-ins or attendees who didn’t receive their tickets by email.
4. Track attendees and performance
Just organizing a concert isn’t enough; you must also keep track of performance statistics, such as ticket sales, total check-ins, and no-show rates. Also, if certain types of tickets sell out quickly or attendance drops during specific hours, you can use this information later.
5. Reuse the template for future concerts
Once you’ve completed one concert, save the layout, copy email templates, and maintain a checklist of what worked and what could be improved. It will be easier to manage things if you plan to host shows regularly or run a multi-date tour.
💡Read also: How to Get Sponsorships for an Event
Bonus: Use Eventin + multivendor setup for festival-style concerts
If you’re running a large concert with multiple stages, organizers, or event days, using a multivendor setup can make things much easier. You can allow different organizers or partners to manage their own concerts or artist lineups on a single, central platform.
For example, you can let different vendors handle their own parts of the event, like each stage at a music festival. They can add their own event info, set up tickets, and see who’s coming. You still stay in control, but it makes it easier when more people are helping run things.
Want to see how this works in action?
These guides walk you through the process of turning your site into a fully functional multivendor concert or festival hub, step by step.
FAQs about how to manage concerts in WordPress
1. Do I need WooCommerce to sell concert tickets with Eventin?
No, WooCommerce is optional. You can enable Stripe or PayPal directly in Eventin if you want a simpler setup. WooCommerce is helpful if you need more advanced features, such as coupons or merchandise sales.
2. Can I run multiple concerts simultaneously using Eventin?
Yes. Eventin supports multiple active events. You can list separate concerts, each with its own schedule, tickets, and performers; all managed from the same dashboard.
3. What if a performer cancels? Can I update the schedule easily?
Absolutely. You can edit the schedule at any time from the WordPress dashboard. Changes are reflected instantly on the event page, and you can also notify attendees via email.
4. Can I duplicate a concert event for future use in Eventin?
Yes, Eventin allows you to duplicate existing events. This is especially useful if you’re running a recurring concert series or tour. You can reuse the structure, ticket settings, and layout, then just update the date, venue, and artist lineup.
5. Does Eventin support recurring concert events?
Yes, Eventin includes a recurring event feature. You can schedule concerts that happen weekly, monthly, or on custom intervals, and manage them from a single dashboard.
6. Can I embed Eventin concerts into other WordPress pages?
Yes, using shortcodes, you can embed upcoming concerts, performer lists, or ticket options into any post or page on your site, including your homepage or artist profile pages.
7. How do I customize the design of my concert event page?
You can use Eventin’s built-in template builder or use Elementor widgets to design your concert landing page fully. This allows for total control over layout, fonts, colors, and content blocks — without writing code.
💡Read also: Why Eventin is Better Than Other Event Management Systems
Ready to manage your next concert with Eventin?
Managing a concert doesn’t have to be stressful. With a WordPress site and Eventin event management plugin, you can manage concerts more efficiently, all from one place.
No matter whether it’s a single music show or a recurring music tour, the process becomes much easier once you have the proper setup. You can create polished event pages, automate emails, simplify entry, and even track how your event performed afterwards.
And if you’re planning something bigger, like a multi-day music festival, combining Eventin with a multivendor setup gives you the flexibility to scale without taking on everything yourself.
Concerts should be about the experience, for both you and your audience. A more organized system behind the scenes helps you focus on delivering that experience, while the tools handle the rest.