How to Add Event Banner, Website & Logo in WordPress Website: Full Tutorial
Table of Contents
If you’re creating event pages, adding a clean event banner in WordPress and a proper website logo should be your first step. It helps people understand your event, builds trust, and improves your overall event page design in WordPress.
You can manually add an event banner, update your website logo, and customize your event page layout. But if you manage multiple events, handling event branding in WordPress separately can quickly become difficult.
In this guide, we will show you how to add an event banner in WordPress, set up your logo, and improve your event page design step by step. We’ll also show you a smarter way to manage everything using a WordPress event management plugin.
Grow Your Events Faster
Plan, manage, and grow your events with Eventin event manager.
- 🟣 Attendee registrations
- 🟣 Virtual events with Zoom
- 🟣 Smart email reminders
- 🟣 Secure ticket sales with Woo
Quick Overview
This guide shows you how to add an event banner in WordPress, update your website logo, and improve your overall event page design in WordPress. If you’re managing events, this setup helps you create clean, professional event pages that build trust and improve user engagement.
Inside this article, you’ll learn:
- What an event banner in WordPress is and why it matters
- How to add an event banner and set your website logo in WordPress
- Why using a WordPress event management plugin makes customization easier
- Common Mistakes to Avoid When Designing Event Pages

What Is an Event Banner in WordPress?
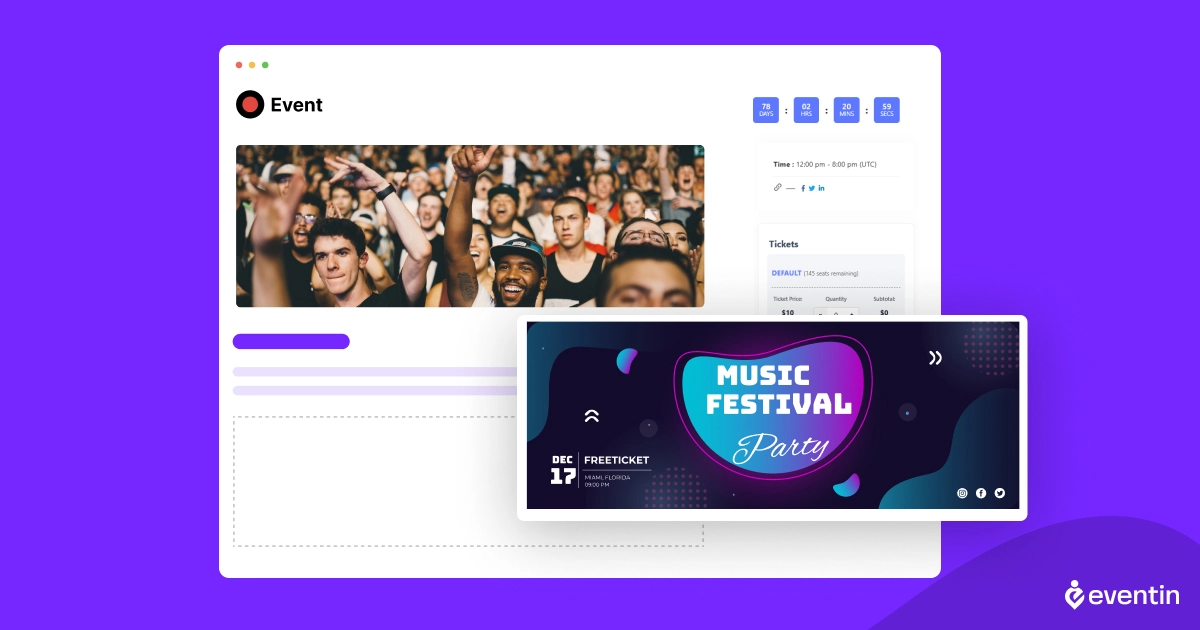
An event banner in WordPress is a visual header image that appears on your event page to highlight key details like the event name, date, location, or theme. It acts as the first thing visitors see when they land on your page, so it plays a big role in creating a strong first impression and improving your overall event page design in WordPress.
In most cases, you can add an event banner in WordPress using a featured image, page builder, or a WordPress event plugin. A well-designed WordPress event banner helps your event stand out, makes your page look more professional, and clearly communicates what the event is about.
Why Event Branding Matters for Your Event Pages
Event branding in WordPress is more than just adding a banner or logo. It’s about creating a consistent look across your event pages so visitors instantly understand your event and trust your website.
When you combine a clear event banner in WordPress, proper website logo placement, and a well-structured event page design, your content becomes easier to scan and more engaging. This not only improves user experience but also helps keep visitors on your page longer.
Strong event branding also makes your promotions more effective. Whether someone finds your page through search or social media, a consistent design helps your event feel more professional and credible.
If you’re managing multiple events, maintaining branding manually can be difficult. That’s why many users prefer using a WordPress event management plugin to manage event banners, layouts, and event pages from one place while keeping a consistent design across all events.
How to Add Event Banner, Logo & Webhook in WordPress
This section will guide you to set up an event logo, add an event banner, and share essential event information with another WordPress website.
This guide is made using Eventin Event Management Plugin for WordPress as an example in order to make it easier for you to understand.
In the same way, you can also try this step in other plugins as well. In any case, if you face any problem, then you should check out the documentation that comes with the plugin that you plan to use.
Add Event Banner and Logo
Adding a custom logo to your event website is a simple way to brand your site and make it look more professional. Follow these steps:
- Install and Create an Event (learn how to create an event. Click here)
- From the WordPress dashboard, go to Eventin > Edit Event > Branding.
- Choose the option to upload your logo image.
- After uploading, preview your website to ensure the logo appears as desired on desktop and mobile.
- Click “Publish” to save your changes.
🔖 Goodreads: Maximize Your Business Revenue: Explore Top-Rated Booking Plugins for Elementor & WordPress| Read more
Add Webhook in Event Website Using Eventin Plugin (for example)
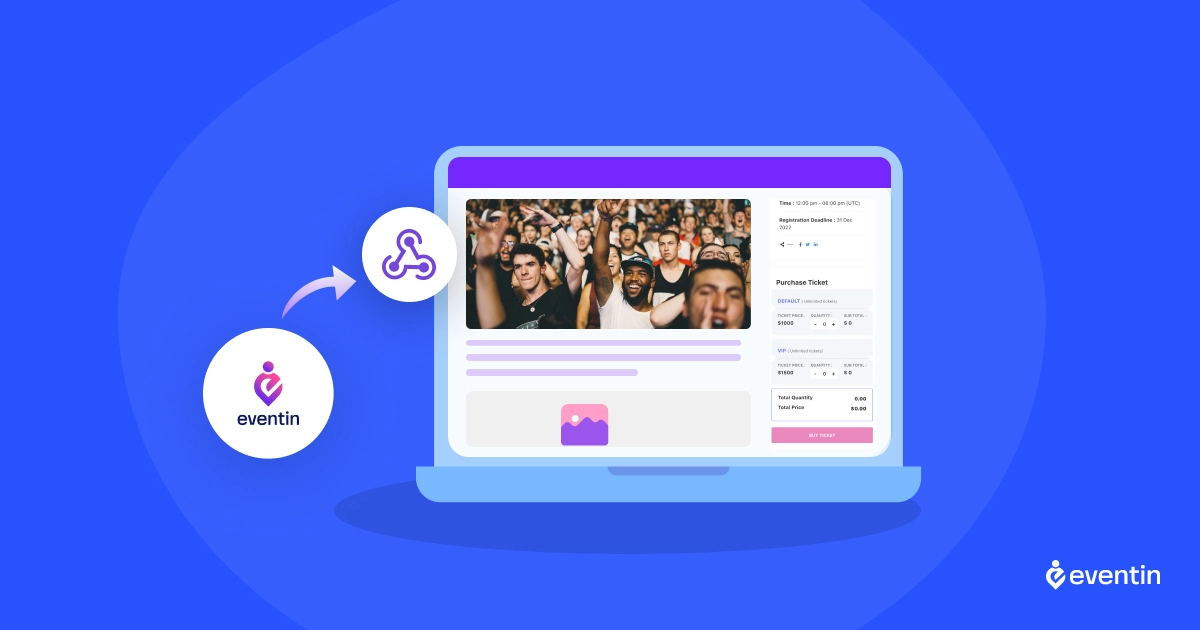
A webhook is a tool that automatically sends data from one application to another when a specific event happens. Think of it as a real-time notification system for a website, like getting an instant alert when someone registers for an event.
Eventin is a WordPress plugin designed for event management, and it includes webhook functionality that allows you to integrate with other applications. Here’s how to set up a webhook in Eventin:
Step 1: Generate a Webhook URL
- First, determine where you want to send the data. This could be a CRM, a messaging app, or an automation tool like Zapier or Make.
- Many services will provide a unique Webhook URL when you create an integration.
- Copy this Webhook URL, as you’ll need it in the Eventin settings.
Step 2: Go to Eventin Webhook Settings
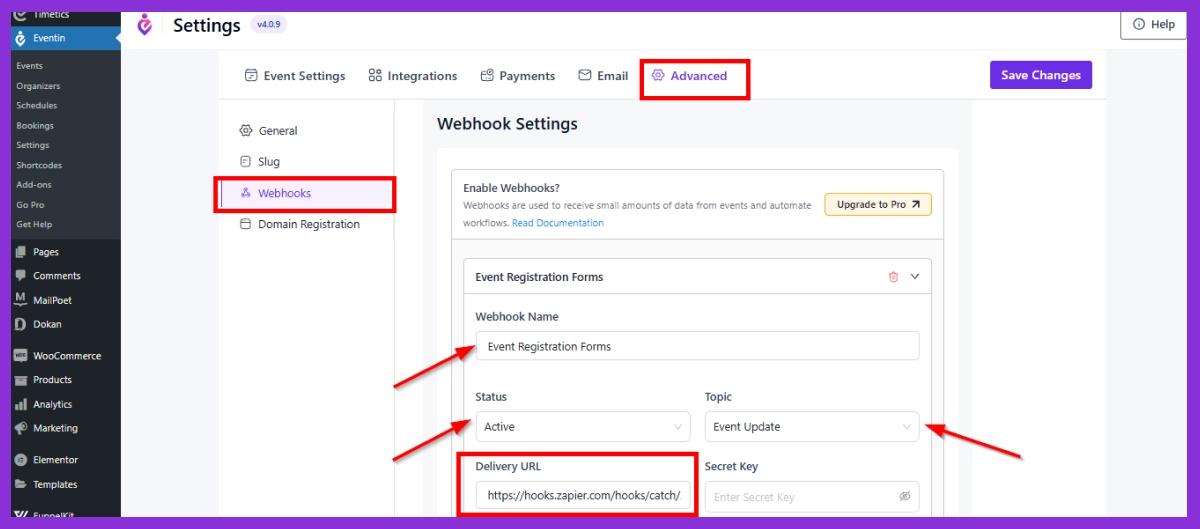
- In your WordPress dashboard, go to Eventin > Settings >Advanced >Webhook.
- Click on “Add Webhook.”
- Fill in the form fields according to your webhook information
- Paste the Webhook URL you copied from the destination
- And save the changes.
Step 5: Test the Webhook
- Test the webhook by performing the event action you selected (e.g., registering for an event).
- Check the destination application to confirm that the data was received successfully. Some tools, like Zapier, offer testing options to confirm the webhook works as expected.
Step 6: Save Changes
- Once you’ve tested and confirmed the webhook works correctly, save your settings in Eventin.
Additional Tips and Guide (Optional)
Testing and Optimizing for Mobile Responsiveness
- Preview your site in the WordPress Customizer or use browser developer tools to simulate different screen sizes.
- Use image optimization plugins, like Smush or ShortPixel, to compress images without losing quality. This helps improve site load speed on all devices.
SEO Optimization and Accessibility Considerations
- Add Alt Text: Write descriptive alt text for logos and banners to improve SEO and accessibility.
- Link Banners: If linking to an internal page, make sure it’s a direct, valuable page related to the event.
Troubleshooting Common Issues
- Banner or Logo Not Displaying: This can happen due to caching or theme limitations. Try clearing the cache or switching themes temporarily to troubleshoot.
- Slow Load Times: Large images can slow down your website. Use an image compression plugin to optimize file sizes.
- Responsiveness Issues: If banners or logos appear blurry, check that your theme is using the correct image size for responsive views.
How Eventin Makes Event Customization Easier
With a WordPress event management plugin like Eventin, you can manage your event banner, website logo, and overall event page design from one place. Instead of switching between theme settings, page builders, and manual edits, everything stays organized inside a single dashboard.
Eventin gives you:
- All-in-one event management: Manage your event banner in WordPress, website logo, and event page design from one dashboard.
- No manual setup needed: Create and customize event pages in WordPress without switching between multiple tools.
- Built-in event layouts: Design structured event page layouts with banners, schedules, and tickets already included.
- Consistent event branding: Keep your event branding in WordPress clean and uniform across all events.
- Easy to scale: Reuse the same event banner style and layout for multiple events without extra work.
Create Branded Event Pages Faster with Eventin
Want an easier way to manage your event banner in WordPress, event layout, tickets, schedules, and branding? Eventin helps you create clean, professional event pages in WordPress without switching between multiple tools.
Explore Eventin NowCommon Mistakes to Avoid When Designing Event Pages
Even with a good layout, small mistakes in your event page design can affect user experience and reduce conversions. Avoid these common issues to create better, more effective event pages.
- Using low-quality or unclear event banners: A blurry or poorly designed event banner can make your page look unprofessional and reduce trust.
- Ignoring consistent event branding: Mixing different styles, colors, or logo placements across event pages can confuse visitors and weaken your event branding.
- Overloading the page with too much content: Adding too many elements can make your event page design hard to read. Keep the layout clean and focused on key details.
- Poor placement of important information: If users can’t quickly find the event date, time, or registration option, they may leave your page.
- Not optimizing for mobile users: Many visitors will view your event page on mobile. Make sure your WordPress event banner and layout look good on all devices.
- Manual customization for every event: Repeating the same setup for each event wastes time. Using a WordPress event management plugin helps streamline the process.
- No clear call-to-action (CTA)
: Even with a good design, missing a strong CTA can reduce conversions. Always guide users toward registration or ticket purchase.
Frequently Asked Questions (FAQ)
What is the best way to design an event page in WordPress?
The best way to design an event page in WordPress is to use a structured layout that includes a banner, event details, schedule, and call-to-action. Using a WordPress event plugin helps you manage all these elements without manual customization.
How can I change the website logo in WordPress?
To change your website logo in WordPress, go to Appearance → Customize → Site Identity, then upload your logo image. Once saved, the logo will appear in your website header across all pages.
Why is event branding important for event pages?
Event branding helps your event look professional and consistent. A well-designed banner and logo improve user trust, increase engagement, and make your event easier to recognize across your website and promotional channels.
How do I create a professional event page in WordPress?
To create a professional event page in WordPress, you should add a clear banner, use consistent branding, include event details, and provide an easy way for users to register or buy tickets. Using an event plugin like Eventin simplifies this process and ensures better design consistency.
Conclusion
Adding an event banner and website logo in WordPress is a simple step that can greatly improve your event page design and overall user experience. A clear layout, strong branding, and well-placed visuals make your event pages look more professional and easier to understand.
While you can set everything up manually, managing multiple event pages can become time-consuming. If you want a more organized and scalable solution, using a WordPress event management plugin like Eventin can help you manage event banners, layouts, and branding from one place without extra effort.