How to Automate WordPress Event Management with Eventin and Bit Flows
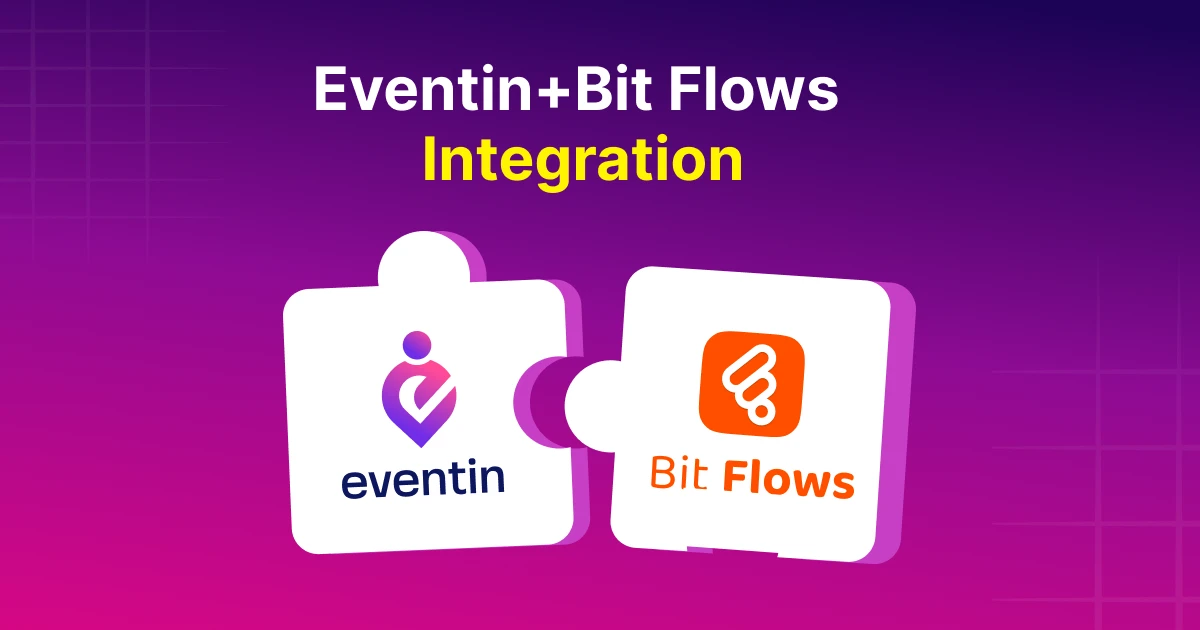
Table of Contents
Managing events in WordPress is easier than ever with Eventin. You can create events, sell tickets, manage speakers, and track attendees from one place. Everything stays organized inside your website.
As your events grow, small tasks start adding up. Booking data needs to be shared. Teams need updates. Attendees expect timely communication. Doing this manually takes time.
This is where smart automation helps. Here, Eventin manages your events, and Bit Flows automates what happens next. Together, they help you build simple, reliable workflows without code. You save time, reduce manual work, and run events more efficiently.
In this guide, you will learn how to automate WordPress event management using Eventin and Bit Flows.
Ready to run smoother events?
Create & manage events easily with Eventin event manager.
- ✅ Sell tickets
- ✅ Track attendees
- ✅ Automate reminders

How Automation Takes Care of Event Management Tasks
Event automation uses triggers and actions to do repetitive tasks for you. A trigger is something that happens. An action is what you want to happen next.
How this automation runs in the background
Trigger: A ticket gets purchased
Action 1: The buyer’s details are automatically added to your spreadsheet
Action 2: Your team receives an instant notification
Result: Everything happens automatically. You don’t need to touch anything.
Think of it like setting up a line of dominoes. You set them up once. Then you can just watch them fall perfectly every time you start them.
Here are some common tasks you can automate:
- Syncing booking data to a spreadsheet.
- Notifying your team about event changes.
- Sending attendees different information based on their ticket.
- Tracking event updates and logging them.
- Sending alerts about speaker or schedule changes.
Once you set up these automated jobs, they run in the background. This frees you up to focus on creating better events for your attendees.
Why Eventin and Bit Flows Work So Well Together
Let’s look at the two tools that make this possible.
Eventin: Your Event Management Foundation
Eventin is a complete event management plugin for WordPress. It handles everything you need, from creating an event to selling tickets. All of this happens in one dashboard.
You can manage your events, schedules, speakers, attendees, and bookings. You never have to leave your WordPress site. It becomes the one place where all your event information lives.
Bit Flows: Your Automation Powerhouse
Bit Flows is a tool that automates WordPress without code. It takes the data from Eventin and turns it into automated jobs. You do this on a visual screen.
You just drag triggers and actions into place. You can add conditions if you need them. You can even connect to other tools you use. You don’t have to write a single line of code. Key features include:
- Create as many workflows and tasks as you need.
- A visual builder to see your automation.
- Use conditional logic to make smart decisions.
- Add AI Tools like ChatGPT, Claude, and more for smarter automation.
- Connect to other apps with webhooks and APIs.
- See detailed logs of every time an automation runs.
- It runs in the background, so your site stays fast.
How They Connect
It’s a simple bridge. Eventin knows what is happening with your events. Bit Flows decides what to do about it.
When someone buys an event ticket, Eventin records that purchase. Bit Flows sees this happen and starts the automated job you created. The data flows from Eventin, through Bit Flows, and goes wherever you need it to go.
Built-In Integrations That Power Events Even Further
Eventin already gives you a rich set of built-in integrations to run events smoothly. You can connect with WooCommerce, Stripe, Paypal and Surecart for ticket sales, Zoom and Google Meet for virtual events, FluentCRM for marketing, Twilio for SMS updates, and popular builders like Elementor, Divi, Gutenberg templating system, and mapping tools. These integrations help you launch, manage, and scale events directly from WordPress.
Bit Flows takes this strong ecosystem to the next level. It lets you connect Eventin with hundreds of additional tools and turn single actions into smart, multi-step workflows.
You can route data, apply conditions, and automate entire event processes in one flow. The result is a more connected, automated, and scalable event system powered by Eventin.
Understanding How a Workflow is Structured in Bit Flows
Every automation you build follows four simple steps.
- Trigger: Something happens in Eventin.
- Listen Response: Bit Flows sees that the trigger happened.
- Processing: Your workflow uses any rules or logic you set up.
- Action: The automated tasks run one after another.
This structure makes your automations predictable. It also makes them easy to fix if something goes wrong. You can see every step clearly on the visual builder.
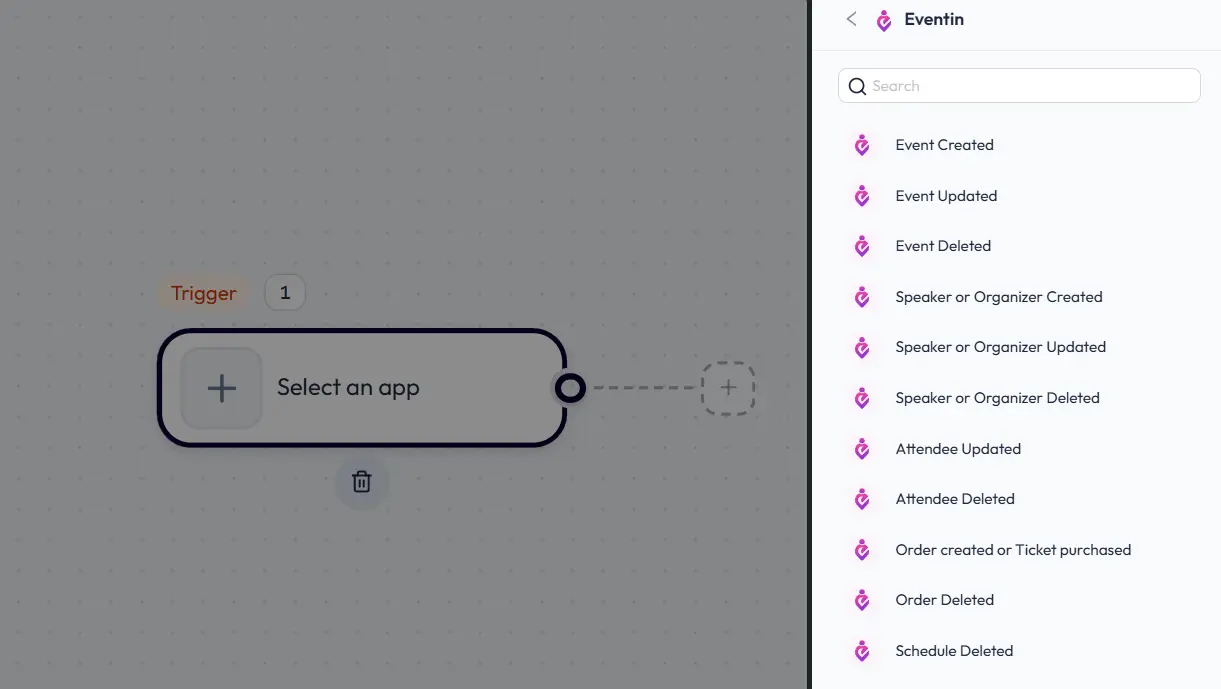
Available Eventin Triggers in Bit Flows
Bit Flows can start an automation when these things happen in Eventin:
Events
- An event is created.
- An event is updated.
- An event is deleted.
Team Management
- A speaker or organizer is created.
- A speaker or organizer is updated.
- A speaker or organizer is deleted.
Attendees
- An attendee’s information is updated.
- An attendee is deleted.
Bookings
- An order is created (a ticket is purchased).
- An order is deleted.
Schedules
- A schedule is deleted.
Each of these triggers gives you real-time data. You can use this data in your automated jobs.
How to Automate WordPress Event Management: a Step-by-step Guide
Let’s walk through the steps to create your first automation. We will start with a simple setup. You can expand it later as your needs grow.
For now, we will send the attendee data to Google Sheet, MailChimp, Slack, and Telegram, all in one single workflow.
Step 1: Create Your Workflow
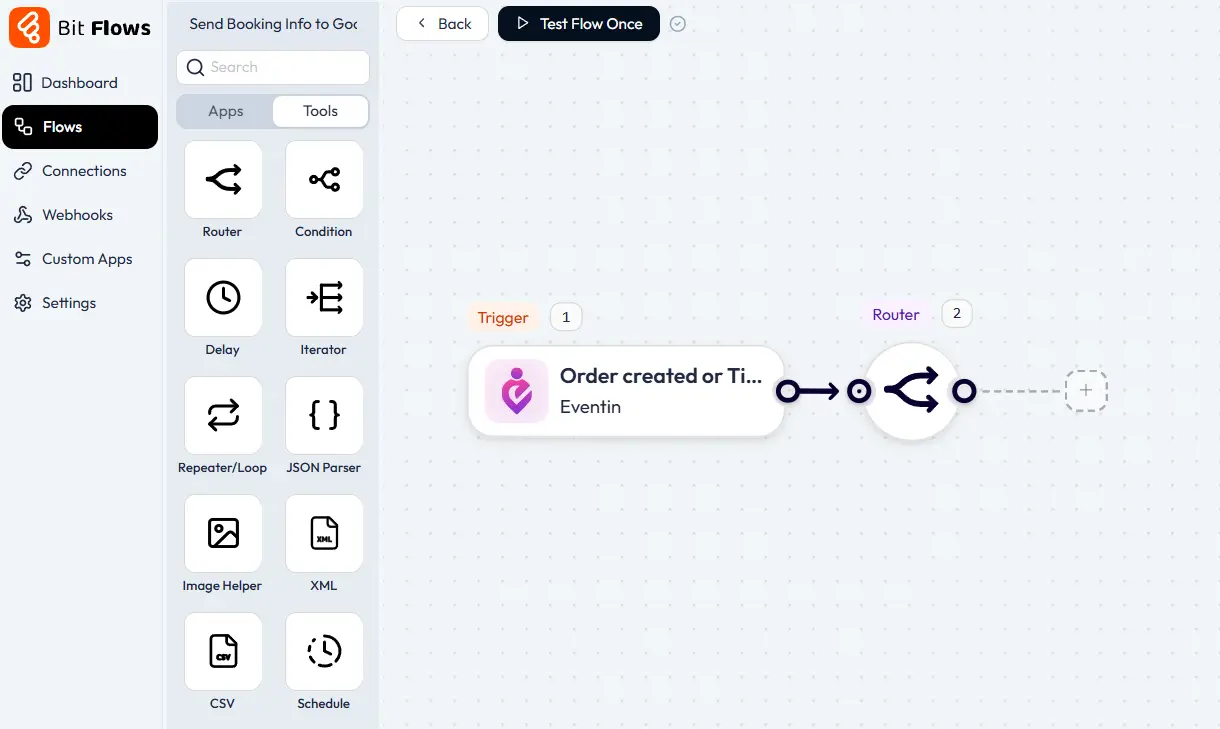
Go to Bit Flows in your WordPress dashboard. Click the Flows> Create Flow button to create a new workflow. Give it a name that makes sense, like “Send Booking Info to Google Sheets.” Then click on the Create button.

Related names will help you to recognize the workflow later. This is especially true when you have many different workflows in Bit Flows.
After clicking the Create button, you will see the awesome Bit Flows builder. Here you will get tools, triggers, actions, and other things to build your workflow.
Step 2: Choose Your Trigger
At first, you need to select the Eventin trigger from the list. Click on the trigger node on your workflow, and you will see a panel on the right side with the Tools and Apps menu.
Click on the apps menu and search for Eventin. To automate bookings, you would choose “Order Created or Ticket Purchased.”
After selecting the event, click on the Listen Response button and do a test ticket purchase. This step helps Bit Flows capture all event data, which makes field mapping easier and more accurate
Now, Bit Flows will watch for new ticket purchases and trigger the automation.
Step 3: Add Actions and Tools
Now you build what happens next. You can add a Google Sheets action to log the data in a spreadsheet. You could also add a Slack notification to tell your team and send the data to CRM.
To add multiple branches, we need to add the router tool of Bit Flows. Please navigate to the Tools section, drag and drop the router, and connect it after the Eventin node.
After the router tool, you will see a ”+” icon; click on it. This will open up the “Select App & Action” panel. Here you can add multiple apps. Now search for Google Sheet and select the “Add Row” event.
Now you need to connect the Google Sheet to Bit Flows to get your Client ID and Client Secret from Google Cloud Console and connect Bit Flows. After connecting Bit Flows, you can select the specific sheet you want to work with.
After selecting the sheet, you can map all the fields from Eventin to your Google Sheets.
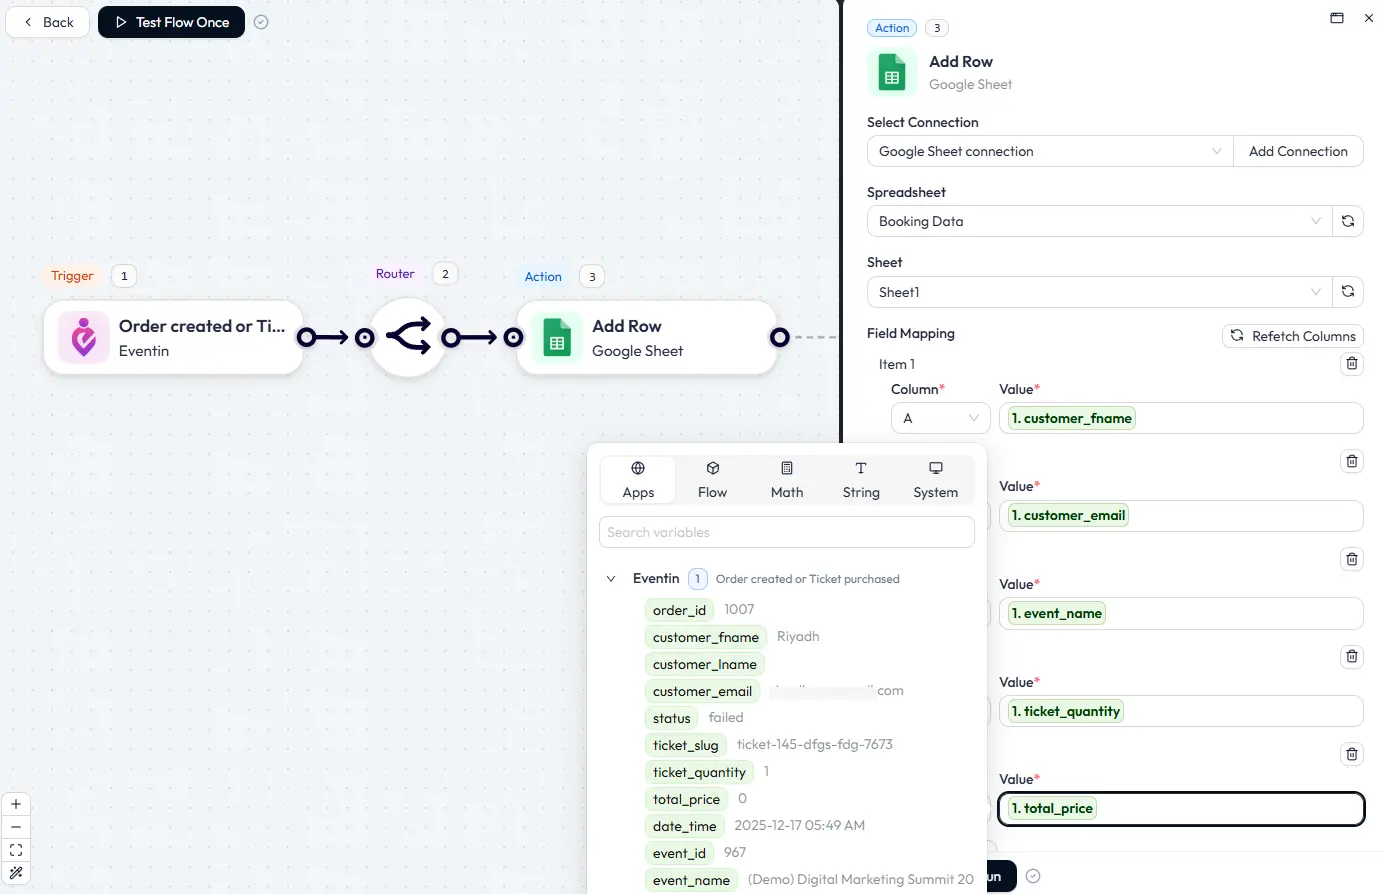
After mapping all the fields, click on the Test Run button. You will see the data recorded on your Google Sheets.

Now you have successfully connected Google Sheets with Eventin. So whenever someone purchases, the data will directly go to the Google Sheet. Similarly, we will send the data to MailChimp and Slack.
In Bit Flows, you can add as many actions as you need. There are no limits on steps and tasks in Bit Flows. To add new actions, click on the router tool and choose your preferred platform. Then connect it with your credentials.
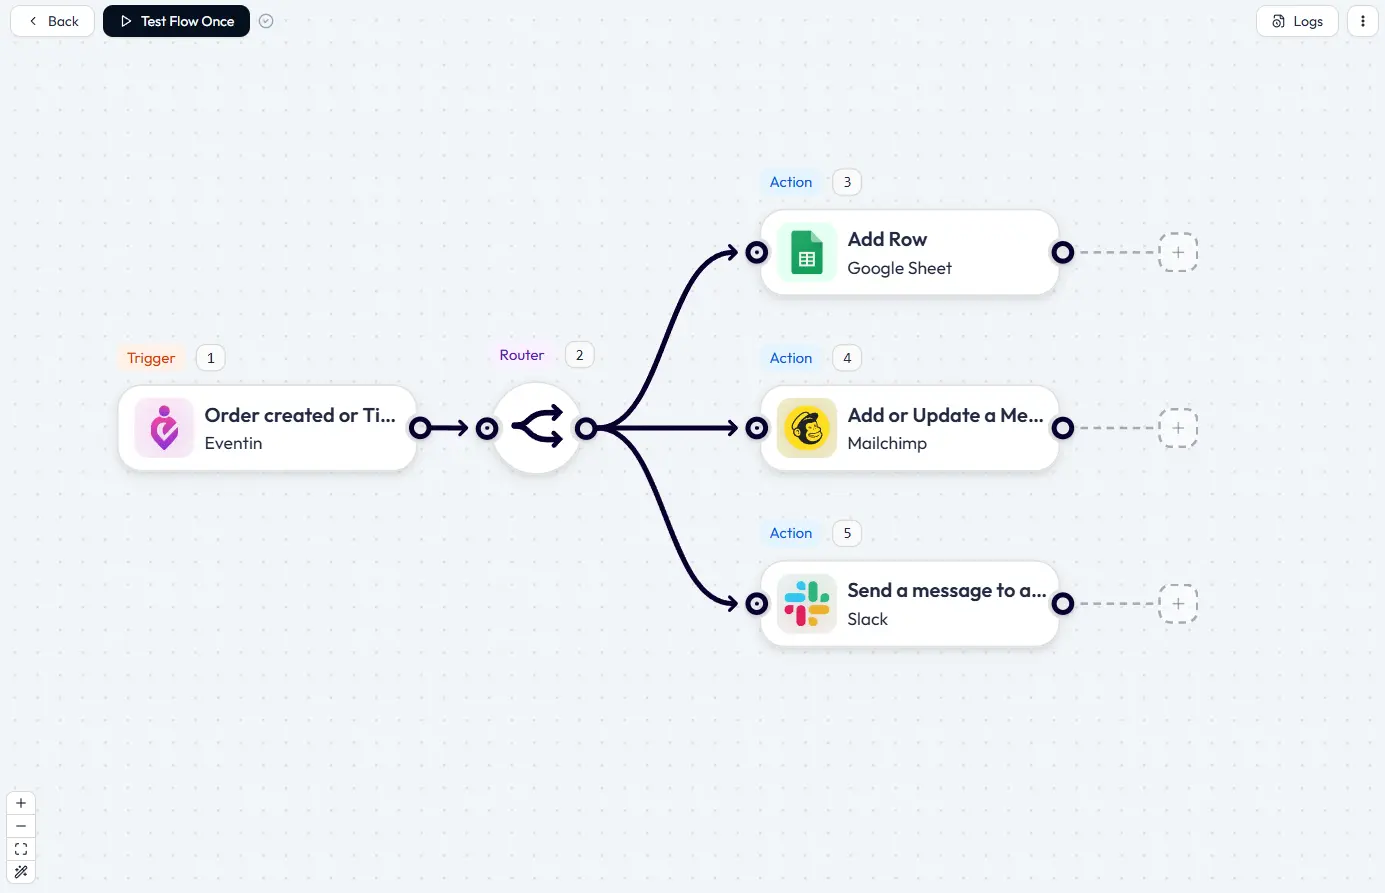
Once you have connected all of your platforms, do some test purchases to make sure it works perfectly. Explore the log details to see how your workflows perform. If something failed, you can re-execute the tasks. Also, you can set up email notifications for failed tasks in bit flows.
Step 4: Add Advanced Logic
This was a simple connection, but what if you want to apply conditions to achieve different goals? For example, you have three events, and you want to send the specific event details to a particular platform. This is easy with the Bit Flows condition tool.
You just need to add the condition tool of bit flows and apply conditions as per your requirements. For example, here I have added conditions.
If the user purchased a ticket for “Digital Marketing Summit”, the data will go to a Google Sheet. If the user purchased a ticket for “AI Workflow Automation Workshop”, the data will go to Telegram.
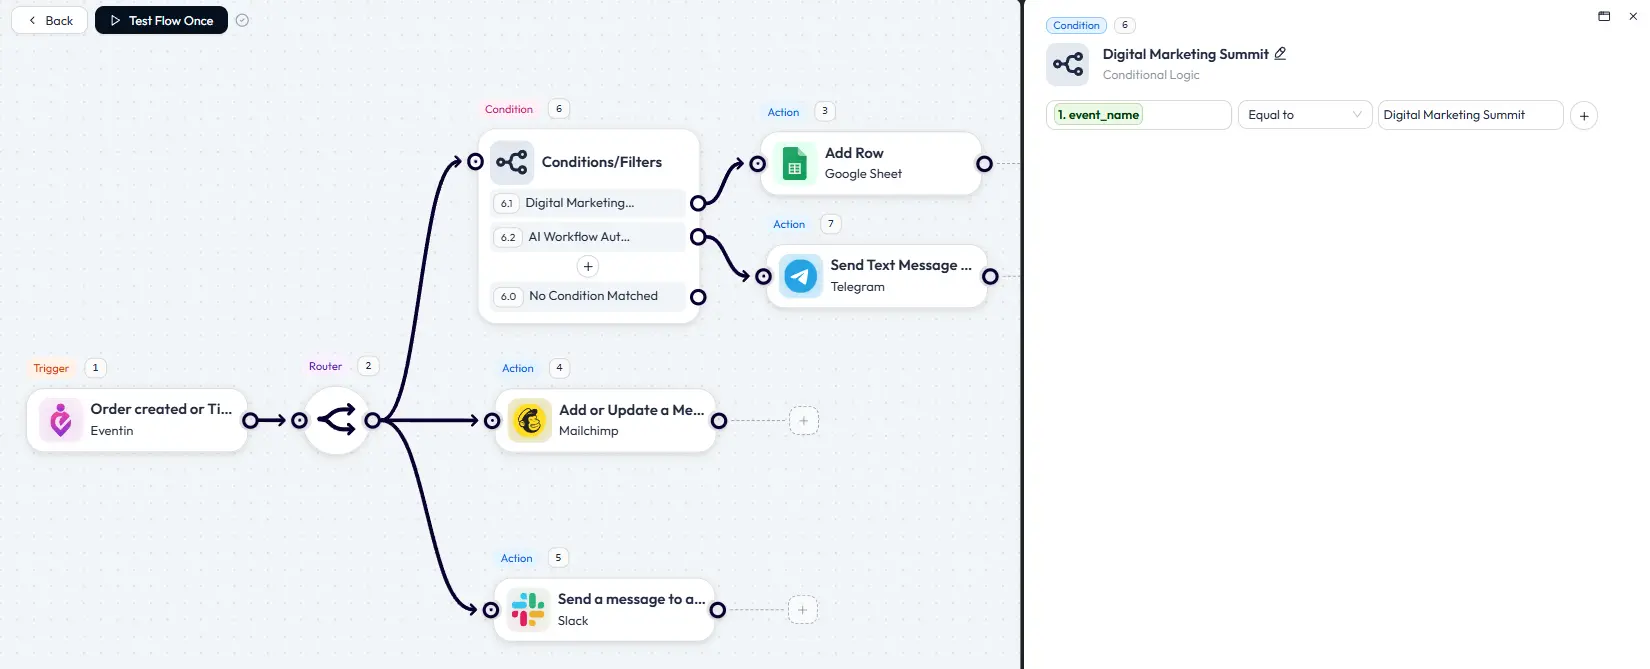
Similarly, you can add as many conditions as you need. Also, you can add AI tools like ChatGPT, Gemini, Claude, and more to analyze data and generate content.
Benefits of WordPress event automation
- Save time: Automation handles repetitive tasks in seconds. You get hours back every week to focus on planning and running your event.
- Improve accuracy: Automated jobs run the same way every time. There are no typos, no missed steps, and no data entry errors.
- Scale easily: The same workflow can handle 10 bookings or 1,000. Your system can grow with your events without creating more work.
- Better team coordination: Automatic notifications keep everyone in the loop. You won’t have any more “did anyone tell the marketing team?” moments.
- Maintain clean data: Data is handled the same way across all your tools. Everything stays organized without you having to clean it up manually.
Best practices for event automation success
- Start simple: Build one simple workflow first. Get the hang of it before you create complex jobs with many steps.
- Use clear names: A name like “VIP Ticket Alert to Sales Team” is much better than “Workflow 2.” You will recognize the workflow easily.
- Test thoroughly: Always run test bookings to make sure your workflow runs correctly before you rely on it. Check that the data goes where it’s supposed to.
- Monitor regularly: Look at your execution logs once a month. This helps you spot patterns and catch minor issues before they become big problems.
- Iterate and improve: Your first version probably won’t be perfect. Watch how it works and make small changes to improve it over time.
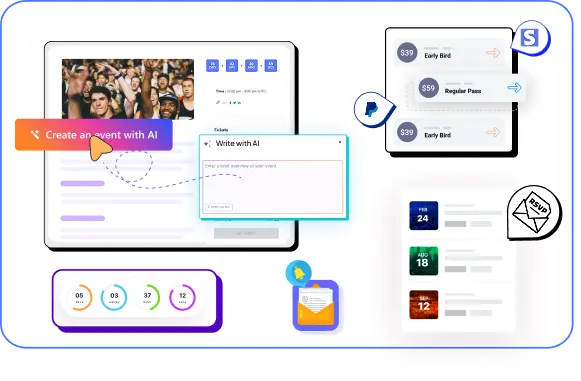
Want to automate event creation too?
Automation doesn’t stop at tickets and notifications. You can also create full events using AI, from titles to descriptions, without starting from scratch.
See how AI event creation works →Getting started with event automation
WordPress event automation changes how you manage events. Manual tasks become automatic. Your team stays informed without constant check-ins. Your data stays clean without manual work.
Eventin gives you the event management foundation. Bit Flows adds the automation power. Together, they create a system that can grow with you.
Start with one workflow. Pick the one that will solve your biggest headache. Maybe it’s that booking spreadsheet you update by hand every day. Or perhaps it’s the VIP ticket notifications you sometimes forget to send. Build it. Test it. Then watch it work.
FAQs
What exactly is event automation in WordPress?
Event automation uses triggers from your event system, like a new ticket sale, to automatically perform tasks. These tasks can include updating spreadsheets, sending notifications, and organizing data. It gets rid of repetitive manual work.
Do I need coding skills to use Eventin and Bit Flows?
No. Bit Flows uses a visual drag-and-drop screen. You build your automations by connecting blocks. You do not need any programming knowledge.
How do I automatically sync event bookings to Google Sheets?
Create a workflow using “Order Created” as the trigger. Then, add a Google Sheets action that puts the booking data into a new row. Every purchase will update your sheet automatically.
What Eventin triggers work with Bit Flows?
Bit Flows supports all the important triggers. This includes Event Created, Updated, and Deleted. It also supports Ticket Purchased, Attendee changes, Speaker/Organizer updates, and Schedule changes.
Can I route different ticket types through different workflows?
Yes. You can use conditional logic in Bit Flows to check the ticket type. This lets you send different ticket holders to different actions. VIP, standard, and student tickets can each start their own unique automated job.
What happens if an automation workflow fails?
Bit Flows will send you a notification immediately if something fails. The detailed logs will show you exactly which step failed and why. This makes it easy to fix the problem.
Is there a limit to how many workflows I can create?
No. Bit Flows lets you create unlimited workflows and run unlimited tasks. You can build as many automations as you need to manage your events.