How to Create Multiple Pricing Options for Events in Eventin


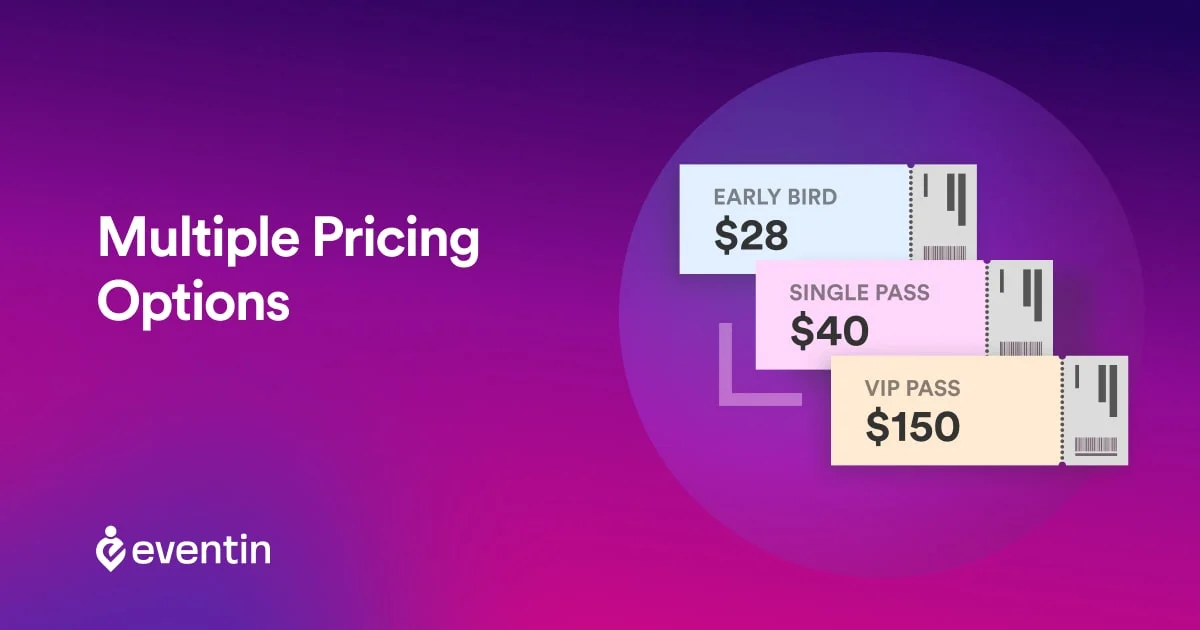
Eventin lets you add multiple ticket options to one event. Each option can have its own name, price, quantity, sales period, and purchase limits.
In this tutorial, you’ll learn how to install Eventin, create an event, and configure multiple ticket pricing options from the event dashboard.
How to Set Up Multiple Pricing Options in Eventin
Eventin lets you create separate ticket options within the same event. For each option, you can set a ticket name, price, quantity, sales period, and purchase limit.
Follow the steps below to configure each ticket option.

Step 1: Install and Activate Eventin
To create an event and add multiple ticket options to your event page, you need to choose the best event management plugin. Here, we would prefer to install the Eventin plugin on our WordPress site.
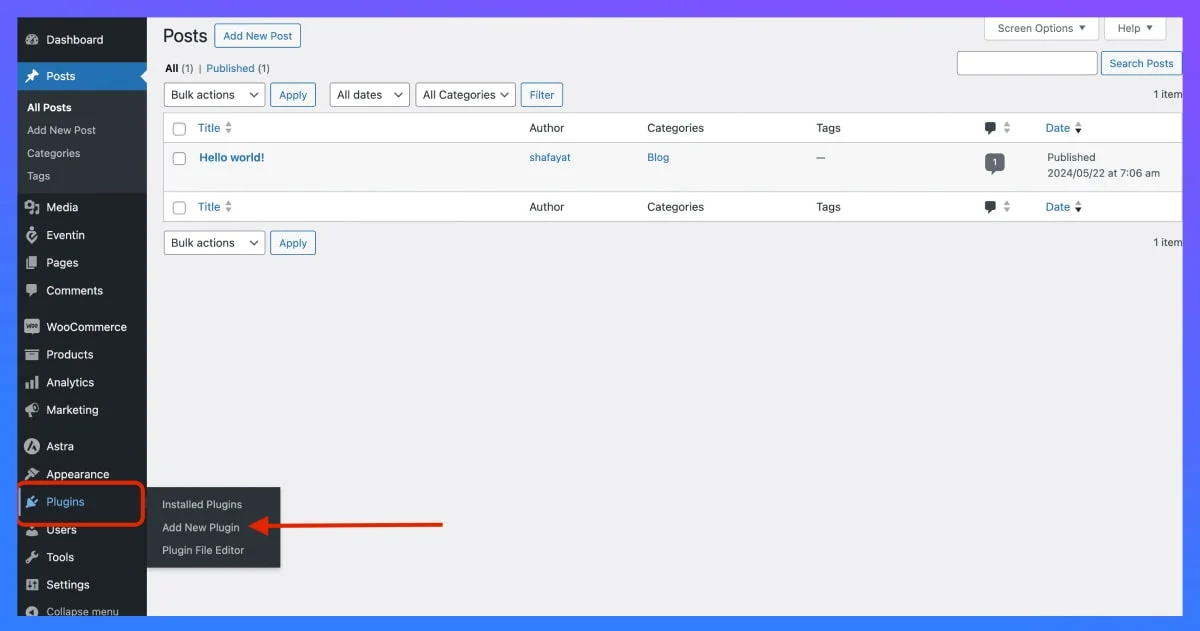
Firstly, log in to your account and click on ´Plugins´ and select ´Add New Plugin.´
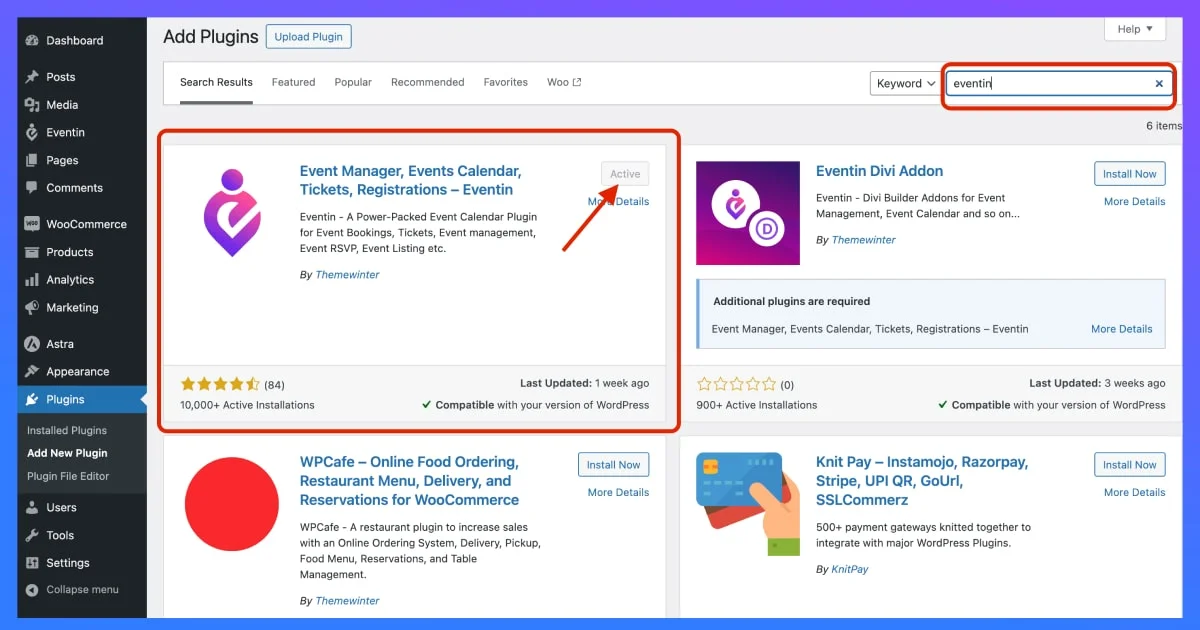
Now search for Eventin from the search bar > Install > and Activate it.
Once you are done with installing the best event management plugin, it´s time to create a new event.
Step 2: Create the Event
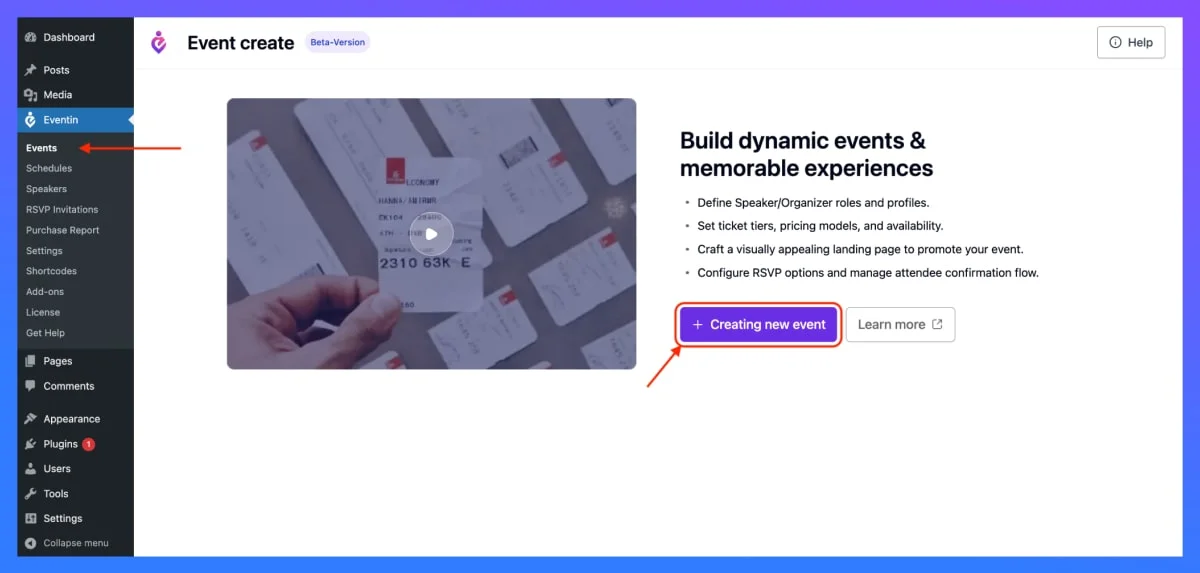
To create an event for adding multiple pricing options, simply click on Eventin from your dashboard´s left sidebar.
Now, select ´+ Create new event´.
Here, you need to add your event name on the title, set event type, and other basic information about your event.
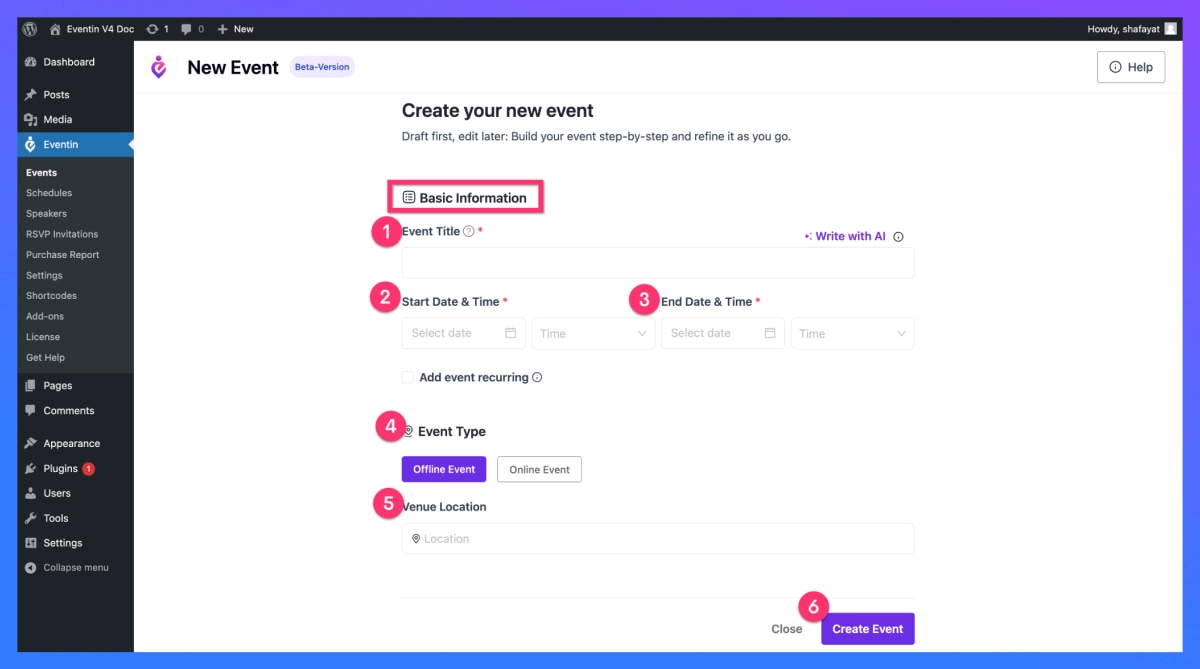
Once you are done, hit the ´Create Event´ button to proceed to the next step.
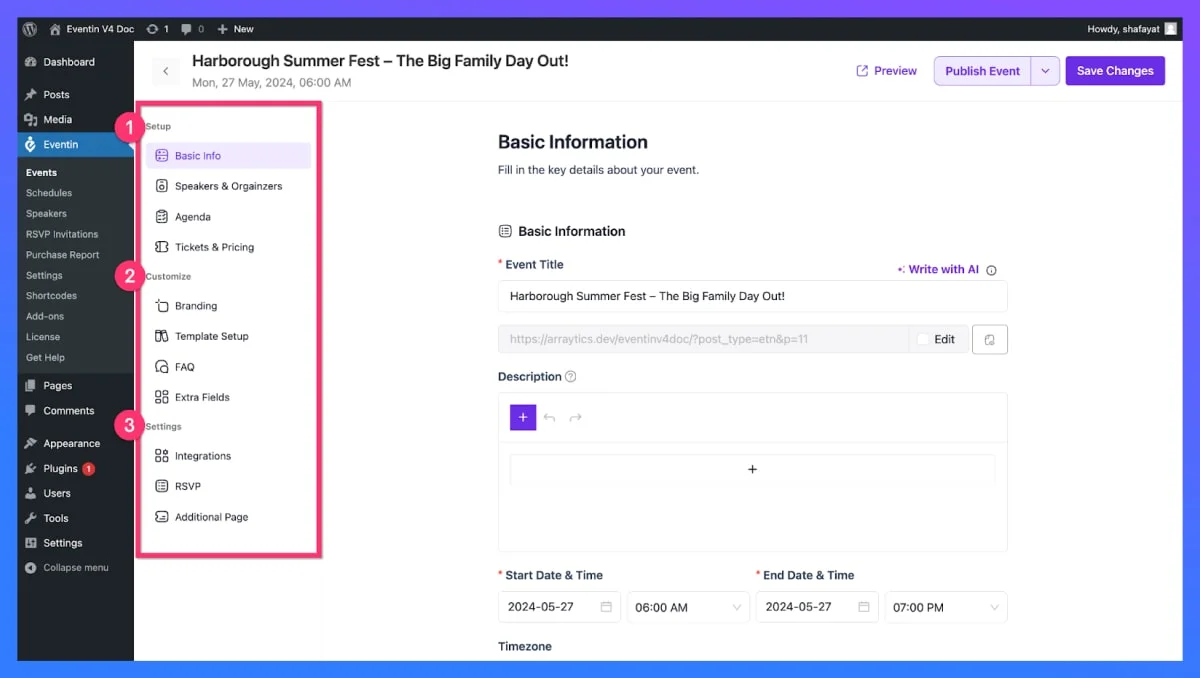
Here, you would need to add further details for your event in three different steps- Setup, Customization, and Settings.
Check out the Single Event documentation to see the process in detail. I am avoiding this step here so that you can get directly into your pricing setup without any dilly-dallying!!
Step 3: Add and Configure Multiple Ticket Options
On the setup field of your event dashboard, you can create and set up various tickets for your event.
Just click on the ´Add new ticket´ card and you are on your way to create a new ticket for your event.
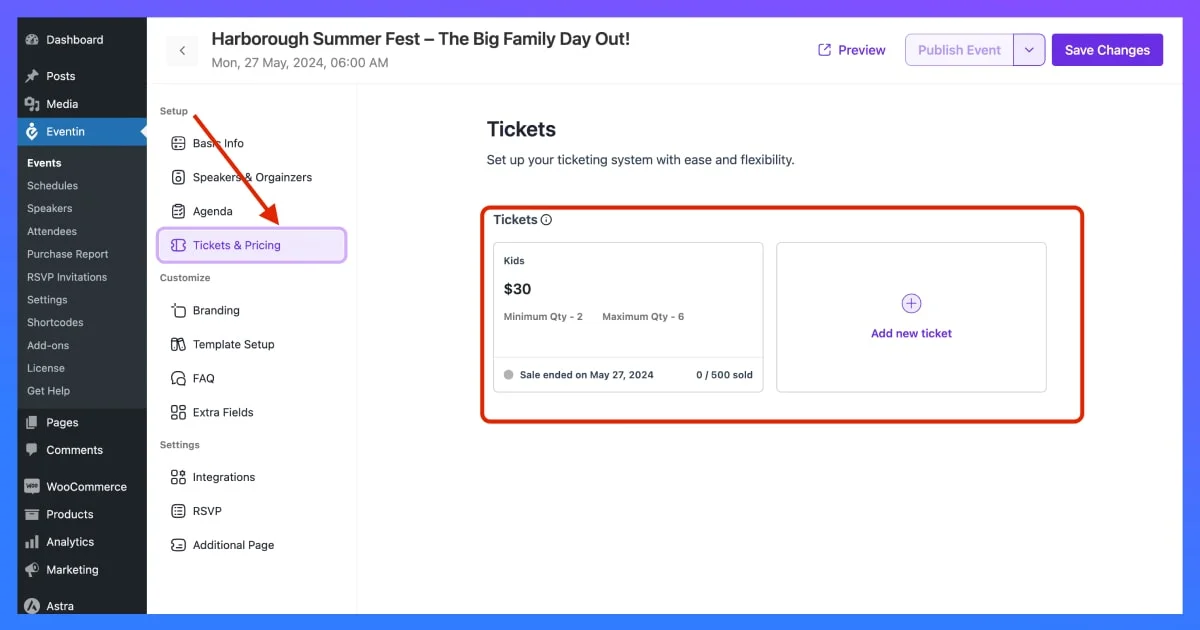
When you click on the ´Add new ticket´, a new pop-up form will open up to add ticket details.
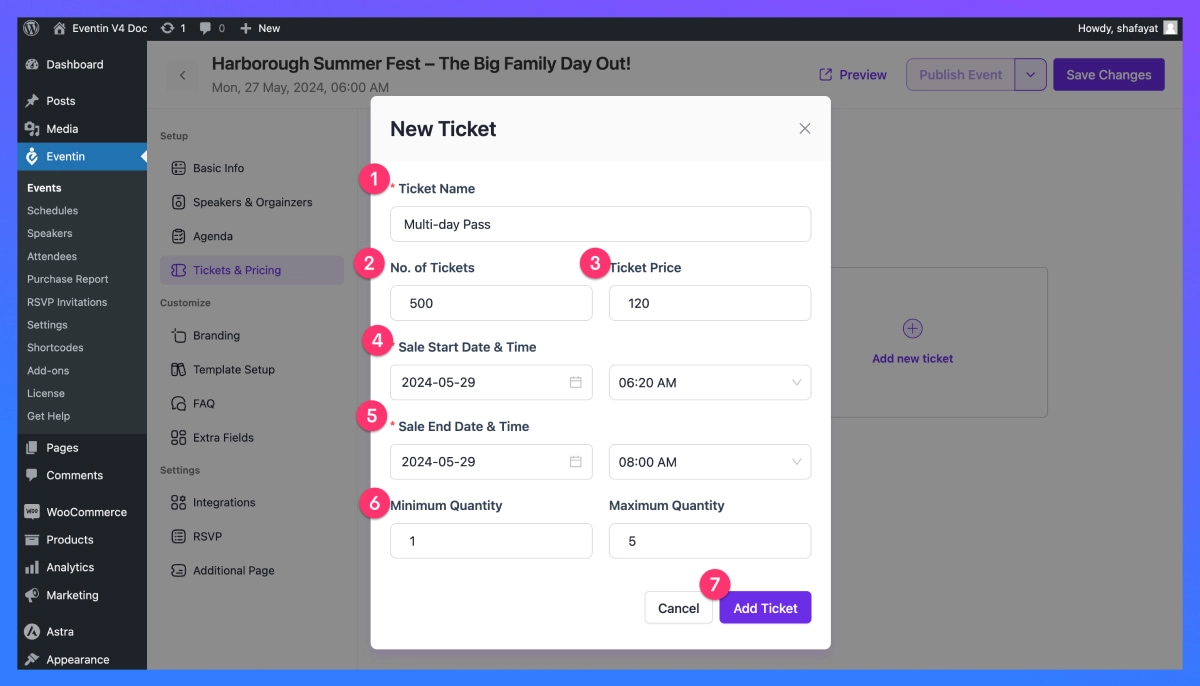
Here´s a breakdown of what you need to add to the fields:
- Ticket Name: Add the name of the ticket type that offers a clear message about what this ticket is for.
- No. of Tickets: Specify how many of these particular ticket types you want to sell.
- Ticket price: Set the price of each ticket.
- Sale Start Date & Time: Specify at which date and time you want to start selling these tickets.
- Sale End Date & Time: Specify at which date and time you want to stop selling these tickets.
- Minimum Maximum Quantity: Limit how many tickets one person can buy at a time.
- Add Ticket: Click on this button to add your new ticket type or simply cancel if you don´t want to add.
Finally, when you are done adding or modifying new ticket details, click on Add Ticket´ and your new ticket with the multiple pricing options will be created.
Now, if you go back to the tickets editor, you can see your new ticket with a different pricing tag and details has been successfully created.
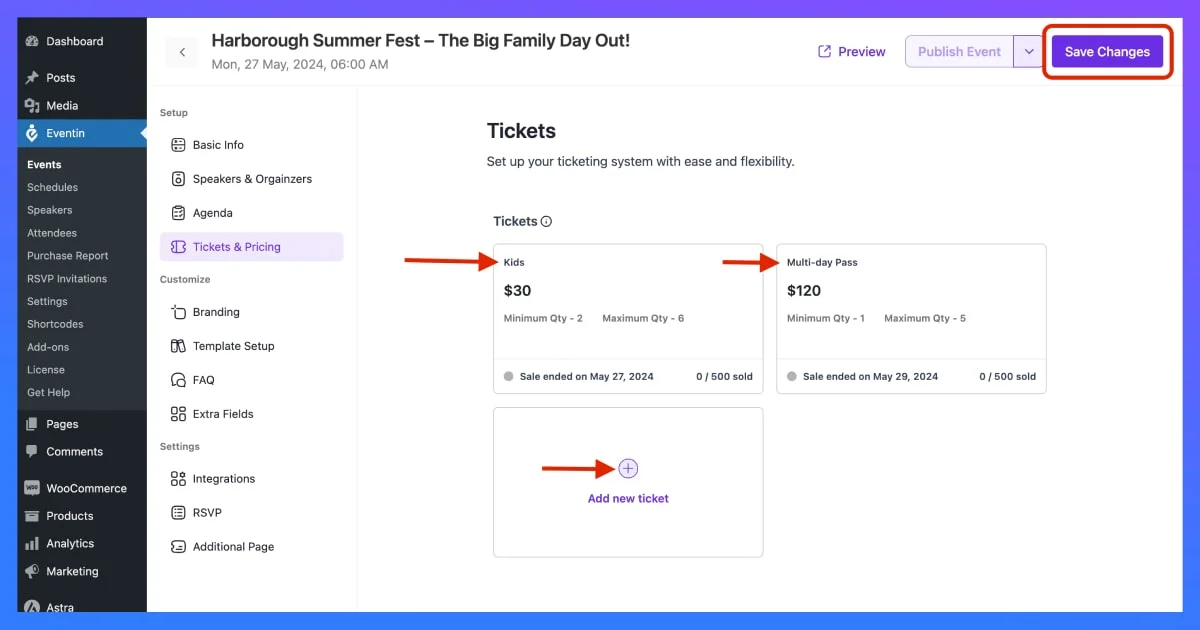
This way, you can add multi-tier ticket pricing options using Eventin.
P.S. Don´t forget to hit the ´Save Changes´ button whenever you make any changes to the tickets.
Check out the short video on how to add event ticket options with the Eventin event management plugin-
Finish Setting Up Your Ticket Options
Once all ticket options are added, review their names, prices, quantities, sales periods, and purchase limits.
Select Save Changes to complete the pricing setup for your event.
For the complete WordPress ticketing workflow, including payments, attendee management, and check-in, see our guide to the WordPress event ticketing plugin.