How to Create and Display an Event Schedule in WordPress
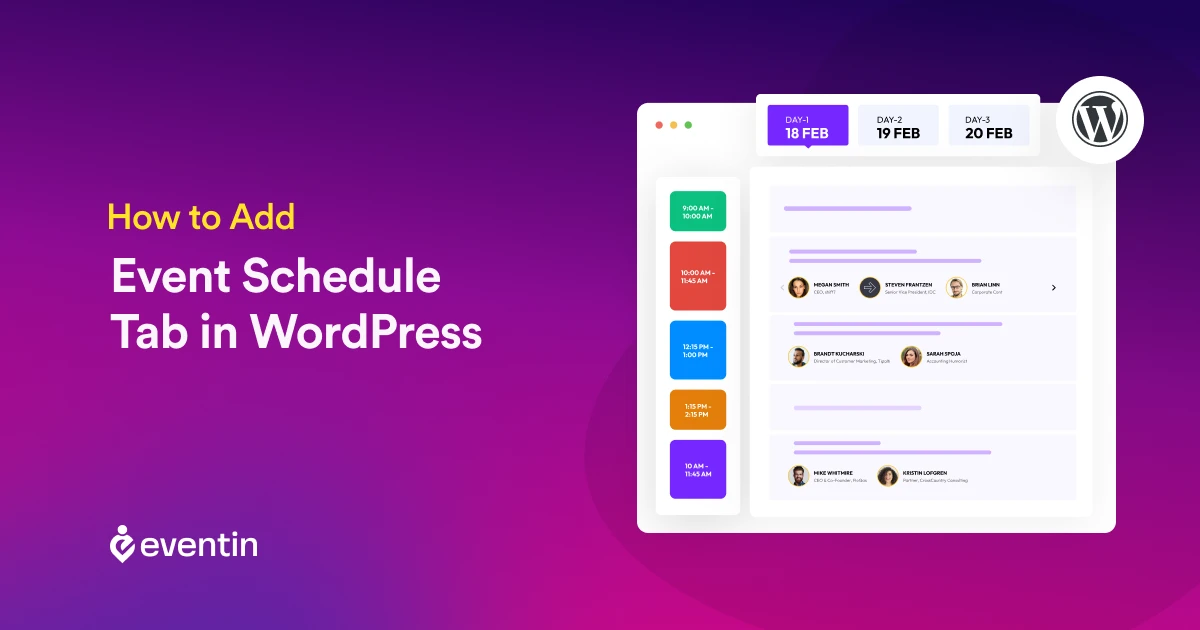
Table of Contents
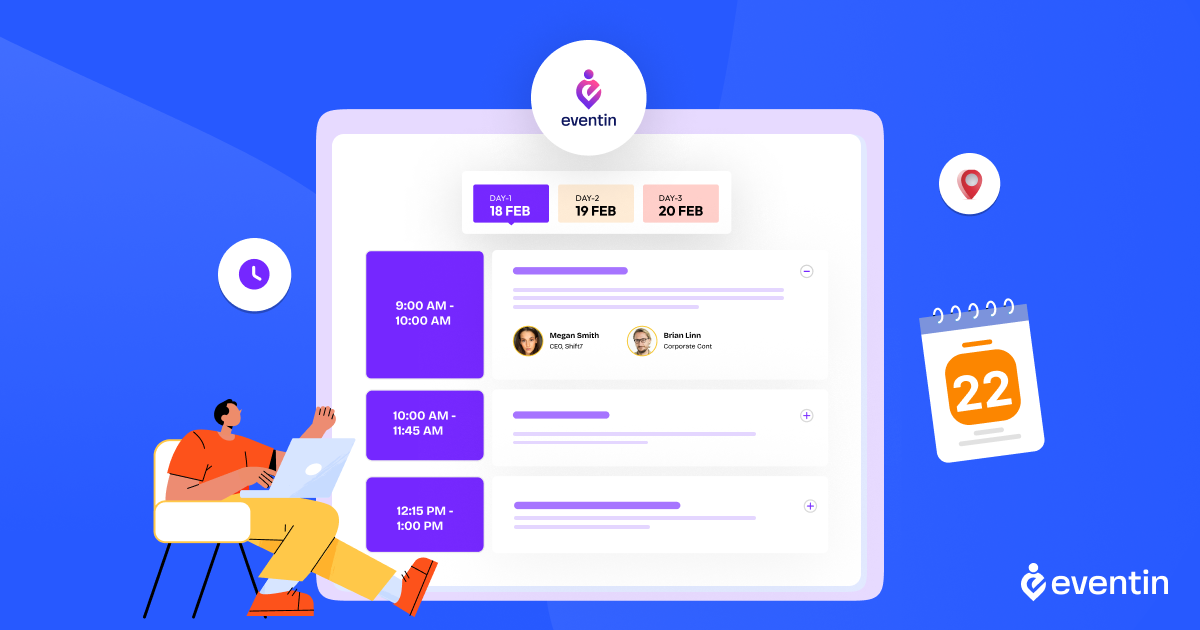
A clear event schedule makes your event page more useful for visitors. It helps attendees to check their event session times, speaker details, and the full agenda without confusion.
The problem is that managing schedules manually on WordPress can take extra time and quickly become hard to organize. That’s why using a WordPress event management plugin like Eventin is a much easier option.
In this guide, you’ll learn how to add an event schedule tab in WordPress and create a clean, organized WordPress event schedule using Eventin. 🙌
Grow Your Events Faster
Plan, manage, and grow your events with Eventin event manager.
- 🟣 Attendee registrations
- 🟣 Virtual events with Zoom
- 🟣 Smart email reminders
- 🟣 Secure ticket sales with Woo
📚 Quick Overview:
Let’s start with a quick overview of what you’ll achieve by the end of this blog:
- We’ll discuss the importance of having an event schedule tab on your event.
- Introduce tools to create and manage event schedules.
- Step-by-step guide on how to add an event schedule tab.
- Share best practices and pro tips for making your event schedule tab effective.
- Finally, we’ll answer some frequently asked questions to address common concerns and queries.
Why you need an event schedule on a WordPress event page
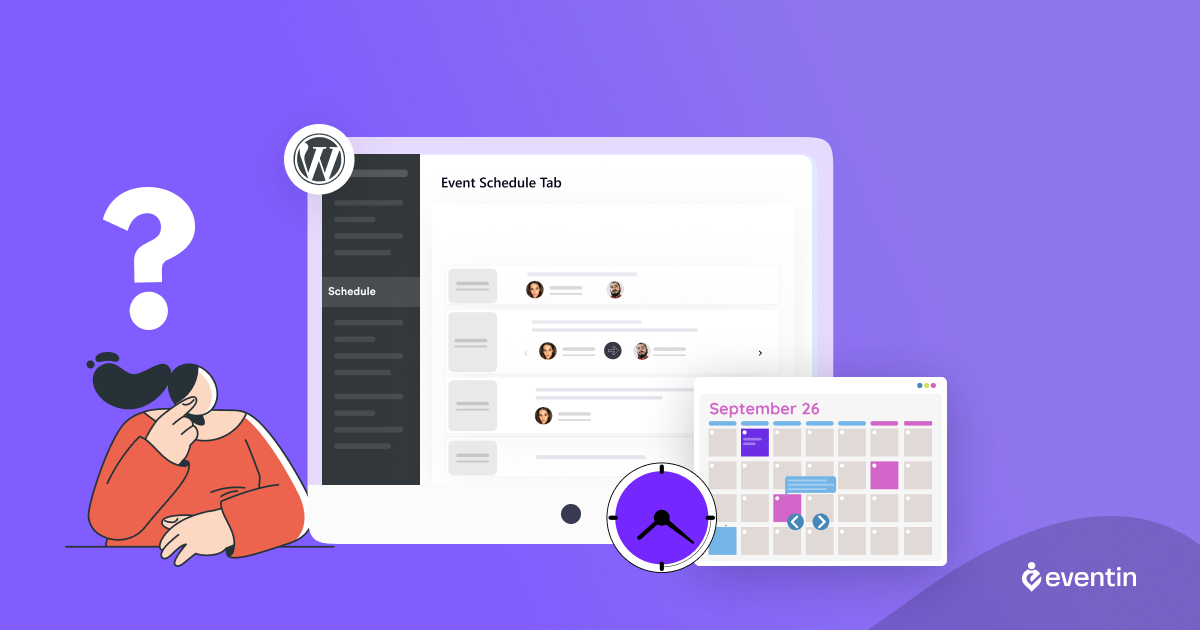
Adding an event schedule tab to your WordPress website is a great way to organize and manage your events more efficiently. It organizes all key event details, making it easy for attendees to access information like dates, times, and locations in one place.
This not only improves the user experience but also simplifies navigation, especially for complex events with multiple sessions or days. Attendees can quickly find what they need without sifting through various pages.
Additionally, the schedule tab allows for real-time updates, ensuring that any last-minute changes are instantly reflected, keeping your audience informed and reducing confusion.
Let’s explore some of the key reasons-
- A better user experience for all schedule-related information
- With dedicated tabs, it’s easier to organize
- Can help generate excitement about the event
- Attendees will save time instead of scrolling through long pages.
- Schedule tabs make it easier to update and manage the event schedule
- The event schedule tab adds professionalism to your website.
This is especially useful for conferences, webinars, workshops, and multi-day events where visitors need a clear event agenda before they register.
Manual tabs vs generic tab plugins vs Eventin
| Option | Best For | Limitation |
|---|---|---|
| Manual Tabs | Very simple layouts with basic content | Takes more time, needs manual updates, and is not built for event schedules |
| Generic Tab Plugins | Showing simple tabbed content on a page | Does not manage sessions, speakers, or event timing properly |
| Eventin | Creating a full WordPress event schedule with sessions, speakers, and agenda tabs | You need an event plugin setup instead of a basic tab plugin |

How to create an event schedule tab in WordPress with Eventin
WordPress does not include a built-in way to manage a full event agenda with sessions, speakers, and time slots. That is why most site owners use a WordPress event schedule plugin.
With the Eventin event scheduling plugin, you can create schedules, organize multi-day sessions, add speakers, and display everything with a shortcode or page builder block from one dashboard.
It’s a lightweight event plugin that lets you build and manage event schedules without any hard setup.
Below is a simple step-by-step guide to creating an event schedule tab using the Eventin plugin. 👇
Step 1: Install and activate the Eventin plugin
To begin, you’ll need to install the Eventin event manager plugin:
- From your WordPress dashboard, navigate to Plugins > Add New.
- In the search bar, type Eventin.
- Click on Install Now next to the Eventin plugin and then hit Activate once the installation is complete.
The plugin is now ready to use, and you can start configuring your event schedule.
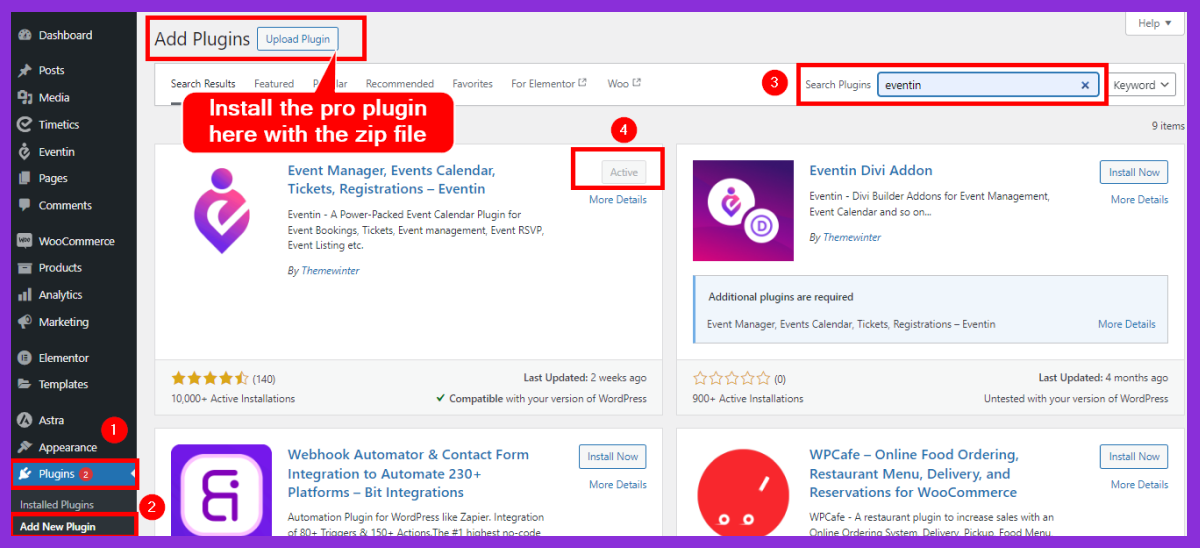
To install the Eventin Pro plugin
- Download Eventin Pro from Themewinter website
- Log in and go to the WordPress dashboard
- Go to Plugins > Add New Plugin > Upload Plugin
- Now Click on Install Now, then Activate the plugin after installation.
Step 2: Create a New Event
Once Eventin is activated, head over to the Eventin dashboard:
- Navigate to Eventin > Add New Event.
- Fill in basic event details like event name, date, venue, and description.
- For your event, you can add speaker information, ticket prices, or any other custom fields.
Step 3: Set up the event schedule tab
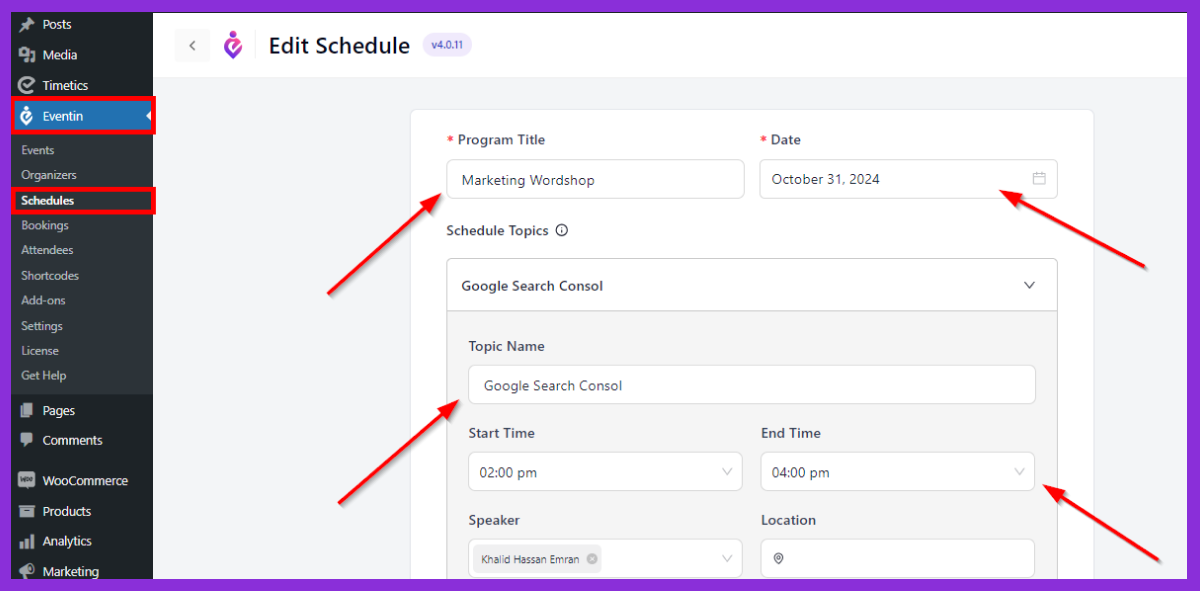
Now that your event is created, you can add the event schedule:
- Under the Eventin section, look for the “Event Schedule” tab.
- Add program titles, dates, start times, end times, speakers, and any other relevant details.
- When your event spans several days, you can arrange sessions according to days.
Step 4: Add the event schedule tab to the Event
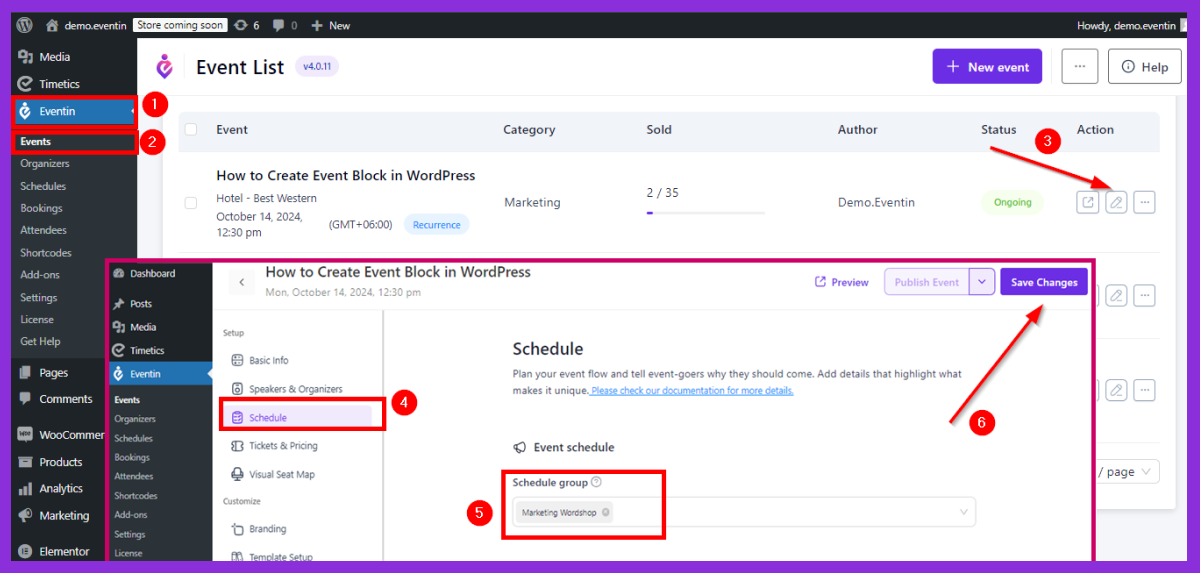
- Navigate to Eventin > Events > Edit > Schedule.
- Choose a schedule that you created recently from the “Schedule group.“
- Lastly, Save changes > Check and preview
Step 5: Add the event schedule tab to your WordPress website
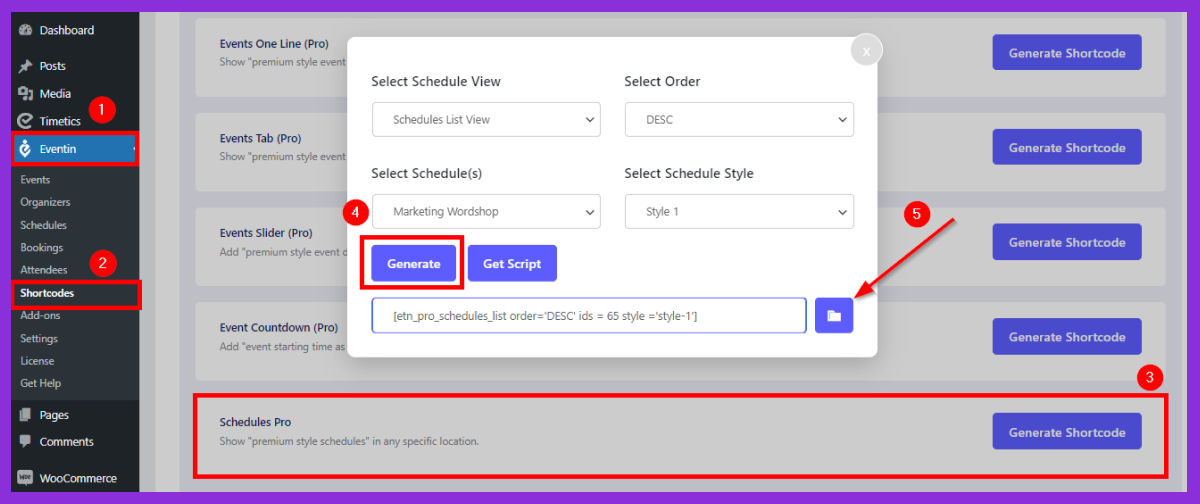
- Go to your dashboard and navigate to Eventin > Shortcodes > Schedules Pro.
- Click “Generate Shortcode”
- Copy and paste into the page (guide below).
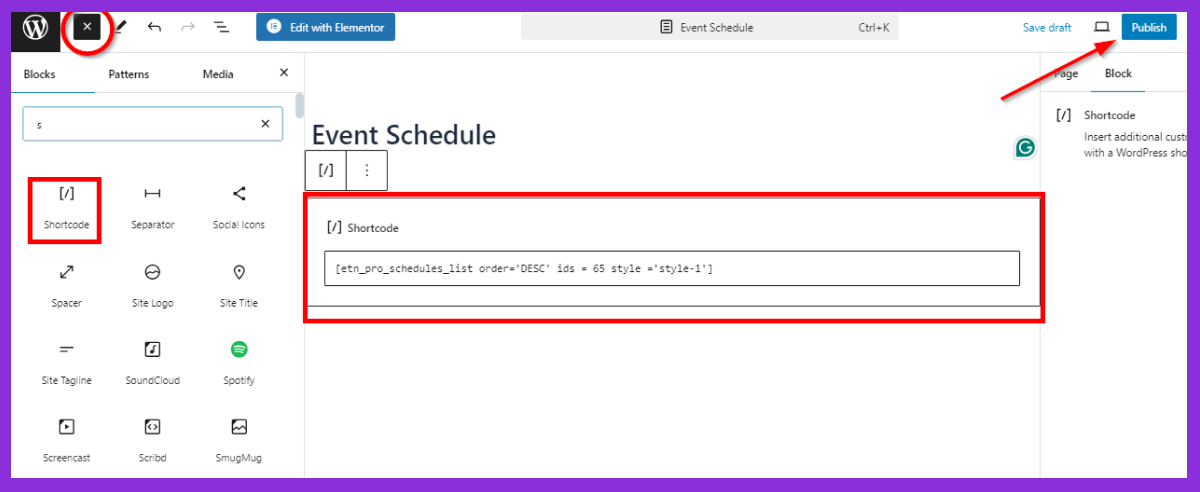
Once you’ve done, it’s time to add it to your WordPress site:
- Go to the page where you want to display your event schedule tab.
- Click on Edit Page or Create new page and use the Copy Shortcode into the shortcode block.
- After placing the shortcode, save the draft and “Publish.”
Display the schedule tab in the Website menu
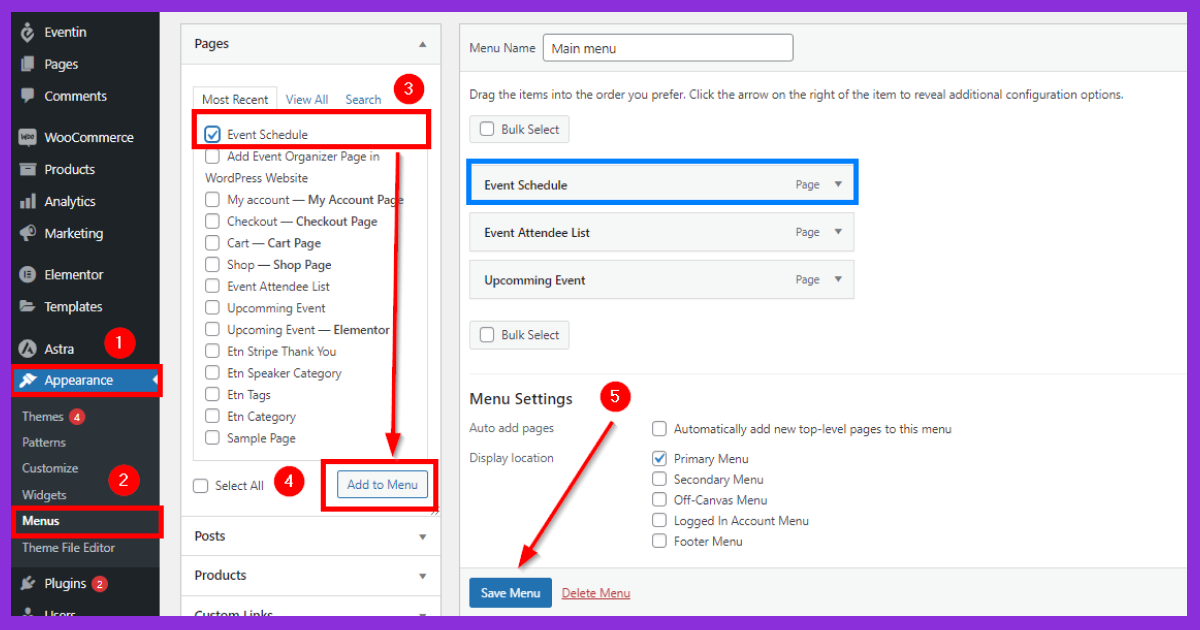
- Go to Appearance > Menus.
- Find the page you just created(“Event Schedule”) and add it to your menu.
- Click the “Save Menu” button to finalize the changes.
Step 6: Preview and publish
Always preview your event schedule before you go live.
- Preview and check how the schedule appears on desktop, tablet, and mobile devices.
- Make any necessary adjustments based on the preview results.
Congratulations!🎉
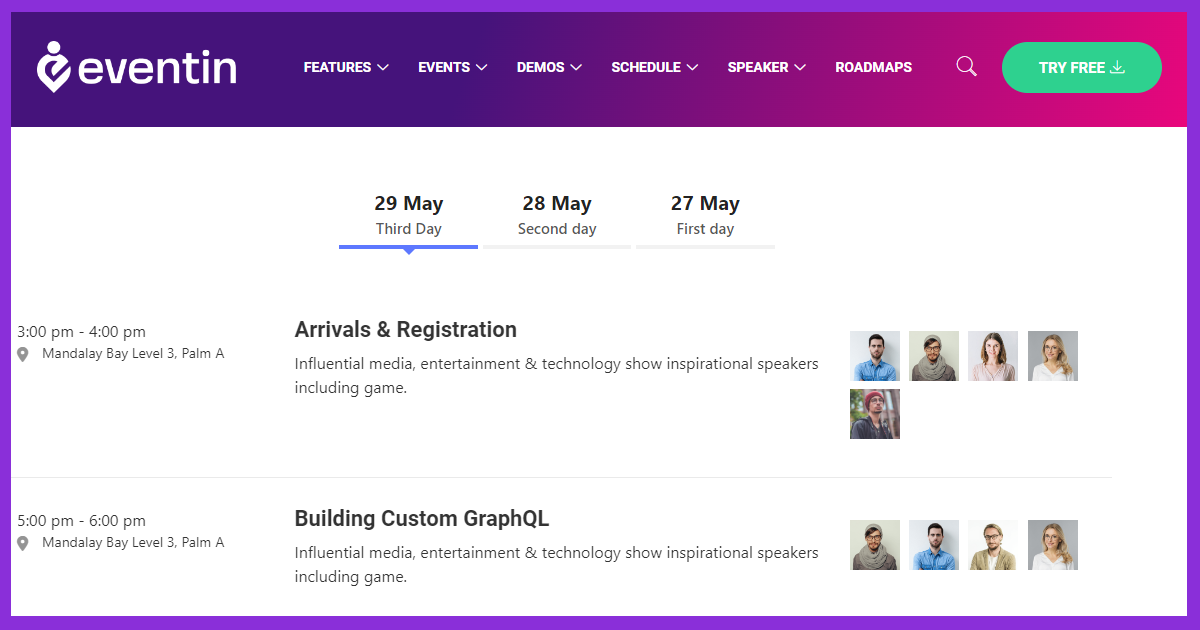
You’ve successfully added an event schedule tab to your WordPress site using the Eventin plugin.
Now, your attendees can easily access event details in a visually appealing and structured format.
Final Word
Adding an event schedule tab to your WordPress site not only simplifies event management but also elevates the overall experience for your attendees. Using the Eventin event management plugin makes this process straightforward and highly customizable.
With features like multiple session tracks, speaker bios, and flexible design options, Eventin gives you all the tools you need to create a schedule that both informs and engages your audience.
Whether you’re organizing a one-day seminar, a multi-day conference, or a virtual webinar series, having a dedicated event schedule is essential to ensuring everything runs smoothly.
If you haven’t added an event schedule tab to your WordPress event pages yet, now is the time to get started. Organizers will appreciate its simplicity and clarity, and attendees will appreciate the convenience it provides. 🎊
FAQ about WordPress event schedules

1. Can I add an event schedule without using a plugin?
-Yes, you can create an event schedule manually by using WordPress’s built-in tools, such as pages, tables, and widgets. This method is time-consuming and has a very basic function.
2. Is Eventin Event Management Plugin free to use?
-Eventin offers both free and premium versions. The free version includes standard event management features, while the premium version provides access to advanced features like multiple event schedules, ticketing systems, and event countdown timers.
3. Can I integrate Eventin Event Management Plugin with other WordPress plugins?
-Yes, Eventin event manager is compatible with many popular WordPress plugins, including WooCommerce (for ticket sales), Elementor (for design customization), and WPForms (for registration forms).
4. How do I update my event schedule once it’s live?
-Updating your event schedule is easy. Simply go to the Eventin dashboard, click on the event you wish to edit, and make the necessary changes. The updates will automatically reflect on your live site.
5. Is it possible to display multiple event schedules on one page?
-Yes, Eventin Event Management Plugin supports multiple event schedules. You can create separate schedules for different days, tracks, or types of sessions and display them all on one page using different shortcodes.