How to Add Event Organizer Page in WordPress Website
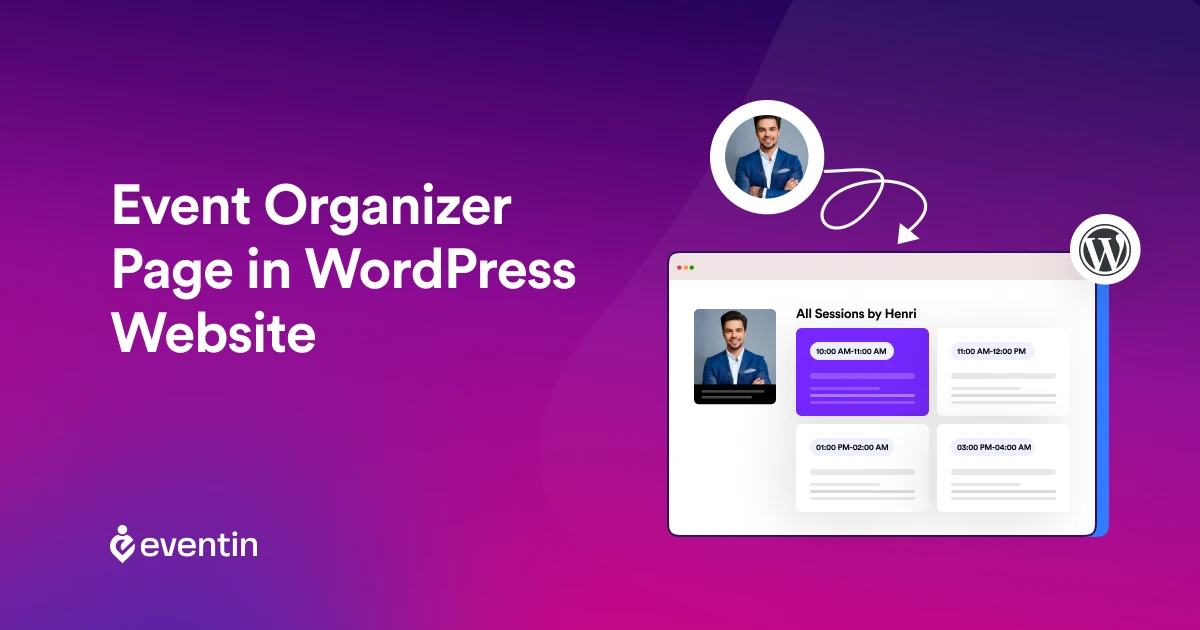
Table of Contents
If you’re an event planner or organizer managing events on a WordPress website, you may know that attendees are interested in knowing who is organizing or hosting the event. That’s why adding an organizer page is very important for .
Having an event organizer page can significantly enhance the attendee experience. It provides a centralized place where visitors can learn about event organizers, their credentials, and the upcoming events they host.
In this tutorial blog guide, we’ll explore how to add event organizer page using the Eventin event management plugin for WordPress.
You will learn from this blog:
- How to Create an Event Organizer Page
- How to Customize the Event Organizer Page
- Advanced features and enhancements
- Common Questions and Answers

Why Use Eventin Plugin to Create an Event Organizer Page ?
Events Management Plugins provide virtual and onsite events to be organized, promoted, and managed. So, you can automate the event management process from beginning to end and improve the experience for both the website owner and visitor.
Key Features of Eventin Event Management Plugin:
- Speaker/Organizer list, slider and details
- Recurring events
- Multivendor event marketplace
- Automatic certificate issue
- Unique QR code
With the Eventin event management plugin, the whole process can be easily managed. Therefore, thousands of event organizers and planners love Eventin Event Management Plugin for WordPress events. This plugin was designed for businesses, organizations, or event planners who need to coordinate large-scale events, handle ticket sales, manage payments, distribute certificates, and manage marketing campaigns for large-scale events. For conferences, festivals, webinars, salons, or any event that requires more complex planning and engagement, it is perfect.
Step-by-Step Guide to Add Event Organizer Page Using Eventin Plugin
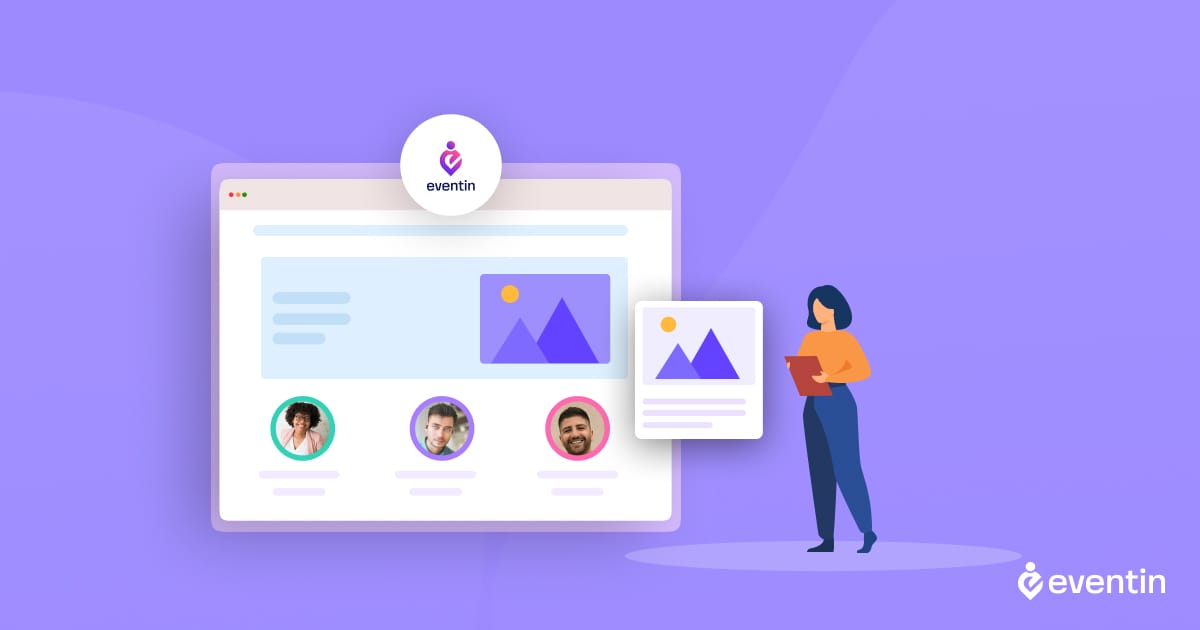
As you already know, we are creating an event organizer page using the Eventin event management plugin. We don’t want to waste your time reading a lot of text, so we have organized this tutorial into 7 simple steps. If you are already an Eventin Event Manager plugin user, you can skip the installation part and proceed to the next step.
Step 1: Install and Activate the Eventin Plugin
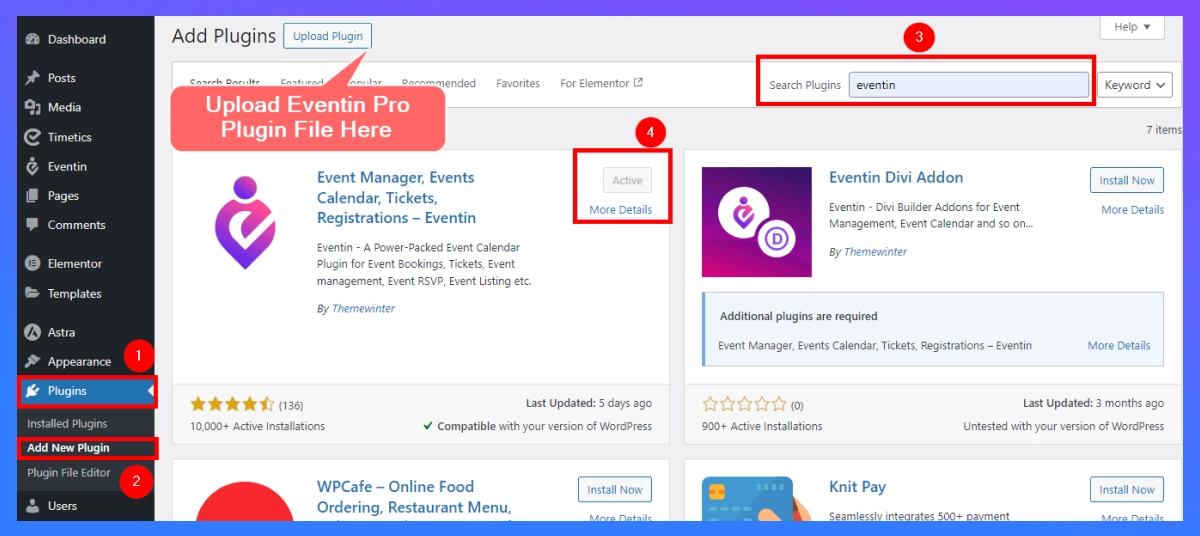
- Log in to your WordPress dashboard.
- Go to Plugins > Add New Plugin.
- Search for “Eventin” and “Install” the plugin.
- After installation, click the “Activate” button to enable the plugin on your site.
Now a new menu option titled “Eventin” will appear in your WordPress dashboard sidebar.
Step 2: Configure Eventin Settings
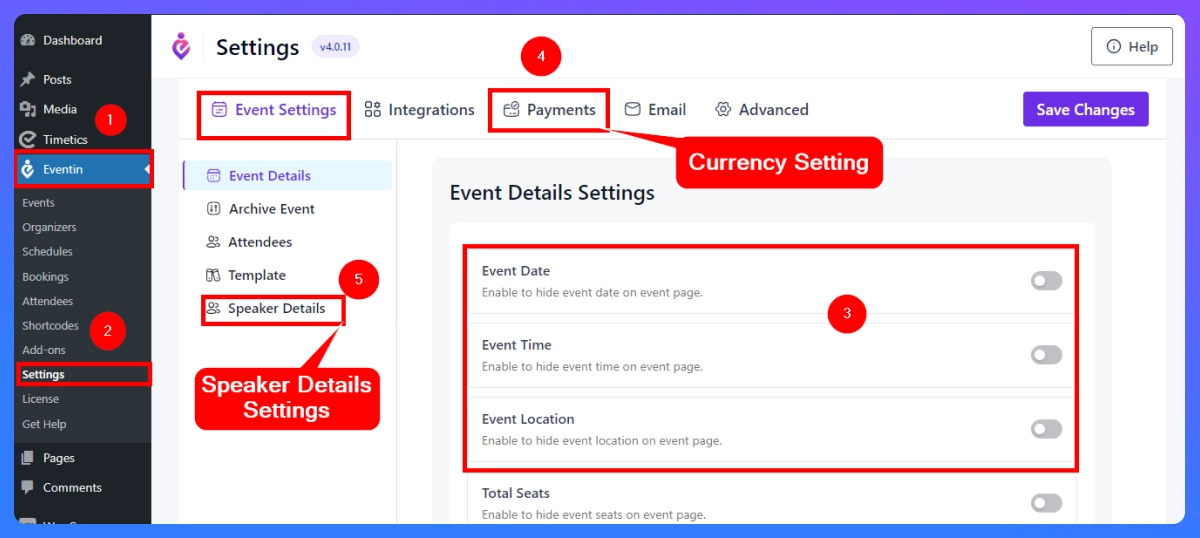
- On your WordPress dashboard, navigate to the Eventin > Settings.
- Configure event defaults, such as time zones, currency (if you’re selling tickets), and display options. With Eventin, you can customize these settings according to the needs of your site.
- You can also configure the “Show Email” settings for organizers and speakers
Step 3: Create an Organizer Profile
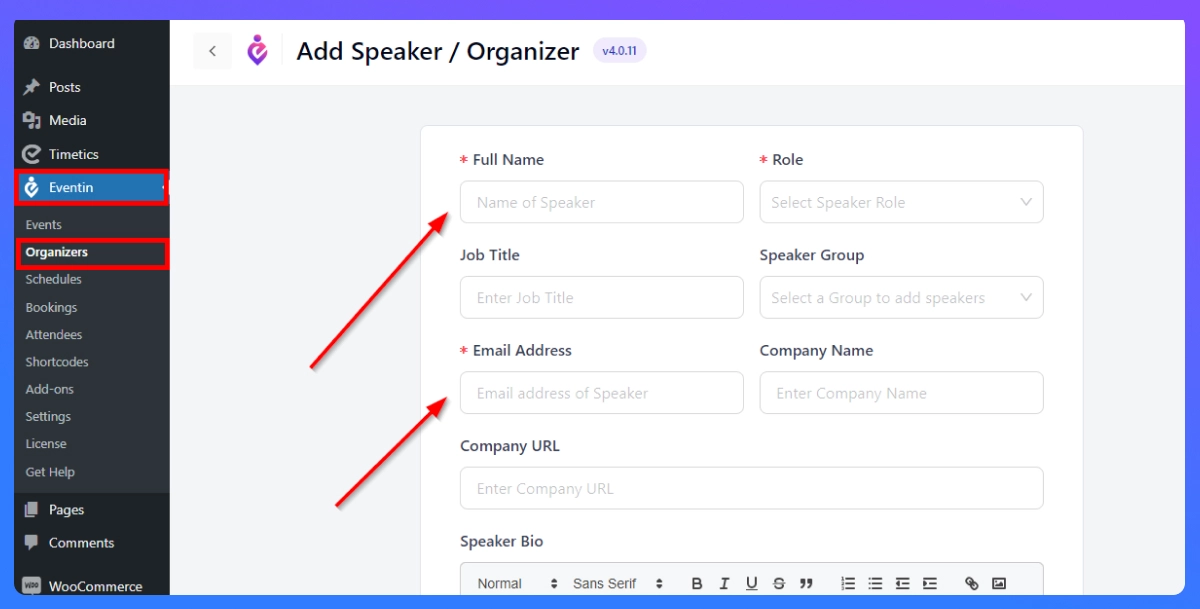
Go to Eventin > Organizers: In the Eventin menu, click on the ‘Organizers’ tab.
Add New Organizer: You’ll see a “Let’s Start Creating” button at the middle of the screen. Click on it to create a new organizer profile.
👉Fill in the Organizer Details:
- Name: Enter the organizer’s name.
- Profile Image: Upload a profile image of the organizer.
- Contact Information: Add the organizer’s contact details, including email, phone number, and website.
- Social Media Links: You can also add links to the organizer’s social media profiles.
- Biography: Write a brief description of the organizer’s background, experience, and expertise.
Publish the Organizer Profile: Once you’ve filled in all the necessary details, click the “Publish” button to create the organizer profile.
Step 4: Assign the Organizer to an Event

- Go to Eventin > Events: Navigate to the ‘Events’ tab under Eventin.
- Edit or Create a New Event: You can either create a new event or edit an existing event to assign an organizer.
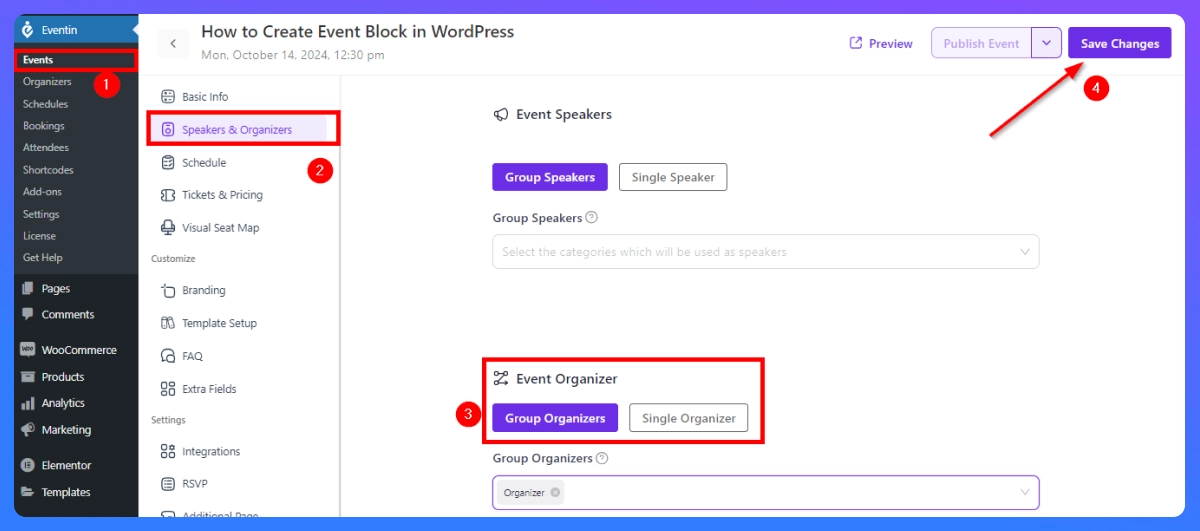
- In the event editor, look for the “Event Organizer” section. Here, you can select “Group Organizers” or “Single Organizer”.
- After assigning the organizer, ensure you “Save Changes” to the event.
Step 5: Configure Speaker Template
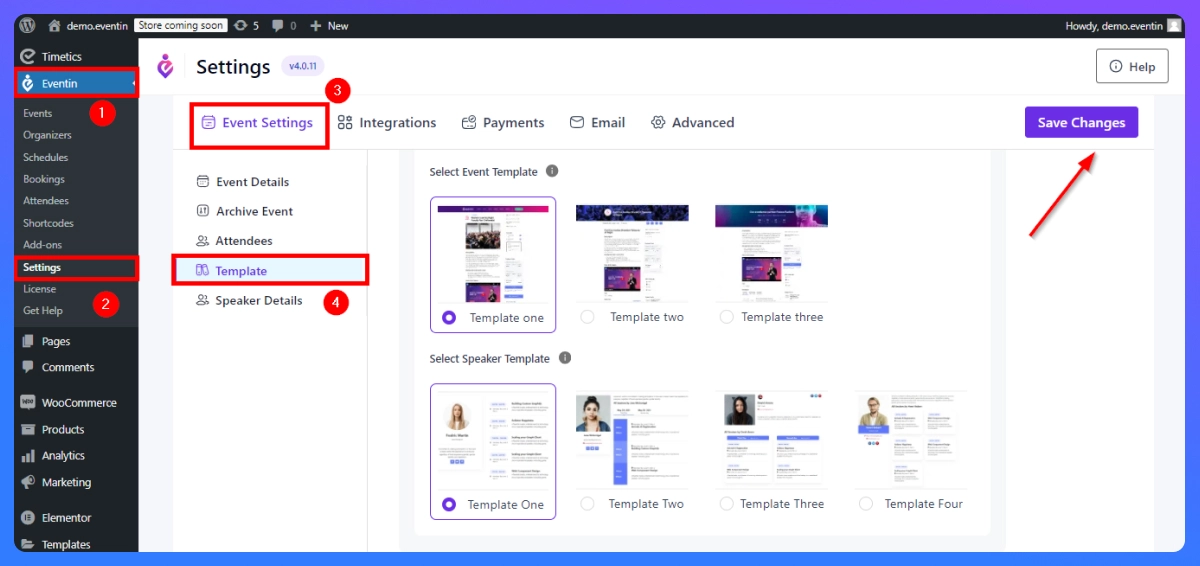
You can edit the speaker/organizer template so that you have the option of choosing how you want your speaker profile to appear on your website. The speaker slug name and template can be accessed from your Dashboard > Eventin > Setting > Event Setting > Template > Save Changes.
Step 6: Eventin Speaker/Organizer Shortcode Create and Implement
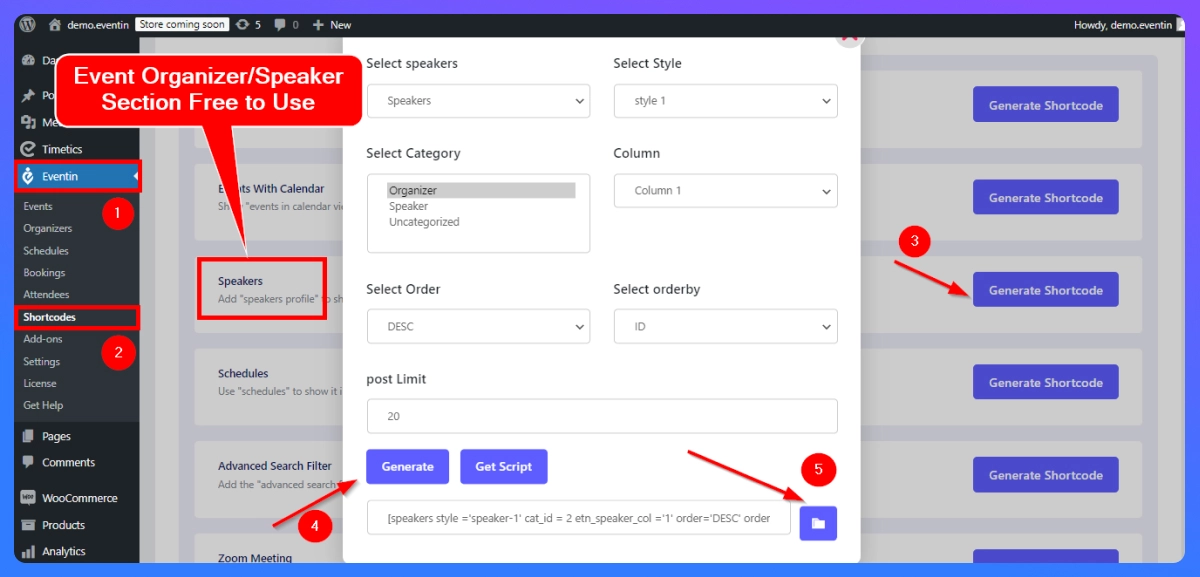
To create an event organizer shortcode in the eventin event management plugin, go to Dashboard > Eventin > Shortcode > Generate Shortcode > Copy Code.
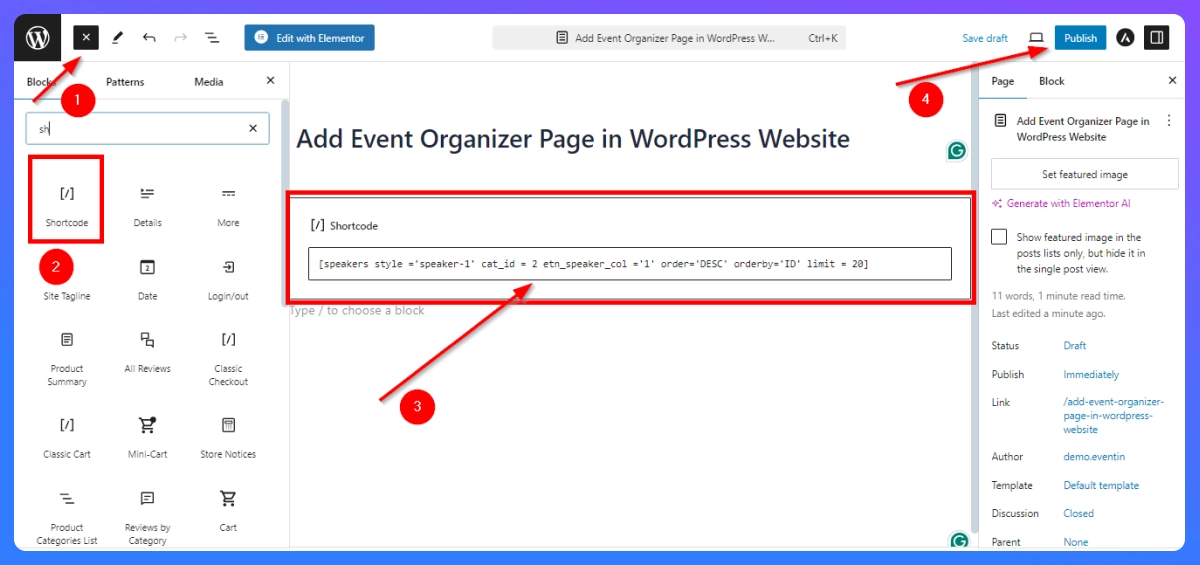
- Create a New page or previous one where you want to display the organizer information.
- In the page or post editor, click shortcode block > past copy shortcode > publish page.
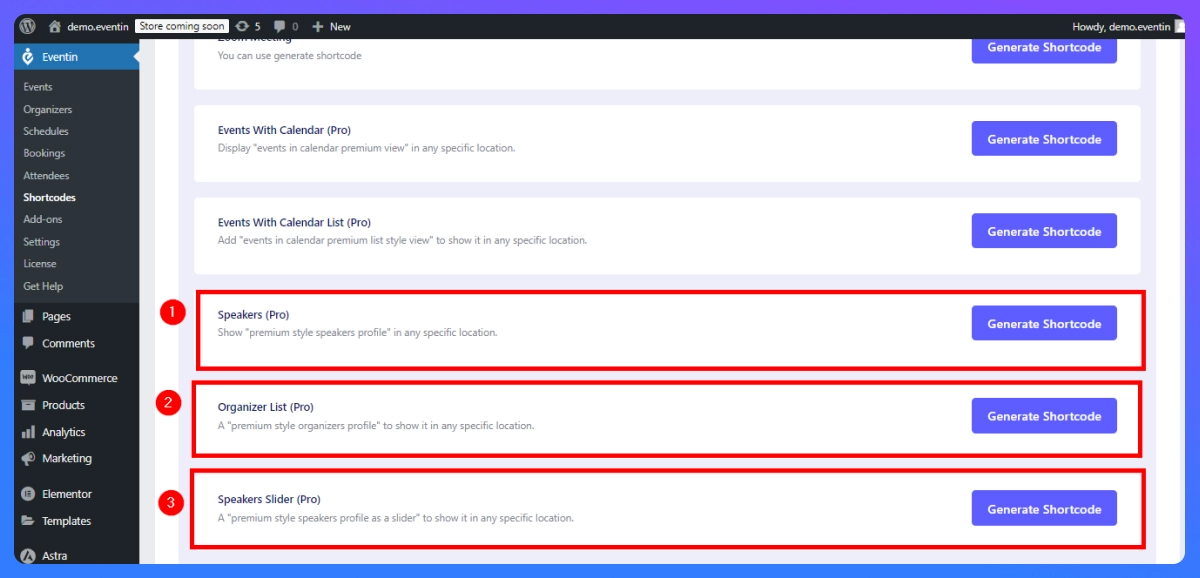
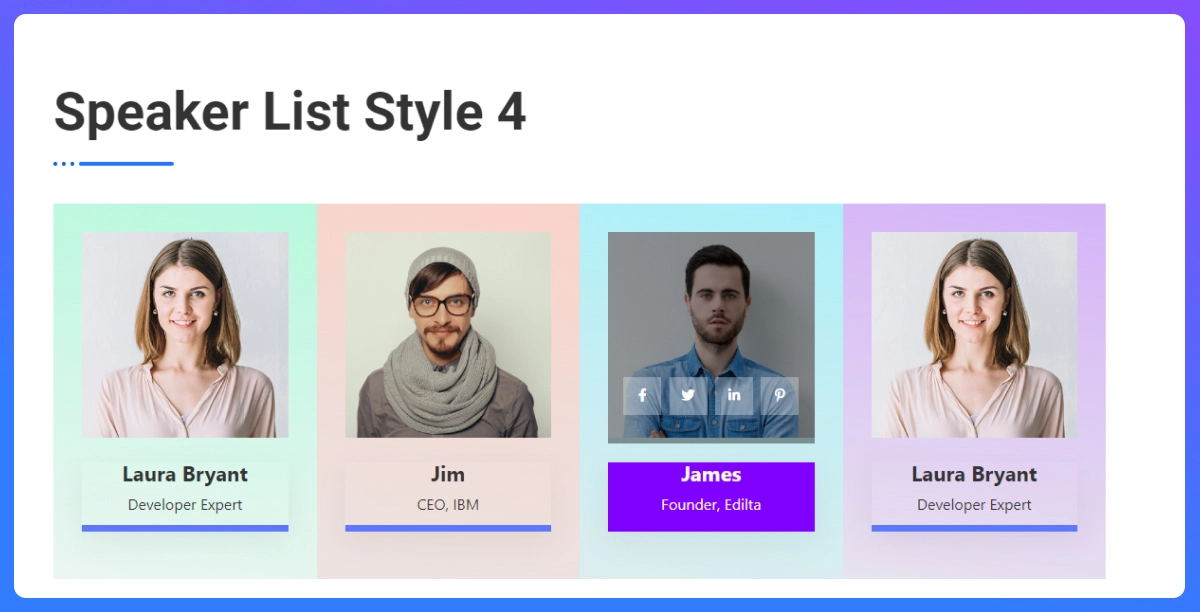
📌 With the eventin pro plan, you can get many more organizer options. When you add the “Organizer list” shortcode to the page, you can see a list of event organizers/speakers sections.
Step 7: Test Your Event Organizer Page
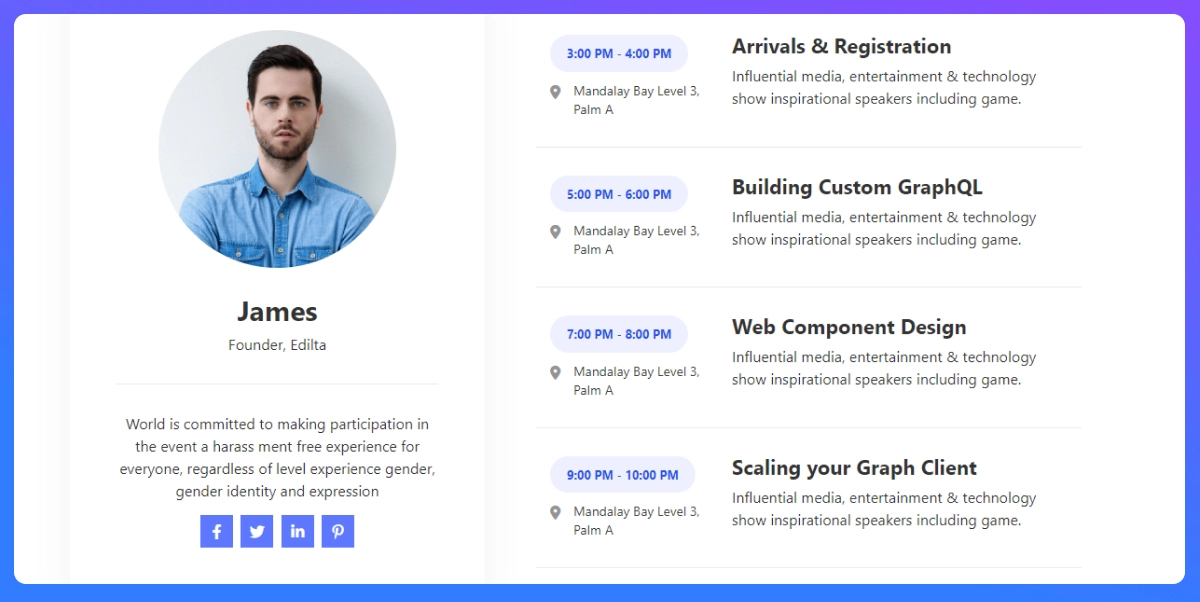
After customizing the organizer page, it’s important to test it to ensure that it works as intended.
- View the Page: Open the organizer page on the front end of your site to ensure it’s displaying correctly.
- Test Links and Functionality: Click on the links to ensure that the contact details, social media links, and event listings are all functioning properly.
- You can check this documentation if you are still having any problems.
Explore More Event Management Features With Eventin Event Management Plugin
Eventin offers a wide range of additional features that make it one of the most comprehensive event management plugins for WordPress. Here are a few more features you can explore:
- Ticket Sales: Integrate with WooCommerce to sell tickets for your events and track sales directly from your website.
- Event Calendar: Display an interactive event calendar that allows users to view upcoming events at a glance.
- Zoom Integration: Host virtual events with built-in Zoom support, allowing for a smooth webinar or conference management.
- Attendee Management: Track attendees, send reminder emails, and manage registrations for both online and offline events.
- Customizable Email Templates: Eventin allows you to send automatic emails to attendees with customized templates for confirmations, reminders, and event updates.
These additional features make Eventin a powerful tool for managing all aspects of event organization and attendee engagement.
Frequently Asked Questions (FAQ)

1. Can I use Eventin for both virtual and physical events?
-Yes, Eventin event management plugin supports both virtual and physical events. With features like Zoom integration and WooCommerce ticketing, it’s suitable for all event types.
2. Is Eventin compatible with any WordPress theme?
-Eventin is compatible with most WordPress themes. It also offers customization options to ensure that your event pages match your site’s overall design.
3. Can I manage multiple organizers and speakers for one event?
-Absolutely. Eventin event management plugin allows you to assign multiple organizers and speakers to any event, making it ideal for conferences or large events with several hosts.
4. Does Eventin event manager offer analytics for event performance?
-Yes, Eventin provides reporting tools that help you track attendee engagement, ticket sales, and other key event metrics.
5. Is there a free version of “Eventin event management plugin” available?
-Eventin offers both free and premium versions. The free version includes basic event management features, while the premium version unlocks advanced functionality such as ticketing and Zoom integration.
