How to Create Event Attendee List in WordPress Event Website
Table of Contents
Are you looking for how to create event attendee list in WordPress event website? If so, learn how to create an event list on your website easily.
You can use the “Attendee List” to display on the event webpage, allowing users to see who is attending your conferences, workshops, or meetups. It is also a useful tool that allows you to prepare for future events by organizing relevant information about attendees.
This guide will cover the steps to create and manage an event attendee list on your WordPress event website. We will discuss ways to collect attendee information, organize the list, and use the data to enhance your event planning and execution.
Quick Overview
We would like to provide a quick overview of what we will be learning from this blog and what we will be doing in this blog at a glance.
📌 The importance of the Event Attendee List in event management
📌 Summary of the purpose and benefits of the Event Attendee List
📌 The easiest way to create an event attendee list on a WordPress website
📌 Event management tools related suggestions

What is Event Attendee List in WordPress?
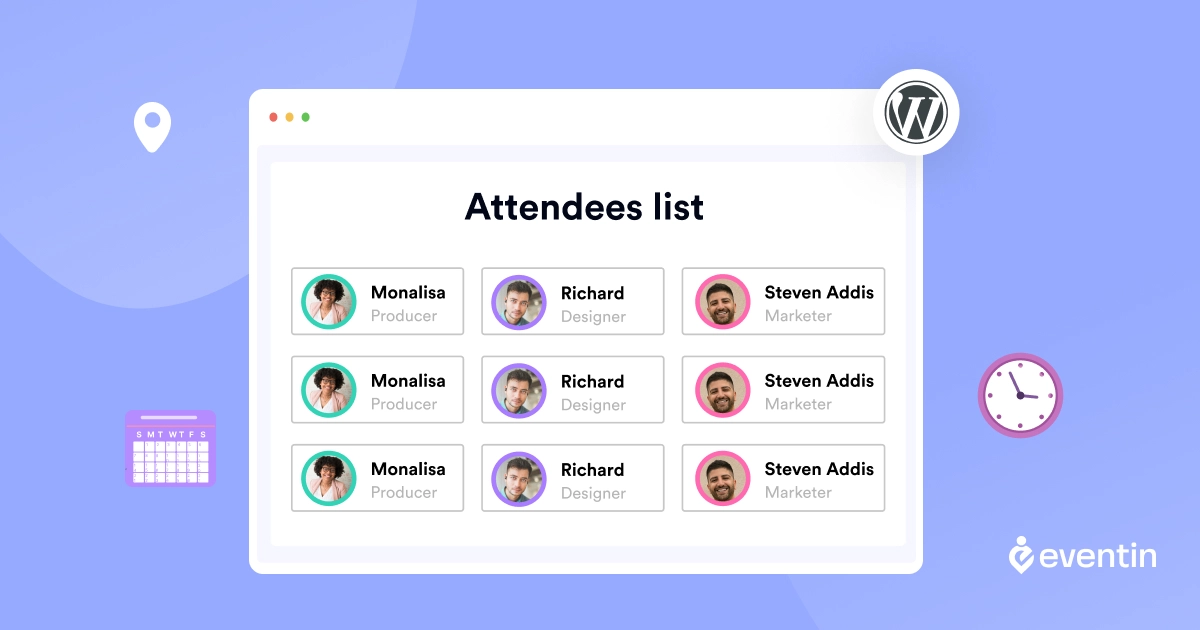
An Event Attendee List is a comprehensive database of individuals that allows the admin/event planner to manage and track the people who have registered for or plan to attend an event organized through a WordPress website. This list can be displayed on the event website where attendees can see the list of other attendees. It typically includes:
- A database to store attendee information
- Integration with event registration forms on your site
- An admin interface to view and manage the list
Importance and Benefits of Creating Event Attendee List
Event Attendee Listing in WordPress provides valuable insights into your audience and helps you plan and execute your event more professionally.
- It allows you to keep track of all participants in one place
- Seeing other attendees participate, they became interested
- Display new event attendees in the website’s “attendee list” when they register
How to Create an Event Attendee List in WordPress Using a Plugin
Creating an event attendee list in WordPress event Website is a very easy process if you use the right event management plugin. To simply create and manage your event attendee list, you will need two key plugins: The first one is the WooCommerce plugin to handle the sales process and an event management plugin to list and organize your events on your website.
There are several popular plugins available for creating an event attendee list in WordPress website. Some of the most popular options include The Events Calendar, WP Events Manager and Eventin Event Management Plugin for WordPress. In this tutorial we will use Eventin Event Management Plugin as an example, because by using this event management plugin you can create your own event attendee list without any coding skills in just 5 simple steps.
Step 1: Install Required Plugins
Let me show you how to install a plugin through the WordPress dashboard.
- Log in and go to the WordPress dashboard
- Go to Plugins > Add New Plugin.
- Type “Eventin” in the search bar. (Similarly, do it for WooCommerce)
- Now Click on Install Now, then Activate the plugin after installation.
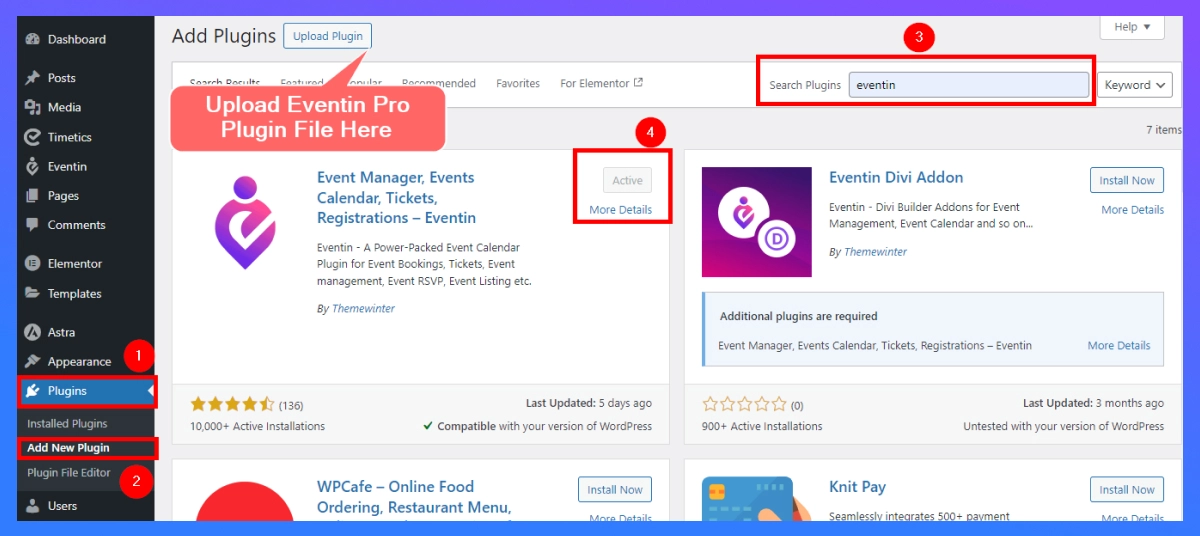
Follow these steps when installing Eventin Event Manager Plugin Pro
- Download Eventin Pro from Themewinter website
- Log in and go to the WordPress dashboard
- Go to Plugins > Add New Plugin > Upload Plugin
- Now Click on Install Now, then Activate the plugin after installation.
Step 2: Create Event Attendee list
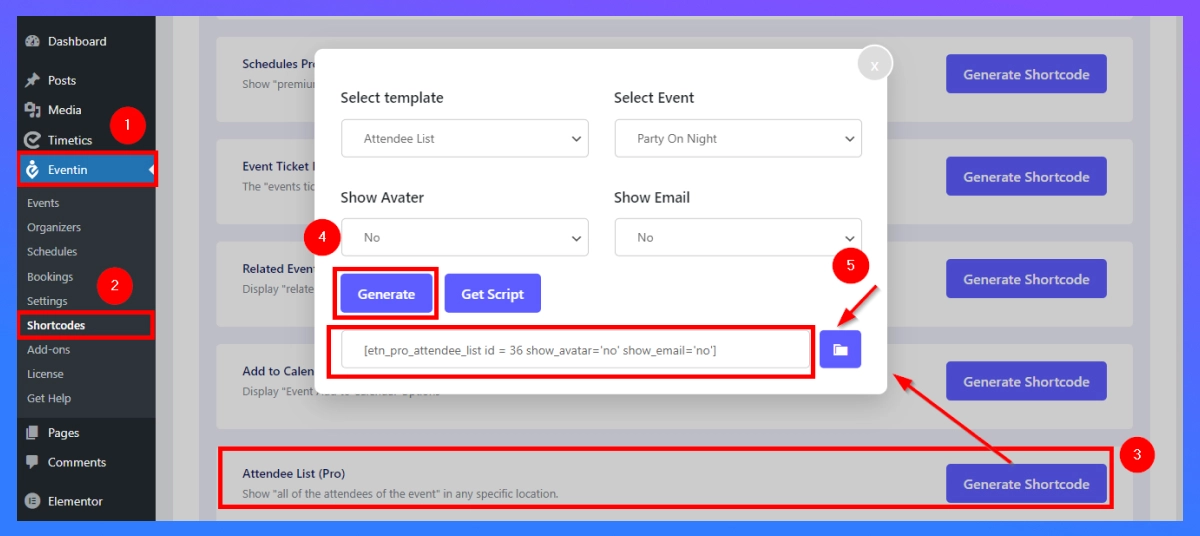
- Dashboard > Eventin > Shortcodes
- Find “Attendee List” and Click “Generate Shortcode”
- Select the Template, Event, Avatar and Email that you would like to view.
- Click “Generate” to get the shortcode
- Copy and paste into the page (guide below).
Step 3: Create Event Attendee List Page
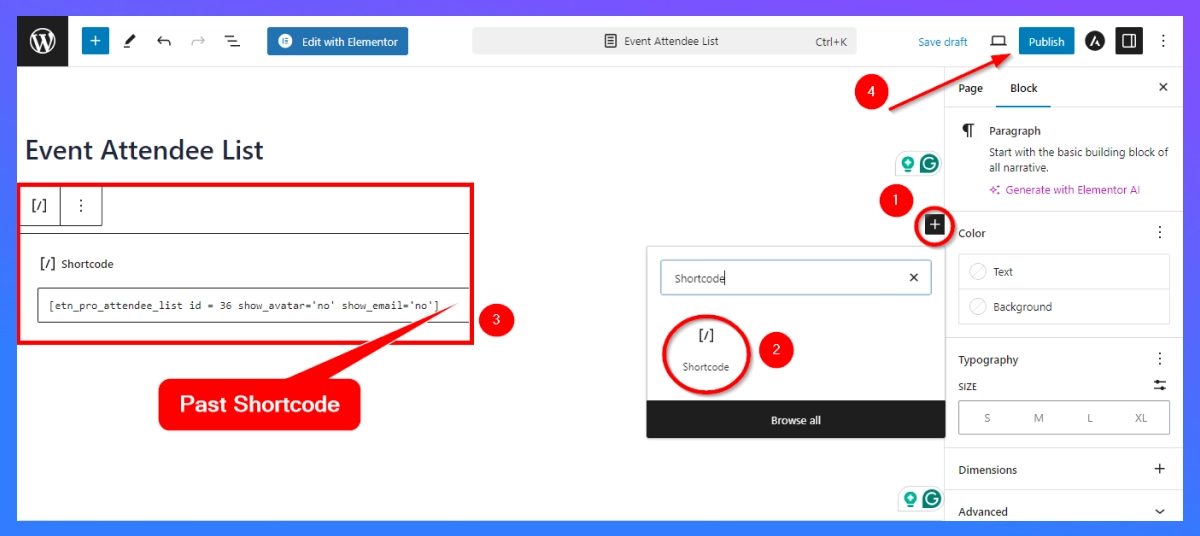
- To display your event attendees, create a dedicated page. Go to Pages > Add New.
- Now paste the shortcode into your page “Shortcode box.”
- Save Draft and Publish: Select a title for your page (like Event Attendee List) and then hit Publish. The page will automatically generate a list of all attendees.
Step 4: Configure Settings
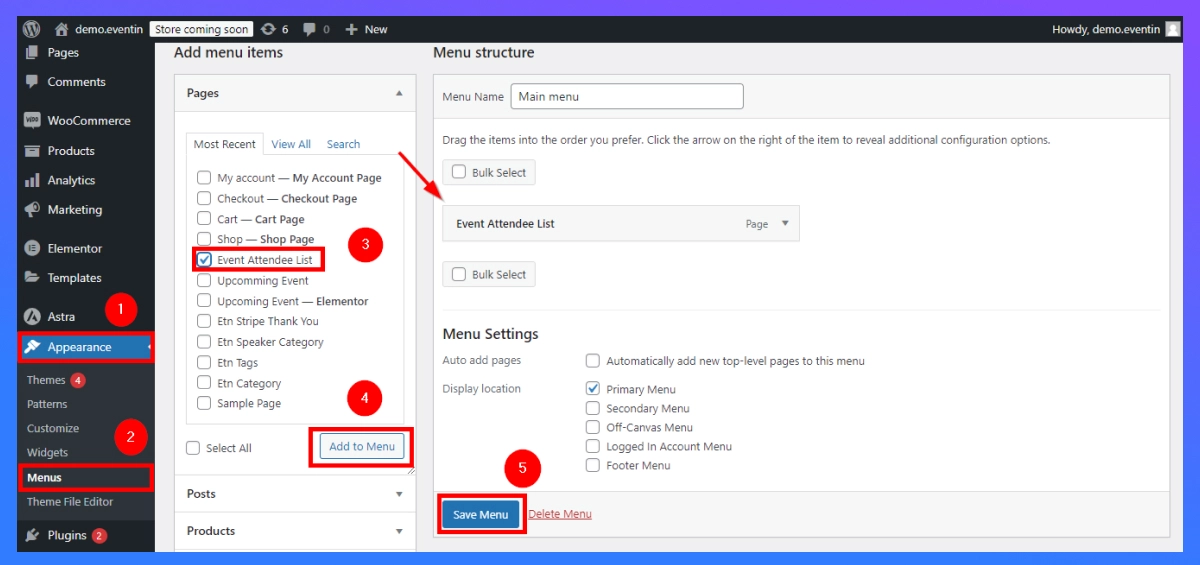
- Go to Appearance > Menus to make your event list easily accessible in Website view.
- Find the page you just created(“Event Attendee List”) and add it to your menu.
- Lastly, click “Save Menu” to complete the process.
Step 5: Manage Your Event Attendee List
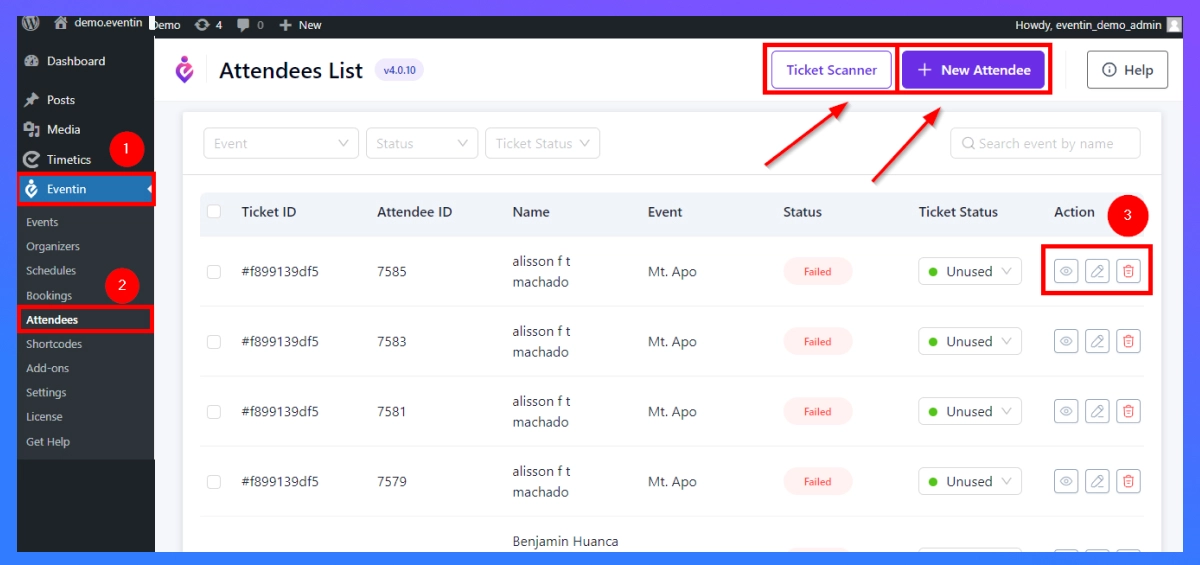
- To update or modify any event attendee, navigate to Eventin > Attendee.
- Using this section, you can edit, delete, or view the details of existing event attendees.
- You can easily add new attendees manually from “New Attendee.”
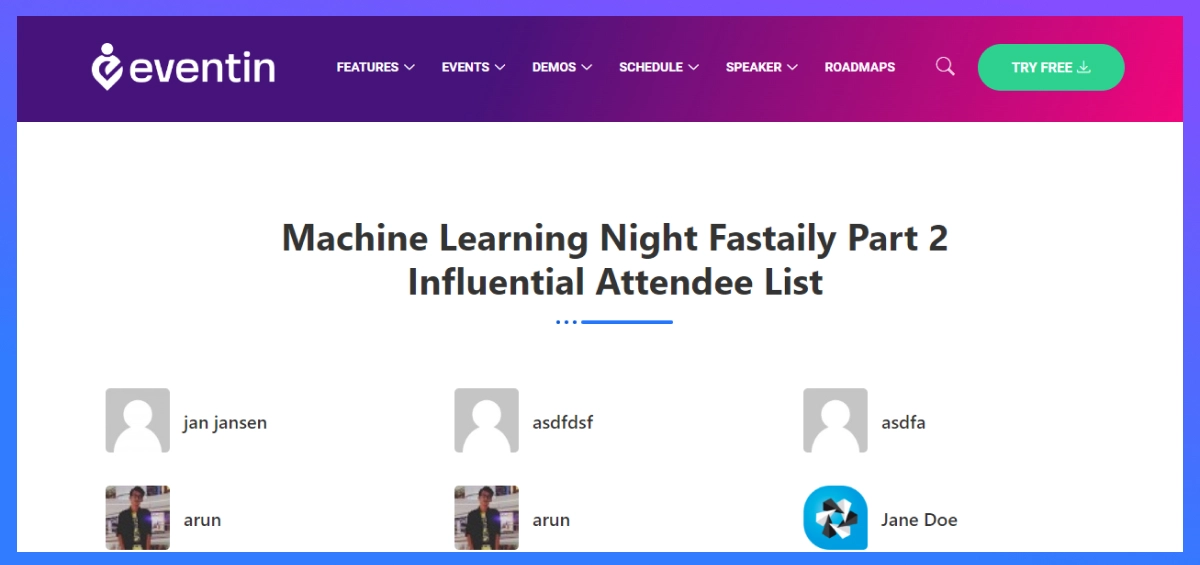
Attendee List Frontend View on WordPress Website
📌 Want to know “How to Add Event Listing in WordPress” | Read more
Explore More Event Management Feature Options With Eventin Event Management Plugin
I hope that after reading this blog, you can easily create an Event attendance list on the WordPress Event Website. If you have any questions, please feel free to reach out to our Facebook community. We are always happy to help!
As a final note, we recommend using the Eventin Premium plan if you would like to engage your users and provide valuable content. Using the Pro plan, you have access to all advanced features such as listing event attendees, listing the event calendar, listing speakers, listing organizers, adding QR code tickets, creating recurring events, making event certificates, and many more.

