How to Speed Up Your WordPress Site in 2025 [Beginner Guide]
Table of Contents
If your WordPress site is slow to load—you’re losing visitors every second.
A slow website can hurt user experience, lower your conversion rates, and push your site down in search engine rankings.
Moreover, search engines like Google, Bing, and Yahoo prioritize fast-loading websites in their rankings. So, making website speed optimization not just a luxury but a necessity.
So, keep reading this blog…
This WordPress site speed optimization guide is prepared for everyone—from beginners to advanced users—who wants to ensure their WordPress site delivers a seamless experience.
We’ll cover why website speed matters, how to measure it, and actionable steps to optimize your website. At the end of this blog, you’ll have a clear roadmap to make your WordPress site faster than ever.
Quick Summary
After reading this guide, you’ll have a clear step-by-step plan to boost your WordPress site’s speed, improve search rankings, and give visitors a smoother browsing experience.
- Why speed matters-how slow load times hurt user experience, conversions & SEO.
- How to test your website’s performance using free tools.
- Key speed metrics to watch such as TTFB, LCP, and FCP.
- 15 proven optimization methods to make WordPress faster.
The impact of slow-loading websites on user experience, conversions, and SEO
A slow-loading website can silently damage your success. Studies and statistics have clearly shown that even a few seconds (or milliseconds) of delay in page load time can negatively affect how users interact with your site (Source: WP Rocket).
Let’s break down the key impacts of slow load times on user experience, conversion rates, and search engine optimization (SEO):
Impact on user experience
- Frustration and abandonment: Visitors grow impatient if a page takes too long to load and often leave before it fully appears – over half of visitors will abandon a site if it takes longer than 3 seconds to load.
- High bounce rates: Longer wait times cause more visitors to “bounce” (leave immediately) – even a 2-second slowdown can double the number of people who exit.
- Negative brand perception: A sluggish site creates a poor impression. Visitors may see it as unprofessional or unreliable, making them less likely to trust your business or return.
- Lower engagement: Even those who don’t leave immediately will view fewer pages and interact less if every click is delayed.
Impact on conversions
- Missed sales and leads: Every extra second of load time can cost you conversions; many users will give up before completing the desired action (for example, they might abandon their shopping cart).
- Reduced revenue: Small delays can have a big financial impact – for example, one study showed a 0.1-second slowdown led to a 7% drop in conversion rates. Those lost conversions add up to significantly lower revenue.
- Loss of customer loyalty: A poor speed experience can drive people away. Users who find your site slow are unlikely to return, and even loyal customers may start looking elsewhere.
Impact on SEO
- Lower search engine rankings: Search engines like Google use page speed as a ranking factor. A slow site is likely to rank lower in search results.
- Reduced organic traffic: With lower search rankings comes a drop in organic traffic. If users quickly bounce back to the search results because your page is slow, it sends a negative signal to search engines and can further hurt your SEO.
How to check your WordPress website speed
Before you start speeding up your WordPress site, you first need to know how it’s performing now. Checking your website’s speed will give you a baseline and help identify what might be causing slowdowns. Here’s a simple step-by-step guide on how to test your WordPress website’s loading speed:
1. Choose a speed testing tool: There are several free online tools available that analyze website performance.
Popular choices include Google PageSpeed Insights, GTmetrix, Pingdom Website Speed Test, and WebPageTest. For example, Google PageSpeed Insights is a great starting point as it provides both mobile and desktop performance scores along with suggestions for improvement.
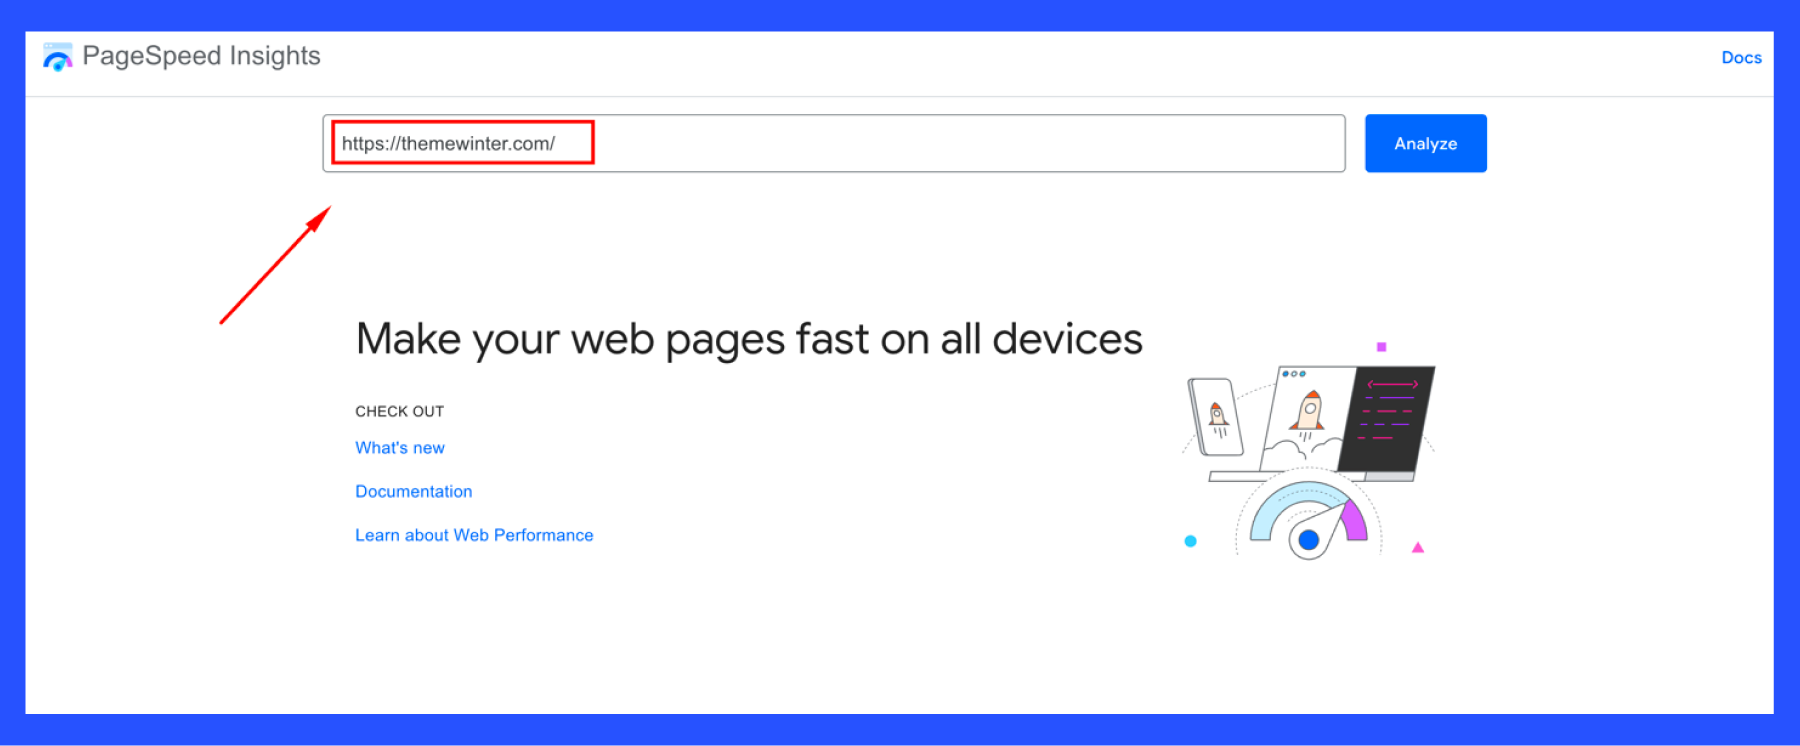
2. Enter your URL: Once you’ve picked a tool, enter the full URL of the page you want to test into the tool’s input field. Typically, you’d start by testing your homepage, since it often is the most crucial page.
You can also test specific high-traffic pages or pages that seem sluggish. (Make sure to include the http:// or https:// part of the URL as the tool instructs.)
3. Run the test: Click the analyze or start button to initiate the speed test. The tool will then load your site from a designated test server. This process may take a few seconds as the tool measures various aspects of your page’s performance.
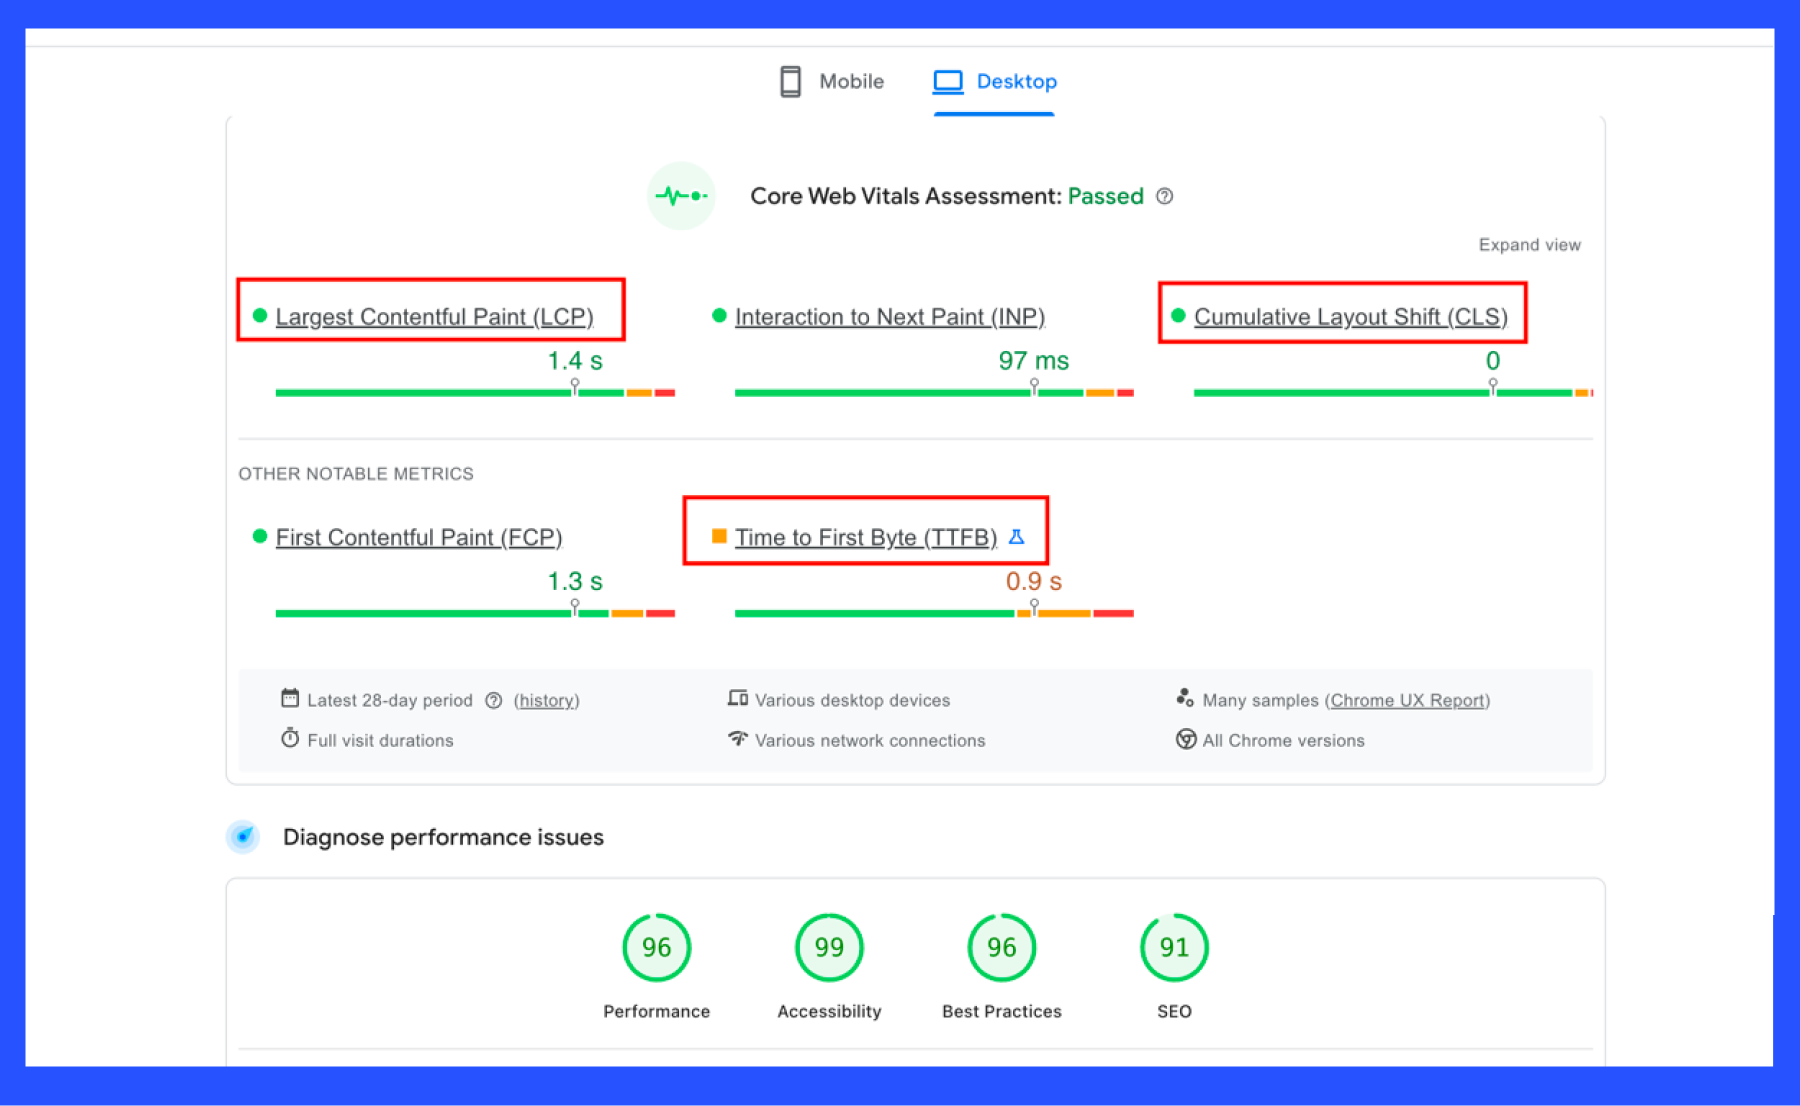
4. Analyze key metrics: After the test completes, you’ll be presented with a report.
Focus on essential speed metrics: for instance,
- Time to First Byte (TTFB) – how long it takes for the server to send the first byte of data (an indicator of server/hosting speed);
- First Contentful Paint (FCP) – when the first piece of content (text or image) is visible to the user;
- Largest Contentful Paint (LCP) – when the most significant element (like a main banner image or heading text) is prominent.
These metrics give insight into both the backend and frontend performance of your site. The report may also include an overall performance score or grade.
5. Review recommendations: Most speed test tools will list specific recommendations or “opportunities” to improve load times.
Common suggestions might be things like compressing images, eliminating render-blocking JavaScript/CSS, leveraging browser caching, or reducing server response times.
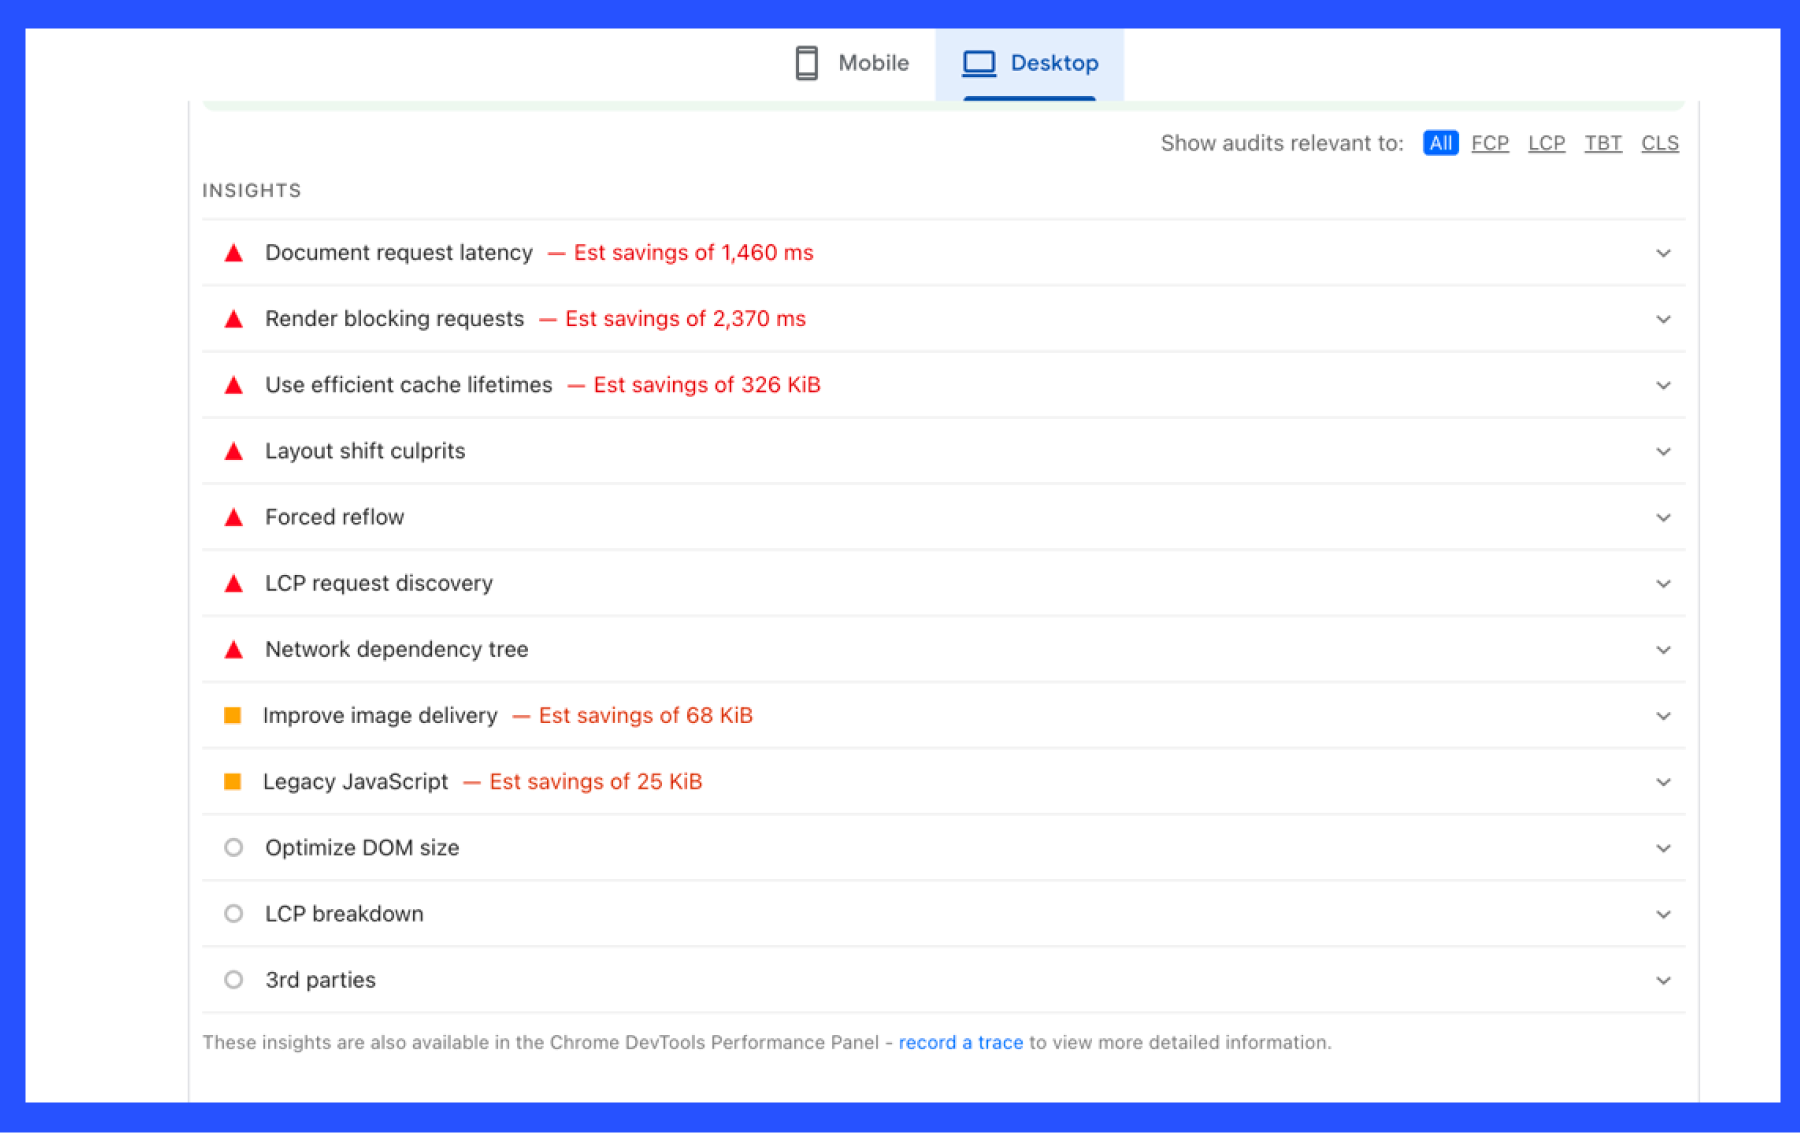
Go through these suggestions to see what optimizations apply to your WordPress site.
📌 Sources: The recommendations below are based on proven techniques and best practices from the WordPress community and performance experts.References include WordPress optimization guides and case studies which demonstrate the effectiveness of these methods.
15 Professional ways to speed up your WordPress website
Speed matters – a faster WordPress site keeps visitors happier, boosts conversion rates, and even ranks higher on search engines.
To help you achieve a blazing-fast site, here are 15 professional tips to speed up your WordPress website.
Each tip includes a simple explanation, why it improves site performance and step-by-step instructions to put it into action.
1. Choose a fast hosting provider for your WordPress site
Your web hosting is the foundation of your site’s performance. This tip is about picking a fast, reliable hosting provider that is optimized for WordPress.
In simple terms, a good host gives your site a strong engine, while a poor host can be like a slow engine holding you back.
Why does this speed up your site?
- A reputable hosting service is specifically optimized for speed, ensuring high server performance for WordPress.
- Faster hosts have better hardware (SSD storage, sufficient memory) and efficient server configurations, resulting in quicker response times (lower TTFB) for your pages.
- Managed WordPress hosts often include built-in caching and CDN features, which further improve loading times.
How to choose the best hosting provider and implement:
- Research quality hosts: Look for WordPress-recommended or performance-tested hosting providers. For example, Kinsta, SiteGround, and WP Engine.
- Choose the right plan: If you’re on a slow shared hosting plan, consider upgrading. A managed WordPress hosting plan or a VPS/cloud plan often provides more resources and speed optimizations than basic shared hosting.
- Migrate your site if needed: Once you select a fast host, follow their migration guide or use a plugin to move your WordPress site. Many hosts will migrate your site for free. Always back up your site before migrating.
- Monitor performance: After switching, test your site’s speed (using tools like Pingdom or GTmetrix). Ensure the new host indeed improved your load times. Good hosts will show a noticeably snappier response.
💁 Related reading: Premium WordPress Hosting: How Kinsta is Ahead of Competition- Read more
2. Keep your WordPress website up to date (also themes and plugin)
Keeping your WordPress site up to date means always running the latest version of WordPress core, along with updates for all themes and plugins. In other words, don’t ignore those “update available” notifications in your dashboard. Updates often include performance improvements and bug fixes that make your site run more efficiently.
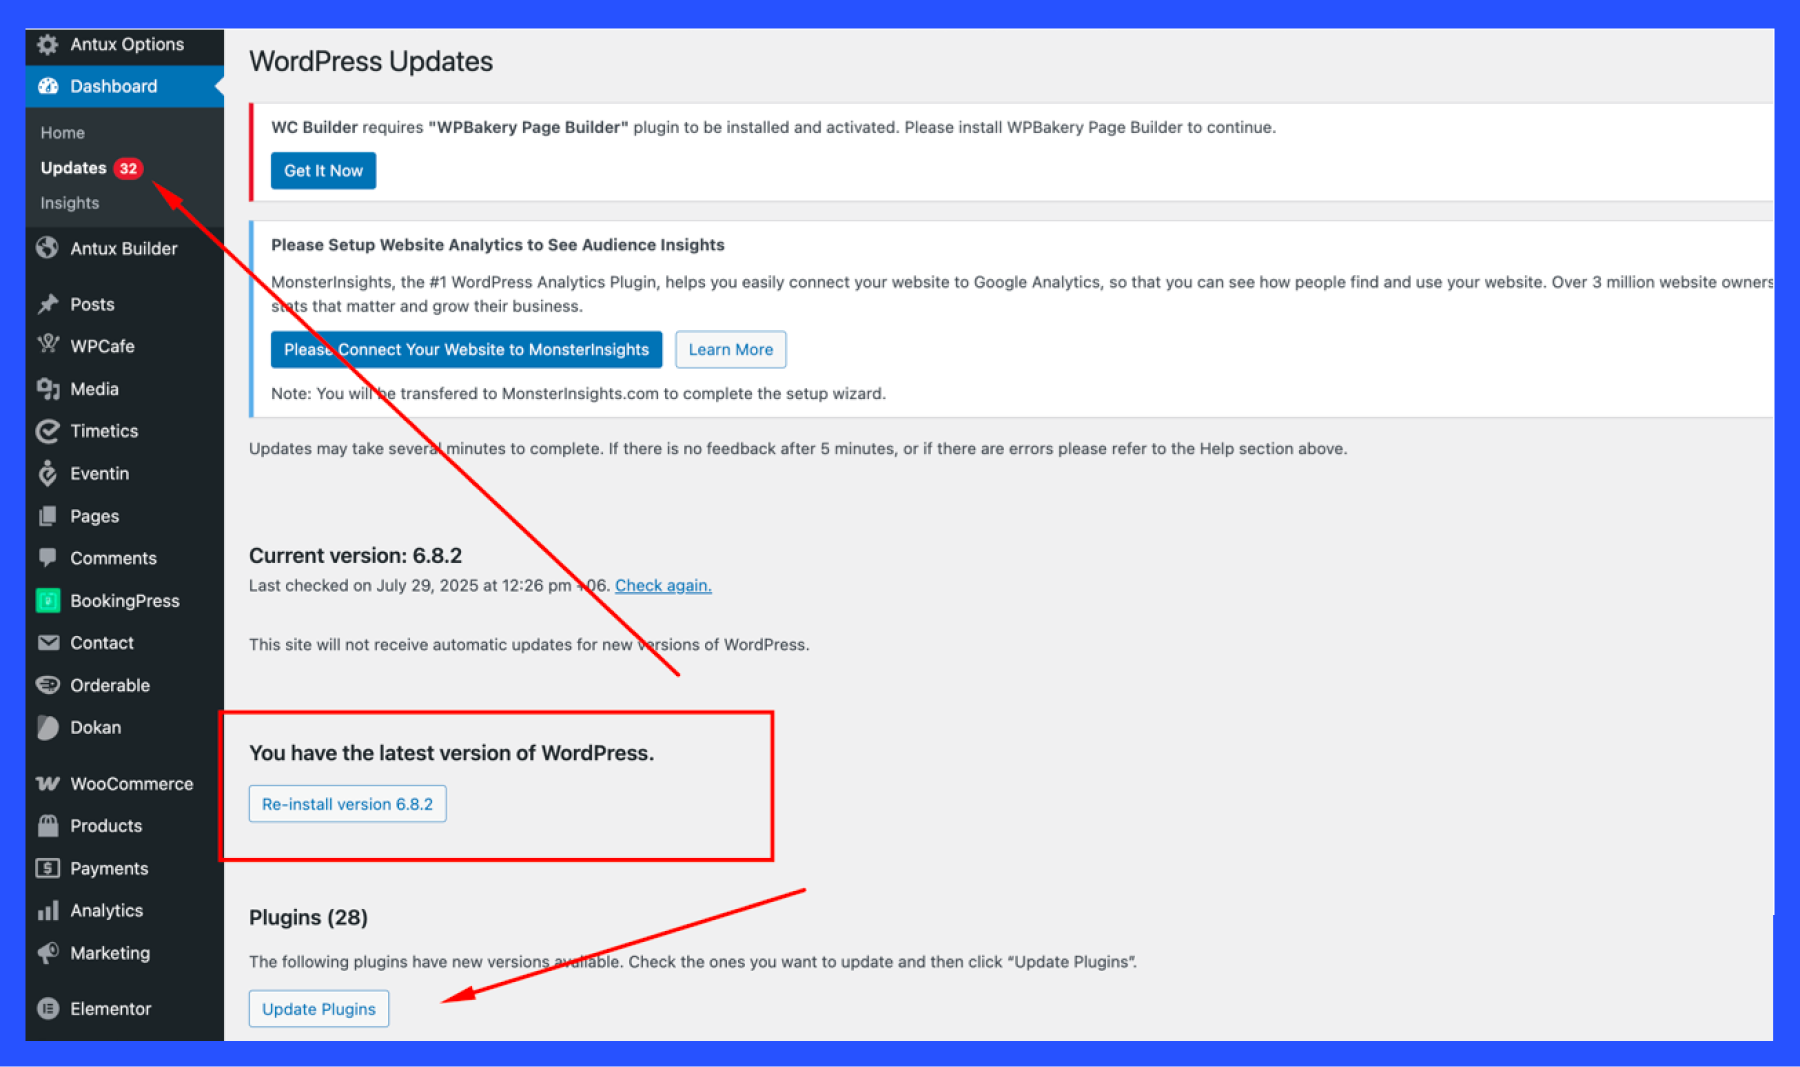
The WordPress Updates screen in the admin dashboard, showing an available core update.
Why this speeds up your site:
- Performance improvements: Each new WordPress release often includes code optimizations that make WordPress run faster by using resources more efficiently . The same goes for plugin and theme updates – developers frequently improve speed in updates .
- Bug and security fixes: Updates fix bugs that might be slowing things down or causing memory leaks. They also patch security issues; a secure, bug-free site performs more reliably.
- Compatibility: Newer versions of WordPress are designed to work better with modern PHP and web technologies.
How to do it:
- Backup first: Before updating, perform a quick backup of your site (database and files). While updates usually go smoothly, having a backup ensures you can restore if something goes wrong.
- Update WordPress core: Log in to your WordPress dashboard and go to Dashboard > Updates. If a WordPress core update is available, click the “Update Now” button. WordPress will download and install the latest version automatically.
- Update plugins and themes: Still on the Updates page, you will see any plugin or theme updates listed. Select all and click “Update Plugins” (and similarly for themes). You can also update plugins via Plugins > Installed Plugins (click the update notice under each plugin). Keeping themes and plugins updated ensures you benefit from their latest performance tweaks .
- Enable auto-updates (optional): For convenience, WordPress allows you to enable automatic updates for core, plugins, and themes. On the Plugins page, you can turn on Auto-updates for each plugin. This way, your site will stay up to date on its own.
- Test your site: After updates, visit your site and make sure everything is working and loading correctly. If you face any issues, you can restore from backup and troubleshoot (or seek support) – but in most cases, updates will improve your site’s stability and speed.
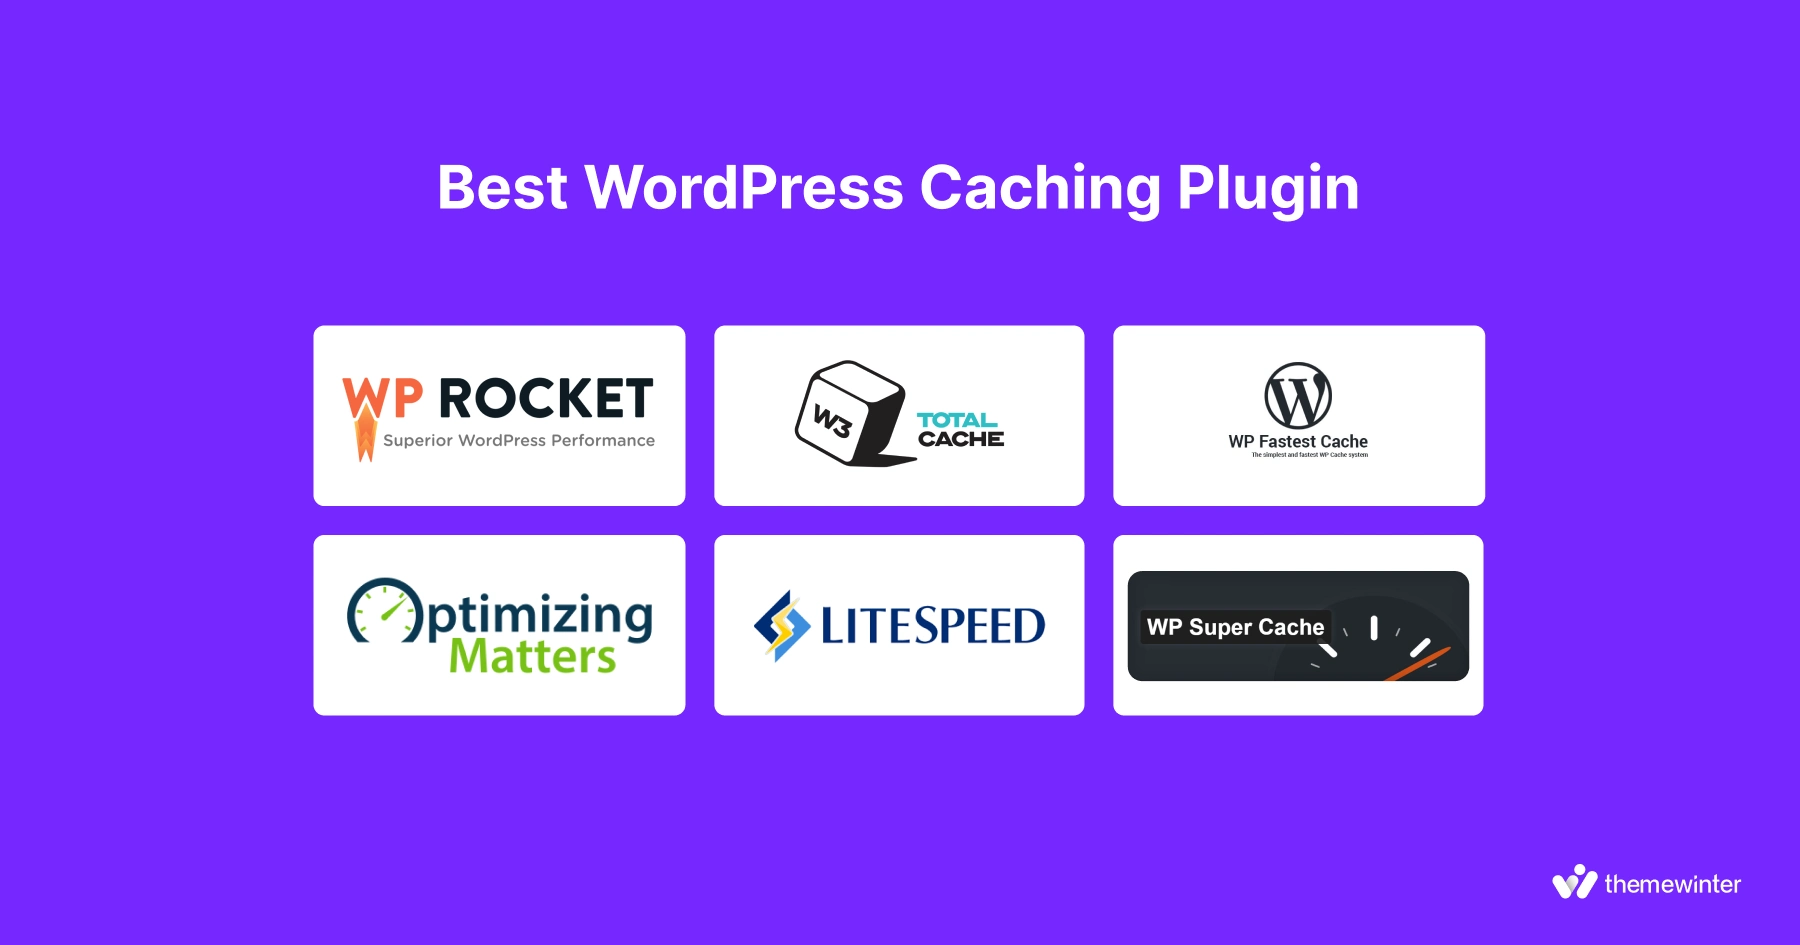
3. Use a caching plugin for your website
A caching plugin generates and serves static HTML copies of your pages, instead of executing heavy PHP scripts and database queries on every page load. In simple terms, caching is like taking a snapshot of your page and reusing it, so the server doesn’t have to work from scratch each time. This dramatically reduces page load time for repeat visitors and high-traffic situations.
Why does this speed up your site?
- Reduces server processing: Normally, WordPress builds pages dynamically (fetching data from the database, processing PHP code, etc.). Caching skips that by serving a pre-built page, lowering server load and response time.
- Lower Time to First Byte (TTFB): With caching, the server responds faster because it just returns an already-prepared page. This often leads to a snappier initial response to the browser.
- Better handling of traffic spikes: Cached pages are lightweight for your server to deliver. Your site can handle more simultaneous visitors without slowing down, since the heavy lifting is done once and reused for everyone.
How to use a cache plugin:
- Choose a caching plugin: Popular options include WP Rocket (premium), W3 Total Cache, WP Super Cache, or WP Fastest Cache (free). If you’re a beginner, a user-friendly choice like WP Rocket or LiteSpeed Cache can automate many optimizations.
- Install and activate the plugin: From your dashboard, go to Plugins > Add New, search for your chosen caching plugin, install and activate it. For example, if you decide on WP Rocket, it starts caching immediately upon activation.
- Enable page caching and configure: Ensure that page caching is turned on in the plugin’s settings. Most plugins enable it by default. This allows the plugin to start generating static HTML versions of your pages.
- Save and test: Save the plugin settings. Then, visit your site as a regular user or use an incognito window. The first load might be normal, but subsequent loads of the same page should be much faster (since it’s now cached).
Note: Many managed WordPress hosts have built-in caching. If so, you might not need an extra plugin – check your host’s documentation. But if your host doesn’t provide caching, adding a plugin is one of the quickest wins for speed.
📌 Related Reading: Best WordPress Cache Plugins to Boost Your Website Speed- Read more
4. Use a content delivery network (CDN)
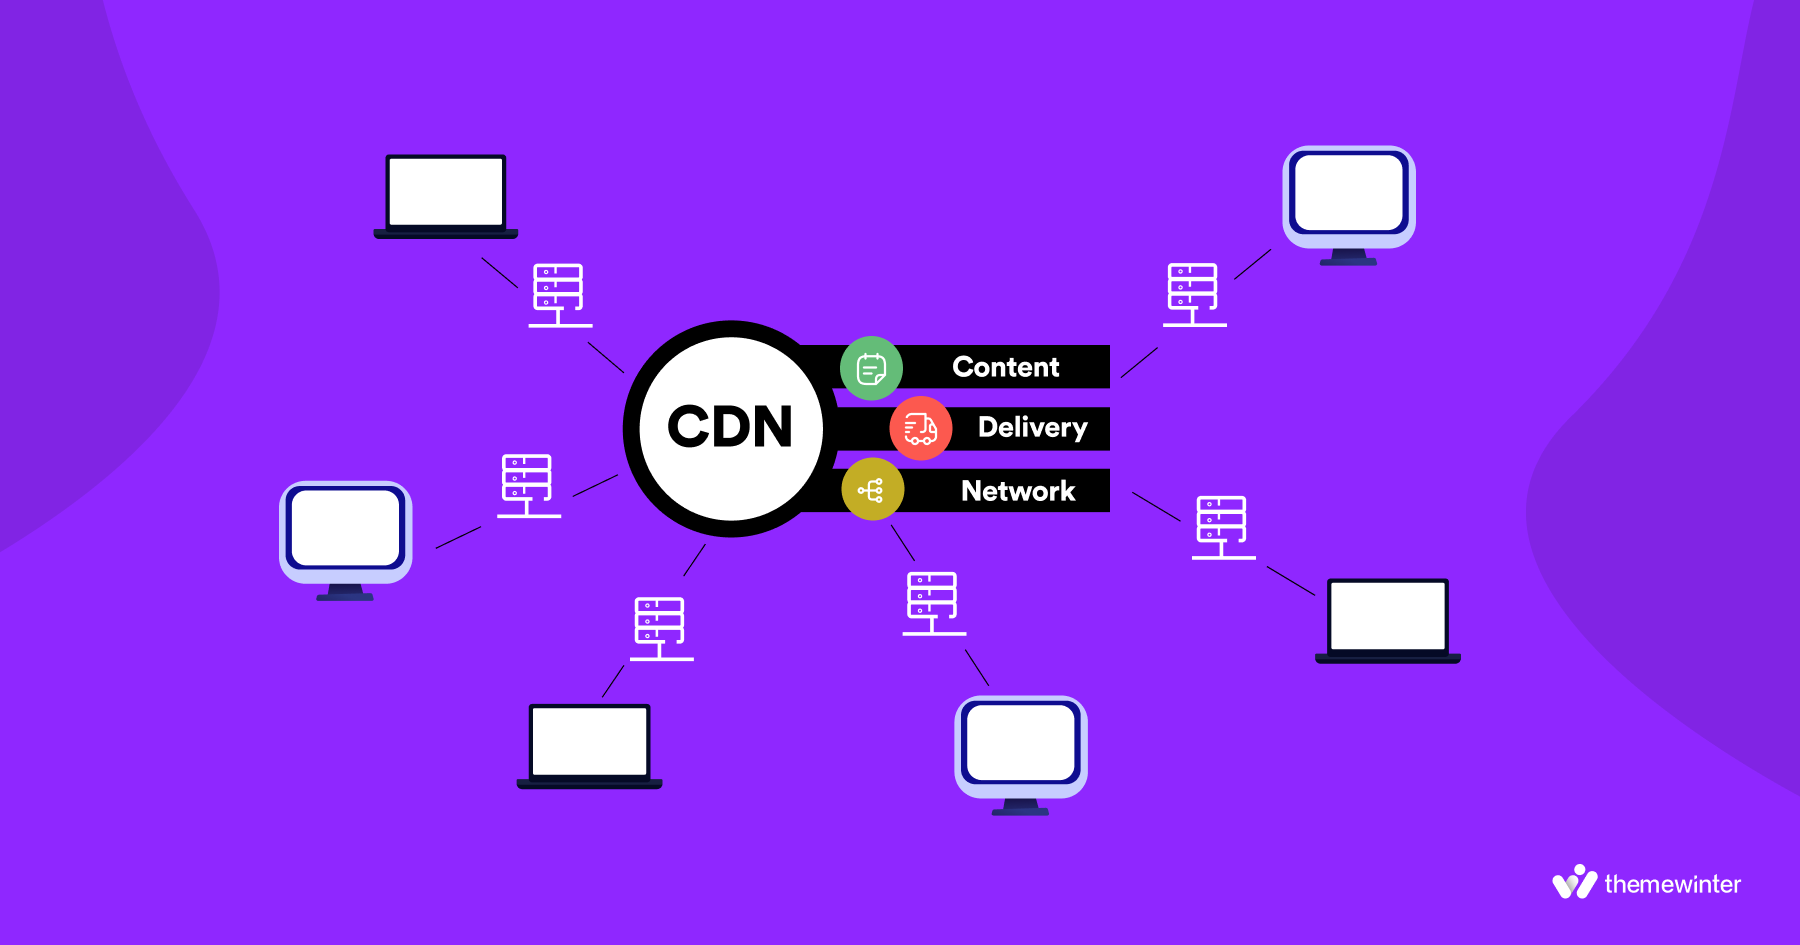
A Content Delivery Network (CDN) is a network of servers distributed around the world that stores copies of your site’s static files (images, CSS, JavaScript).
When someone visits your site, the static content is served from the server node that is geographically closest to them.
This reduces the distance data must travel and speeds up loading for global visitors. Think of it as placing copies of your site’s files in multiple locations worldwide so everyone gets a fast response.
Why does this speed up your site?
- Reduced distance and latency: If your hosting server is in North America, a visitor from Asia might experience slower loads due to distance. A CDN delivers files from a nearby location, so data travels a shorter distance and arrives quicker .
- Less load on your server: The CDN servers handle delivering images, scripts, etc., which takes strain off your origin server. Your web host server can then focus on generating pages (or serving cached pages), while the CDN serves heavy assets. This often results in a faster and more stable site, especially under traffic spikes .
- Parallel downloads: With a CDN, browsers can download resources from your domain and the CDN simultaneously. Modern CDNs also support HTTP/2, allowing efficient multiplexing of assets for even faster loading.
- Built-in optimizations: Many CDN services also compress files, convert images to next-gen formats on the fly, and use optimized routing to speed up delivery .
How to use a content delivery network:
- Choose a CDN service: Some well-known CDN providers are Cloudflare (which has a generous free plan), BunnyCDN, StackPath, and Amazon CloudFront. Cloudflare is a popular choice for beginners since it’s free and doubles as a security/DNS firewall.
- Create an account – Add your website URL to the CDN dashboard.
- Change nameservers – Go to your domain registrar and replace the current nameservers with the ones given by your CDN.
- Enable CDN features – Your CDN will start caching static files like images, CSS, and JS.
- Check if it’s working – Open your site and check if assets are loading from the CDN (use browser dev tools or a CDN checker tool).
📌 Note: Using a CDN in combination with caching gives the best results – caching speeds up page generation, and the CDN speeds up delivery of those pages to the user.
5. Optimize images and media
Images are often the most significant components of a webpage. Smaller image files mean faster load times. Optimizing images means reducing their file size (through compression and proper formatting) without noticeably harming quality.
This also includes using the correct dimensions – not uploading huge 4000px images if they will display at 630px. By optimizing images (and other media like PDFs), your pages become much lighter and load significantly faster.
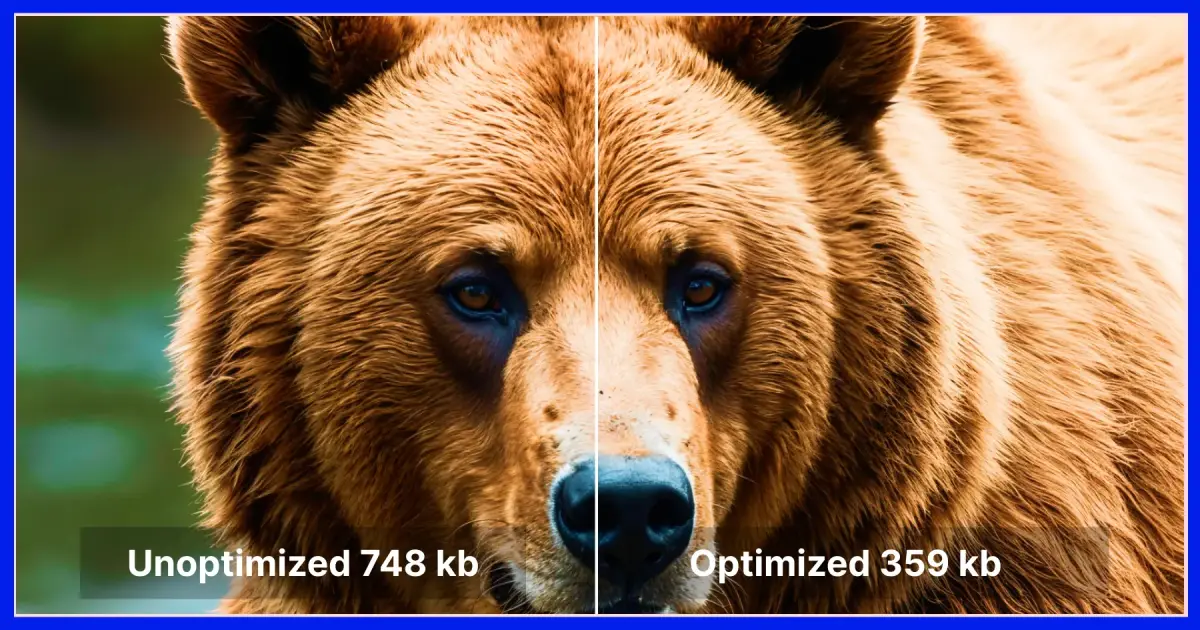
An example of image optimization: the left side (748 KB) is an unoptimized image, while the right side (359 KB) is optimized with minimal quality loss.
Why does this speed up your site?
- Smaller files load faster: When images are optimized, their file size can drop dramatically (often 30-80% smaller) with no visible difference. A smaller image file travels quicker from the server to the browser, speeding up page load.
- Less bandwidth usage: Optimized images consume less data. For users on slower connections (or mobile), this reduces the time waiting for images to display. It also reduces the strain on your server and CDN.
- Improves performance scores: Tools like Google PageSpeed Insights often flag unoptimized images. By compressing images and using correct formats, you eliminate these bottlenecks and get better performance ratings.
- Enables advanced formats: Optimization might include converting images to modern formats like WebP or AVIF, which provide the same quality at much smaller sizes. Many CDNs or plugins can auto-convert JPEG/PNG to WebP for browsers that support it .
Ideal Website Image Size Chart for WordPress
| Image Type | Recommended Size (pixels) | Notes |
|---|---|---|
| Thumbnail | 150 × 150 | Square cropped, good for small previews or gallery |
| Medium | 300 × 300 (up to 800 × 800) | For in-content images, maintaining aspect ratio |
| Large | 1024 × 1024 (or 1200 × 900) | For full-width content or featured images |
| Full Size | Original size | Full resolution, use sparingly for performance |
| Blog Post Featured Images | 1200 × 630 / 1200 × 675 | Ideal for blog thumbnails or featured images |
| Hero/Header Images | 1920 × 1080 / 2560 × 1440 | Large banners or header images with 16:9 ratio |
| Fullscreen Slideshows | 2800 × 1500 | High-quality large slideshows |
| Background Images | 1920 × 1080 / 1920 × 1200 | Full-width backgrounds for desktop display |
| Logo Images | 200 × 100 / 250 × 100 | Depends on theme, landscape or square |
| Gallery Images | 800 × 600 / 1500 width auto | Optimized for clarity in portfolios or galleries |
| Social Media Share Images | 1200 × 630 | Optimized for Facebook, Twitter, LinkedIn |
| WooCommerce Product Images | 600 × 600 (single product) | Catalog images often 300 × 300 |
How to optimize images and media:
- Resize before uploading: Use image editing software (or online tools like Photopea) to scale your images to the maximum size they’ll be displayed. For example, if your blog content width is 630px, don’t upload a 3000px wide photo. This avoids serving unnecessarily large images.
- Use the right format: Save photographs or complex images as JPEG and simpler graphics or images needing transparency as PNG. JPEGs typically result in much smaller files for rich-color images .
- Compress images: Run images through a compression tool. You can use online tools to handle it. Recommended site include Photopea, TinyPNG ,FreeConvert– these will automatically compress images on upload and can even bulk-optimize existing images .
- Optimize other media: Avoid uploading huge PDF files or other media directly for download if possible – compress them beforehand. If you have background videos, ensure they are compressed and short.
- Retest your site: After optimizing images, test your page speed again. You should see a noticeable reduction in page size (KBs) and loading time. The site will feel faster, especially on image-heavy pages or mobile devices.
6. Don’t upload audio/video files directly to WordPress
Uploading large audio or video files to your WordPress media library is not recommended. WordPress can technically host them, but it’s inefficient. Instead, use dedicated video or audio hosting services (like YouTube, Vimeo for video; SoundCloud or Spotify for audio/podcasts) and embed the media on your site. These platforms are optimized for streaming and will handle the bandwidth and delivery much better than your web server.
Why does this speed up your site?
- Saves bandwidth and server load: Hosting videos yourself can quickly absorb your bandwidth. Videos are large files – if multiple users stream from your server, it can slow down your site. Offloading this to YouTube/Vimeo means their servers (which are built for video streaming) do the heavy lifting, not yours.
- Faster backups and less bloat: Large media files would overload your site’s backups and make restores cumbersome. Keeping such files off-site means your WordPress backup remains lightweight and quick to create.
- Optimized delivery: Video platforms automatically adjust quality, provide buffering, and serve content via CDNs. Users get a smoother playback experience, and your page loads faster initially because you’re only loading an embed.
How to video to your WordPress website:
- Upload to a video/audio service: If you have a video you want on your site, upload it to a platform like YouTube, Vimeo, or DailyMotion (for audio, use something like SoundCloud or a podcast host such as Blubrry). These services often offer free hosting up to certain limits and are optimized for media delivery.
- Copy the media URL: Once uploaded, get the share URL or embed code of your video/audio. For YouTube, for instance, it would be the video’s URL (like https://youtu.be/yourvideoID) or the longer embed code if needed.
7. Use a lightweight theme (Optimized for speed)
Your WordPress theme controls the design and layout of your site, but not all themes are equal in performance. Some themes are bloated with tons of features, scripts, and heavy design elements that can significantly slow down your site. In contrast, a lightweight, well-coded theme focuses on basics and performance. Choosing a theme optimized for speed (or simplifying your current theme) will make your pages load faster.
Why does this speed up your site?
- Less bloat = faster load: Fancy multipurpose themes might include sliders, page builders, animations, and dozens of CSS and JavaScript files. Each of those adds to page load time. A simpler theme means fewer HTTP requests and smaller file sizes to download, resulting in quicker loads .
- Better coding practices: Poorly coded themes can make excessive database calls or not load assets in an optimal way, hurting performance. A good theme only loads the necessary resources and defers others when possible.
- You add only what you need: A minimalist theme gives you a fast foundation, and you can then add specific features via plugins as needed. This modular approach tends to be faster than an all-in-one theme trying to do everything.
- Improved Core Web Vitals: A lightweight theme often yields better scores on Google’s Core Web Vitals because it’s delivering a easy experience without heavy scripts delaying rendering.
8. Minimize plugins and optimize the database
Plugins add great functionality to WordPress, but each plugin can also introduce overhead. If you have too many plugins (or a few poorly-coded ones), they can slow down your site. This tip is about being selective with plugins – keep the count low and use only well-optimized plugins.
Additionally, it’s about cleaning and optimizing your WordPress database. Over time, the database accumulates clutter (post revisions, spam comments, transient options, etc.) which can bloat it and slow down queries. By optimizing it, you ensure the database can retrieve data faster.
Why does this speed up your site?
- Fewer plugins = less bloat: Each active plugin can load PHP code, run database queries, and add CSS/JS files. The more plugins, the more work on each page load. Reducing plugins (and avoiding slow ones) cuts down on background processing and resource usage .
- Optimizing the database speeds up queries: Your database is where WordPress stores posts, pages, comments, settings, etc. As it fills with garbage data (old revisions, orphaned metadata, tables from deleted plugins), certain operations slow down. Cleaning out this junk means the database can be queried more quickly . A lean database uses less memory and CPU to fetch the info needed for each page, resulting in snappier page generation.
- Smaller database = faster backup and restore: An optimized database is also quicker to backup and restore, which indirectly helps performance (e.g., your backup processes will complete quicker and be less likely to bog down the server during the backup).
How to do it (Plugins): Audit your plugins– Go to Plugins > Installed Plugins and list them out. Ask yourself for each: “Do I truly need this?” Identify plugins that are inactive. Also note any multiple plugins overlapping in functionality (e.g., two gallery plugins – you only need one).
How to optimize database: Install a database optimization plugin– Two popular ones are WP-Optimize and WP-Sweep. These plugins can safely remove unnecessary data like post revisions, trashed posts, spam comments, transient options, and orphaned tables . Install and activate one of them.
Limit Post Revisions (optional)
To prevent your WordPress database from keeping unlimited post revisions, you can limit how many revisions are kept. Add the following line to your wp-config.php file:
define('WP_POST_REVISIONS', 5);This configuration keeps only the last 5 revisions per post and discards older ones automatically.
9. Update PHP version to reduce TTFB (Server response time)
WordPress was developed using the PHP programming language. Newer PHP versions are much more efficient. For instance, PHP 8 is significantly faster and uses less memory than PHP 7 did .
This means WordPress can generate pages quicker. If your server takes 300ms to build a page on PHP 7.4, it might do it in, say, 150ms on PHP 8 (exact improvement varies, but it’s substantial). That directly reduces your server’s first response time.
“TTFB” (Time To First Byte) which is basically how quickly your server responds to a request. Upgrading PHP is one of the best ways to cut down server processing time and thus reduce TTFB.
How to update PHP version?
In WordPress, you can install a plugin called “Display PHP Version” or “Version Info” which will show your PHP version in the dashboard .
Alternatively, if you have hosting control panel (like cPanel or Plesk), it often lists the PHP version. For example, in cPanel there’s “MultiPHP Manager” where you select your domain and choose the PHP version from a dropdown.
On managed hosts, there may be an option in the dashboard (e.g., “Environment -> PHP version”). Select the latest available (e.g., PHP 8.1 or 8.2). Apply the change. It usually takes effect immediately or within a minute.
10. Configure optimal WordPress settings for performance
WordPress has a lot of settings. Tuning some default settings can make your site more efficient. Here we target a few built-in WordPress settings (in your admin under Settings menu) that can impact speed, as well as general configuration choices that keep your site running lean.
This includes things like how content is displayed (to reduce load), and turning off unnecessary features. Essentially, we want to configure WordPress to do just the amount of work needed for your site, and no more.
How to configure ideal WordPress settings?
Setting A: Show excerpts instead of full posts
Go to Settings > Reading in your dashboard. Find the option “For each article in a feed, show:” and select “Summary” (Excerpt) instead of Full Text.
This means your blog homepage, category, and archive pages will only show a snippet of each post (or the manual excerpt you write) rather than the entire post content .
This drastically reduces page size on those pages. After changing to summary, click Save Changes.
Setting B: Limit posts per page
In the same Reading settings, consider the “Blog pages show at most” setting. The default is 10 posts per page, which is fine in many cases. If your posts are very long or media-heavy, you might even lower it to 5 or 6 to lighten the homepage or archives further.
The trade-off is pagination (users might click to page 2 more often). Adjust according to your content length. Save changes if you alter this.
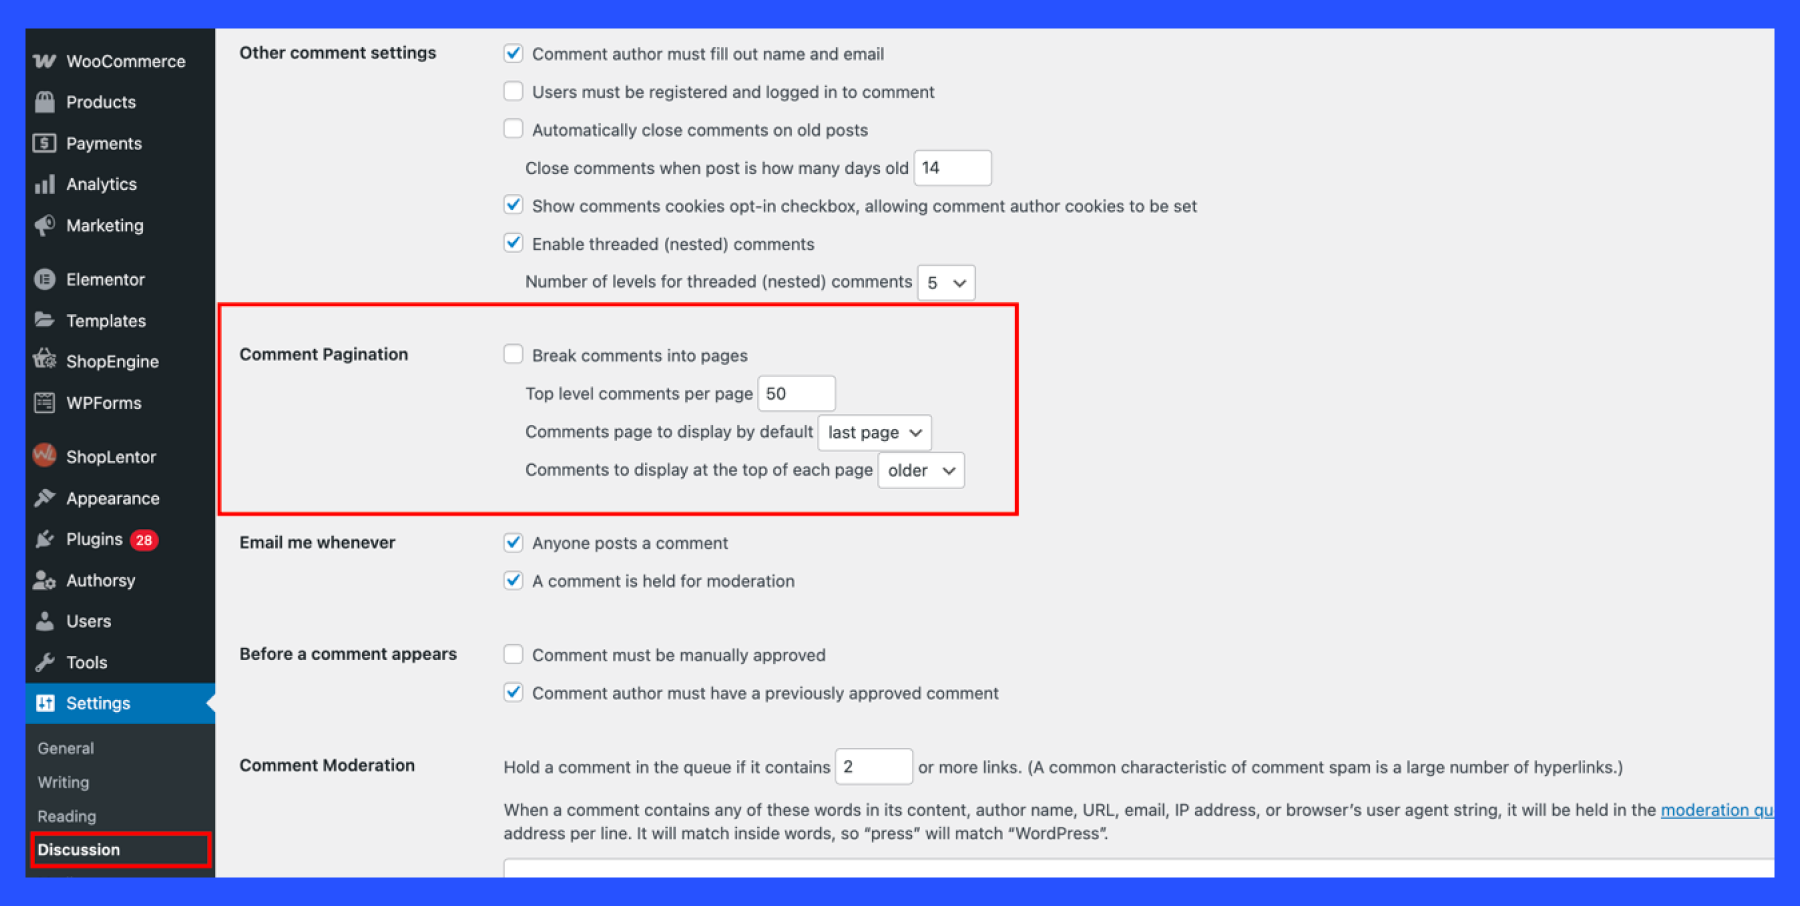
Setting C: Paginate comments
If your posts get a lot of comments, loading them all on one page can be slow. Go to Settings > Discussion. Under “Other comment settings,” check the box for “Break comments into pages” and set a number (e.g., 50 comments per page) .
Also decide if you want the first page to show the oldest or newest comments. This ensures that for hugely popular discussions, visitors aren’t forced to load hundreds of comments at once. Save the settings.
Setting D: Disable pingbacks and trackbacks
In Settings > Discussion, uncheck “Allow link notifications from other blogs (pingbacks and trackbacks)” for new posts. Pingbacks/trackbacks are rarely used legitimately now and can create performance and security issues .
By turning them off, you prevent your site from processing these requests. (Note: This stops future pingbacks. To remove existing pingbacks on posts, you’d have to disable per post or use a plugin, but at least new ones won’t be accepted or sent.)
Setting E: Control the Heartbeat API (optional)
WordPress’s Heartbeat API runs AJAX calls in the background (for example, when you’re in the post editor, it auto-saves drafts every 15 seconds). This can sometimes create overhead, especially if you leave admin pages open. You can use a plugin like Heartbeat Control to reduce its frequency or disable it on certain pages.
For instance, you might set it to tick less often on the post editor page (maybe once every 60 seconds instead of 15) to reduce server calls. This is a minor tweak but can help on sites where multiple users might be in the admin simultaneously.
Setting F: Ensure Gzip compression is enabled
While not exactly a WP setting, it’s often accessible via .htaccess or your host’s config. You can verify if your site is serving compressed content by using online tools or browser dev tools (check response headers for Content-Encoding: gzip).
If not, you can add rules in .htaccess to enable gzip compression of text resources (many caching plugins do this for you under the hood). Compressed content travels faster over the internet, speeding up loads.
11. Disable hotlinking and leeching of your content
Hotlinking is when another website directly embeds your images (or other media) by linking to them on your server. For example, someone might put <img src=”https://yoursite.com/wp-content/uploads/photo.jpg”> on their site. Their visitors then load the image from your server, using your bandwidth, even though the image is showing on someone else’s page. This is also called “leeching” your content.
It’s bad because it steals your server resources without giving you page views. By disabling hotlinking, you prevent other sites from using your assets and consuming your bandwidth.
Why does this speed up your site?
If a popular site hotlinks your image, your server has to serve that image to all their visitors. This can takes a lot of bandwidth (and if it’s a PHP script or something, even CPU). By blocking hotlinking, your server is only serving images to your own visitors, reducing unnecessary load. The result is more resources available to serve your actual pages faster .
How to prevent hotlinking on your WordPress eebsite:
To prevent others from hotlinking your assets, add code to your .htaccess file, which you can access using your hosting file manager or an FTP client.
Here’s how:
- Open your .htaccess file: You’ll find this file in your WordPress root directory (where wp-config.php is located). You can access it using your hosting file manager or an FTP client.
- Add this code at the bottom of the file:
RewriteEngine On
RewriteCond %{HTTP_REFERER} !^$
RewriteCond %{HTTP_REFERER} !^https?://(www\.)?yourdomain\.com [NC]
RewriteCond %{HTTP_REFERER} !^https?://(www\.)?google\.com [NC]
RewriteRule \.(jpg|jpeg|png|gif)$ - [NC,F,L]
- Replace yourdomain\.com with your actual domain name (example: themewinter\.com).
- Save the file.
It blocks image access if the request is not from your site or Google. You can change or add more trusted sites if needed.
Now your images are protected!, If someone tries to use your image on another site, it won’t load!
12. Enable HTTPS and upgrade to HTTP/2
Moving your site to HTTPS (HTTP Secure) by installing an SSL certificate is not only good for security, but it’s also a requirement for leveraging HTTP/2, the newer, faster version of the HTTP protocol.
HTTP/2 allows browsers to load your site’s assets more efficiently (multiple requests in parallel over a single connection, header compression, etc.). The catch: browsers only fully use HTTP/2 on HTTPS connections.
So by enabling HTTPS on your site, you unlock the ability for visitors’ browsers to use HTTP/2 when communicating with your server, resulting in speed improvements. Additionally, HTTPS can enable HTTP/3 (even newer protocol) if supported, but we’ll focus on HTTP/2 as it’s widely used.
How to set up HTTPS for WordPress:
A. Obtain an SSL certificate: Many hosts now provide free SSL certificates via Let’s Encrypt or a similar service. Check your hosting control panel for an SSL/TLS section – you might have a one-click “Enable SSL” option.
If not, you can usually request Let’s Encrypt for free through your host or get a certificate elsewhere. For example, on cPanel there’s often “AutoSSL”. If on a managed WordPress host, they likely already have a certificate or will install one if you ask.
B. Install and activate the certificate: Once the SSL certificate is issued, ensure your site is configured to use it. This means your site URLs should start with https://.
In WordPress, go to Settings > General and update the “WordPress Address” and “Site Address” to https://yourdomain.com (if they were http). Save – you will need to log in again.
C. Redirect HTTP to HTTPS: It’s important to funnel all traffic to the secure version. Typically, this is done by adding a redirect rule in your .htaccess (for Apache) or equivalent for Nginx. A common .htaccess rule is:
RewriteEngine On
RewriteCond %{HTTPS} off
RewriteRule ^(.*)$ https://yourdomain.com/$1 [L,R=301]
This forces any http:// request to go to https://. If you’re not comfortable editing config, a plugin like Really Simple SSL can handle most of this (it will update URLs and set up redirects for you).
Enabling HTTP/2 is often described as an “easy win” for performance because once you have HTTPS, it usually just works automatically.
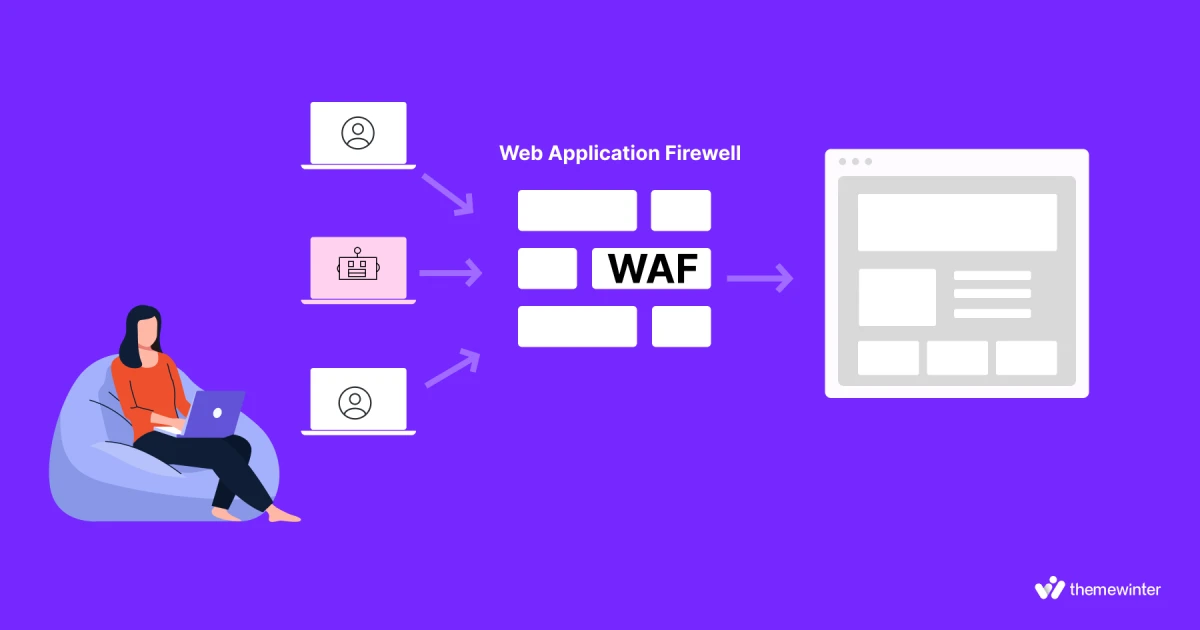
13. Use a DNS-level website firewall (WAF)
A DNS-level firewall, also known as a cloud web application firewall (WAF), sits between your website and the rest of the internet. Services like Cloudflare, Sucuri, or StackPath operate by having you route your domain’s DNS to them. They then filter incoming traffic before it reaches your hosting server. These services block malicious visitors (hackers, bots, DDoS attacks) and can also serve cached content. By doing this at the DNS/network level, bad traffic never hits your server at all.
The result: your server deals only with legitimate visitors, reducing load and improving speed for those real users.
Why does this speed up your site?
Using a DNS-level firewall is like putting a shield in front of your site. It’s highly recommended not just for security but also for performance stability.
When only legitimate traffic reaches your server, you effectively increase capacity and speed for those users. It’s one of those things that you set up once, and it quietly does its job in the background, keeping your site fast and safe.
How to add a DNS firewall service in WordPress:
Choose a DNS-level firewall service: Popular options are Cloudflare (which has a free plan), Sucuri Website Firewall (paid, often included with their security plans), StackPath, Wordfence Central (Cloud), or Imperva. For most, Cloudflare is the easiest start (and free).
We’ll use Cloudflare as an example.
- Create a Cloudflare Account: Go to cloudflare.com and sign up for a free account.
- Add Your Website: Enter your domain (e.g., yourdomain.com) and click Add Site. Cloudflare will scan your DNS records automatically.
- Select a Plan: Choose the Free Plan (or paid if you prefer more features).
- Update Nameservers: Cloudflare will show you two nameservers.
- Go to your domain registrar (like GoDaddy, Namecheap) and replace your current nameservers with the ones Cloudflare gives you
⚠️ Important: It may take a few hours to update, but your site will stay online.
Configure Firewall & Performance Settings: Once your domain is active on Cloudflare:
- Go to the Firewall tab → Cloudflare blocks known threats automatically.
- Add custom rules if needed (like blocking a country or rate-limiting login).
- Go to Speed tab → Enable Auto Minify and Rocket Loader for better performance.
14. Optimize CSS and JavaScript files (Minify and combine)
Most modern WordPress sites use multiple CSS and JavaScript files (from themes and plugins). Optimizing these assets means minifying them (removing unnecessary whitespace, comments, and shortening code where possible) and potentially combining them to reduce the number of requests.
It can also involve deferring or loading some scripts asynchronously so they don’t block page rendering. The goal is to ensure that the delivery of CSS/JS resources doesn’t slow down the page.
Why this speeds up your site:
Removing spaces, line-breaks, and comments can shrink file sizes by 20-30% or more in some cases. Smaller files download faster. Importantly, minification doesn’t change functionality – it’s purely removing humans-readable parts that browsers don’t need . This means quicker transfer and often an improvement in PageSpeed scores for “Minify CSS/JS”.
How to optimize CSS and JavaScript files?
- Use a plugin for automation: The easiest route is to use a performance plugin like Autoptimize (free) or leverage the capabilities in WP Rocket (premium) or W3 Total Cache. Autoptimize specifically focuses on aggregating and minifying CSS/JS/HTML.
- Install and activate Autoptimize, then in its settings check the options “Optimize JavaScript Code” and “Optimize CSS Code”. This will aggregate and minify your site’s CSS and JS.
- Save changes and test your site to ensure styling or functionality isn’t broken.
15. Use the latest PHP version (again, it really matters!)
Well, I discussed PHP earlier (in tip #9 about TTFB), but it’s important to mention again: always run your site on the latest stable PHP version supported.
As of 2025, that means PHP 8.x. If you are on an older version (like 7.4 or anything 7 and below), you are missing out on major performance improvements. WordPress itself works best on newer PHP – and the community is continually adding support for the latest versions. Ensuring you’re on the newest PHP can give your site a noticeable speed boost across the board.
Kinsta cites that PHP 8.3 is 42% faster than previous versions . That’s a massive difference that translates to faster page generation.
Use the new PHP instead of the old one and gain 30-40% in speed!
Conclusion
Improving website speed is not a one-time task but an ongoing process. Regularly test your WordPress website’s performance and make optimizations as you add new content or features. Even minor improvements, like compressing an image or updating a plugin, can contribute to a snappier user experience.
By following the professional tips outlined above, you’ll put your WordPress site on the path to loading lightning fast. In doing so, you create a better experience for every visitor and set your site up for greater success in achieving its goals.
Never miss an update!
Share your email, and we’ll keep you posted whenever we publish related articles.
FAQs on how to speed up WordPress sites
Q: What is a good loading time to aim for on my WordPress website?
A: Ideally, you should aim for your pages to load in about 2-3 seconds or less for the average user. Within the first 3 seconds is a common benchmark because user drop-off increases significantly after that. For mobile users, faster is always better (since mobile networks can be slower). Also, Google’s Core Web Vitals guidelines suggest that your Largest Contentful Paint (LCP) should occur within 2.5 seconds to be considered a good user experience. While not every page may hit these exact numbers, the closer you get, the better.
Q: How can I tell what is making my WordPress site slow?
A: Using the speed testing tools mentioned earlier (like Google PageSpeed Insights or GTmetrix) will give you a breakdown of what’s slowing your site. These reports often highlight specific issues – for example, large image files, render-blocking scripts, slow server response, or unoptimized CSS.
Q: Do too many plugins slow down a WordPress site?
A: They can. It’s not just the number of plugins, but what those plugins do. Each plugin can introduce additional code, database queries, and external requests. Having a lot of plugins increases the chances that some may be poorly optimized. It’s best to be selective: only use plugins that you truly need and that are well-coded.
Q: Will switching to a different theme help speed up my WordPress site?
A: It can, especially if your current theme is heavy and not optimized for performance. Switching to a lightweight, speed-optimized theme can remove that bloat and make a noticeable difference in load times.
Q: Is installing a caching plugin enough to make a WordPress site fast?
A: Using a caching plugin is one of the most effective steps to speed up a WordPress site, but it’s not a magic solution by itself. However, true optimization comes from a combination of measures. You should also consider optimizing images, minimizing and combining files, using a CDN, and the other tips mentioned above.