How to Set up Online Food Menu For Your Restaurants on WordPress
Table of Contents
Your menu is more than a list — it’s your restaurant’s first impression.
And today, that impression happens online. Whether you’re running a café, food truck, or cloud kitchen, a clean digital menu helps customers browse, decide, and order—before they even visit.
The good news? You don’t need to touch a line of code.
With WPCafe and WooCommerce, you can create a beautiful, fully functional food menu in WordPress — complete with online orders, category filters, and live search.
In this guide, we’ll walk you through the exact steps to set it up the right way.
Let’s build a menu your customers will love.
📌 TL;DR – What you’ll learn
Want to create a digital food menu for your restaurant in WordPress? You don’t need coding skills — just the right tools and a few setup steps.
- ✅ Tools you need to build and manage an online food menu
- ✅ How to upload food items and organize them into categories
- ✅ Ways to display your menu using shortcodes, Gutenberg, or Elementor
- ✅ How to add search, location-based menus, and discounts for better UX
Let’s make your food menu not just visible — but irresistible.
Your food is excellent — but can customers find it online?
You’ve kept your recipes perfect, and your service is spot-on. But if your menu isn’t online, you’re losing customers before they even walk through the door.
Here’s the reality:
Today’s diners browse before they buy. They Google “best pasta near me,” check menus, compare prices, and decide where to eat — all from their phones.
If your restaurant doesn’t have a digital menu, or it’s hidden inside a blurry PDF or Facebook photo, you’re invisible to a big part of your potential audience.
Let’s break down why a proper online menu matters:
- Seamless ordering = more sales
When your menu connects directly to ordering options (like WooCommerce + WPCafe), customers can add items to cart, choose pickup or delivery, and pay instantly.
Less friction = more completed orders.
- Visibility in local search
People search for food using location + menu keywords like: “Burger menu in New York”, “Pizza near New York open now”
Having a structured, searchable menu on your website helps you show up in Google results and Google Maps — especially if it’s optimized with categories and schema.
- Better mobile experience
Customers hate pinching and zooming into menus on social media.
A responsive, mobile-friendly menu on your site means: faster decision-making, less confusion, more trust before visiting.
- Builds brand trust and professionalism
A clean, easy-to-navigate menu shows that you care about your business and your customers. It’s not just about what’s on the plate — it’s about the entire experience.
- Keeps you competitive
Other restaurants in your area already have digital menus, QR codes, online orders, and promo deals. If you don’t offer the same convenience, you’re giving up your edge.
Requirements for creating a restaurant food menu in WordPress
Before creating your online food menu, make sure you have the right tools in place. You’ll need two essential plugins and one optional tool to get the best setup.
- WooCommerce is the go-to plugin for selling anything online—including food. It helps you
- WPCafe
- Try Cafesio theme if you want flexible settings and customization options.
- And any page builder that you want to use, Elementor plugin, addons, or the Gutenberg plugin.
🍽️ Why Use WPCafe for Restaurant Management?
WPCafe is an all-in-one WordPress plugin built specifically for restaurants, helping you manage food menus, online orders, table reservations, and multi-location branches — all without needing extra tools or coding. It integrates seamlessly with WooCommerce, offers 30+ menu layouts, supports live search and discounts, and lets you highlight dishes with custom badges. Whether you’re running a small café or a multi-branch restaurant, WPCafe simplifies your workflow and improves customer experience with a fast, mobile-friendly, and fully customizable setup.
👉 Explore WPCafe NowHow to create a food menu in WordPress using WP Cafe
Before creating food menus, first, please upload your food items one by one.
From your WordPress dashboard:
- Go to Products → Add New
- Add the food item name, image, price, and description
- Assign a category (optional but recommended)
- Click Publish
Tip: If you have many items, you can bulk import them from a CSV or Excel file using the WooCommerce product importer.
Once your food items are added, you’re ready to display the menu on your website.
WPCafe offers three easy ways to add your food menu: shortcode, Elementor, and Gutenberg block.
1. Add food menu with shortcode
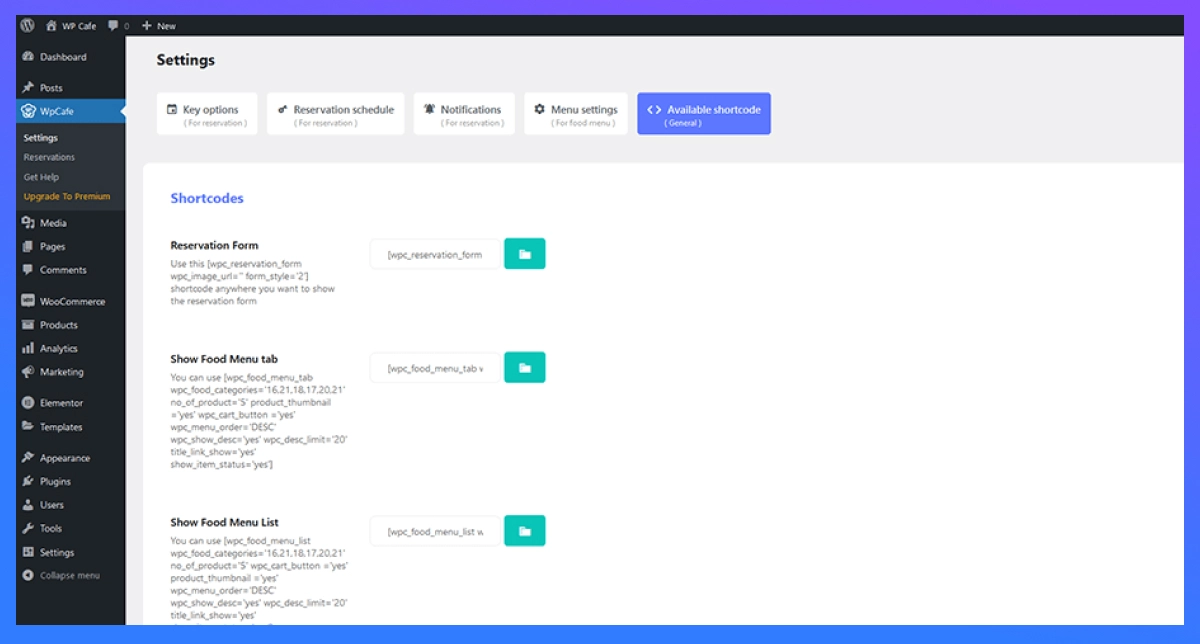
To get the food menu shortcode, please move to the WPCafe settings, select the shortcode, and paste it into the page. The WP Cafe Menu will appear on the left side of your WordPress dashboard.
Here’s how to use it:
- Go to WPCafe → Available Shortcodes
- Copy the shortcode for your preferred menu layout
- Paste it into a page or post using the classic editor or Gutenberg’s shortcode block
- Update and preview the page
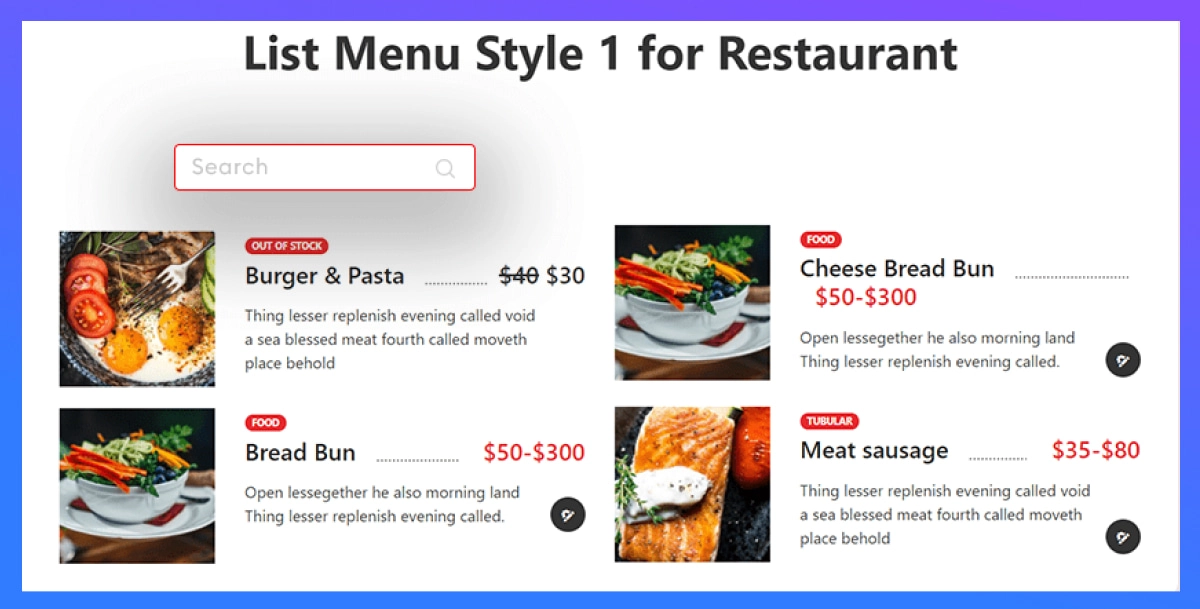
Example shortcode: [wpc_food_menu style=”style-1″]
Note: With WPCafe Pro, you’ll get access to more layouts, category tabs, filtering, and multi-page menu options.

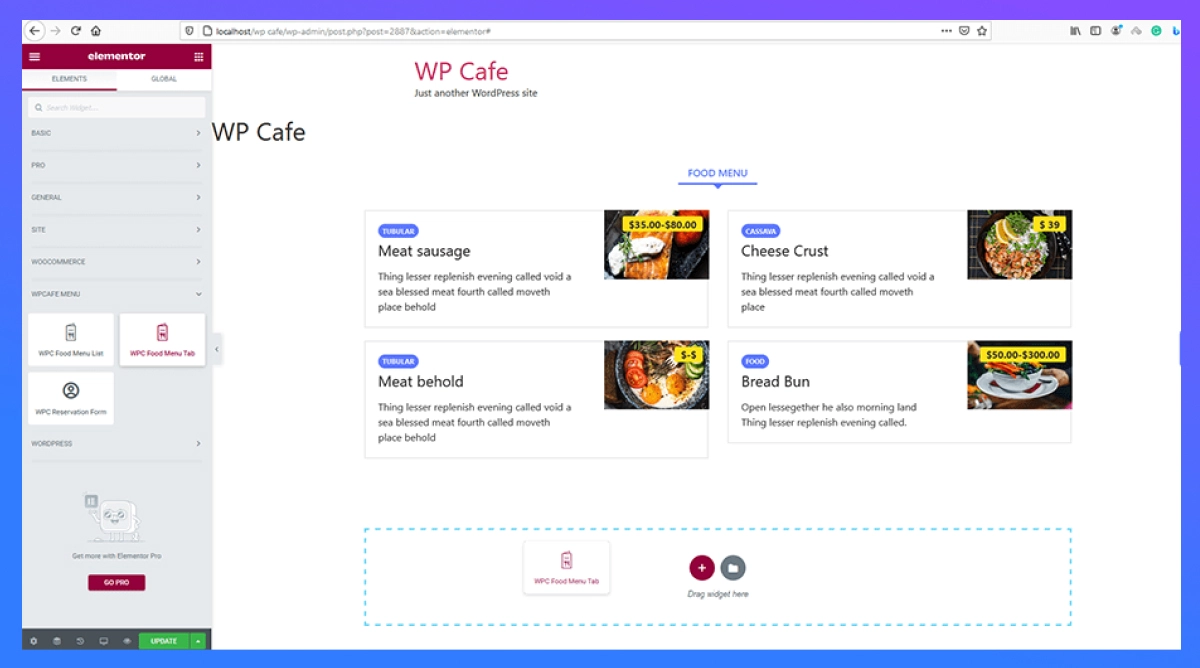
2. Add food menu with Elementor
If you’re using Elementor, WPCafe provides ready-made widgets for drag-and-drop design.
Steps:
- Go to the page where you want the menu
- Click Edit with Elementor
- Search for “WPCafe Menu” in the Elementor widget panel
- Drag the widget onto the page
- Choose your layout and adjust the settings as needed
- Click Publish or Update
This gives you complete control over menu appearance—no coding needed.
Add food menu with Gutenberg
WPCafe includes Gutenberg blocks that make it easy to display the menu in the WordPress block editor.
Steps:
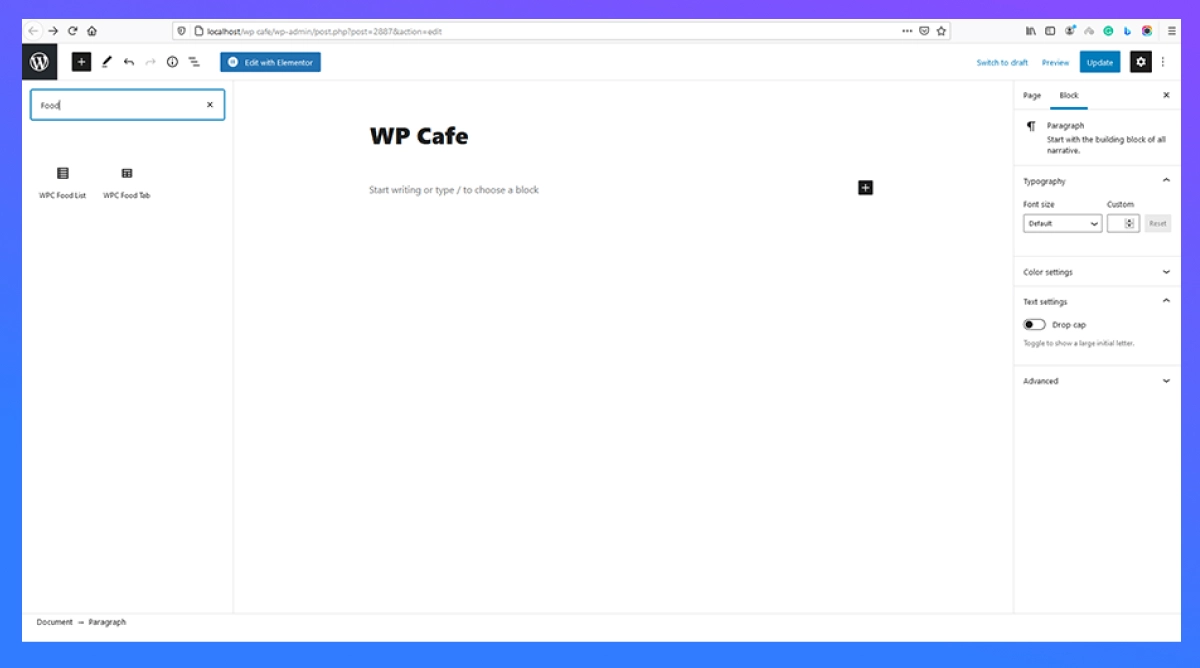
- Go to Pages → Add New or edit an existing page
- Click the ( + ) button in the editor
- Search for “food”
- Select the WPCafe Food Menu block
- Choose layout, category, and other display options from the right panel
- Click Publish
Gutenberg makes it simple to add and manage menus without plugins like Elementor.
Additional settings you can enable for a better menu experience
Once your food menu is live, you can take it further with a few extra features built into WPCafe. These settings help you organize your menu better, improve customer experience, and manage orders more efficiently.
Here’s a closer look at the most valuable options:
a) Set food item category
Categorizing your food items makes your menu more straightforward to navigate. Instead of scrolling through a long list, customers can filter by sections like “Starters,” “Main course,” “Desserts,” or “Drinks.”
To create categories:
- Go to Products → Categories from your WordPress dashboard
- Add a name, slug (optional), and description
- Assign each food item to one or more categories when adding products
You can also use WPCafe’s category-based shortcodes or tab layouts to display grouped items. This keeps your menu clean and helps users find what they’re looking for faster.
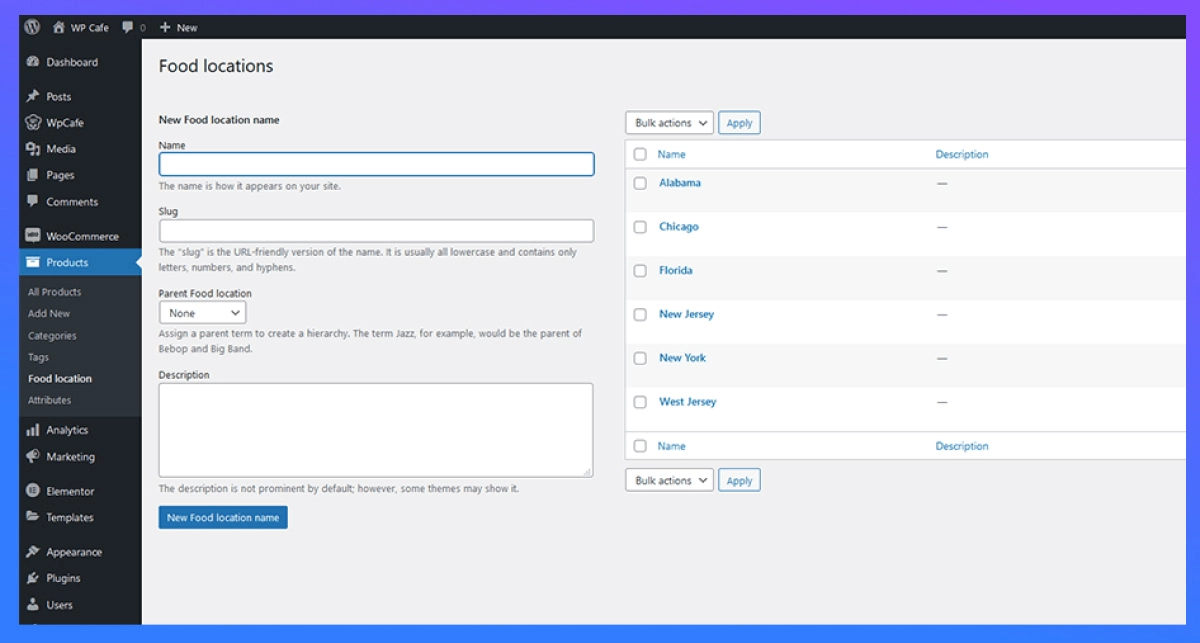
b) Set food serving location
If your restaurant has multiple branches or you offer delivery to different areas, you can assign food items to specific locations. This is helpful when certain items are available only in certain places.
Steps to enable:
- Go to Products → Location and add your locations (e.g., Banani, Dhanmondi, Uttara)
- Add relevant info like address or branch code
- Then go to WPCafe → Menu Settings → Allow Locations
- Enable this setting so customers can select their location before browsing
This makes it easier to manage regional menus and prevent confusion or wrong orders.
c) Set discounts on food items
Offering limited-time deals or discounts can help increase orders and boost customer engagement.
To add a discount:
- Go to WPCafe → Menu Settings → Discount Options
- Set a discount percentage (e.g., 10%, 20%)
- Choose whether to apply it to all menu items, selected categories, or specific products
💡 Discounts can be used for promotions like happy hours, first-time buyers, or combo deals.
d) Enable the integrated search option
Adding a search bar to your menu lets customers quickly find what they want—especially useful for long menus or when users are browsing on mobile.
How to add live search:
- Add this parameter to your shortcode:
- Go to the page where you placed your food menu shortcode: live_search=”yes”
- Final shortcode example: [wpc_food_menu style=”style-1″ live_search=”yes”]
🔎 Once enabled, a search box will appear above the menu, allowing users to type and filter items in real time.
e) Add menu badges and highlights (Pro)
With WPCafe Pro, you can add badges like “New,” “Popular,” or “Chef’s special” to draw attention to featured items. These visual cues help guide customer choices and improve menu interaction.
How to use:
- When editing a food item, select a badge type from the options
- You can customize badge colors and labels under Menu Settings → Badge Options
This slight touch can increase clicks and make your menu feel more curated and thoughtful.
Menu layout styles available in WPCafe
WPCafe comes with multiple food menu layouts you can use based on your restaurant type and design preference. You can easily switch between styles to match your branding or page layout.
Here are the most popular options:
- List style: A simple vertical list showing food items with images, names, descriptions, and prices. Great for mobile-friendly menus.
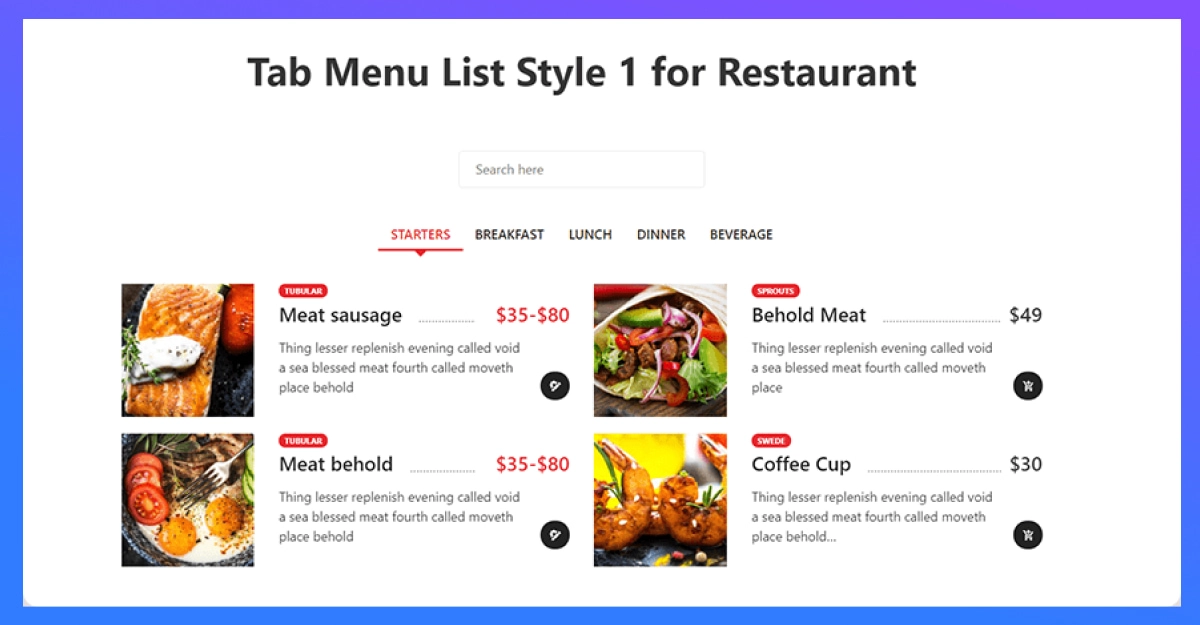
- Tab style: Organize items in tabs like “Breakfast,” “Lunch,” or “Desserts.” Customers can click between them for faster navigation.
- Category style: Automatically groups menu items by category (e.g., Starters, Main course, Beverages).
- Location-based menu: Ideal if your restaurant has multiple branches. Customers can view menus specific to their selected location.
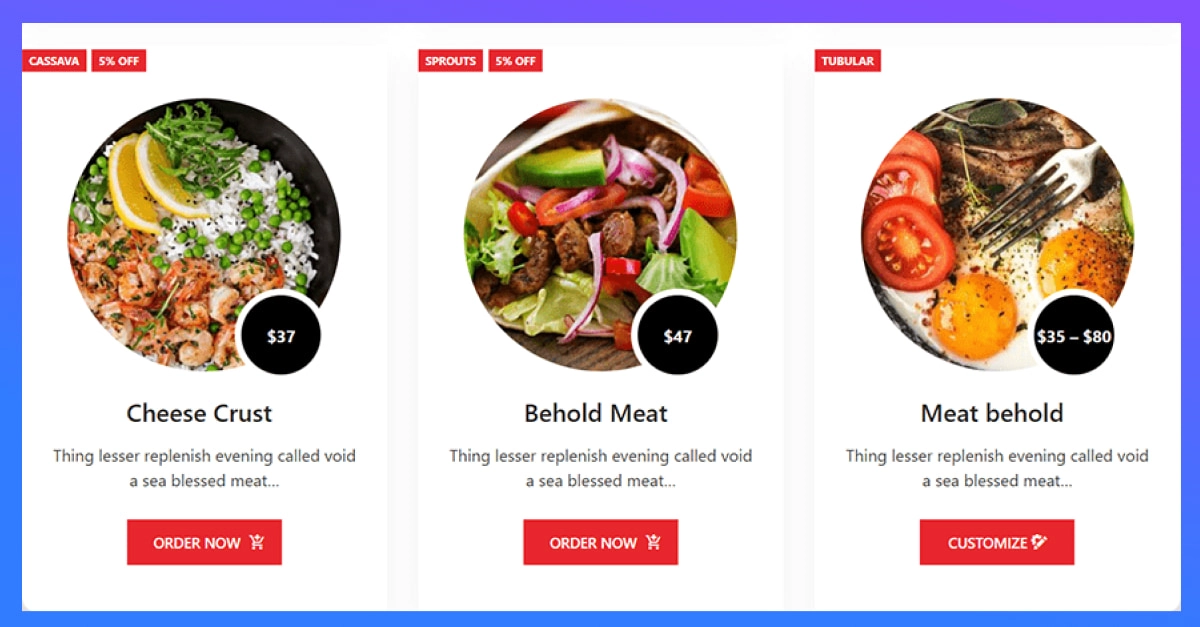
- Slider style: Displays menu items in a sliding carousel. Valid for featured or seasonal items.
- Tab + list style: Combines tabs for categories with a clean list layout inside each tab.
- Tab + slider style: Shows sliding menus under each tab. Perfect for showcasing limited items in a modern layout.
You can apply these styles using WPCafe’s shortcode settings or Elementor widgets with just a few clicks.
Tips to improve your restaurant menu performance
Creating a menu is just the first step. To boost engagement and conversions, here are some tips that make a real difference.
1. Use authentic, high-quality food images
Stock photos or low-resolution pictures make your menu look generic. Instead:
- Take real photos of your actual dishes
- Use natural lighting and clean backgrounds
- Make sure images are optimized for the web (compressed, but sharp)
People eat with their eyes first—let your photos do the selling.
2. Enable online ordering and reservations
Today’s customers want convenience. Adding online ordering and table reservations directly from your menu:
- Saves time
- Increases average order value
- Helps you manage peak hours better
WPCafe supports both ordering and reservations. You can enable them from the plugin settings without needing extra tools.
3. Keep promoting—online and offline
Even with a great menu, your audience won’t grow unless you promote it. Here’s what to do:
- Share menu updates on social media
- Run Google Ads for local searches (e.g., “best burger near me”)
- Print QR codes that link to your digital menu and place them on tables or flyers
- Ask for reviews and user-generated content
Marketing is ongoing. Keep testing what works and stay visible where your audience hangs out.
Frequently asked questions
-
Can I create a food menu in WordPress without any coding?
Yes! With plugins like WPCafe and WooCommerce, you can create, customize, and manage a professional food menu without writing a single line of code.
-
Do I need WooCommerce to use WPCafe’s food menu features?
WPCafe works best with WooCommerce if you want to enable online ordering, payments, and cart functionality. However, you can still display your food menu without WooCommerce if you’re not taking orders online.
-
Is WPCafe compatible with Elementor or Gutenberg?
Yes, WPCafe offers built-in support for both Elementor widgets and Gutenberg blocks, so you can design and place your food menu anywhere on your site — no technical setup required.
-
Can I set up different menus for multiple restaurant locations?
Absolutely. WPCafe supports multi-location menus, allowing you to assign specific food items to different branches or service areas. This helps avoid confusion and shows customers only what’s available in their area.
-
What extra features do I get with WPCafe Pro?
With WPCafe Pro, you unlock advanced features like menu badges (e.g., New, Popular), live search, discount settings, reservation slots, and more layout styles — making your menu more interactive and effective at converting visitors into customers.
Ready to launch your online menu?
Running a restaurant today is about more than just great food — it’s about creating a smooth digital experience that customers can trust and enjoy.
With WPCafe, setting up your food menu is fast, flexible, and beginner-friendly. From listing dishes to accepting orders and managing reservations, everything is handled in one place — no need for extra tools or complicated setup.
If you’re ready to simplify your operations and offer a better experience for your customers, WPCafe is the plugin to start with.
🍽️ Simplify Restaurant Management with WPCafe
One plugin. Complete control. Build menus, accept online orders, manage reservations, and create a smoother experience for both you and your customers.
🚀 Try WPCafe Today